Four valves at low end of clearance spec. Button her up or adjust?

Yamaha FJR Motorcycle Forum

Help Support Yamaha FJR Motorcycle Forum:

This site may earn a commission from merchant affiliate links, including eBay, Amazon, and others.

staledonut

Well-known member
Joined
Jul 19, 2005
Messages
68
Reaction score
0
Location
San Jose, CA
I've performed the second valve clearance check on my 05 with 54kmi on the clock. Six valves have tightened (5 exhaust & 1 intake) since the first check at 28k which required no adjustment. Two exhaust valves are now at the bottom end of spec (.18mm) and one intake (.15mm) so two intakes are now at the bottom. All other valves are in the ~middle of the range.

Claim victory and button it up (already have new O-rings for the cooling system plumbing), or adjust the valves at the bottom end to the upper/middle range so all are near even?

As it's a PITA getting to the business site and have it open, I'm contemplating adjustment of the four and then extending the next clearance check as the clearance pattern seems predictable and will have range within the spec. On the flip side it would be nice to not to screw with pulling cams and sourcing shims but would not feel comfortable pushing my luck with extending the next check.

 
If you plan, religiously, to check again at 78k, leave it alone. If you're gonna screw around and ignore it 'til you hit 80-90k, change 'em.

 
With all the other shit you got to do to pull it apart (coolant, coolant pipe, gaskets), if it were me I would adjust to center and extend the next interval a bit.

 
I'd adjust AND check at the next scheduled interval....but, that's just me.

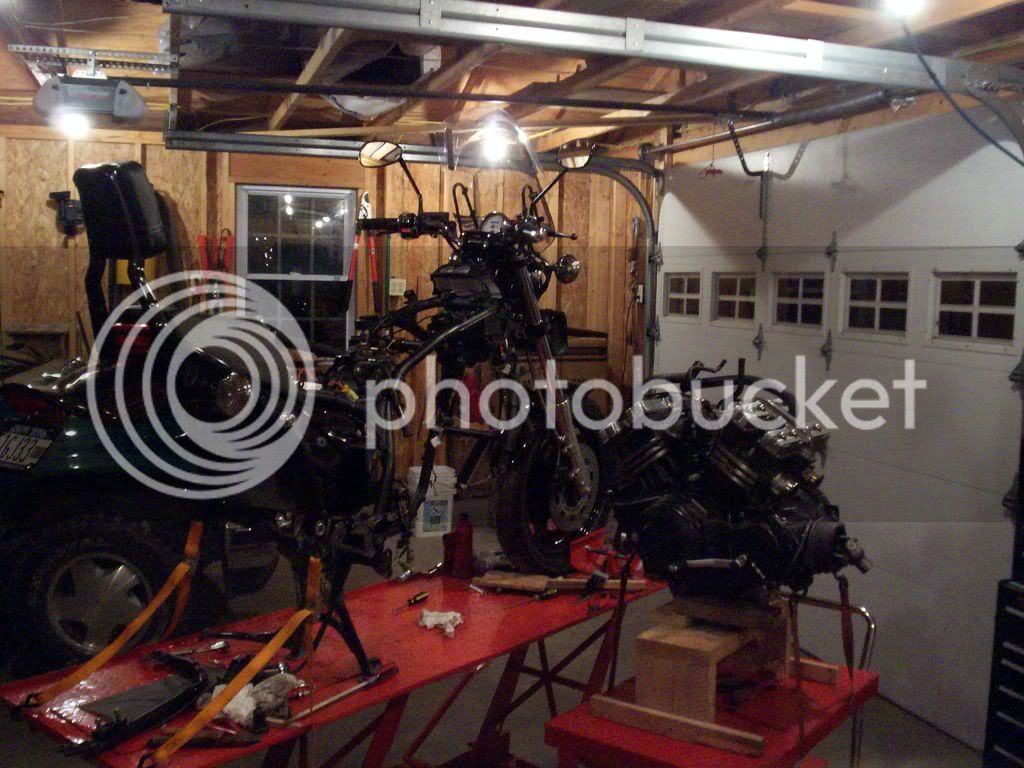
I also plan on pulling the motor for the next valve check.

 
I'd adjust AND check at the next scheduled interval....but, that's just me.

I also plan on pulling the motor for the next valve check.
3584842677_c9e75f712a.jpg


I also plan on pulling the motor for the next valve check.
"There's a method to the madness..." :huh:

For many years, now, there've been lots of motorcycles (in-line-4 sportbikes, for example) where removing the engine (or, almost removing the engine) can greatly facilitate valve clearance checks -- and, especially valve clearance changes (where camshafts must be removed, re-installed, and re-timed).

If you're not fighting the shop-time (flat-rate) book and want to do a relaxed, clean, confident, job (you're working on your own bike) -- it can make some sense. :blink:

Some modern bikes just have very little room to do good work -- especially for those with big hands. :(

As always..., YMMV :)

 
Last edited by a moderator:
It's definitely tight in the FJR to perform valve clearance work but certainly doable without pulling the motor and made more so by experiences shared by others.

I've decided to adjust those valves at the bottom of the spec. I got a good start last night and loosened the CCT cap nut (those slender Gear wrenches rock!)and called it a night as I had conference calls to attend (%#&! globalization!). May take week or more get it all done but meanwhile can keep the two wheel itch in check with my KLR.

I have no intention of skipping an entire 26.6kMi clearance check interval but may stretch it 5-10K after this round.

 
Last edited by a moderator:
good decision. If you didn't already, secure the chain tightly around the crank sprocket. Upon loosening the CCT it can slack down and skip a tooth on that sprocket. Just double check your timing on top and bottom before it's all done.

 
I have the chain zip tied to guides and the cam and crank sprockets. The CCT won't lock in a retracted position however. I can wind it up until it stops and the the chain slackened but won't lock even with a good twist. Is there something special I'm missing? Twist harder? The CCT was replaced ~20k ago under warranty and is a "blue dot" unit.

I briefly thought of proceeding to remove the cams with it extended however the CCT places a good amount of tension on the chain and isn't something that can be worked around by pushing on the guide. If the CCT spews its guts when all tension is released by pulling the cams, then I hafta yank it, and this all gets more involved. :banghead:
When I replaced my 1st gen CCT with the updated (blue dot) style tensioner I found that the new one would not lock in the retracted position also. You may have to remove the CCT from the head to get the chain slackened. With the CCT in your hand you can wind the spring back up and then ho'd the tensioner plunger compressed from the end, remove the screwdriver and then stick the "key" into the end where the screwdriver was to hold it retracted for re-install.

The alternative would be figuring a way to hold that screwdriver in place during the cam removal (so you don't have to remove the CCT)

Also, seems I'm a bit late to the party here, but I would have looked at what the clearances were at the prior check to get a feel for the wear rate. And considering that they are still in spec, I'd have left them alone.

 
I don't remember who originated this idea so can't give the proper credit, but it's a really good one!

If you have to remove the CCT, Dremel a slot in the cap and mounting bolts for a flat head screwdriver, it makes the re-install and any further CCT manipulations much easier.

 
When I replaced my 1st gen CCT with the updated (blue dot) style tensioner I found that the new one would not lock in the retracted position also. You may have to remove the CCT from the head to get the chain slackened. With the CCT in your hand you can wind the spring back up and then ho'd the tensioner plunger compressed from the end, remove the screwdriver and then stick the "key" into the end where the screwdriver was to hold it retracted for re-install.

The alternative would be figuring a way to hold that screwdriver in place during the cam removal (so you don't have to remove the CCT)

Also, seems I'm a bit late to the party here, but I would have looked at what the clearances were at the prior check to get a feel for the wear rate. And considering that they are still in spec, I'd have left them alone.
Does the CCT extend only so far and stop, or does the spring, rod, and whatever else eject? I checked in the shop manual and it looks like it will all hold together. So, I may loosen the intake cam, wind back the tensioner and hold it, lift out the intake cam just enough to access the lifters with my free hand, slowly let out the tensioner, and repeat for the exhaust cam, if needed. Once ready to put back together, reverse the process all while avoiding removal of the CCT. I briefly checked this morning before heading to work and I'm not sure if I have wrench or socket that can squeeze in to remove the lower CCT mounting bolt. I'll explore this further in the evening but I'm gaining confidence this can be overcome.

Here are my measurements. Before I zip tied the chain, I measured again (twice actually) but this time with the cams 180 from each other as per the shop manual instead of 180 from the lifter surface as per the write up by TORCH (aka Dwayne Verhey) on fjr1300.info. The measurements came up the same except for the RE of #3 (.203 instead .178) so I'm going to leave that one alone. The RI of #3 is a "tight" .152 compared the RI of #3. My plan is to adjust the #4 RE & RI, and the #3 RI valves to the middle/upper end of the spec so no valves are at bottom. Once done and given the wear rate, I may extend the next interval somewhat.

Code:
FIRST CHECK: 9/14/07 @28920 miles																			

left to right	Cylinder #1			Cylinder #2		        	Cylinder #3		        	Cylinder #4		
left exhaust	right exhaust		left exhaust	right exhaust		left exhaust	right exhaust		left exhaust	right exhaust	
0.229	         0.203		        0.229     	0.229		        0.203   	0.203		        0.229   	0.203	
left intake	right intake		left intake	right intake		left intake	right intake		left intake	right intake	
0.178	        0.178		        0.178   	0.178		        0.178	        0.178	        	0.178	        0.152	


SECOND CHECK: 6/9/11 @54154 miles								 				
left to right	Cylinder #1			Cylinder #2			        Cylinder #3			        Cylinder #4		
left exhaust	right exhaust		left exhaust	right exhaust		left exhaust	right exhaust		left exhaust	right exhaust	
0.203	        0.203		        0.203	        0.203		        0.203	        0.203		        0.229    	0.178	
left intake	right intake		left intake	right intake		left intake	right intake		left intake	right intake	
0.178   	0.178	        	0.178	        0.178		        0.178	        0.152T		        0.178    	0.152
 
Last edited by a moderator:
I suspect the factory tech set the intakes on the bottom end of the range for a reason -- make as much power as possible.

On the lower end of the range the valve opens earlier, opens more, and closes later. This allows the maximum air/fuel charge volume to enter the combustion chamber.

 
I suspect the factory tech set the intakes on the bottom end of the range for a reason -- make as much power as possible.

On the lower end of the range the valve opens earlier, opens more, and closes later. This allows the maximum air/fuel charge volume to enter the combustion chamber.
If you plan, religiously, to check again at 78k, leave it alone. If you're gonna screw around and ignore it 'til you hit 80-90k, change 'em.
Thank you for agreeing. :)

 
I suspect the factory tech set the intakes on the bottom end of the range for a reason -- make as much power as possible.
On the lower end of the range the valve opens earlier, opens more, and closes later. This allows the maximum air/fuel charge volume to enter the combustion chamber.
Objection, Your Honor -- speculative... :)

OTOH, one could claim that adusting toward the greater clearance end of the clearance specification may allow the valves more time on their respective seats -- offering precious time to shed heat into the head and cooling oil and coolant.

One could then extrapolate that riders holding the throttles relatively open for extended periods of time -- high-speed Interstates for repeated tanksfull -- would benefit by looser clearance settings. :p

Specs is Specs -- 'In Spec' is 'In Spec'... :blink:

 
No, it's not unusual for enthusiasts who are looking for a bit more performance to adjust the clearances to their minimum allowed values.

https://www.vtec.net/articles/view-article?article_id=143824

"Here at Temple of Vtec, where maximum performance is desired, we want to adjust the valve to the minimum clearance so the intake and exhaust valves open as much as possible."

 
Objection, Your Honor -- speculative... :)

OTOH, one could claim that adusting toward the greater clearance end of the clearance specification may allow the valves more time on their respective seats -- offering precious time to shed heat into the head and cooling oil and coolant.

One could then extrapolate that riders holding the throttles relatively open for extended periods of time -- high-speed Interstates for repeated tanksfull -- would benefit by looser clearance settings. :p

Specs is Specs -- 'In Spec' is 'In Spec'... :blink:
I would have to disagree with your "speculative" statement. There's absolutely no speculation that tighter clearances will result in the valves opening sooner and closing later than loose valves, as well as opening further, although we're talking about tens of thousands of an inch. The range from too loose to too tight is only 27 thousandths of an inch

That being said, you are absolutely correct that looser settings leave the valve on the seats longer, allowing further heat dissipation.

And tight valves that are over the minimum are still "in-spec".

Personally, I'd rather have valves that are tight, but "in-spec" than loose, but "in-spec".

It's a personal choice.

 
Top