


Hi all,
I've run into a bit of a roadblock and I'm hoping that someone here can offer some suggestions. I did a search but found nothing applicable. I'm replacing the OEM rubber brake lines on my '12 with a Galfer S/S brake line kit. I'm not adding the kit for any improvement in braking performance...but since the bike was going to be taken apart for suspension work and various other items, I figured that this would be a good time to install a S/S kit and then never worry about the brake lines again for the life of the bike.
The Galfer instructions are piss-poor. After draining the brake lines, it simply says "Remove the stock hoses on the front of the motorcycle, and replace with Galfer hoses labeled..." Neither the Galfer instructions, nor the OEM or Haynes service manuals discuss *how* to remove the lines. The clutch line was a bear, but I got it done eventually.
My problem now is the junction between the rubber lines and the metal pipes where the lines exit the frame at the steering head, as shown in the exploded parts drawing:
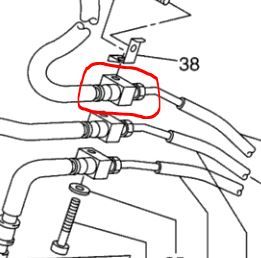
I've tried an open-end 10mm wrench on the fitting and rotate the metal block with an adjustable wrench. No luck...the metal pipe started to bend as I applied some torque. I gave up before I could do any more damage. I'm going to acquire a real brake line wrench before I attack it again, but is there something I'm missing? Anything else I can try to get those fittings loosened and removed from the metal blocks?
Thanks for any suggestions.
