John d
Well-known member
I hope Iggy doesn't mind me creating this topic under the proper product name.
In an effort to make it easier for other people to install the STS Smart Turn System on a FJR1300, in this case a 2008 model, I have prepared the following procedure.
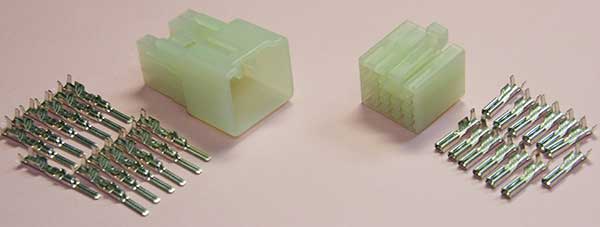
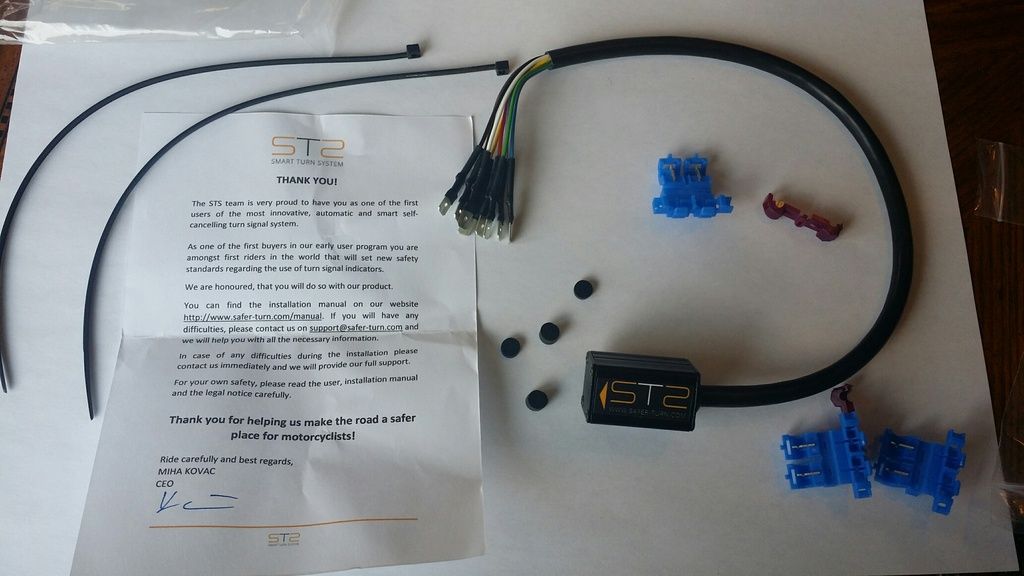
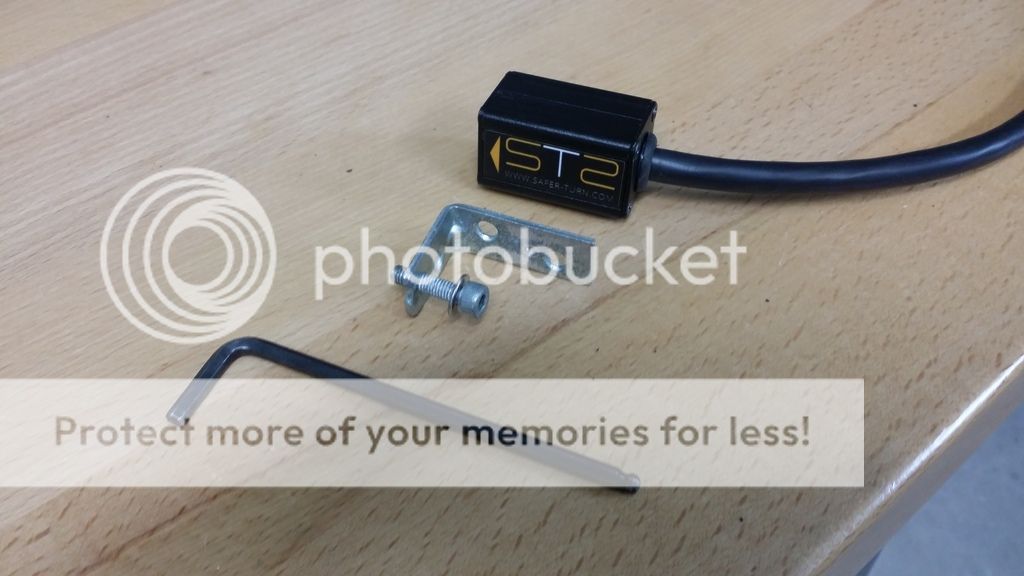
The STS package contents.
This is not an easy or quick task, so allow several hours once you have laid out your tools, and other items as you will see below.
The hard part of this installation is finding a suitable location, that will provide a level and rigid surface to to mount the STS black box to, that also is close enough to where you will cutting and tapping into the existing wiring.
In order to do it my way you will need to remove four pieces of the fairing. The small top two left pieces (console and inner panels) around the glove box, the large side fairing piece and the inside front piece below the left headlight.
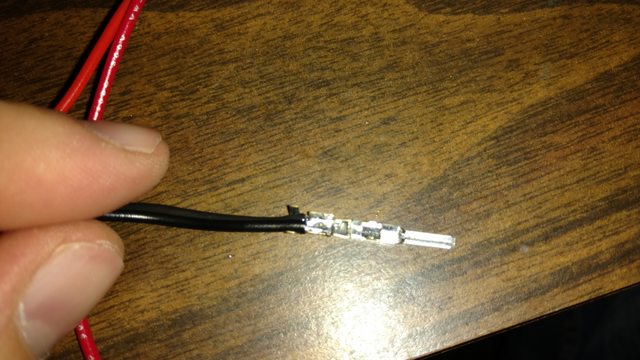
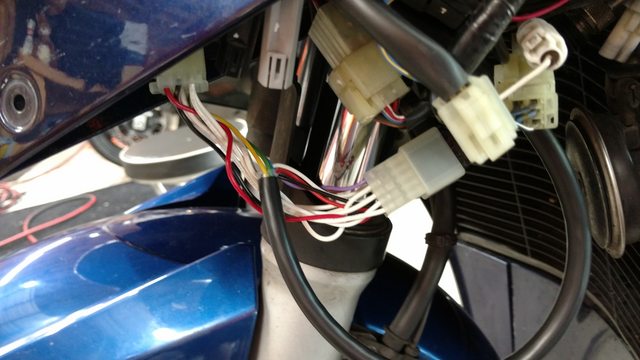
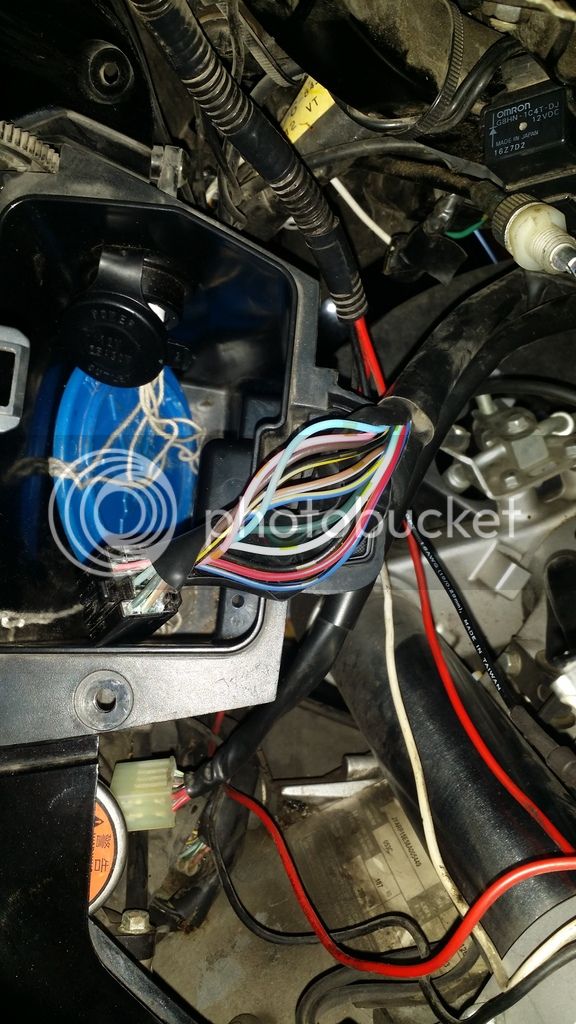
All the existing wiring that is cut or tapped into is on the wiring harness from the left handlebar switch to a block connecter below the fairing glove box in the front top side fairing (upper cowling assembly). You will need to cut the black sheathing on handlebar harness from the block connector up about 3" to 4". No need to cut the second sheathing farther up. When you cut, cut in straight line so that when back in place the cut is facing down. That would allow any water that gets under the fairing to be shed away from the new connections. In order to get working access to the harness, disconnect the harness below the glove box and pull harness back up to over glove box lid area.
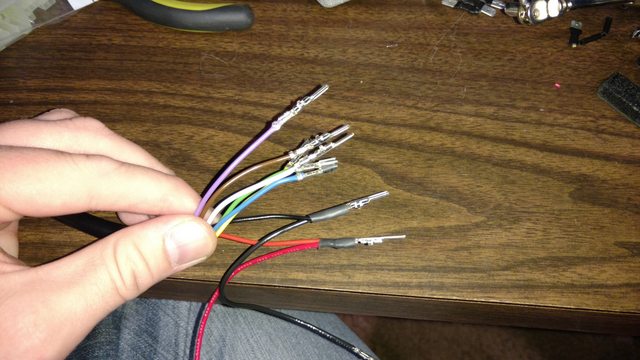
Wire sheath cut and wires exposed.
The supplied taps
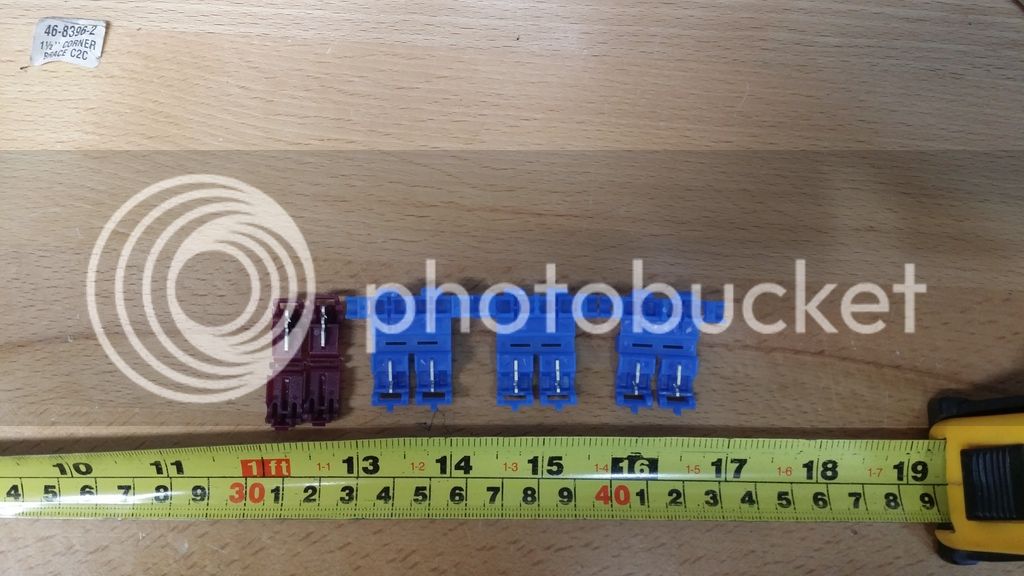
Taps in place and taped up.

Connections made.
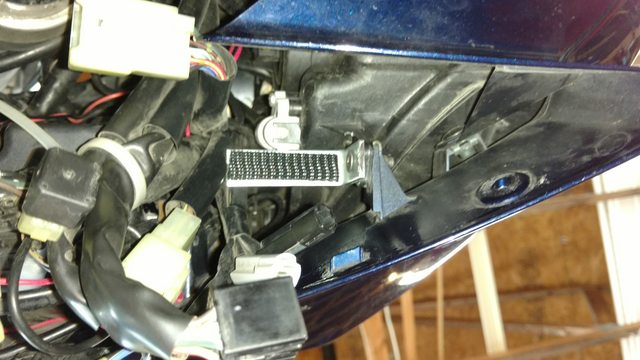
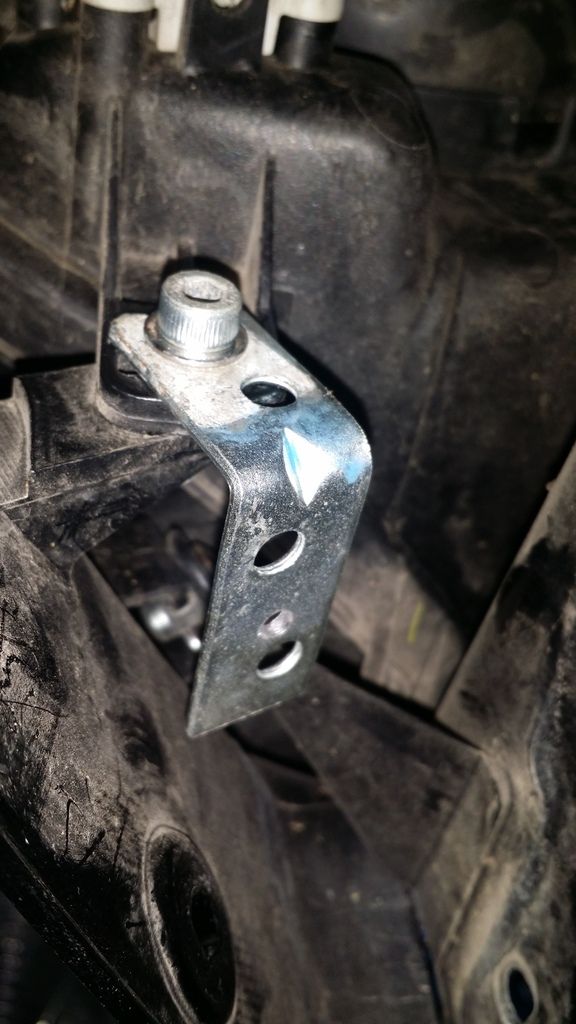
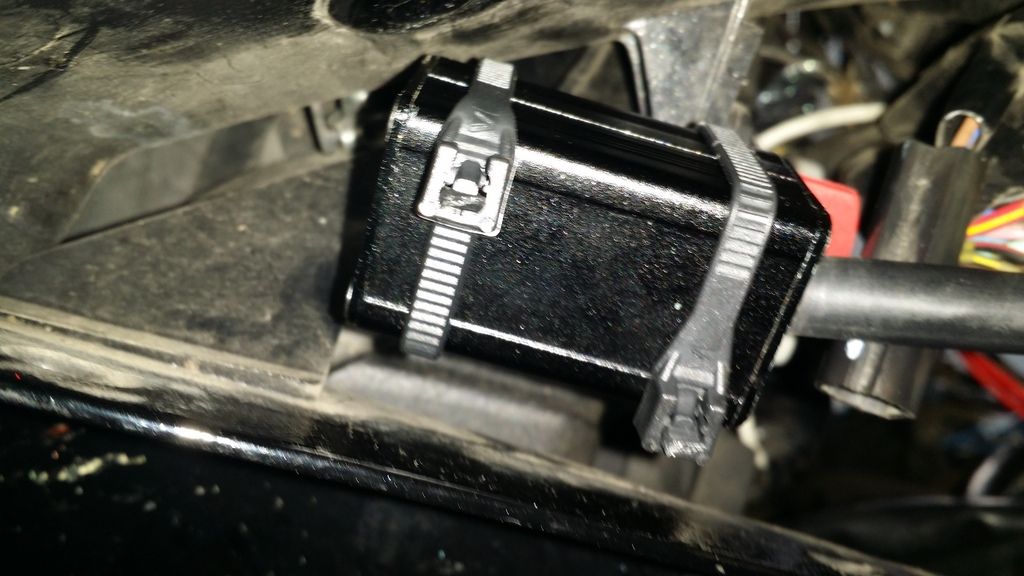
Below the front cowling in the very bottom left front is a solid metal fairing frame piece (stay 1?) with a screw the holds a plastic part of the fairing to it. I removed that screw and replaced it with a longer Allen screw and washer. Attaching a 2"x2" bracket from a hardware store at this location provides a solid, level, and forward facing mount perfect for the needs of the STS black box. The box needs to face forward and have the print face up. Two or three plastic tie wraps will hold the box to the L bracket firmly. The original screw is a standard fairing screw with JIS or Phillips head. The new one needs to be longer to hold the L bracket on. The L bracket itself was shortened on one leg and a new hole was drilled for locating the height within the fairing cavity.
2"x2" modified L bracket with longer allen screw.
L bracket in place looking from bottom up.
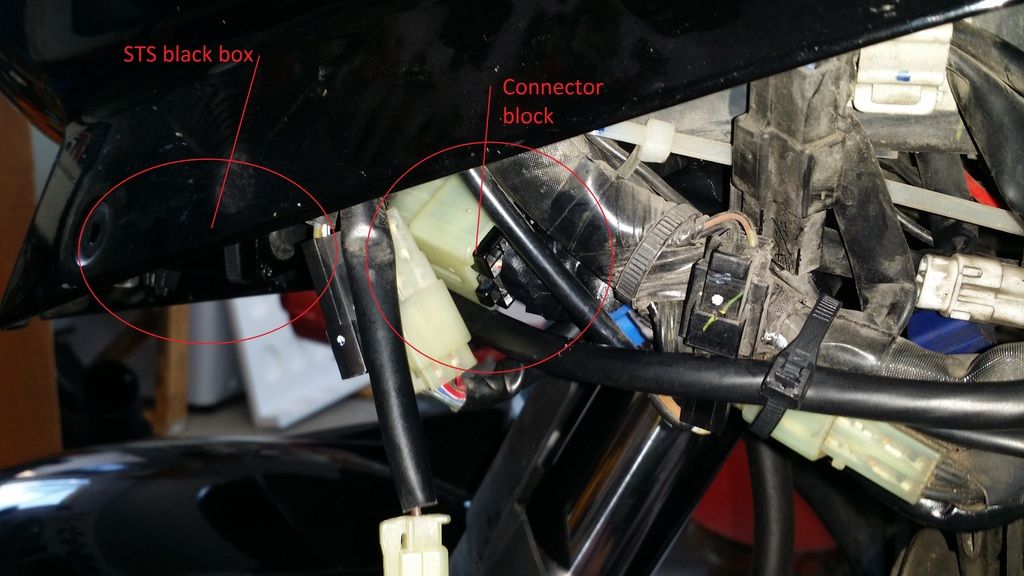
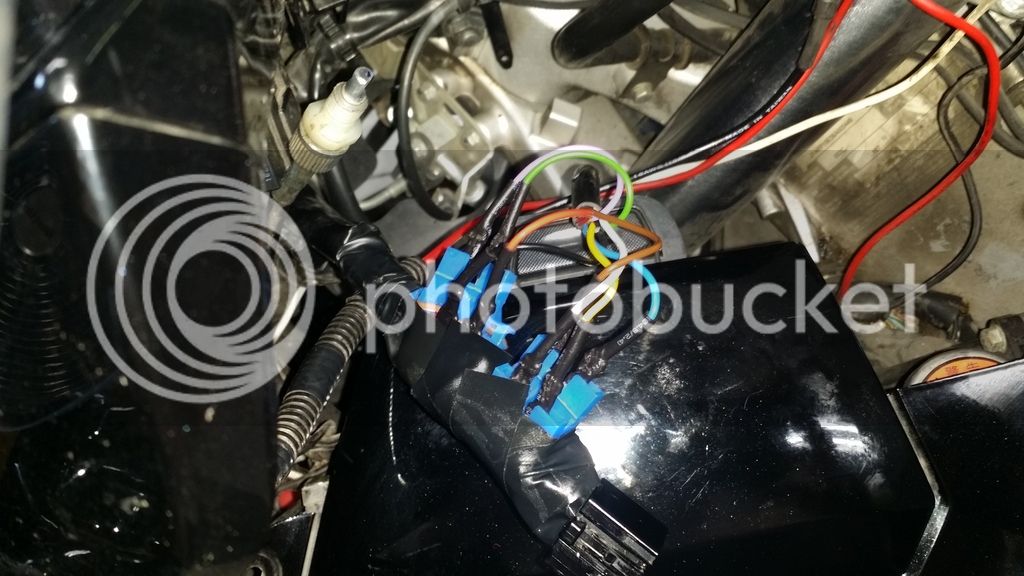
Black box zip tied in place on bracket. I added a piece of plastic to separate the aluminum black box from the steel L bracket.
Here is an electrical schematic of the installation. It is on the top left of this picture. The rest is just my other accessory stuff.
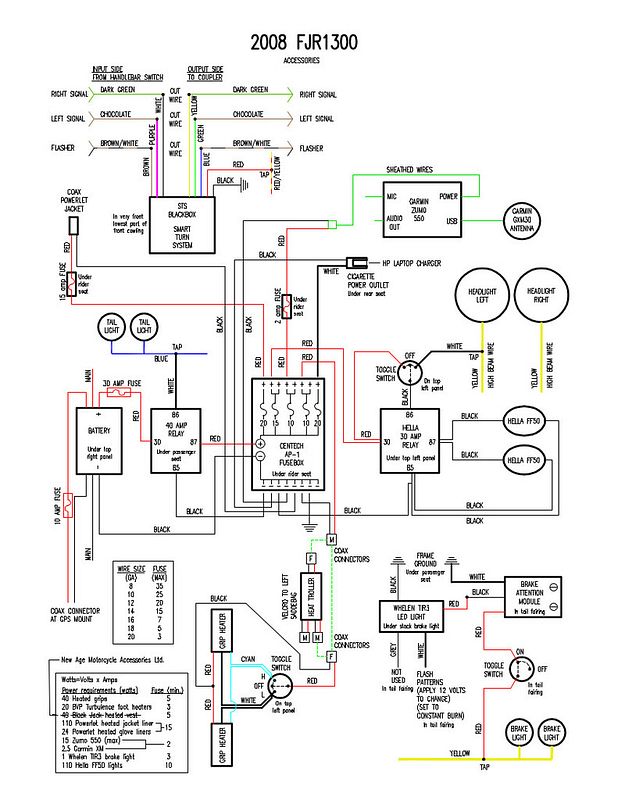
Follow the directions carefully from STS, especially noting the input and output sides.
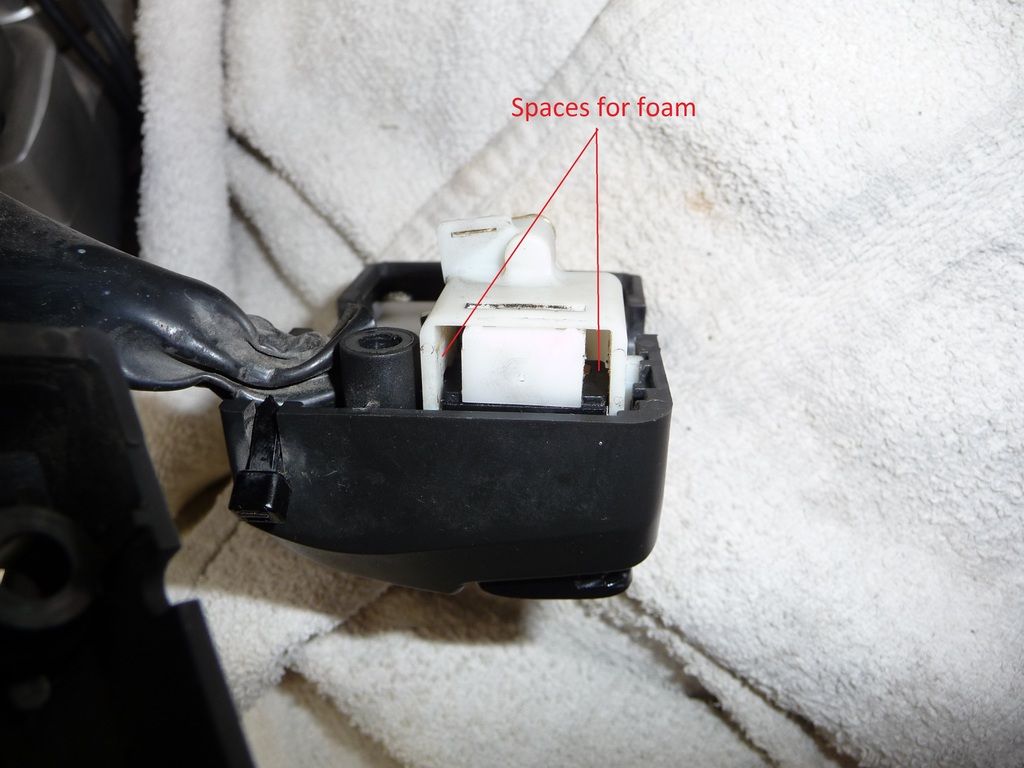
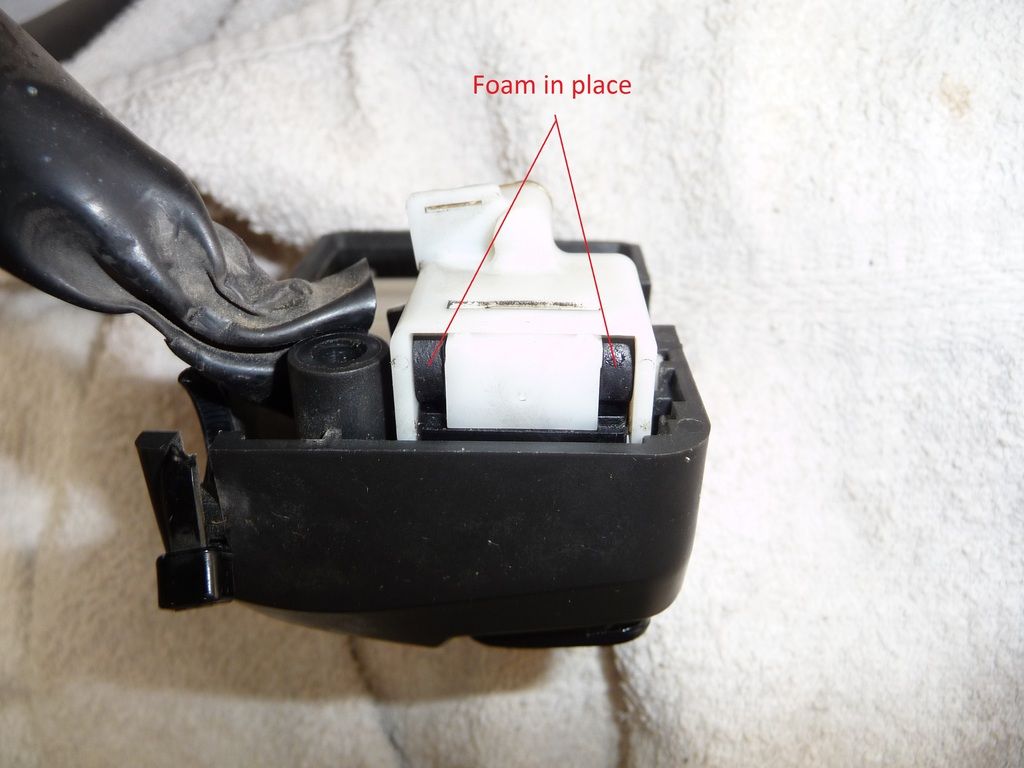
The STS package comes with 4 pieces of foam, two large and two small pieces. Use only the two small pieces in the turn signal switch assembly. It is very easily done. Remove two screws holding the assembly on to the left handlebar. Once the two halves are apart, turn it upside down to see the two areas to insert the foam pieces. In operation the switch requires more effort to operate than without. I expect the effort to be reduced over time as the foam settles.
If for some reason you decide not to use the foam pieces, you will need to cancel as normal by pressing in the canceler as before, before using turn signal again – actually before making another turn in the same direction. Using the turn signal in the opposite direction next time cancels the previous one. Putting the foam in place will alleviate any problem, set and forget, move on down the road, your last move is history, nothing to be done.
Now, if you've read this far you're probably wondering – so is this any good, and what do you think of it? Well, it works surprisingly well, and self cancels very quickly after a manoeuvre. It will stay on at a traffic light and not cancel until it detects a manoeuvre.
If for some reason you signal and then change your mind and not want to turn, you must signal again in the same direction to cancel. Thumbing the button in does nothing in any circumstance. I have no problem with that.
If you signal early and there this is a curve before your stop, it will cancel as soon as the bike rights up, and you'll have to signal again. Again I have no problem with that, plus that happens with cars as well.
It does cancel after lane changes but a smooth lane change is not detectable for it. However it will cancel thereafter within 15 to 20 seconds if it detects no further manoeuvrings at speed. No cars I've had self cancel after lanes changes either.
I paid 89 euros, shipped to the door in the initial offering, and for me it is money very well spent. I would do it again.
Hope this helps,
John
P.S. I have no business or investment interest in this product.
In an effort to make it easier for other people to install the STS Smart Turn System on a FJR1300, in this case a 2008 model, I have prepared the following procedure.
The STS package contents.
This is not an easy or quick task, so allow several hours once you have laid out your tools, and other items as you will see below.
The hard part of this installation is finding a suitable location, that will provide a level and rigid surface to to mount the STS black box to, that also is close enough to where you will cutting and tapping into the existing wiring.
In order to do it my way you will need to remove four pieces of the fairing. The small top two left pieces (console and inner panels) around the glove box, the large side fairing piece and the inside front piece below the left headlight.
All the existing wiring that is cut or tapped into is on the wiring harness from the left handlebar switch to a block connecter below the fairing glove box in the front top side fairing (upper cowling assembly). You will need to cut the black sheathing on handlebar harness from the block connector up about 3" to 4". No need to cut the second sheathing farther up. When you cut, cut in straight line so that when back in place the cut is facing down. That would allow any water that gets under the fairing to be shed away from the new connections. In order to get working access to the harness, disconnect the harness below the glove box and pull harness back up to over glove box lid area.
Wire sheath cut and wires exposed.
The supplied taps
Taps in place and taped up.
Connections made.
Below the front cowling in the very bottom left front is a solid metal fairing frame piece (stay 1?) with a screw the holds a plastic part of the fairing to it. I removed that screw and replaced it with a longer Allen screw and washer. Attaching a 2"x2" bracket from a hardware store at this location provides a solid, level, and forward facing mount perfect for the needs of the STS black box. The box needs to face forward and have the print face up. Two or three plastic tie wraps will hold the box to the L bracket firmly. The original screw is a standard fairing screw with JIS or Phillips head. The new one needs to be longer to hold the L bracket on. The L bracket itself was shortened on one leg and a new hole was drilled for locating the height within the fairing cavity.
2"x2" modified L bracket with longer allen screw.
L bracket in place looking from bottom up.
Black box zip tied in place on bracket. I added a piece of plastic to separate the aluminum black box from the steel L bracket.
Here is an electrical schematic of the installation. It is on the top left of this picture. The rest is just my other accessory stuff.
Follow the directions carefully from STS, especially noting the input and output sides.
The STS package comes with 4 pieces of foam, two large and two small pieces. Use only the two small pieces in the turn signal switch assembly. It is very easily done. Remove two screws holding the assembly on to the left handlebar. Once the two halves are apart, turn it upside down to see the two areas to insert the foam pieces. In operation the switch requires more effort to operate than without. I expect the effort to be reduced over time as the foam settles.
If for some reason you decide not to use the foam pieces, you will need to cancel as normal by pressing in the canceler as before, before using turn signal again – actually before making another turn in the same direction. Using the turn signal in the opposite direction next time cancels the previous one. Putting the foam in place will alleviate any problem, set and forget, move on down the road, your last move is history, nothing to be done.
Now, if you've read this far you're probably wondering – so is this any good, and what do you think of it? Well, it works surprisingly well, and self cancels very quickly after a manoeuvre. It will stay on at a traffic light and not cancel until it detects a manoeuvre.
If for some reason you signal and then change your mind and not want to turn, you must signal again in the same direction to cancel. Thumbing the button in does nothing in any circumstance. I have no problem with that.
If you signal early and there this is a curve before your stop, it will cancel as soon as the bike rights up, and you'll have to signal again. Again I have no problem with that, plus that happens with cars as well.
It does cancel after lane changes but a smooth lane change is not detectable for it. However it will cancel thereafter within 15 to 20 seconds if it detects no further manoeuvrings at speed. No cars I've had self cancel after lanes changes either.
I paid 89 euros, shipped to the door in the initial offering, and for me it is money very well spent. I would do it again.
Hope this helps,
John
P.S. I have no business or investment interest in this product.
Last edited by a moderator: