First Valve Clearance Check

Yamaha FJR Motorcycle Forum

Help Support Yamaha FJR Motorcycle Forum:

This site may earn a commission from merchant affiliate links, including eBay, Amazon, and others.

bergmen

Well-known member
Joined
Jul 21, 2008
Messages
315
Reaction score
125
Location
Ukiah, California
I have a 2014 A that just turned over 27,000 miles and I ordered all the parts for the valve check (gaskets, spark plugs, etc.). They arrived the other day.

So I'll be diving in over the next couple of weeks and checking things out. I'll be replacing the coolant and brake/clutch fluids also. I'll report what I find.

Dan

 
It is a rewarding day's work. Chances are that you won't need gaskets although its good to have them on hand. Probably won't have to change shims at the first check. Don't forget the o-rings for the coolant pipe. Those will need to be changed.

 
Yep, I ordered (and received) the valve cover gasket, timing cover gasket, CCT gasket, coolant pipe O-rings and the rubber washers that go under the valve cover bolts. Also OEM spark plugs. On some bikes I've worked on (Kawasaki first Gen Concours for instance), the valve cover gasket never needed changing. On my ZRX1200R engine, it needed changing every time (it would get a compression set and lose pliability).

I'm not looking forward to having the Feej out of commission since this is the heart of the riding season. But, I will be taking a week to ride up to the Columbia River Gorge in September and I want to do this job before I go.

Dan

 
If you don't mind, please take lots of pictures and share your experience. I will need to do mine soon too. Thanks.

 
Thanks Dan!

Looking forward to it! If I'm close, I would love to come over to give you a hand and learn :)

Mike

 
95% chance the valve cover gasket is OK. 50% on the timing cover gasket. Note: Timing cover doesn't really have to come off unless valve shims actually need changing. Unless you are changing the CCT, that doesn't come off. Never heard of anyone changing the rubber washers under the valve cover bolts. O-rings on the coolant pipe for sure. Good luck with it!

Looks like you may have some parts for future maintenance sessions.

 
Last edited by a moderator:
Looking forward to your excellent pics, and findings, Dan. I will be doing the same as my mileage is about same as yours but I won't be going there until the snow flies .

 
One suggestion for the valve check newbies to help make it easier:

Since you'll be replacing the coolant I recommend removing the left side fairing to get at the overflow reservoir. I like to dump out the old and give it a quick wash inside each time. But that's not the suggestion. The suggestion is to look right above that and you'll see a u-shaped water hose, the other end of it connects to the bottom of the coolant pipe. Remove the hose section. Yes, it's a pain the first time b/c the hose clamps are facing the wrong way so it'll take an extra ten minutes but it is so, so much easier to re-install the pipe THEN put the hose on. You can then orient the clamps to where they are easier to get to next time. I learned this the first time b/c it's tight in there and just getting the coolant pipe back in is a pain but getting the coolant pipe back in while trying to stuff one end of it in a hose is a royal PITA.

 
95% chance the valve cover gasket is OK. 50% on the timing cover gasket. Note: Timing cover doesn't really have to come off unless valve shims actually need changing. Unless you are changing the CCT, that doesn't come off. Never heard of anyone changing the rubber washers under the valve cover bolts. O-rings on the coolant pipe for sure. Good luck with it!
Looks like you may have some parts for future maintenance sessions.
Yeah, I got the valve cover bolt washers just in case. On the ZRX engine mentioned above it was actually the valve cover bolt washers that would take a compression set, the result was a leaky gasket. Gasket was probably okay but I replaced both to solve the problem.

I don't have any problem having too many parts on hand. It is when I don't have enough and have to stop to wait until they arrive (no Yamaha dealer in town) that bugs me.

Dan

 
One suggestion for the valve check newbies to help make it easier:
Since you'll be replacing the coolant I recommend removing the left side fairing to get at the overflow reservoir. I like to dump out the old and give it a quick wash inside each time. But that's not the suggestion. The suggestion is to look right above that and you'll see a u-shaped water hose, the other end of it connects to the bottom of the coolant pipe. Remove the hose section. Yes, it's a pain the first time b/c the hose clamps are facing the wrong way so it'll take an extra ten minutes but it is so, so much easier to re-install the pipe THEN put the hose on. You can then orient the clamps to where they are easier to get to next time. I learned this the first time b/c it's tight in there and just getting the coolant pipe back in is a pain but getting the coolant pipe back in while trying to stuff one end of it in a hose is a royal PITA.
Excellent advice, thank you! It is these little pearls of wisdom that certainly come in handy. I will be removing both the left and right side plastics since there are other things that need to be done while it is on the operating table.

Dan
In that case taking the windshield off too helps a lot.

 
Okay first report:

I started last weekend to remove the plastics etc. to gain access to the valve cover. I used these excellent instructions:

https://atrophy.lock.net/do/FJR2014PanelRemoval.pdf

That I found posted on this forum. I don't have a name of who put these together but whoever you are - THANKS!

Here are some pictures:

Getting ready:


I could only work for half a day each day (Sat & Sun) since it gets too hot in the afternoon here to continue. Here, all of the plastics, etc. are off:


Continued on next post...

Dan

 
Last edited by a moderator:
Chapter 2:

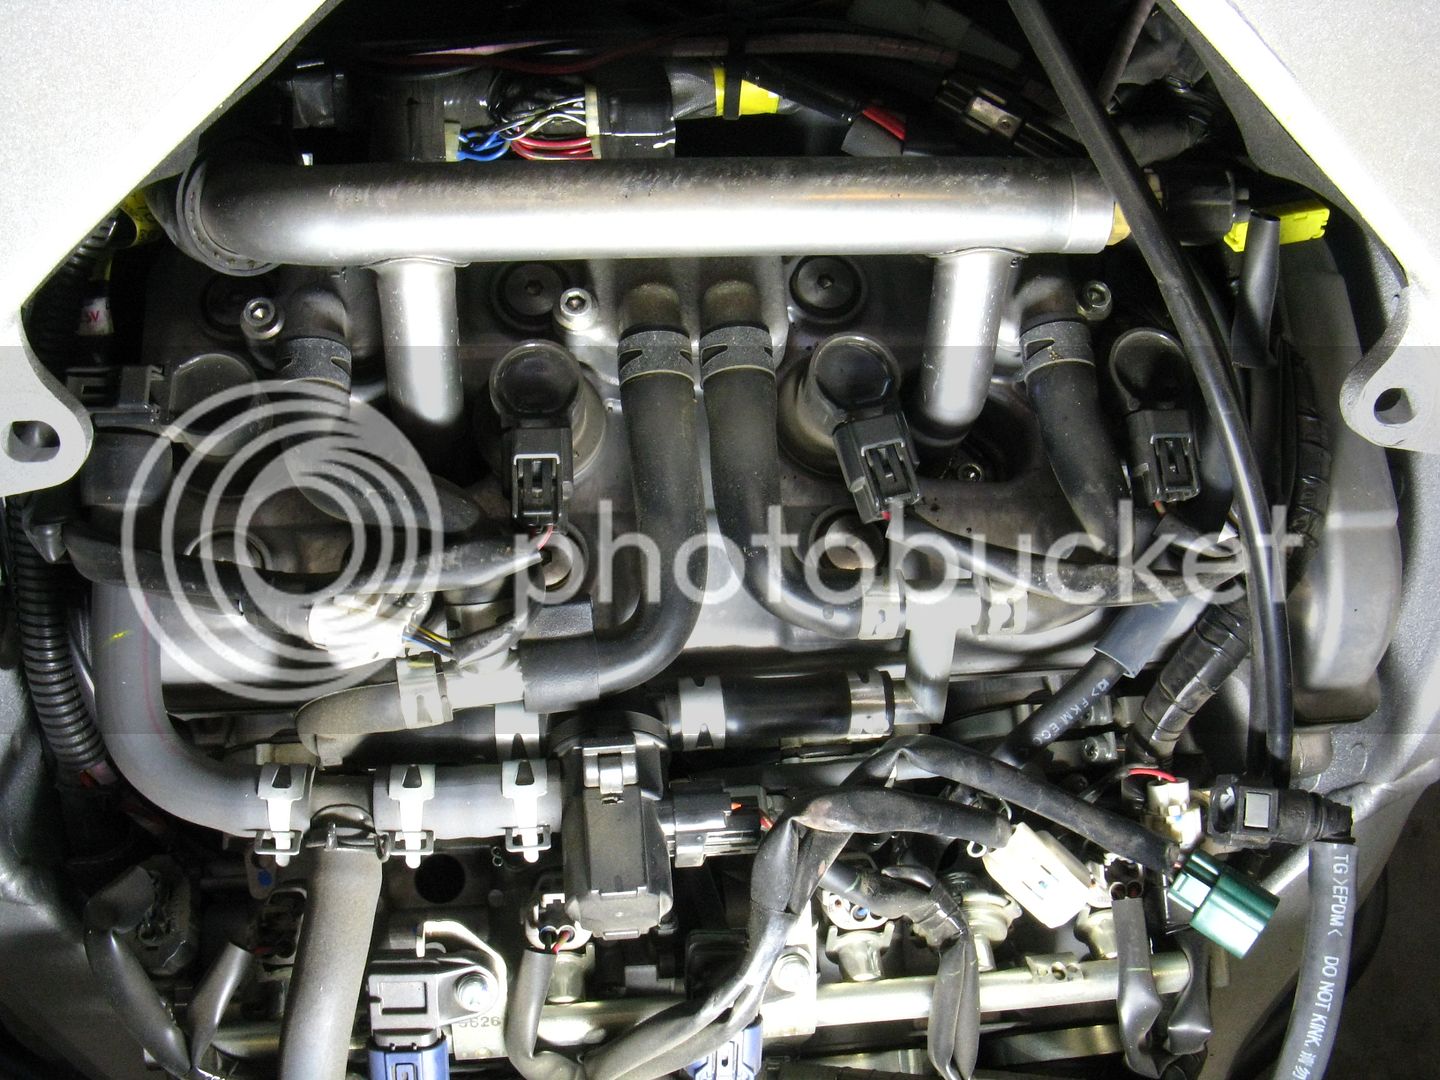
Today I worked on clearing the way to remove the valve cover. I followed rbentnail's advice on the coolant hose and that simplfied things enormously (thanks!). Those hoses were easier to take off than I thought they would be and it really made the next steps easier. Removing the PAIR valves and hoses is very straightforward, no complications there (they come off as a unit). In preparing to remove the valve cover, the biggest issues were a large harness that crosses from front to back right over the cam chain area and the throttle cables. Hard to see with all of the rest of the junk here but they are on the right in this picture:


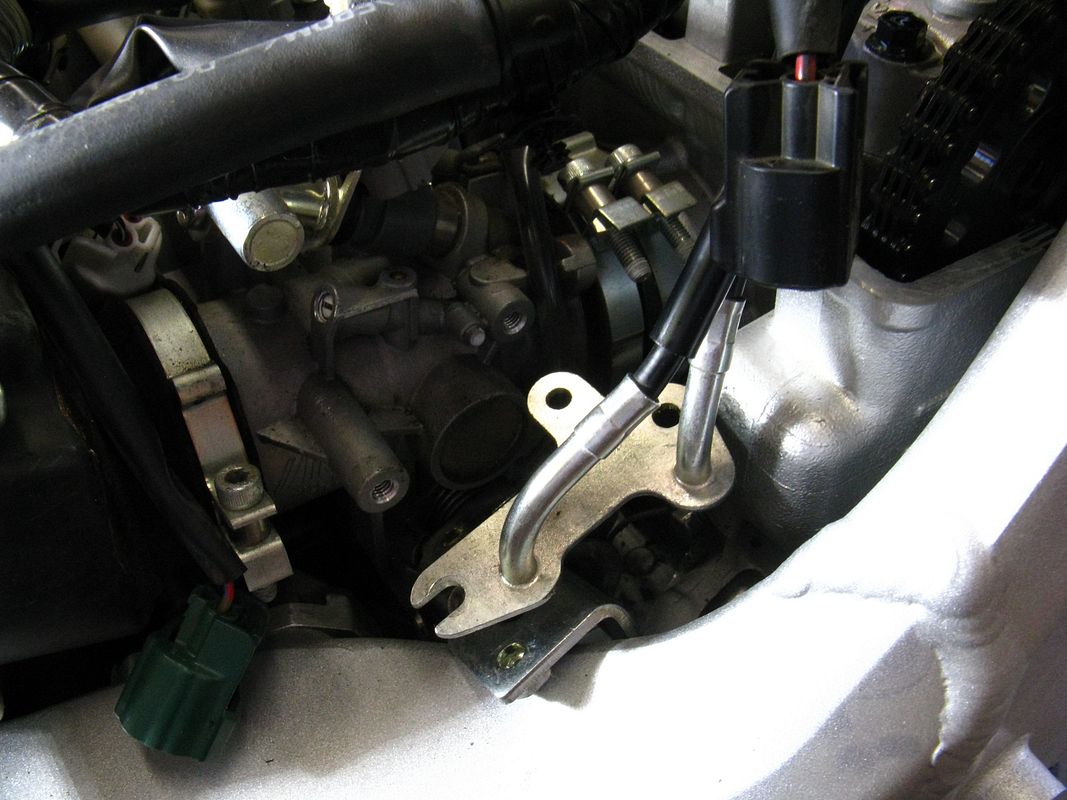
I had to find the points that secured the harness (there are a couple), remove them so I could lift the harness. Next, I had to disassemble the throttle cable mounts at the throttle bodies:


These steps were necessary because the valve cover needs to be lifted and shifted aft in order to clear the cam chain sprockets. I though at first I could just lift and slide the cover out to the left but it hits the frame and prevents this. Once I was able to move the throttle cables and harness, I had room (barely) to wiggle the cover out.

Now to the valves (specs are .006-.009 for intakes, .007-.010 for exhaust):

All of the intakes were at .007 except the left #4 valve which was at .008.

The exhausts were tighter. Here they are in sequence from left to right:

(loose) .007, .008, .008. .009, .009, .009, .008, .007.

As one can see I have two at the minimum clearance. If I were an enterprising soul, I would pull the exhaust camshaft and move those to the center. But I'm not going to do that, I'm okay with where they are at this point.

Spark plugs on the next post...

Dan

 
Last edited by a moderator:
Chapter 3:

The spark plugs actually looked pretty good for 28,000 miles. The gaps measured about .040 which are .005 higher than spec but they were pretty clean thanks to modern ignition systems and electronic fuel injection:


So now it is time to put all of this back together. I took today off work (to add to the three day holiday) so I would have plenty of time to get this project finished off so I can get back to riding (this is prime riding season).

Dan

 
Last edited by a moderator:
If they are in spec then all is good. If I had one or more that was out of spec, I would probably bring all to near the midpoint. You are likely to have to do those when you dig into it the next time. So far, all of my exhaust valves have been OK. On the last check (35,000 miles ago), I had a couple of intake valves below minimum so I set them all to a bit wider than midpoint. Probably a winter works project again this year.

 
Just a couple of handy hints I've learned.

I used dialectic grease on those coil over plug spark plugs, real tight and hard to remove the first time.

I normally blow out the spark plug holes as debris sometimes accumulates in there. Saves it going into the cylinder.

The cooling pipe holes likewise, blow out and spray some WD40 in as those bolts seize in.

The end of the cooling pipes sometimes rust, clean and rust paint. Esp on the older bikes

Get some EFI friendly gasket goo to hold the gasket in place for when you reinstall the cam cover

On the Gen2's, it was easier to remove the throttle cables to get the cam cover off/on.

Double check that the cam marks line up correctly with the crank.

If you change the CCT or Valve shims check, then check again all is good by rotating then engine several times before you hit that starter button.

On the early generations, I have been checking the Cold idle circuit coolant pipes into the wax motor, they clog real easily.

Esp the outlet into the radiator, lower left front fairing, a small single pipe into the radiator.

keep a valve clearance record.

Apart from that enjoy

 
Last edited by a moderator:
All good points, Ken, thanks! I have some very good silicone grease I will add to the stick coils when replacing. They were a bit sticky to remove but I twisted them first to break the rubber from the aluminum. I glued the new gasket into the valve cover just now with a very thin line of blue silicone gasket sealer so it will set tonight and make it easier to lower the valve cover without wrestling with the gasket to keep it in place. That is the first task tomorrow morning. Once the cover is back on and bolted down (and I am sure the gasket is good), then I will breath easier.

I blasted off the valve cover with compressed air before removing anything, lots of little gravel bits in the pockets. Most of the bits were in the pockets for the cooling pipe, spark plug wells were clean as a whistle.

Got a written record of clearances. I just wish that Yamaha would see it in their infinite wisdom to include a factory shim map with each new FJR so I know what is in there. If I need to replace a shim I would be able to know what to get at the dealer before a camshaft-ectomy to find out.

Next time. I have a one week ride from northern California to the Columbia River Gorge and back coming up in late September that I'm getting the bike ready for now. After the engine is back together, new coolant goes in as well as brake/clutch fluid replacement.

I would have paid an extra $2,000 for this motorcycle if it came with hydraulic valve lash compensators (like on the Honda Nighthawk S and Kawasaki ZG1200 Voyager).

Dan

 
Last edited by a moderator:
Top