GP Suspension and Penske 8983 install

Yamaha FJR Motorcycle Forum

Help Support Yamaha FJR Motorcycle Forum:

This site may earn a commission from merchant affiliate links, including eBay, Amazon, and others.

Goodman4

Pressing on
Joined
May 18, 2012
Messages
574
Reaction score
360
Location
Hopkinsville, KY
Warchild's page with the instructions on doing the shock removal and install has been down ever since I bought a used Penske shock to replace my original on my 07 ABS. With photobucket bringing many of the pics back from the dead today, I thought I might be brave enough to tackle it.

I find several sites talking about loosening the 4 bolts around the ABS to get enough room to access the top bolt. I can't determine which bolts this is referring to. Also if there is any help with the GP Suspension bracket install, I've got a good pic, but want to be sure there's not more to it since I have no instructions.

I'm about to give up and let my mechanic do this.

 
Top bolt is awkward to remove but it CAN be done without loosening anything. I had to use a "persuader" to lever some stuff out of the way a little bit but definitely didn't have to loosen anything. (Nothing broke either)

 
Adding to RKs description, there's also a hose bracket that can be removed so one of the brake hoses has additional play. That, with a persuader will let you remove and re-install the top bolt. Only other trick removing the stock shock is unhooking the wiring to the R/R assembly so the hard-soft cable(s) can be removed.

GP reservoir bracket installs inside the RH passenger peg. You should have two longer bolts that extend through the peg mount plus two nyloc nuts to secure the bracket.

--G

 
I was able to work my way onto the bolt head by pressuring the cables. Got it loose and part of the way out, but I get a hard stop on pulling the bolt out far enough to remove the shock as shown below where it hits the black frame of the ABS mount. I put some pressure on it and it doesn't budge, so I don't think that's what you mean.

IMG_5178.jpg


IMG_5177.jpg


I was able to pry mine up far enough to get it by but a PIA for sure. It is doable!

I'm thinking it was Jeff Ashe took a Dremmel and just cut a radius into the plate and I copied his idea.

The prep time trying to insure I captured as much grit as I could took longer than grinding the small radius into the plate. Put a bit of paint and your good.

 
Adding to RKs description, there's also a hose bracket that can be removed so one of the brake hoses has additional play. That, with a persuader will let you remove and re-install the top bolt. Only other trick removing the stock shock is unhooking the wiring to the R/R assembly so the hard-soft cable(s) can be removed.
GP reservoir bracket installs inside the RH passenger peg. You should have two longer bolts that extend through the peg mount plus two nyloc nuts to secure the bracket.

--G
I have a Penske and used the --G method to remove and replace the shock. Tis a PIA but it is the easiest method.

 
Good news and bad news. I finished the install and am pretty happy with the install. Brief ride around the block in the rain so I don't have a good feel for the shock yet, but it felt great for the short ride. BUT I have a collar or bushing of some sort that I found during the project and can't tell where it goes or IF it even came from this project. Pictures of the collar are included at the bottom.

First, comments on the project.

I got the upper bolt off by dremmeling just a bit of the black frame and then by prying the whole assembly with a breaker bar. You can't even tell I did anything to it. On the install of the Penske, the bolt was easier going on than coming off. Also, I would have never got the soft/hard switch out without taking the switch apart. Lastly, for me I couldn't get the top to fit in between the holes mounted up. I undid the bottom and tried the top first and that was easier for me. The rest was pretty smooth. Except for finding the extra part.

Finished install:

IMG_1880.jpg


The bonus part:

IMG_1885.jpg


IMG_1884.jpg


I feel like an idiot, but there is NONE of the parts I removed that can hold this collar. I took the bottom linkage all apart again and looked. We found this part in the bike when I was trying to get off the upper bolt with the ABS in the section below that. I assume it came from this project. I haven't done any major work on it in over a year and that was at the shop, so it "could" be from them dropping something but I think that is not too likely either.

Any ideas?

 
Last edited by a moderator:
Here's my dilemma - I was looking at a similar diagram when I assembled it. I had identified the extra part as number 6 on the revzilla fiche - the shock absorber, since it didn't seem to have one. But I can't see how it would fit! I tried it right in front of the nut and there isn't room for any grip on the nut and it wouldn't be going on like it was when I took it apart. It's the same diameter as the bushings, so nothing can go in it except the bolt. If it's the collar # 2 on the diagram I think I can't get that on either, but that is less visible I guess and more of a possibility.

Does it go partly inside the hole on the bolt head side? You can't tell from the diagram where the mount is in relation to the bolt, spacers and bushings. If this is correct that it's number 2, where is my number 6? I'm just confused. I've got to let the mechanic put new tires on that will be here tomorrow. I'll probably have him check it if he acts like he knows what he's doing. I hate to give up, but I don't want to screw anything up.

 
I looked more at the old shock. The piece in question is just a little less in diameter than the old bushing. This makes me feel like it may go inside the mount hole on the bolt head side (the ABS side). It still seems like the bolt isn't long enough to handle that. But I just now took it out around the neighborhood and it for sure isn't right.

 
I think the part is the #6 but can't be 100% sure. The FSM only shows that one part that goes on the bolt head side. I think the #2 part might be the bushing that goes through the eye of the shock. Hard to tell from these diagrams.

 
<snip> Does it go partly inside the hole on the bolt head side?
Yes, the spacer / bushing allows for some play for easy re-assembly of top mount / bolt assembly. Once tightened up, the top shock mount is captured with this spacer.

~G
Just got through replacing the stock shock on my '10 with a new shock for the 2017 1300A and it looks to me that this spacer's main purpose is to relieve any pressure on the mounting bosses when you tighten the nut to 46 ft-lbs. My spacer remained in the right side boss when I removed the OEM shock.

Anybody interested in an OEM rear shock that has less than 7K miles on it? Make you a good deal and never even been ridden in the rain.

 
If you want the short version - I am done! Shock is on and probably correctly just as you all had said.

Long version:

My excuse is that I've been working around the clock on a project at work and have been too busy to spend a lot of time working on it, but the reality is that when I got a break I kept going back to this problem trying to figure it out. I even called my mechanic to schedule my tire change and have him put it on right but he said they were booked up for 2 weeks. Ouch. So I kept at it. I loosened it all up and put the spacer on and fought it over and over but the spacer wouldn't go in the mount. Tonight I finally took it completely out and started over. I still could not get the spacer to fit in the larger of the two mount holes.

What you all were saying make sense because that's the only place it could go, and without it, the bolt could move on that side (and did). I just could not get it even close to fitting. I watched videos and looked at parts diagrams and it seems like it has to go there. There is a youtube video of a racing team in Singapore installing a shock in an FJR and you can see the spacer briefly in it. They cheated by having the whole seat assembly off. I decided that was more than I would tackle and it wouldn't really change anything. I couldn't get it in there and didn't think it would fit. I was convinced I had found a different part or something.

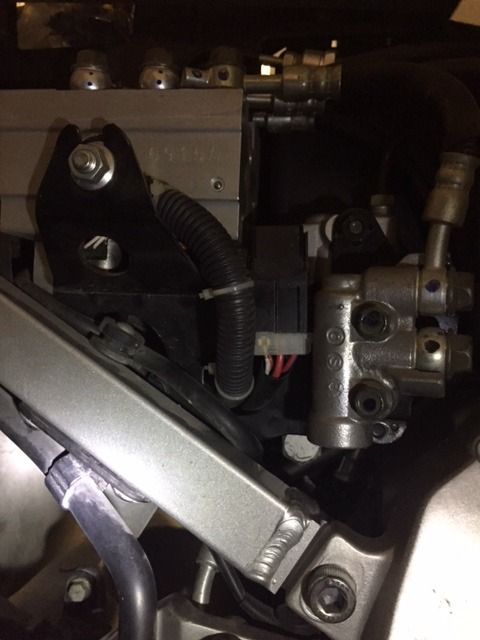
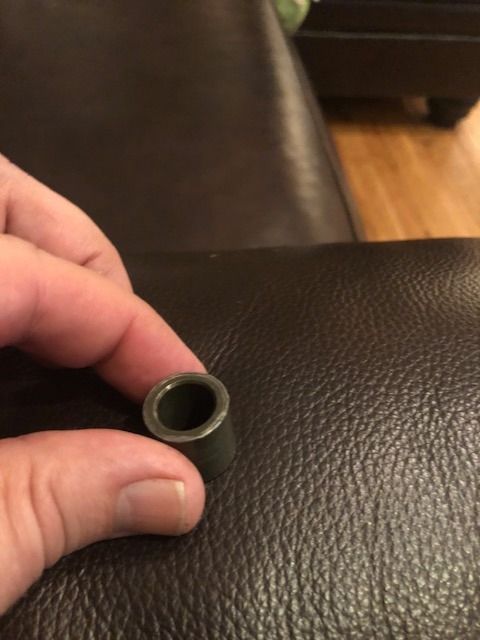
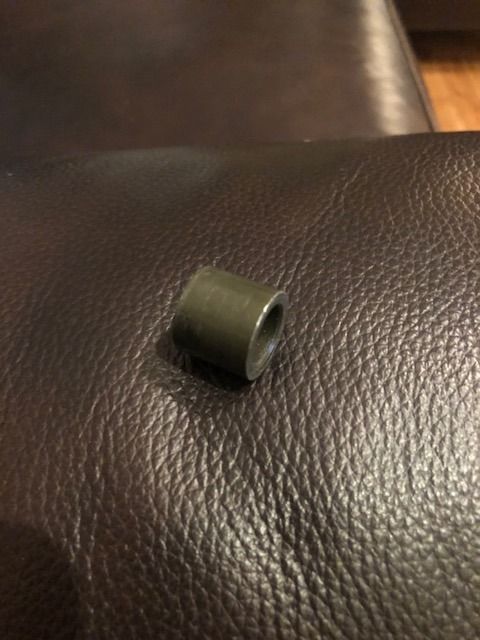
The only way I was able to believe it would fit was with my calipers. I couldn't get them into that hole because of the angle but I could measure the bottom hole on the old shock at 65 mm. The size of the bushing/spacer is 70 mm. I took the short bolt that fits in that hole and tested the snugness and there is no movement. I put the same bolt in the top mount hole and expected the same, but it wiggled. I figured the wiggle was probably at least 5 mm so that proved to me it could fit.

With that confidence, I put it on the bolt without the shock and hammered the dang thing. Magically it went right in. It is pretty tight and wouldn't have went in without the hammer. But it's in. And with all the practice, I was able to get it all lined up pretty quick and got everything back together. I took a quick ride around the block in the dark and this time no weird jerking from that bolt moving. I can't report yet on how much difference it will really make but that's not the point of the thread. The point is that the missing part IS the collar which is #6 on the parts diagrams and it hold the bolt in place for the shock as everyone here has posted.

I am so impressed that I finally got the collar to go in that hole that I now understand the term "shock and awe".

Thanks for the assist, guys.

 
Top