Tapered roller bearing gap,

Yamaha FJR Motorcycle Forum

Help Support Yamaha FJR Motorcycle Forum:

This site may earn a commission from merchant affiliate links, including eBay, Amazon, and others.

Scab

I got nothin' here...
Joined
Jan 30, 2006
Messages
3,126
Reaction score
3
Location
Heflin, AL
Okay, Saturday was spent dismantling the feej for a heap of much-needed maintenance. Of which, one item on the list was a new tapered steering head bearing set. All was well with the world until the installation of the lower bearings onto the steering stem. They don't appear to be fitted flush against the lower triple. I can see approximately 1/32 - 1/16 inch gap. I don't remember seeing any stinkin' gap on the old ones. WTF? I have tried everything possible short of a hydraulic press (cause I don't have one) and this lower bearing is not going any lower.

I was (out of disgust) able to assemble the front end, and everything 'fit' apparently fine, with all torque values easily established. I have yet to ride the bike because I can't help but think this is going to be trouble in just a few short miles.

Suggestion?

Comments?

Experience?

Where's Rad when you need him? Prolly polishing that damn tiarra.

 
Last edited by a moderator:
I don't have a press in my garage and I didn't have the patience to wait for an opportunity to use one somewhere else, so I placed the triple tree on a pine board on the floor, taped over the threads on top of the tree, placed the old ball bearing race, which I had cut off so it was split, on top of the new bearing, and used a 5 foot length of pipe as a slide hammer to drive the roller bearing onto the triple clamp. The pipe was a length of old galvanized pipe that fit over the triple clamp but was small enough to not slip over the old race that was protecting the new bearings. Might have been an inch and a quarter, but I'm not sure.

If you go this route, you need to be careful because pounding on things is generally not a good idea, but it worked for me.

 
Did you compare the races with what you removed to what you put in? Did you use after market bearings or original equitment? Some ofter market bearings need to be replaced as much as twice as often.

 
These are aftermarket bearing/race sets. The originals are ball, these are tapered roller. It's hard to do a real comparison because the bearings are "caged" to the lower race so you can't get a good look at it like you could the factory race, which was 3 seperate pieces. (upper race, ball/cage, lower race)

These are 2 piece. (upper race, rollers/cage/lower race assem.)

 
I haven't taken the steering head area appart so i can't comment on the space you speak of. However in the "For Future Reference Dept" ....any time you'r installing a "important" bearing always throw it in the freezer (in a baggie) for an hour or so and just before assembly heat (as much as possible if a painted outer surface) the recieving hole/area. Much easier install will follow....

It almost sound like it could be in slightly crooked,...not removable at this point to check for misalignment i'm guessing ?

sorry... i couldn't be of more help...

-Don

 
I haven't taken the steering head area appart so i can't comment on the space you speak of. However in the "For Future Reference Dept" ....any time you'r installing a "important" bearing always throw it in the freezer (in a baggie) for an hour or so and just before assembly heat (as much as possible if a painted outer surface) the recieving hole/area. Much easier install will follow....
It almost sound like it could be in slightly crooked,...not removable at this point to check for misalignment i'm guessing ?

sorry... i couldn't be of more help...

-Don
This bearing/race fits over the shaft that is permanently attached to the lower triple. I agree with your suggestion. I should have froze the shaft and heated the race. Damn hindsight.

 
Scab, did you cut the lower metal ring off??

my install...

Smitty

IMG_0593.jpg


IMG_0595.jpg


IMG_0596.jpg


IMG_0597.jpg


Last edited by a moderator:
Smitty,

I actually printed your install instructions and used as my guide. I did cut the old race. Using a die grinder, about 80% through the material, the race snapped and was then easily removed from the stem. The only thing that I cannot determine is final placement of the bearing/race because the final photo is a little blurry. ;)

Perhaps I am going to have to break down and locate a hydraulic press. My conditions may be contributing to this. I am in a portable 12x24 building. While attempting to drive this puppy on, the lower triple is sitting on a piece of wood, which is sitting on my suspended wooden floor. Maybe I am just loosing too much of the force into all that wood.

 
Tried that.
But you saw no gap? Was this also tapered bearings?
Yes, no gap once I was done. They snugged up just like the ones I took off. They are the tapered rollers from AllBalls. Any chance you got some debris stuck in there? Or maybe you just need a heavier hammer. :unsure: I used a piece of pine setting on a concrete floor.

I was surprised at how tight the bearings fit for this application, but I never changed steering head bearings before so I don't have anything to compare with.

 
Last edited by a moderator:
I'm thinking maybe my proceedure and setup is not so good. I think I am going to find an actual hydraulic press and see how that works. I think it is clear they are not installed all the way.

 
If you heat the bearing with the oven or carefully with a propane torch it will set in place with no force and no damage. I realize this doesn't help now but if you ever have to do it again it works well.

 
If you heat the bearing with the oven or carefully with a propane torch it will set in place with no force and no damage. I realize this doesn't help now but if you ever have to do it again it works well.
I would be careful about heating a bearing. The rollers are probably only hardened on the surface (case hardened) and heating them up may cause them to lose that hardness. At a minimum you'd melt out the grease and have to repack them, which will be a pain to do once they are on the shaft.

 
Last edited by a moderator:
I'm thinking maybe my proceedure and setup is not so good. I think I am going to find an actual hydraulic press and see how that works. I think it is clear they are not installed all the way.
+1 I had to use a hyd. press on mine. Its tough getting the race to to seat straight but a press will help put enough pressure on it to seat. You will be able to tell if its set all the way because you won't be able to pump the handle on the press.

Bill

 
I agree with the idea that a press is ideal but in a pinch a nice CLEAN lengh of appropriat diameter pipe and a 2 pound hammer should do the job.

Careful not to damage the roller cage.

 
Smitty

You didn't happen to take note of the bearing and seal numbers.?

Besides Yamaha I can't find anyone in Australia who have a kit for the FJR.

With the bearing and seal numbers I don't need a kit..

 
A while back there was a post about wanting or finding out different ways to remove and install bearings. I suggested go to a shop that deals in heavy equipment and ask and watch them, because they do in all the time or a minning company they work with bearings all the time.

Some of the things that have been mentioned makes me wonder where that information came from.

One thing you never do is put a bearing on pre-greased. Pressing a bearing on is quite time consumming and need a press. Next driving one on with a piece of pipe for more than to get the bearing to seat properly is not a good idea. As for heating a bearing up and takiing the hardness out of the bearing is untrue. The way that happens is when you take it to it critical temperature point of turning to or just starting at its melting point about 2200"F

Fjrray gave you the one of the easiest ways to install a bearing by heating it up with a tourch. Thats how most heavy eqquipment mechanics do it.

Here is a way to put on a new bearing with good results and no problems. remember there are different ways to heat a bearing up, such as... with a tourch ,in a oven made for heating a bearing

I have seen them use oil heated to about 400"F.

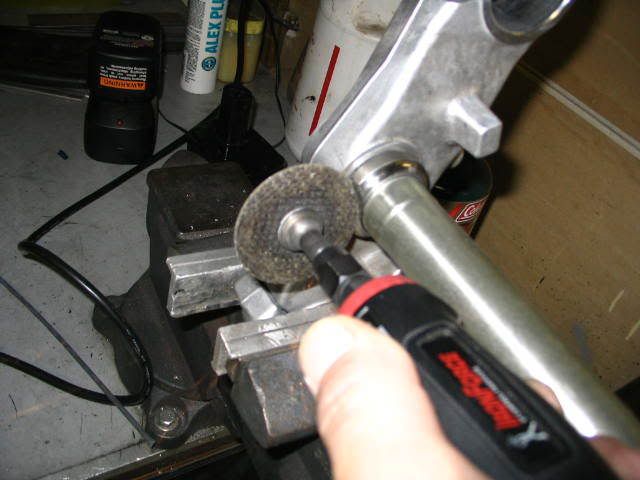
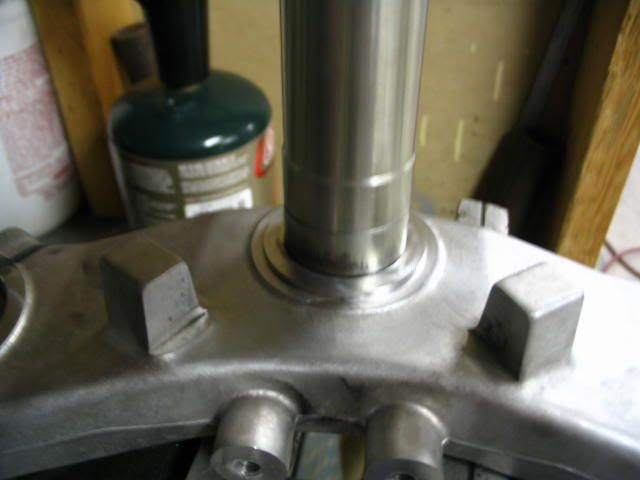
First you need to prerpare the shaft so it is nice and clean, no oil no grease and try not to handle it

to much the heat from your hands will expand the shaft and it makes it hard for the bearing to slide down on the shaft. Never any grease on or in the bearing .Have the shaft in a vise the area clean and have a brass hammer and a drift punch handyjust in case you need it if it does not set all the way down.

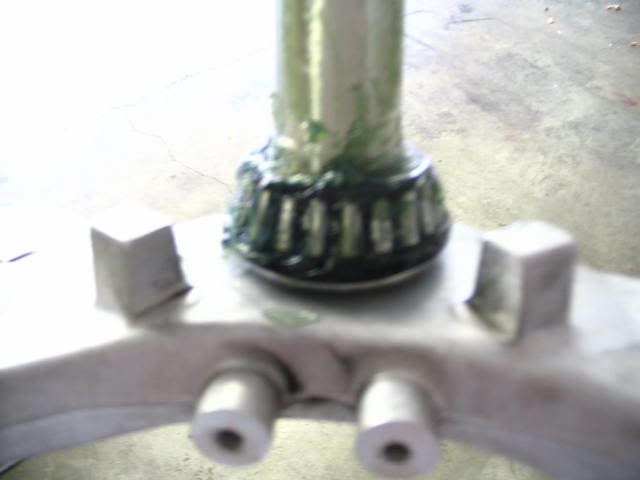
Now the shaft is in the vise clamped and secured tightly now you get the bearing and heat it up to about 400 to 500 degrees F.. You only heat up the inner race that comes in contact with the shaft to the temp. stated before. NOw you use what ever you have a welding leather glove a pair of channel locks drop the bearing on and it should bottom out if not while it is still warm take your punch and brass hammer and tap on it. The bearing is set and is where it needs to be. Let cool then pack the bearing with your choice of grease ( not smear it on the out side of the race and bearing needles.

Guaranteed no problems to work as it should

If you take a piece of pipe and pound on the inner cone of a bearing and it is a quality bearing you can not hurt the inner cone the pipe will mushroom first and score the shaft when removing the pipe.

there are other ways to install bearing and some require a little different method but for the steering head this is how I would do it. I usse this method when I have to work with bearings that require this t ype of installation.

weekend rider :) :D

 
Top