


wfooshee
O, Woe is me!!
This is for FJRs up to 2005. For 2006 and later, see Kaitsdad's thread here. You can also refer to that thread for info about the storage box and the headlight adjustment knobs, which later Gen-I bikes have, but which are not on my 2003.
After my lowside back in October I got all new plastic for the front of the bike, but I didn't think to take any pictures of the removal/installation then. Selfish and inconsiderate, I know, and gee whiz, I apologize sincerely. . . . .
One of the damaged items was a slight bend in the bracket the left mirror bolts to, and during the repair I didn't quite get it right. My left mirror has been at the limit of its outward and upward adjustment, and it still shows me my elbow and the saddle bag. And this IS an FZ-1 mirror. I've been putting off going in after the bracket again, because it means pulling the nose fairing, but now that I'm fed up with it, and I've seen some "how do I?" posts, I thought I'd go back in, and document it. It's a gorgeous day, mid-60s, but I don't have any gas money, so I might as well dig into the bike.
In the pics you'll see some things not on your bike. The wiring harness for the control buttons on my Audivox cruise control pass through the left upper fairing, so that's in some pictures, and I have a gear indicator at the top of my gauge cluster, and its wiring shows in a few places. Also, each of these pics, at 600x450, is probably big enough to use, but they're links to larger 1280x960 images. Click the pic to get the big one.
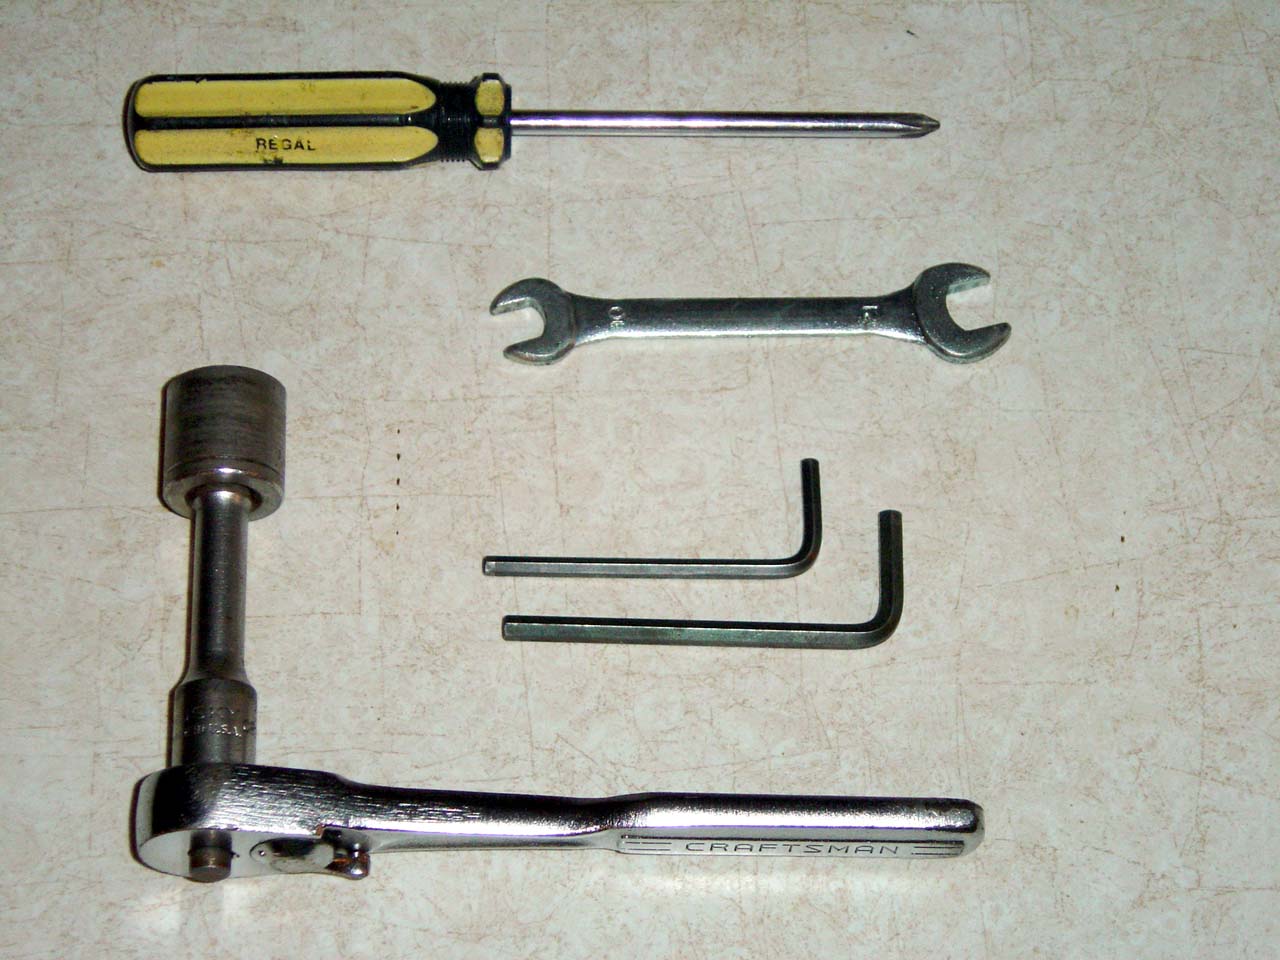
Tools needed: both hex keys from the bike's tool kit and one of the wrenches with a 10mm end. Also from your own tools, a Phillips-head screwdriver, and if you have sliders like I do, tools to get those out of the way. Mine are through-the-fairing, so I just need a 19mm socket.
Start with the inner panels. Look here for instructions. Of course the '04 and '05 have the glove box which is not mentioned there. Doesn't change the sequence for the inner panels, and once the lower fairing is off the bolts to remove the glove box will be exposed.
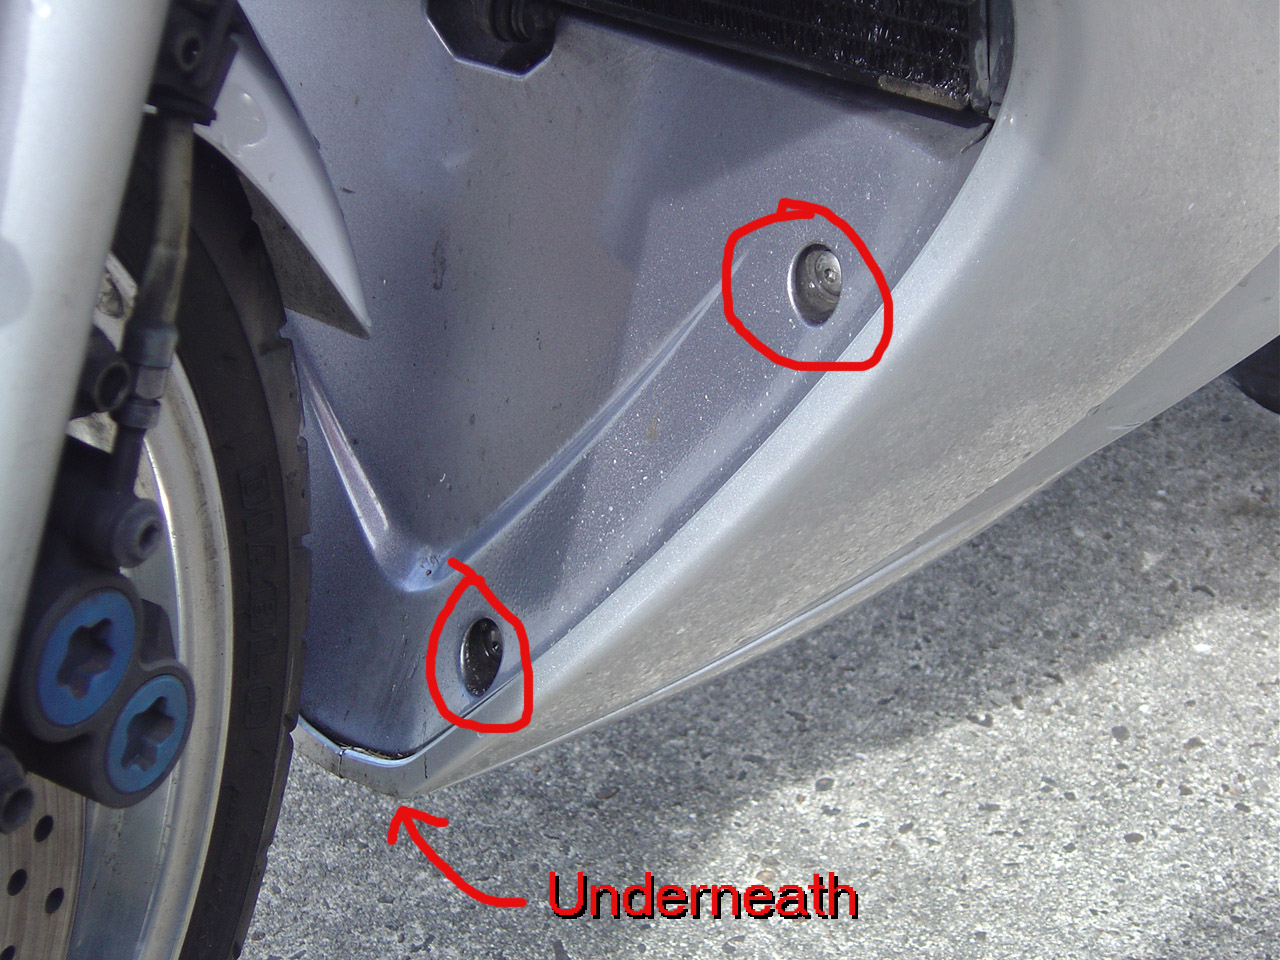
Once the dash panels are done, the next step is the side fairings. These have an inner cover that needs to come off, and it's easier if you have a little give, so start at the bottom, behind the front wheel, and remove the bolt underneath, and the two in the face under the radiator. That lets you spread the fairing panels a bit.
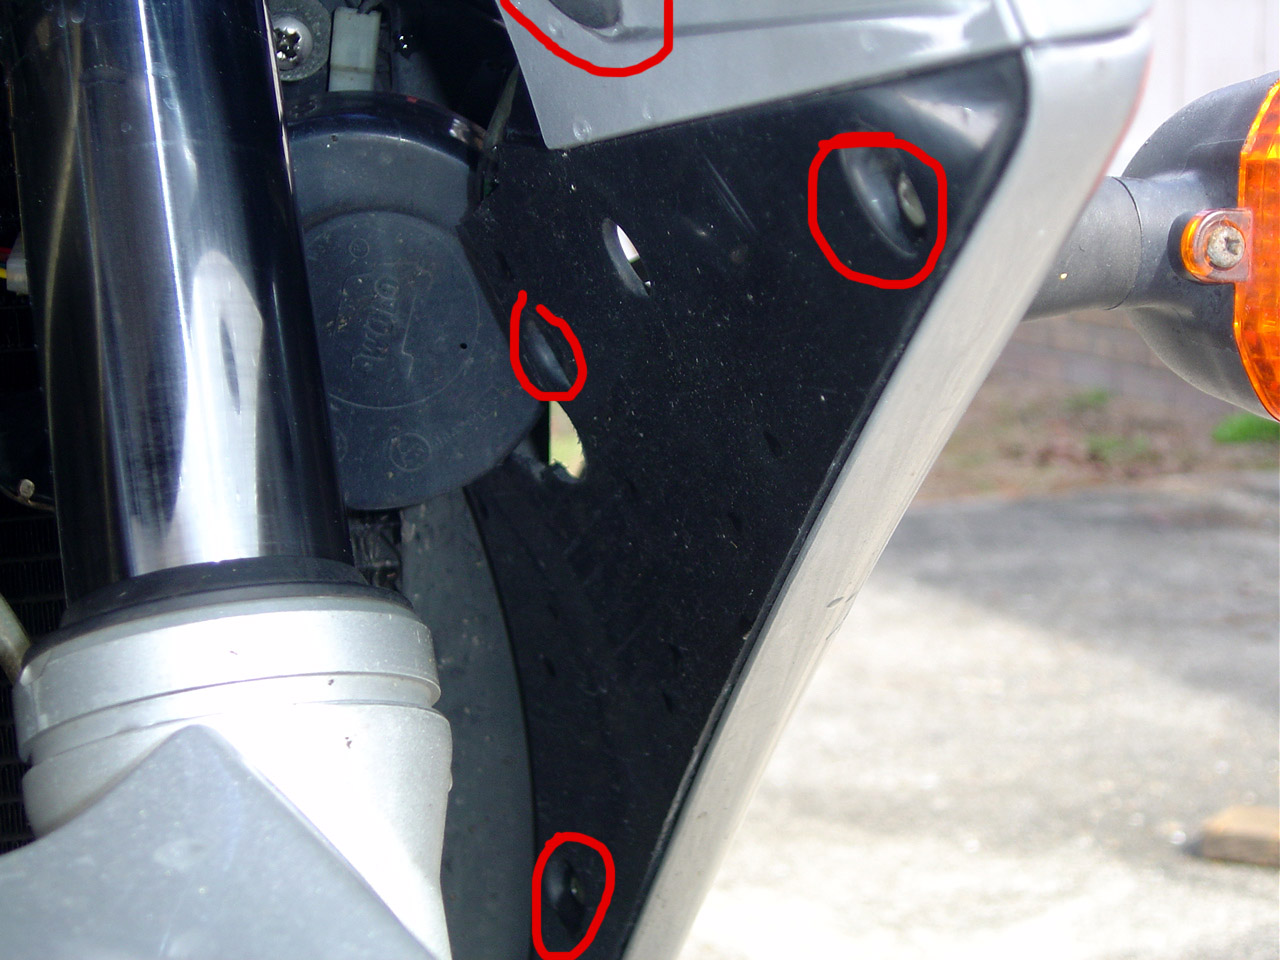
Here's the inner panel on the left side. Remove the plastic rivet at the top, and three Phillips-head screws, circled. Right side is the same.
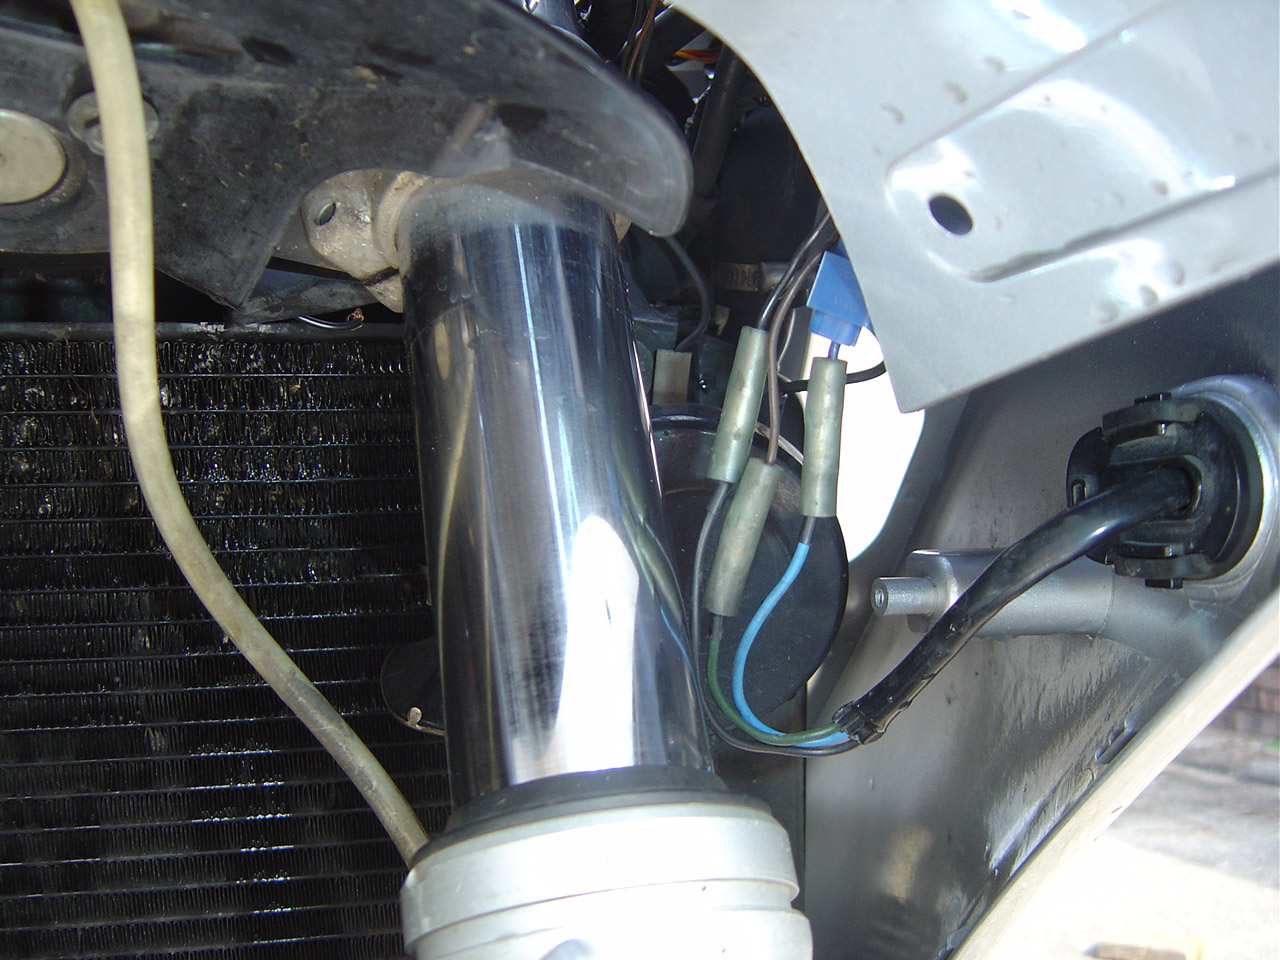
Once the inner panel is removed, you find the connectors for the front turn signal/running lights. The colors are actually supposed to match at each connector, but mine don't. Apparently the previous owner swapped the left and right lamp assemblies at some stage of some repair, and I can't be bothered to correct it. Also, the crimp tap connector is where I got switched power for an accessories strip. Don't be alarmed not to find it on yours, it's not stock.
(Edit: I have since corrected the color match in the wires by swapping the lights back to the correct sides. One was melted a bit on the top, apparently the reason they were swapped over, so the melted part was hidden. Dunno how he did that, though. Also, I've removed all the crimp taps and soldered the connections and covered them with heat shrink tubing. CC got flaky, found corrosion in the connectors.)
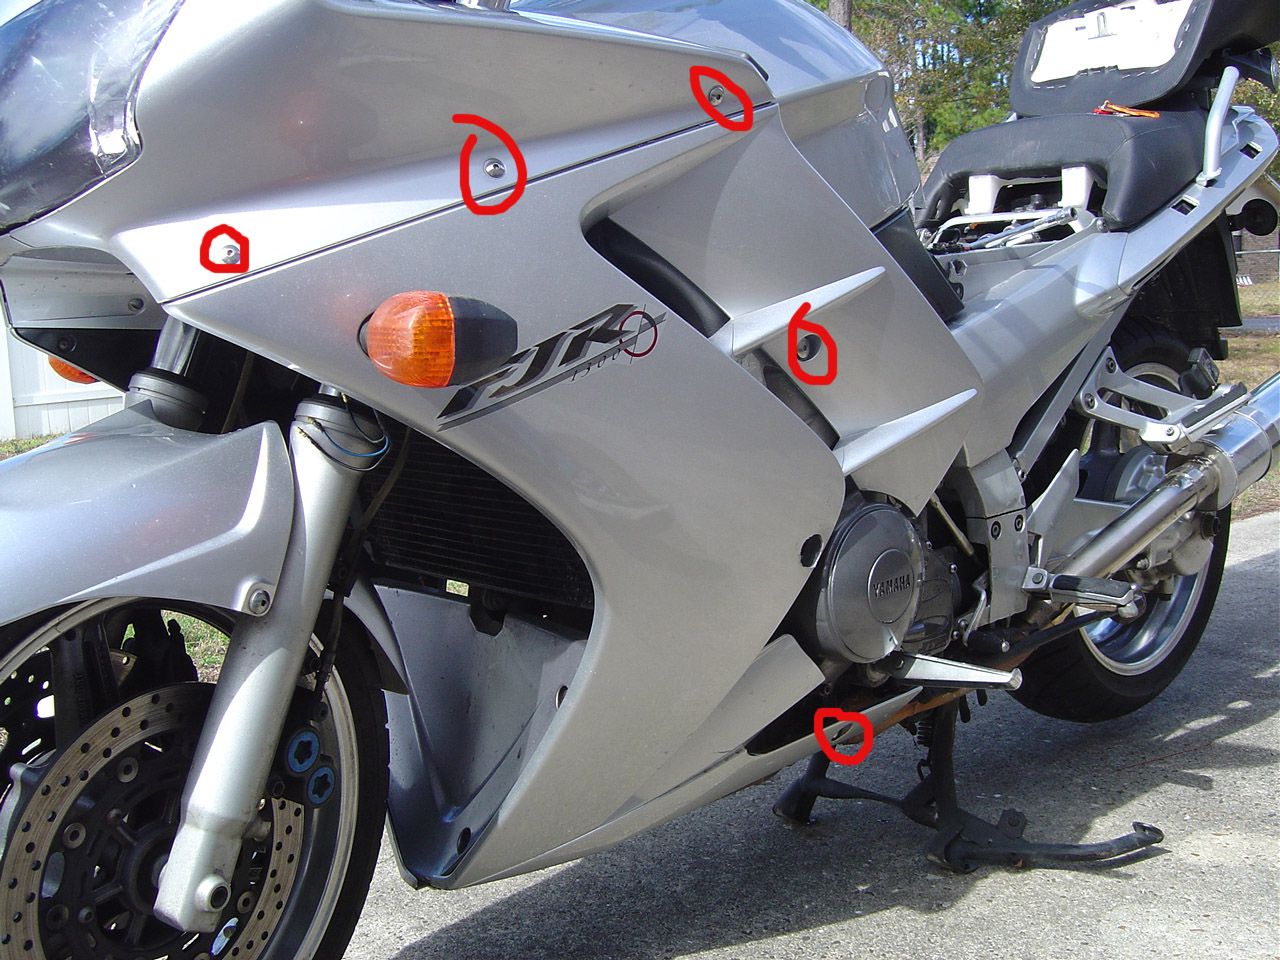
With the turn signal/running lights disconneted, we're ready to remove the lower fairings. Remove the five 4mm hex-key bolts circled. The two that go into the bike's frame are different from the three at the top. Careful with the hex key, don't scratch the paint.
At this point, if you haven't done this before you start looking for bolts to remove the upper fairings, and usually not finding all of them. It's possible but difficult to remove the left side but the right has at least one bolt which is inaccessible with the battery in place.
To continue, first we need to remove the windshield and mirrors. The mirrors are held by these two 10mm nuts on each side. Remove them and catch the mirrors before they hit the ground.
Now the windshield. Run it to the lowest position to relieve tension in the springs. Remove the seven plastic Phillips bolts. I leave the center one for last to keep the weight balanced.

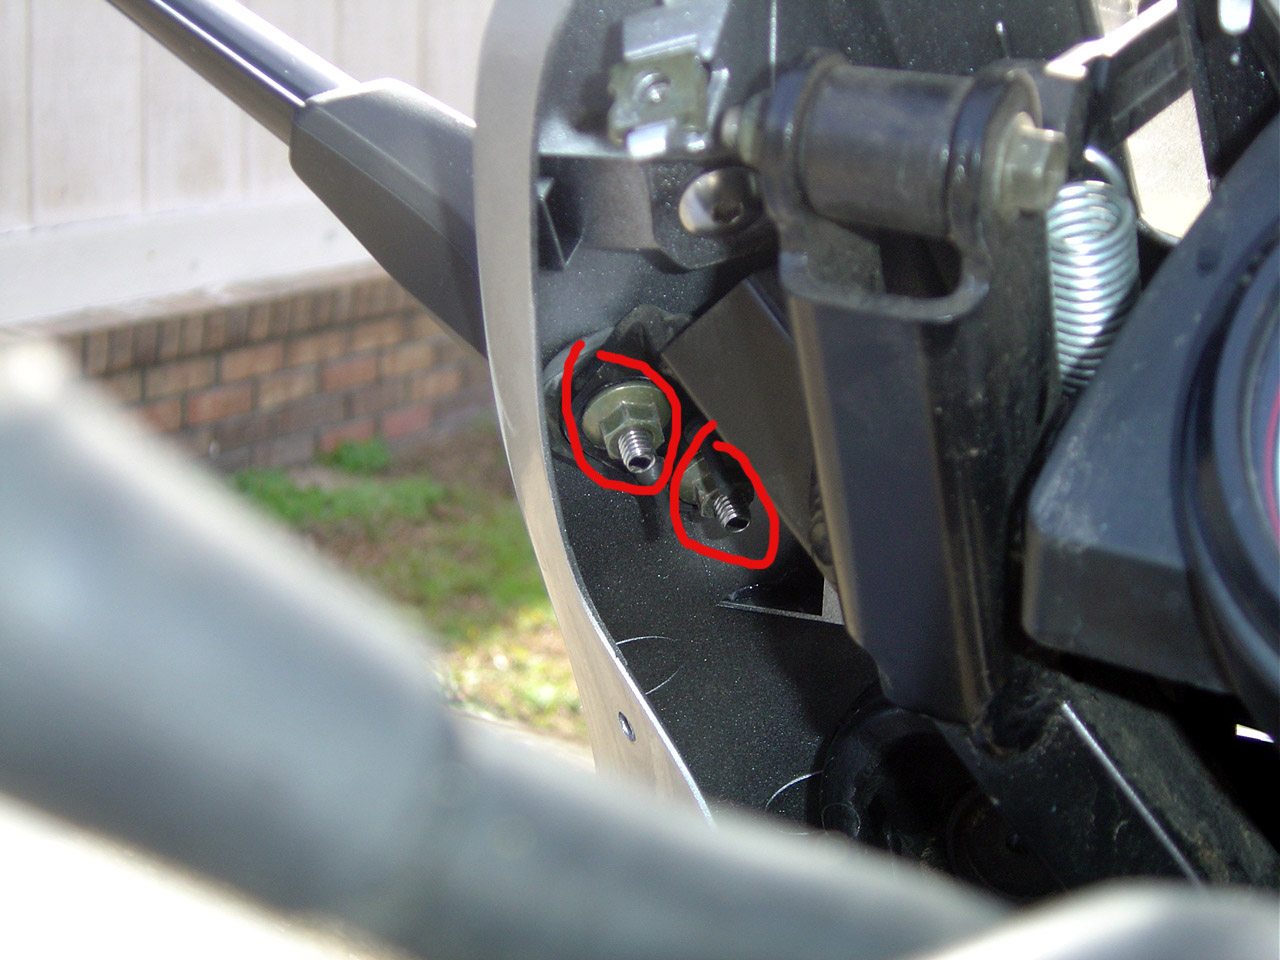
Now remove the two bolts circled here, that connect the windshield bracket to the motor arm.

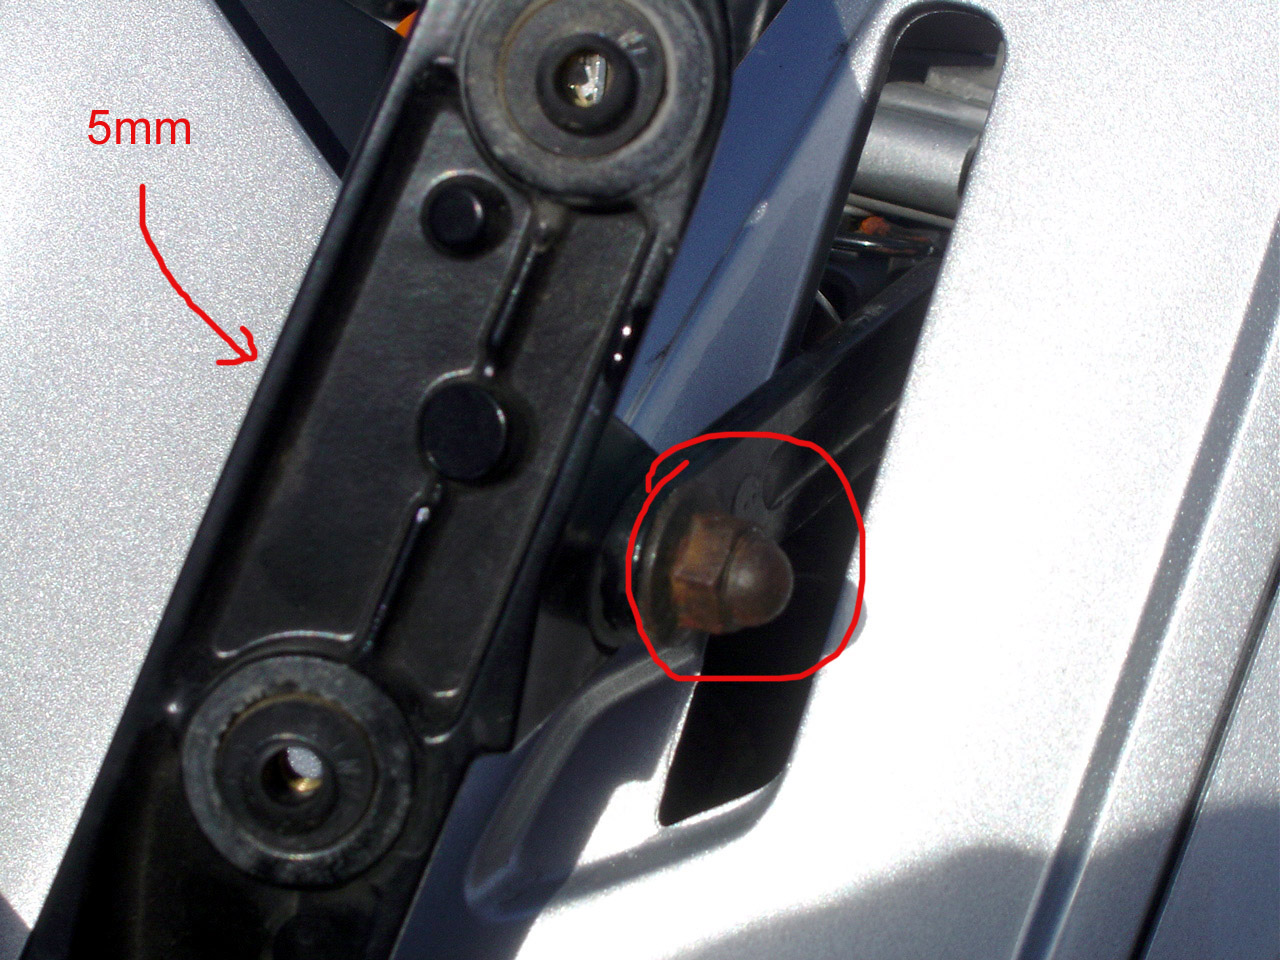
Remove the 10mm acorn nut circled here (on each side.) The bolt needs the larger hex key from your tool kit, 5mm. Apparently the arm is cast with Cheeze Whiz (or something) so don't apply a lot of force to the arm, just torque to the bolts. Ask TWN.
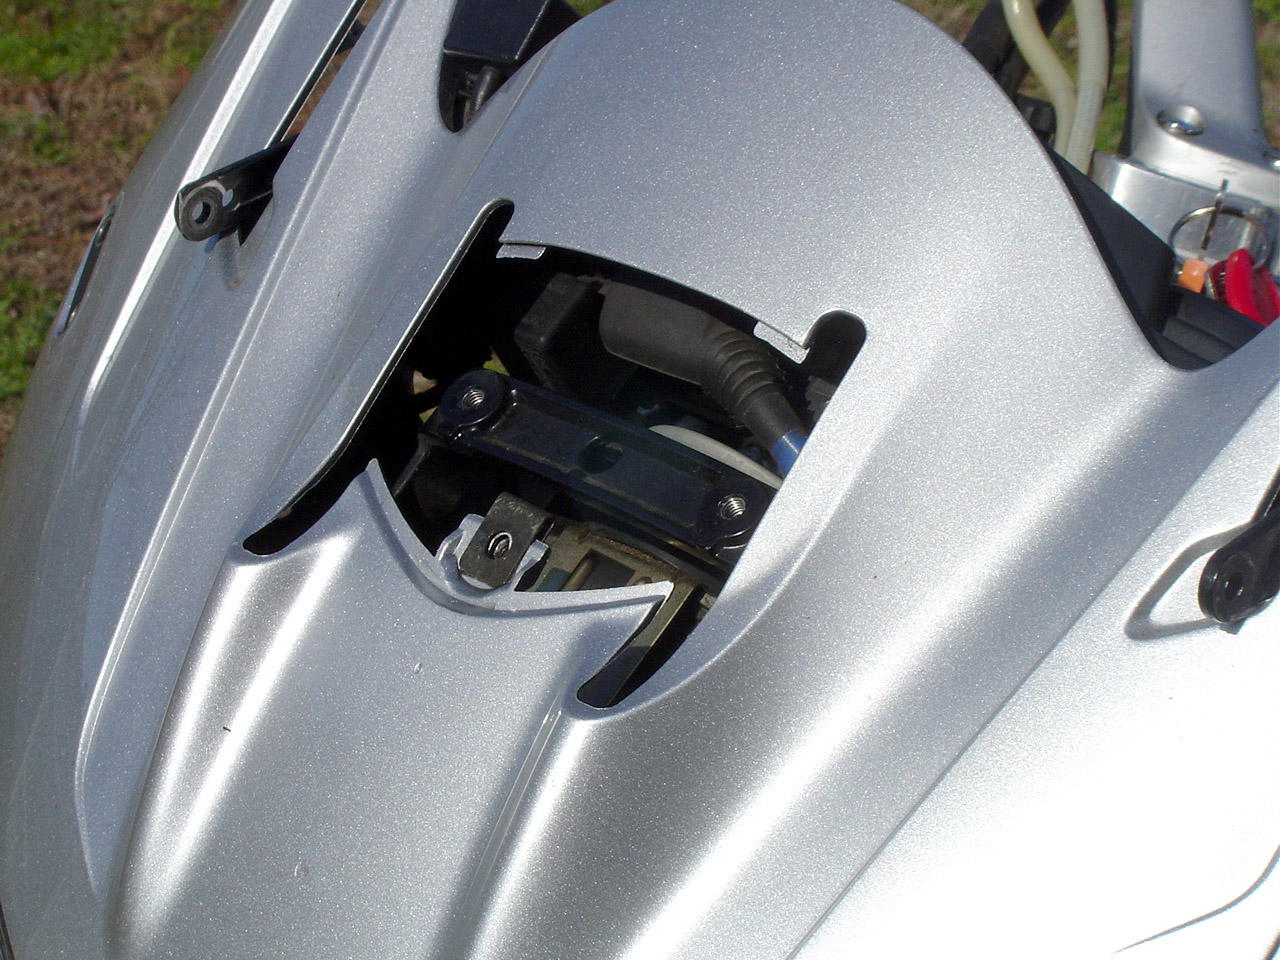
Now turn the key on and run the windshield motor up at least half way. Now you can remove the center cover, just the one bolt, and slide it off.

Run the motor all the way down, retracting the arm inside the front cowl. Turn your key off, too.
Now the whole front cowl is ready to come off the bike as an assembly. Only four bolts hold it. First, disconnect the headlight wiring from the bulbs:
then remove these two Phillips bolts from each side:
The whole cowl now slides forward off the bike. Pull it straight forward.
What's left is not the world's most attractive naked bike. This kind of nakedness is kinda like throwing the shower curtain open and finding your grandma instead of your fantasy babe.
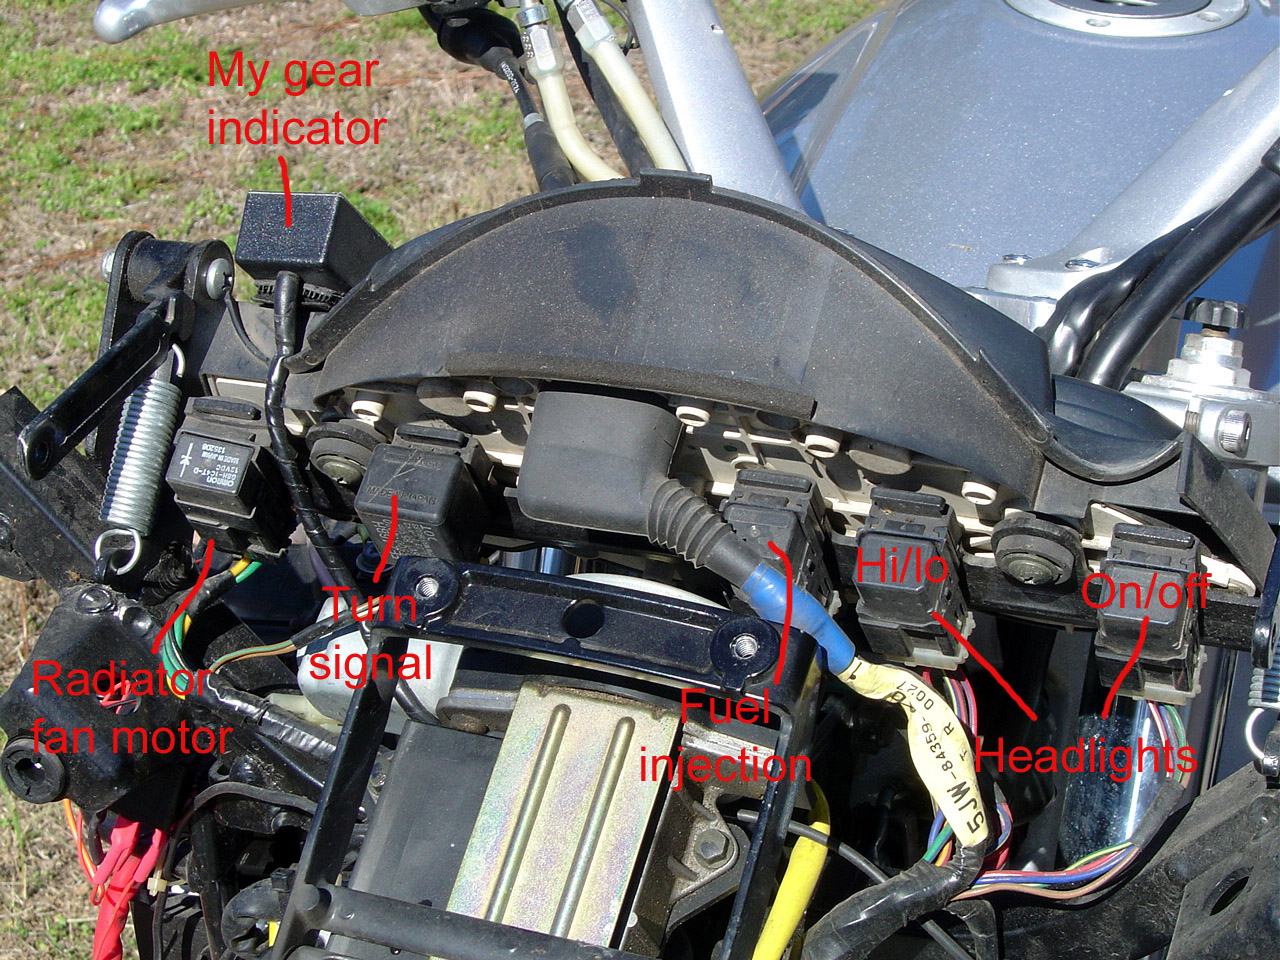
While we're here, might as well reference the relay positions. (This was taken at a later time when it was discovered that the service manual actually locates them incorrectly. This labelling is from actually testing the functions. It's also possible that '04 and '05 are still different from this, as I'm told the relay for the glove box latch is up here.)
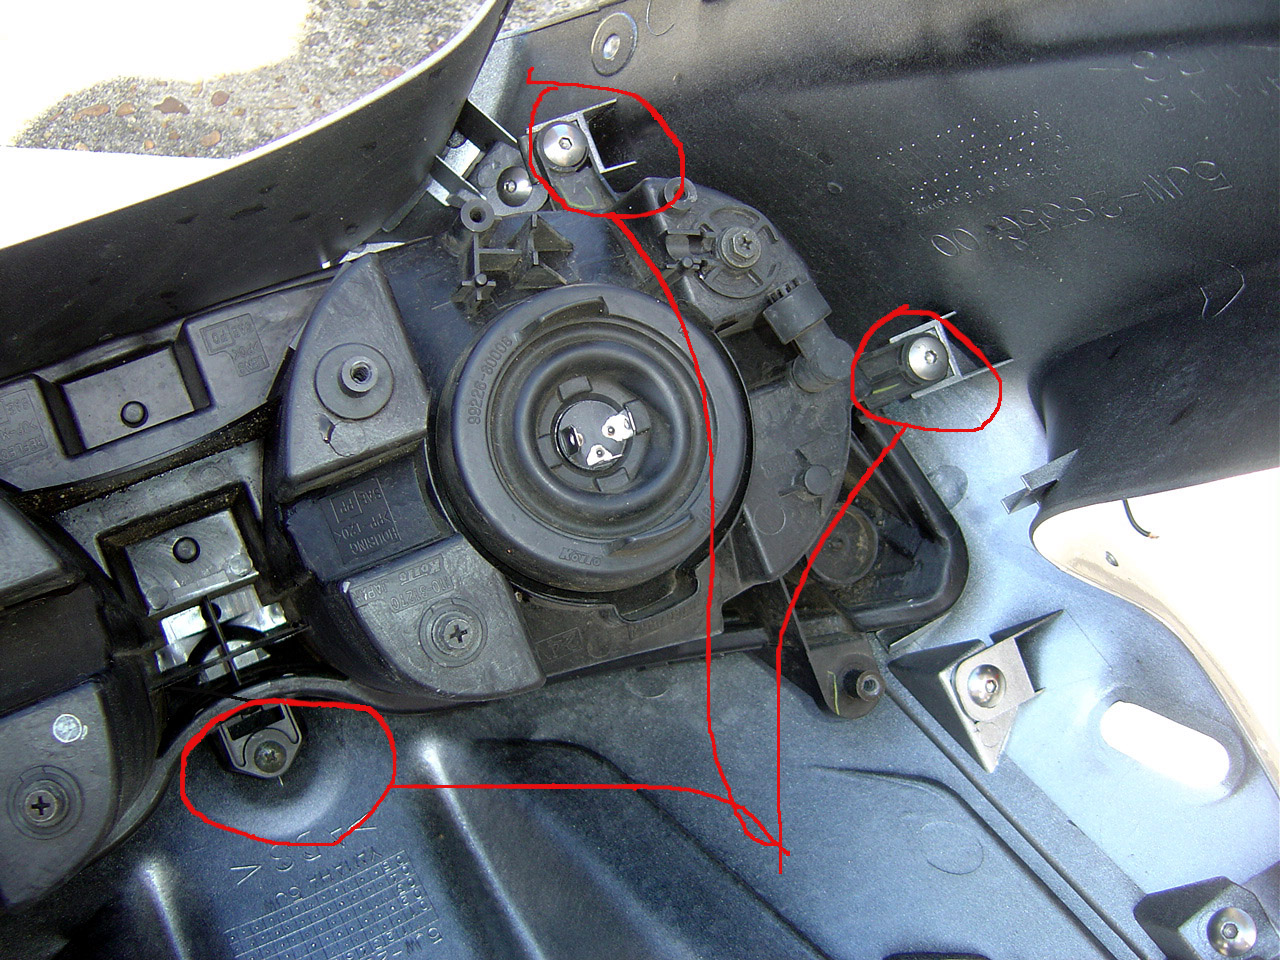
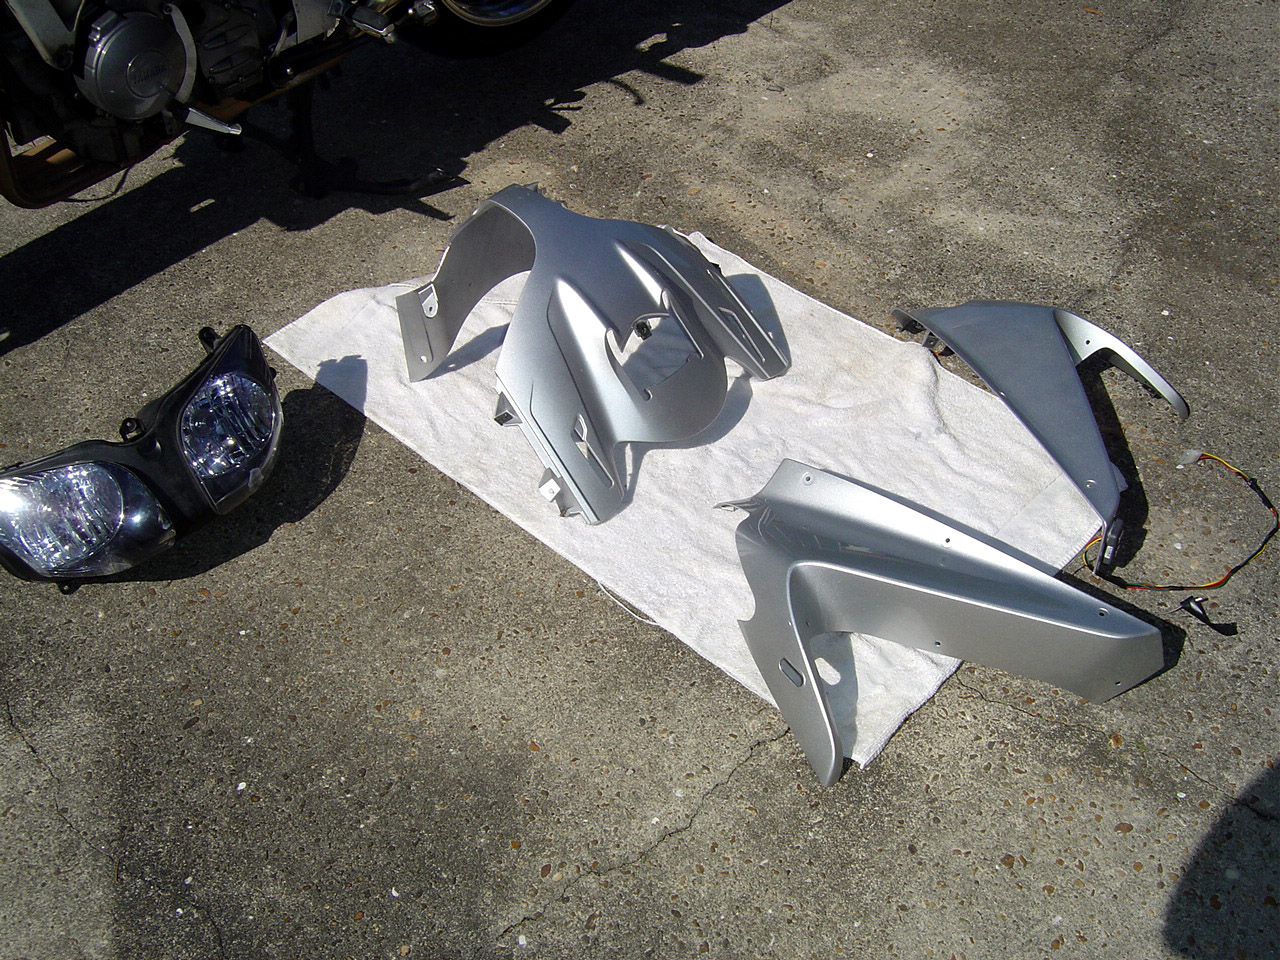
Turn the cowl assembly over on a towel to protect the paint, and you find the previously inaccessible bolts quite easy to reach. Remove two 4mm bolts on each side, plus the Phillips in the center, and the headlight assembly comes out.
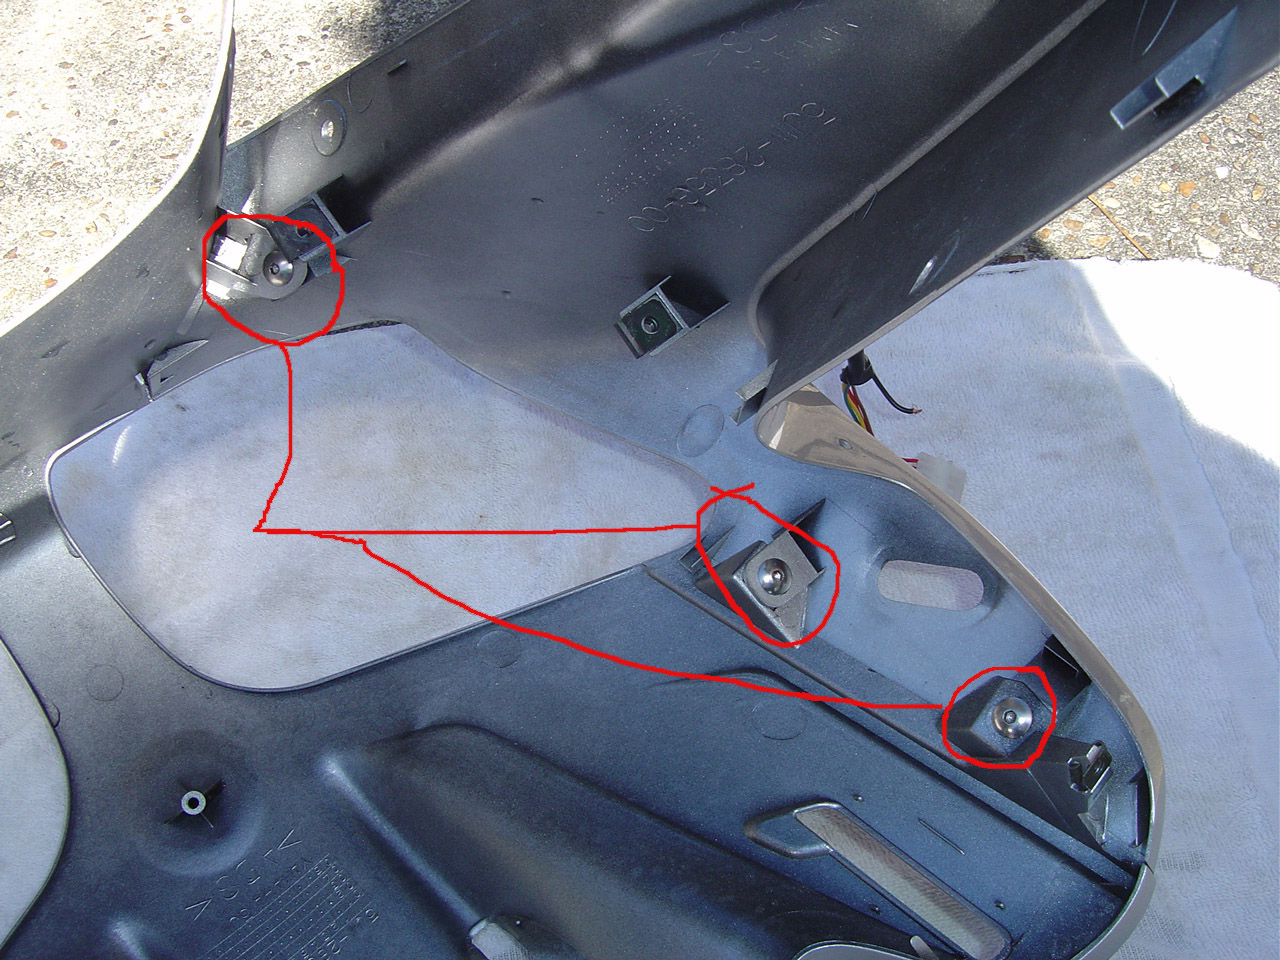
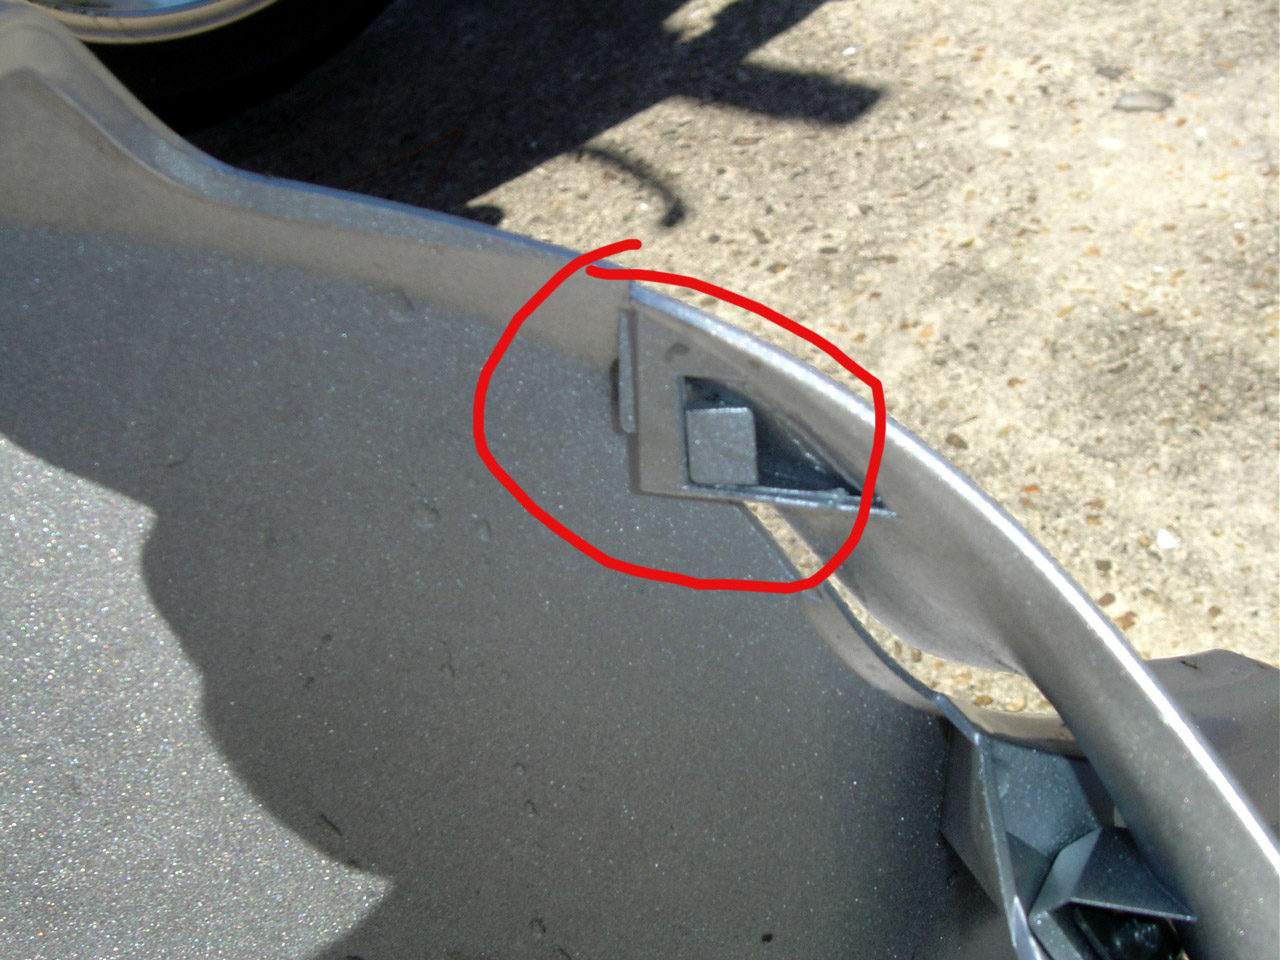
To remove the upper fairings from the center, remove these three bolts from each side, and be careful of the tab at the bottom. It's not a disaster if it breaks, but if it wasn't supposed to be there, Yammy wouldn't have put it there, would they?
Reverse the sequence to put it all back together. When hanging the lower fairing, put the top into the upper fairing, but insert the frame bolt first to carry the fairing's weight. Then put in the three bolts to the upper fairing, and finally the lowest bolt.
After my lowside back in October I got all new plastic for the front of the bike, but I didn't think to take any pictures of the removal/installation then. Selfish and inconsiderate, I know, and gee whiz, I apologize sincerely. . . . .
One of the damaged items was a slight bend in the bracket the left mirror bolts to, and during the repair I didn't quite get it right. My left mirror has been at the limit of its outward and upward adjustment, and it still shows me my elbow and the saddle bag. And this IS an FZ-1 mirror. I've been putting off going in after the bracket again, because it means pulling the nose fairing, but now that I'm fed up with it, and I've seen some "how do I?" posts, I thought I'd go back in, and document it. It's a gorgeous day, mid-60s, but I don't have any gas money, so I might as well dig into the bike.
In the pics you'll see some things not on your bike. The wiring harness for the control buttons on my Audivox cruise control pass through the left upper fairing, so that's in some pictures, and I have a gear indicator at the top of my gauge cluster, and its wiring shows in a few places. Also, each of these pics, at 600x450, is probably big enough to use, but they're links to larger 1280x960 images. Click the pic to get the big one.
Tools needed: both hex keys from the bike's tool kit and one of the wrenches with a 10mm end. Also from your own tools, a Phillips-head screwdriver, and if you have sliders like I do, tools to get those out of the way. Mine are through-the-fairing, so I just need a 19mm socket.
Start with the inner panels. Look here for instructions. Of course the '04 and '05 have the glove box which is not mentioned there. Doesn't change the sequence for the inner panels, and once the lower fairing is off the bolts to remove the glove box will be exposed.
Once the dash panels are done, the next step is the side fairings. These have an inner cover that needs to come off, and it's easier if you have a little give, so start at the bottom, behind the front wheel, and remove the bolt underneath, and the two in the face under the radiator. That lets you spread the fairing panels a bit.
Here's the inner panel on the left side. Remove the plastic rivet at the top, and three Phillips-head screws, circled. Right side is the same.
Once the inner panel is removed, you find the connectors for the front turn signal/running lights. The colors are actually supposed to match at each connector, but mine don't. Apparently the previous owner swapped the left and right lamp assemblies at some stage of some repair, and I can't be bothered to correct it. Also, the crimp tap connector is where I got switched power for an accessories strip. Don't be alarmed not to find it on yours, it's not stock.
(Edit: I have since corrected the color match in the wires by swapping the lights back to the correct sides. One was melted a bit on the top, apparently the reason they were swapped over, so the melted part was hidden. Dunno how he did that, though. Also, I've removed all the crimp taps and soldered the connections and covered them with heat shrink tubing. CC got flaky, found corrosion in the connectors.)
With the turn signal/running lights disconneted, we're ready to remove the lower fairings. Remove the five 4mm hex-key bolts circled. The two that go into the bike's frame are different from the three at the top. Careful with the hex key, don't scratch the paint.
At this point, if you haven't done this before you start looking for bolts to remove the upper fairings, and usually not finding all of them. It's possible but difficult to remove the left side but the right has at least one bolt which is inaccessible with the battery in place.
To continue, first we need to remove the windshield and mirrors. The mirrors are held by these two 10mm nuts on each side. Remove them and catch the mirrors before they hit the ground.
Now the windshield. Run it to the lowest position to relieve tension in the springs. Remove the seven plastic Phillips bolts. I leave the center one for last to keep the weight balanced.
Now remove the two bolts circled here, that connect the windshield bracket to the motor arm.
Remove the 10mm acorn nut circled here (on each side.) The bolt needs the larger hex key from your tool kit, 5mm. Apparently the arm is cast with Cheeze Whiz (or something) so don't apply a lot of force to the arm, just torque to the bolts. Ask TWN.
Now turn the key on and run the windshield motor up at least half way. Now you can remove the center cover, just the one bolt, and slide it off.
Run the motor all the way down, retracting the arm inside the front cowl. Turn your key off, too.
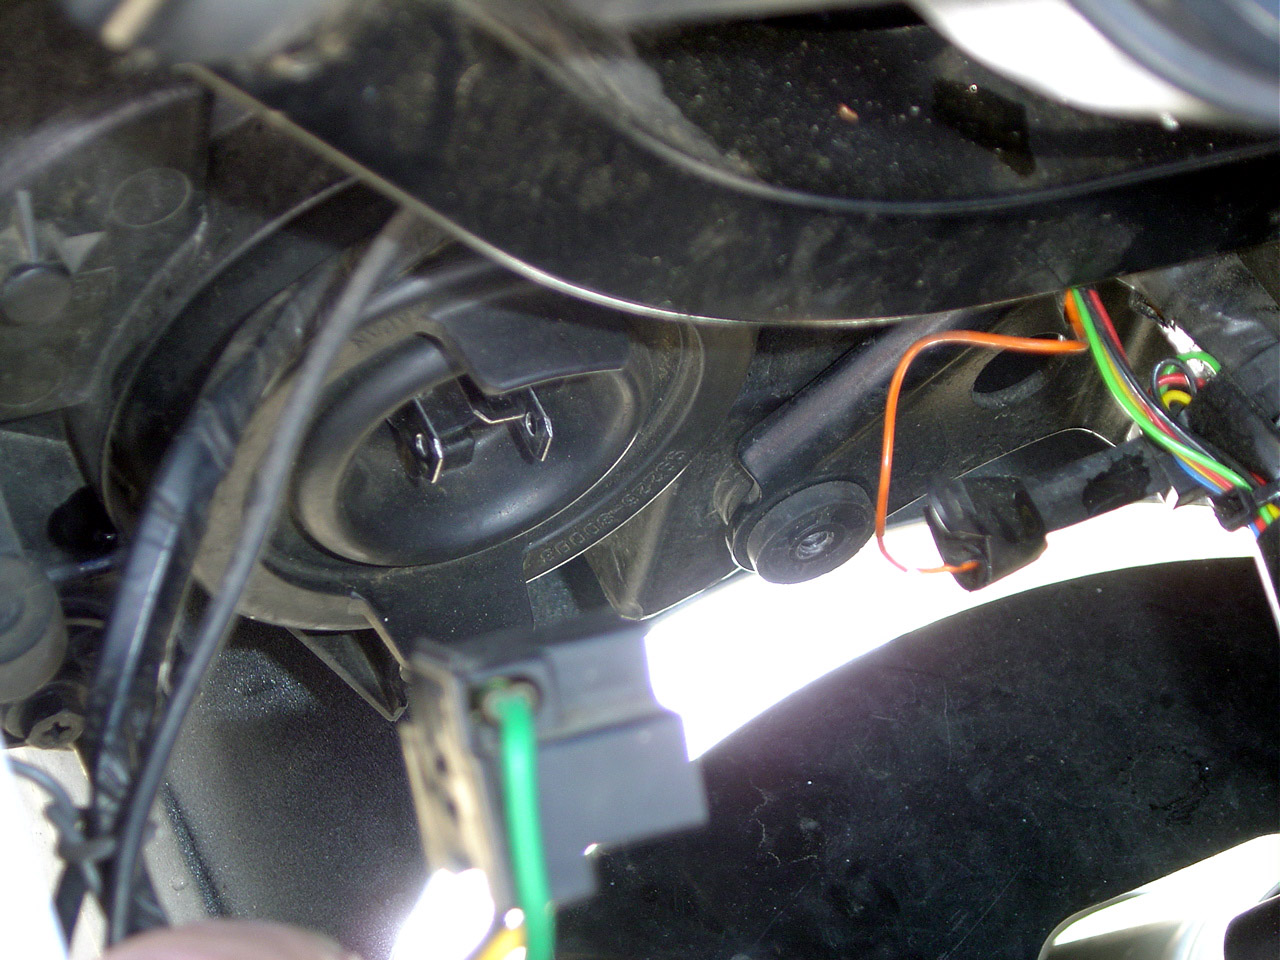
Now the whole front cowl is ready to come off the bike as an assembly. Only four bolts hold it. First, disconnect the headlight wiring from the bulbs:
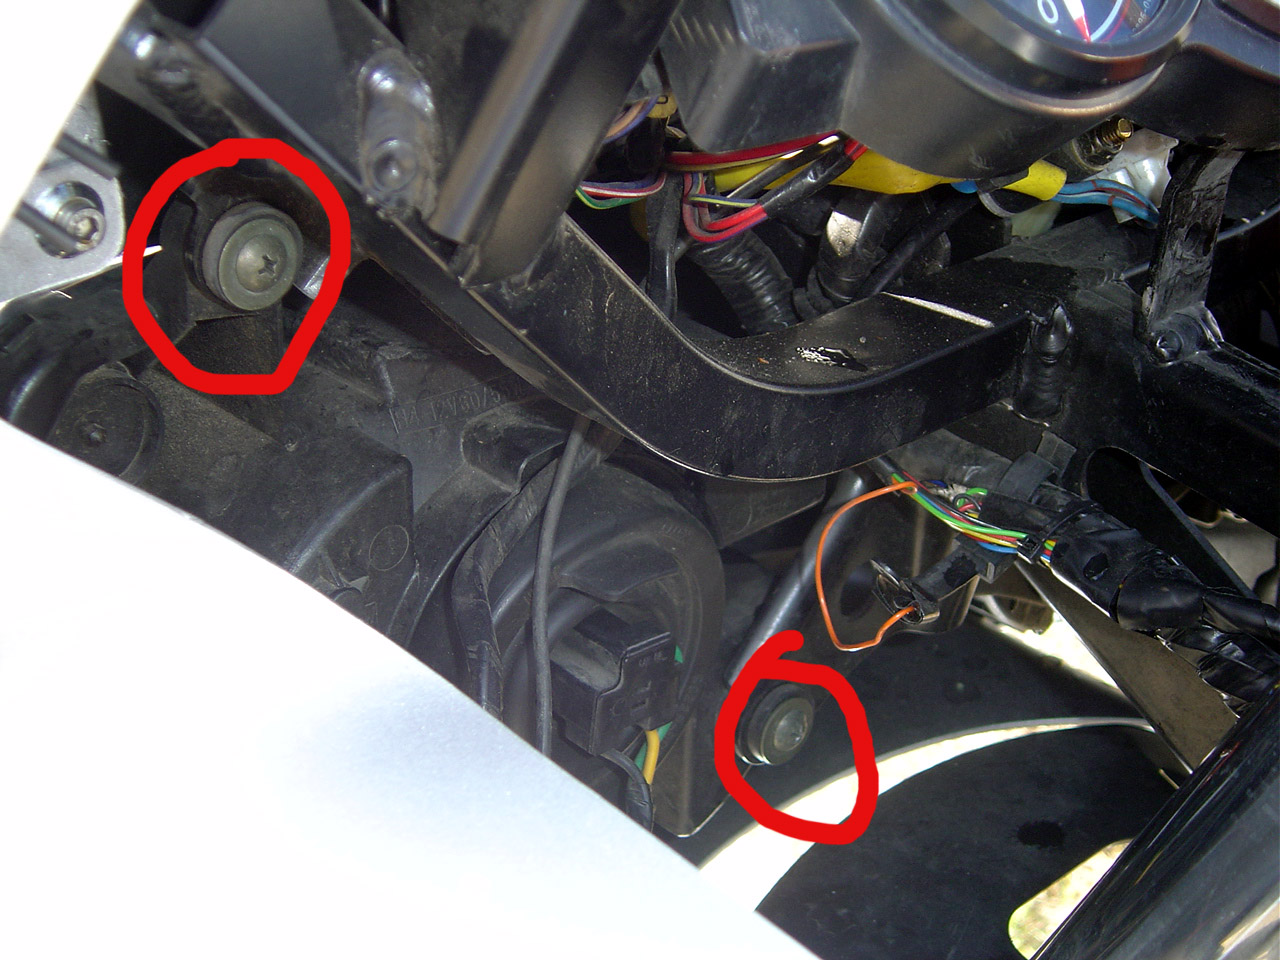
then remove these two Phillips bolts from each side:
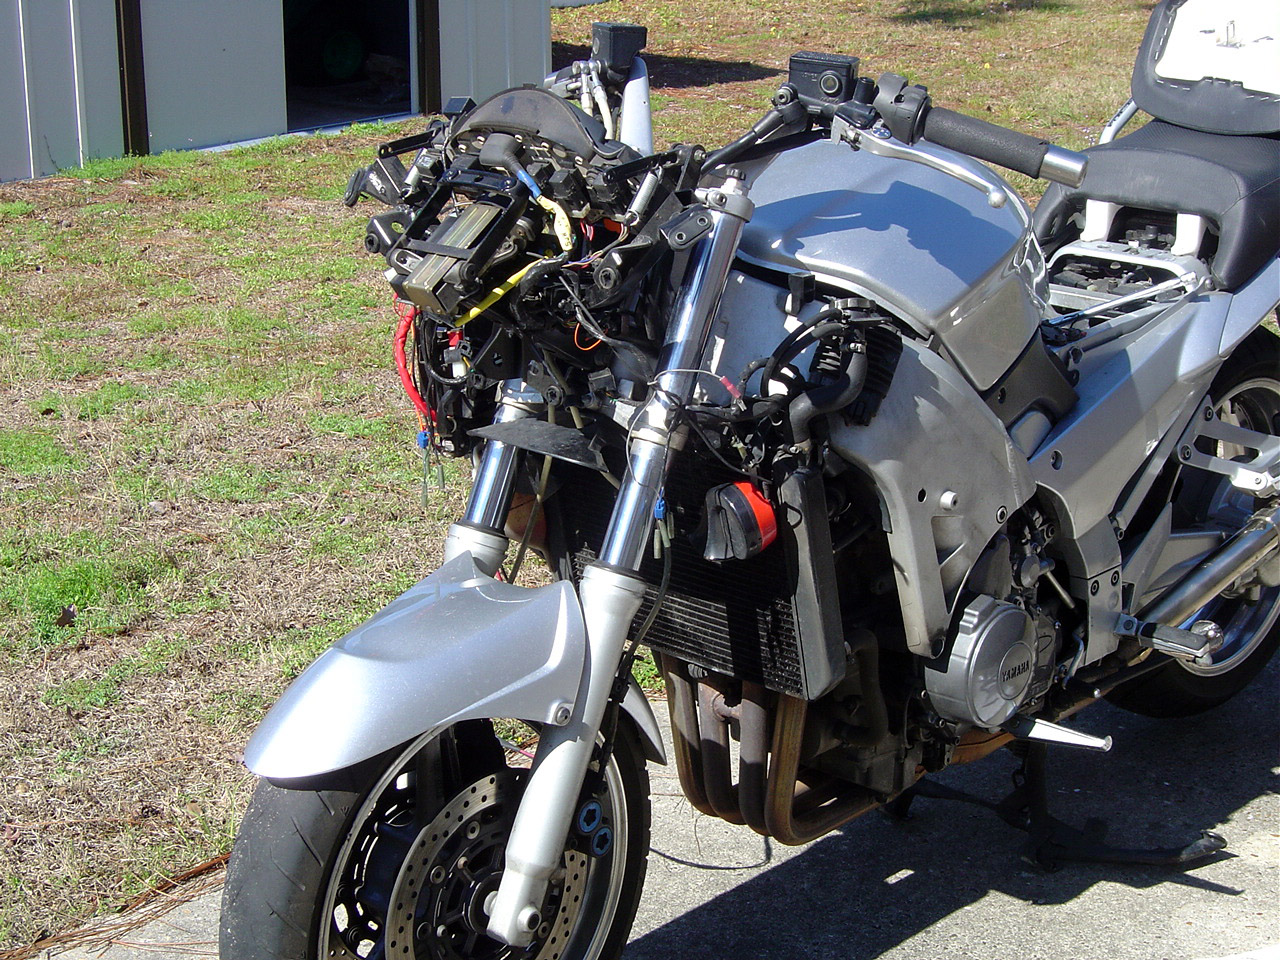
The whole cowl now slides forward off the bike. Pull it straight forward.
What's left is not the world's most attractive naked bike. This kind of nakedness is kinda like throwing the shower curtain open and finding your grandma instead of your fantasy babe.
While we're here, might as well reference the relay positions. (This was taken at a later time when it was discovered that the service manual actually locates them incorrectly. This labelling is from actually testing the functions. It's also possible that '04 and '05 are still different from this, as I'm told the relay for the glove box latch is up here.)
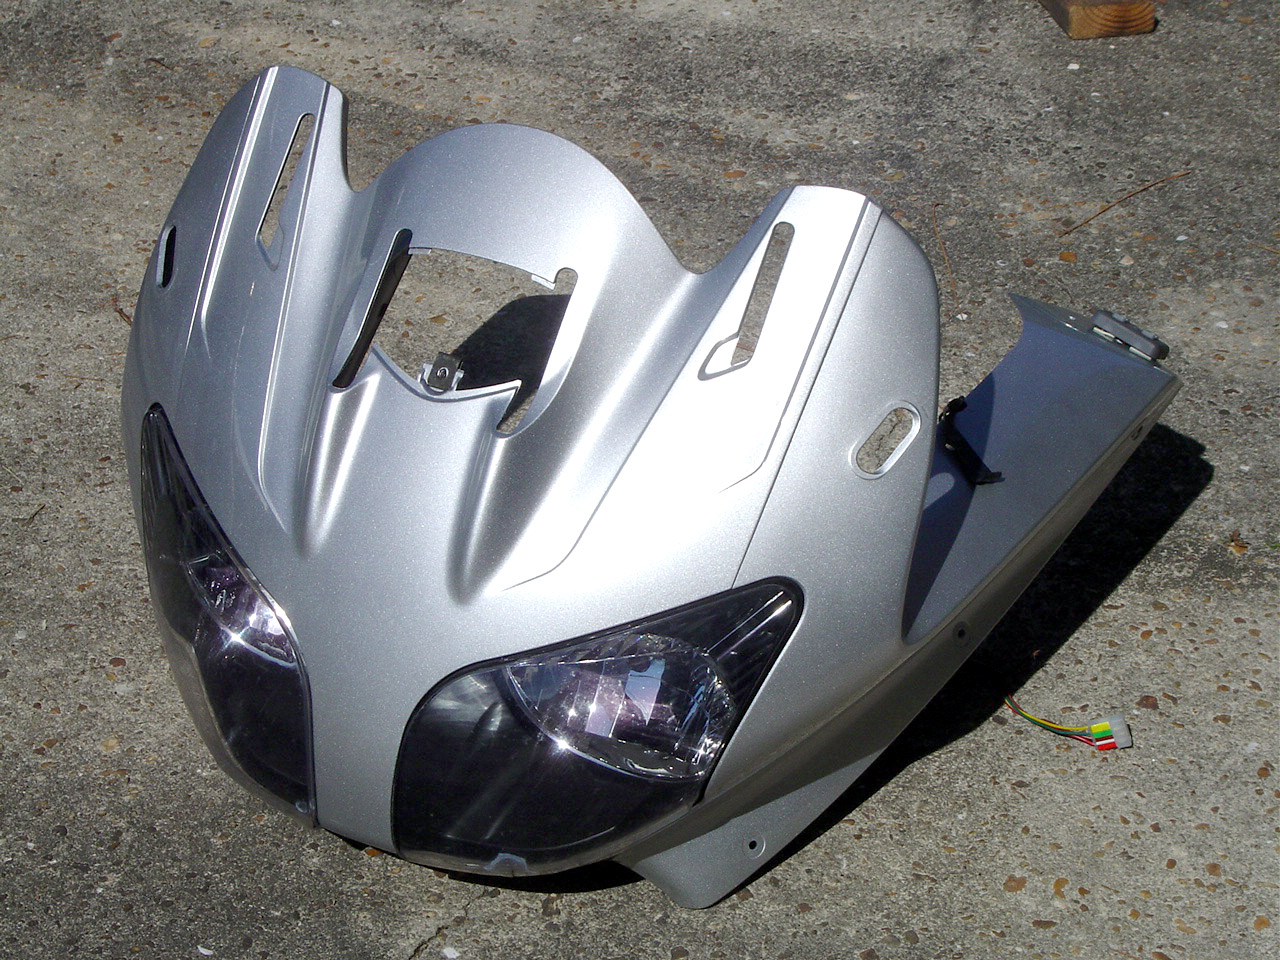
Turn the cowl assembly over on a towel to protect the paint, and you find the previously inaccessible bolts quite easy to reach. Remove two 4mm bolts on each side, plus the Phillips in the center, and the headlight assembly comes out.
To remove the upper fairings from the center, remove these three bolts from each side, and be careful of the tab at the bottom. It's not a disaster if it breaks, but if it wasn't supposed to be there, Yammy wouldn't have put it there, would they?
Reverse the sequence to put it all back together. When hanging the lower fairing, put the top into the upper fairing, but insert the frame bolt first to carry the fairing's weight. Then put in the three bolts to the upper fairing, and finally the lowest bolt.
Last edited by a moderator:

