


SkooterG
Purveyor of Crooked Facts
Well, I FINALLY swapped out my original 165k mile starter with a salvage unit I have had for a few months. As many of you may recall, I have had starting problems that have gradually gotten worse for a while now and that I have documented in other threads. They problems started around 140k, but even recently my FJR would start without drama 98% of the time. Still, a few weeks back I had three 'no-start' episodes in one day that required push starting. I knew then I needed to get this sorted out soon.
I have not been looking forward to this job. And I REALLY did not want to do all the work only to find out the starter was not the root cause of my problems. Well, the job wasn't as bad as I thought it would be. Don't get me wrong, it was still a major pain in the ass. It took me two days working slowly. (And not working the entire day.) But I thought it would be much worse.
Short version: The salvage starter (Cost=$90 delivered) has fixed my issue. Schwing! :yahoo: :clapping: I feel so much better now. The old starter was toast!
So here's some photos:
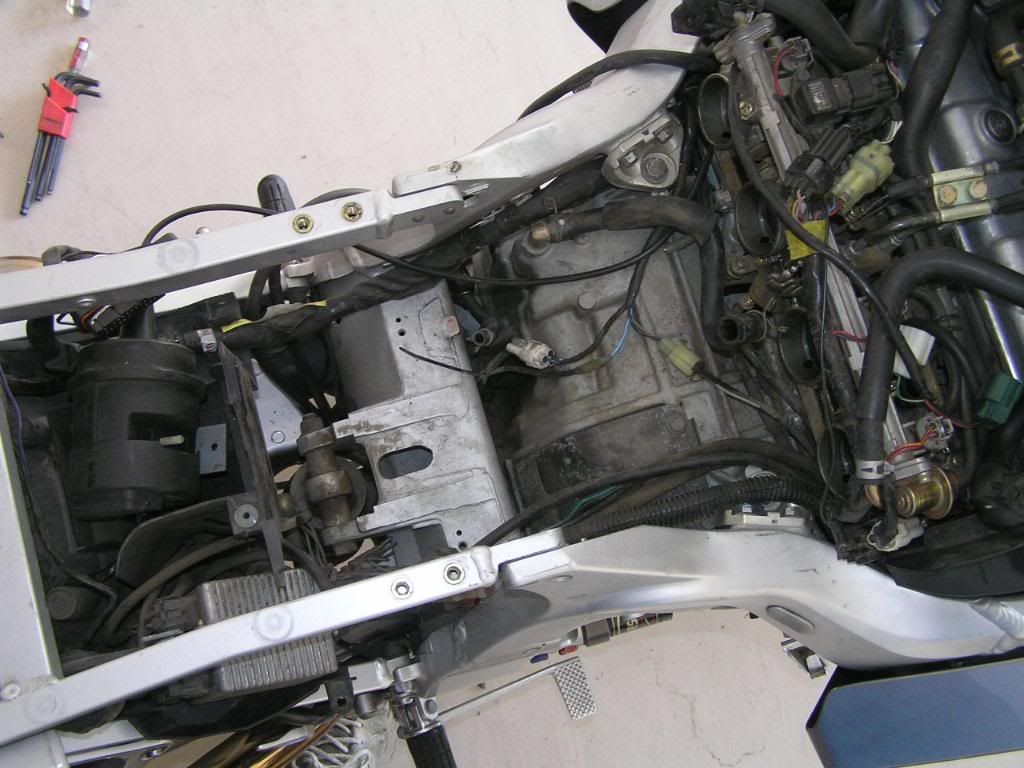
First the gas tank was removed, then the tool tray, and then the airbox. Nothing too hard here. But lots of cables, wires, and shit to deal with. Airbox is wedged in there pretty good and took a bit of fiddling to get it out.
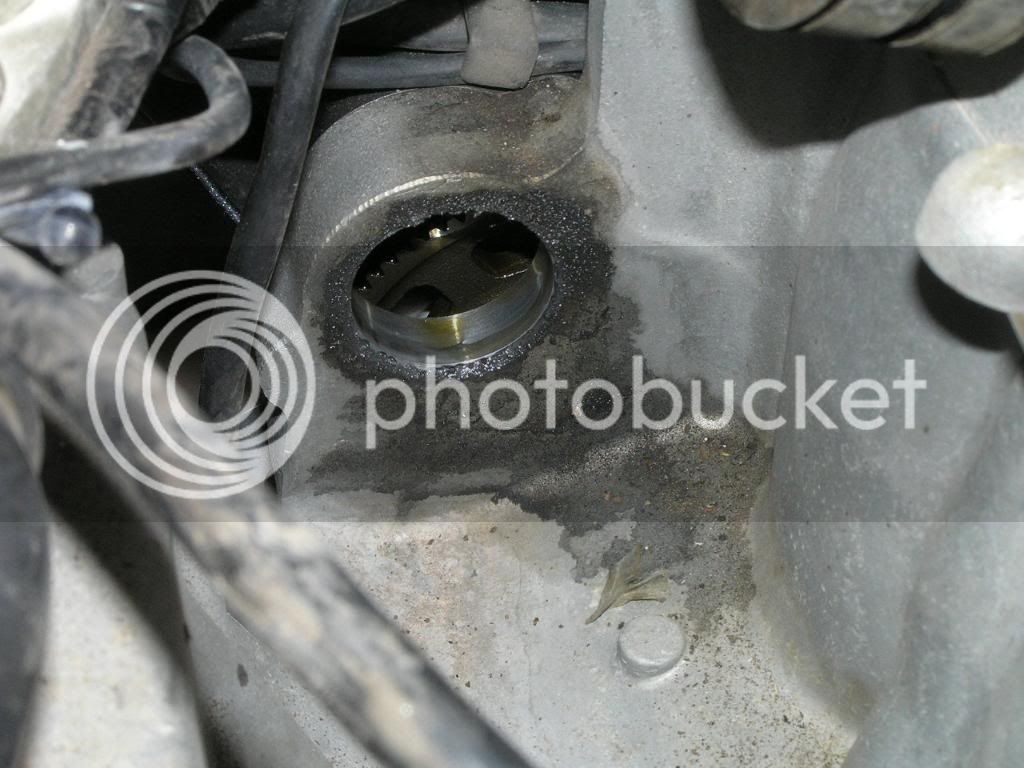
No airbox, and no starter in sight:
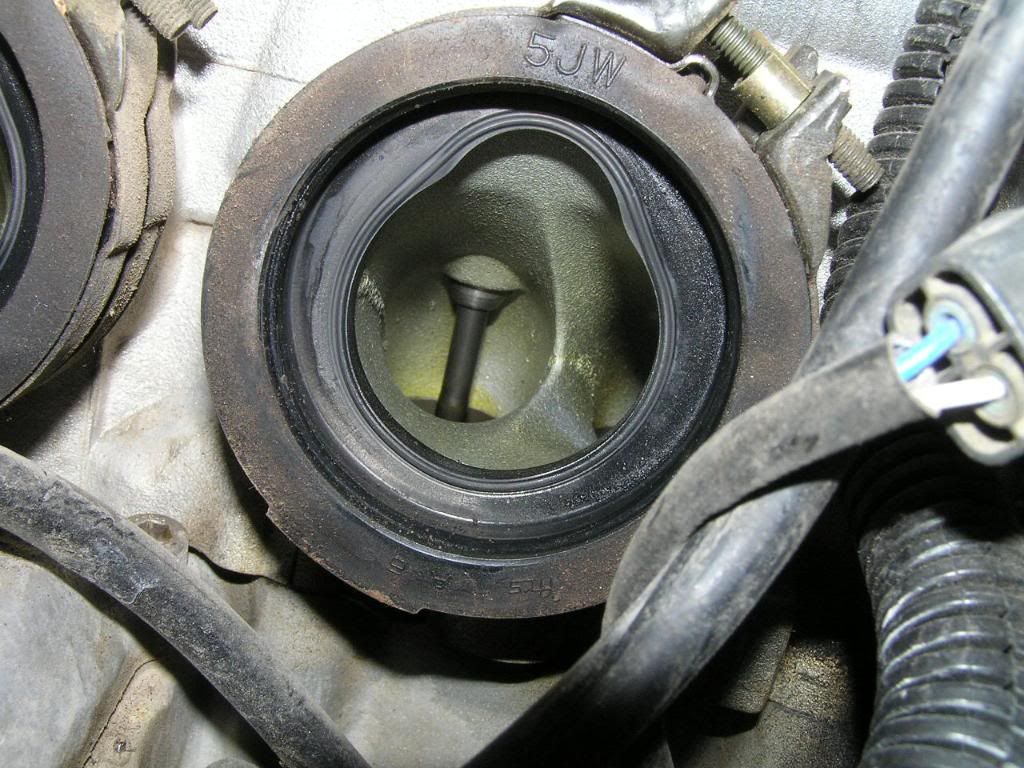
Shit! So as the service manual said, I am going to have to remove the throttlebodies. Speaking of throttlebodies, look at the 'gunk' on these things. Yikes!
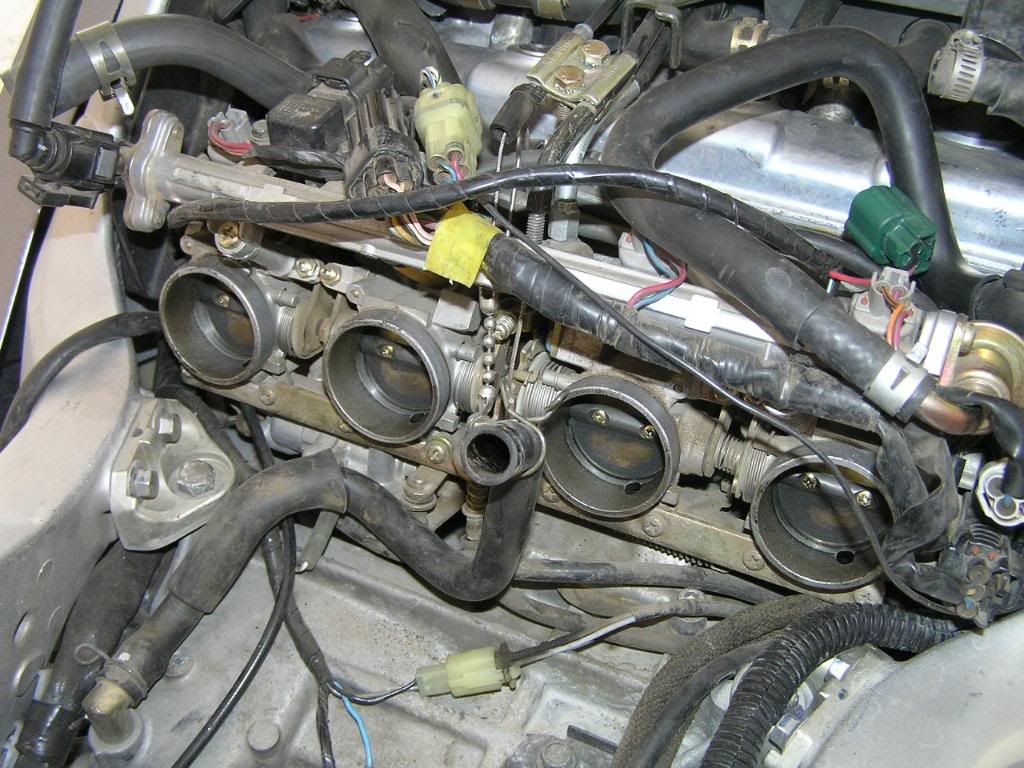
Close up of the 'gunk'. How does all that crap get there? Of course I cleaned them well before re-installing.

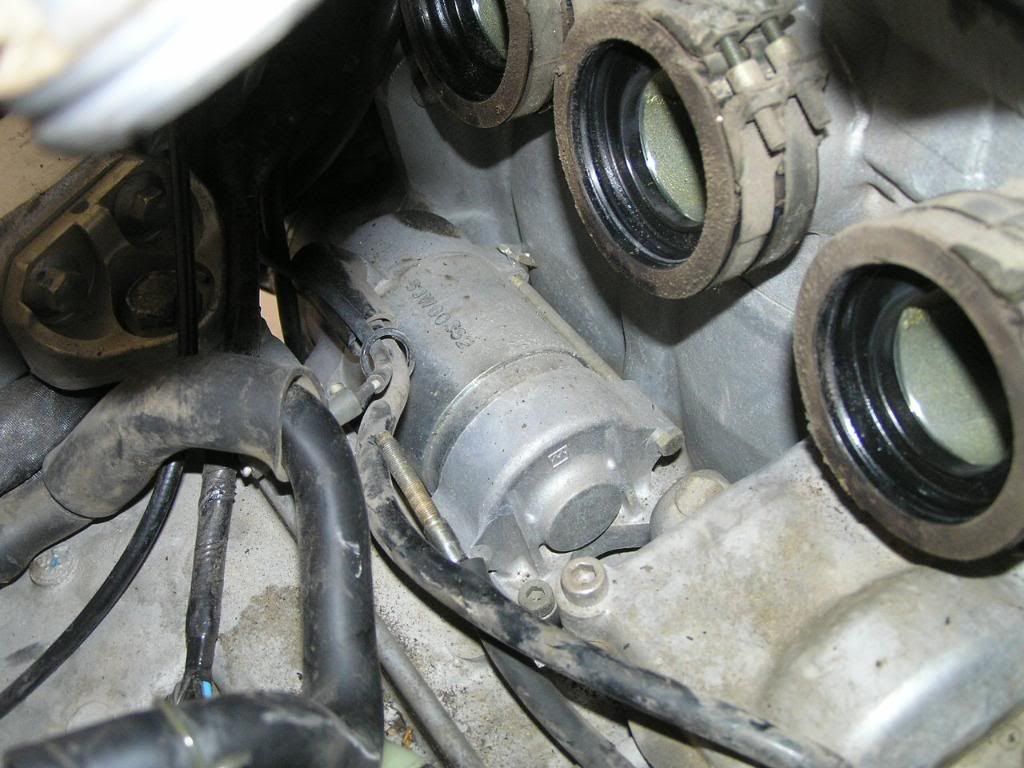
So off come the throttle bodies. Luckily I didn't have to drain the coolant and disconnect everything as the SM instructed. I was able to disconnect most stuff and just pull them off to the side. With throttlebodies gone, I can see the starter.
And there's the two allen bolts that keep the starter mounted. Once those are removed, starter is removed pretty easily.
Old starter on right, *new* salvage unit on left. Note oil on the old one.
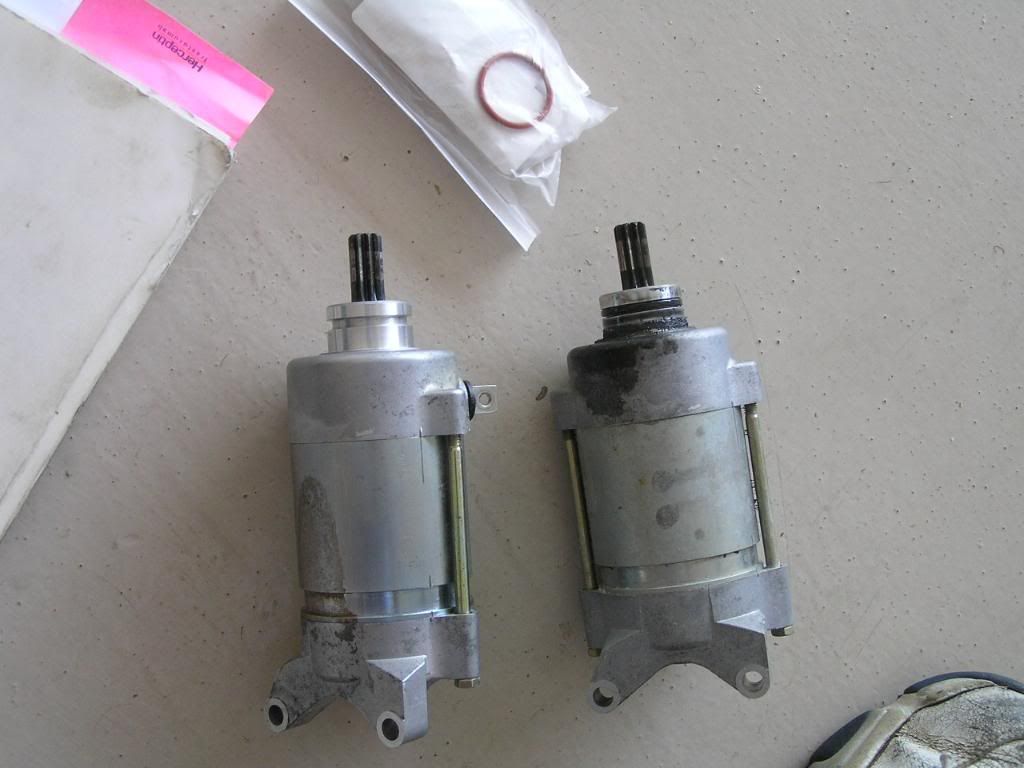
That oil matches up to where starter goes into case. More seepage here. Not too concerned with 165k on the clock.
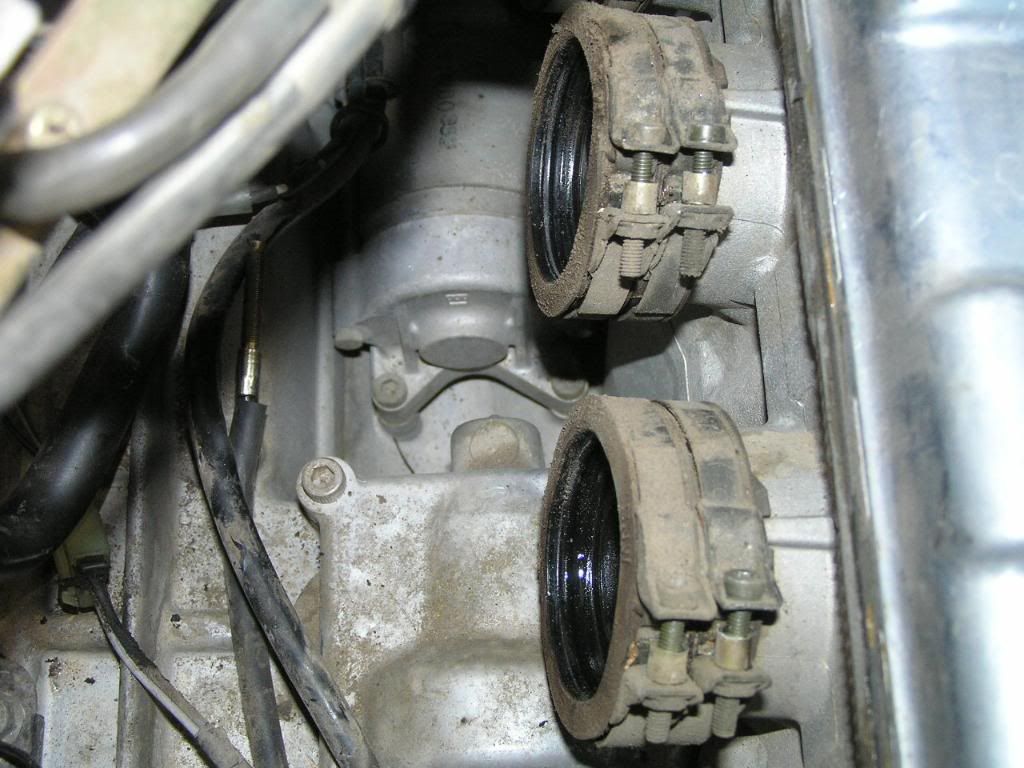
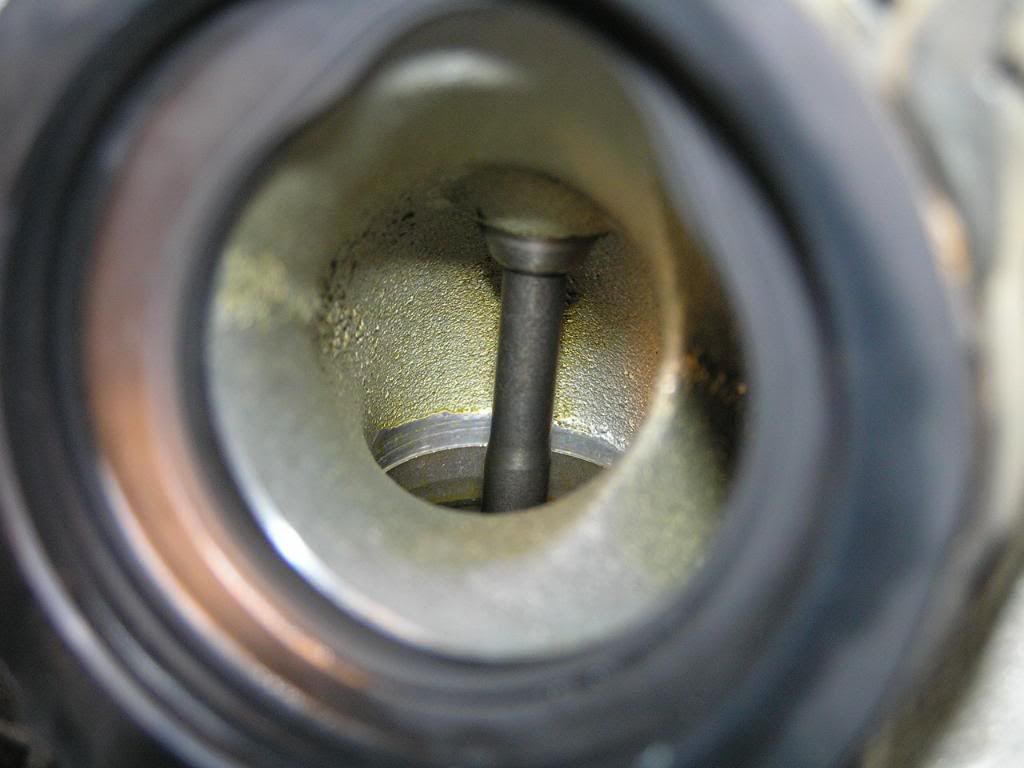
With the throttlebodies removed, I can see into the head.............
Everthing looking pretty good here to my un-trained eye.
So in went the new starter, after everthing was cleaned the throttlebodies were re-installed. The moment of truth came and the starter button was pressed.
Yowsa! That thing is spinning a million RPM compared to the old original! Woo-hoo! It WAS the starter, and problem is now fixed assuming I can get everything back together correctly.
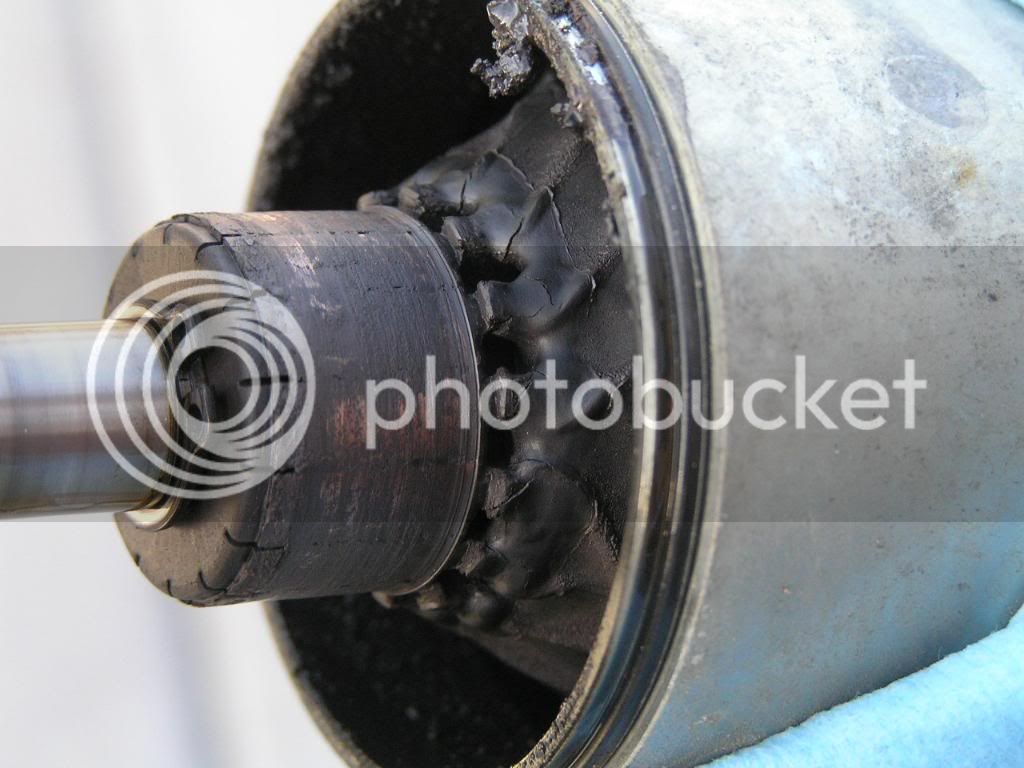
After finishing the tedious job of re-assembling everything, I opend up the old starter. As soon as I loosened the first bolt I smelled the strong odor of burnt electrics. Similar to that smell those old electric trains would make that I had as a young lad. Well, sheeee-ut! Look what I found:
The commutator. I haver never taken apart a starter before but this can't be good.
And the brushes. Unbelievable!
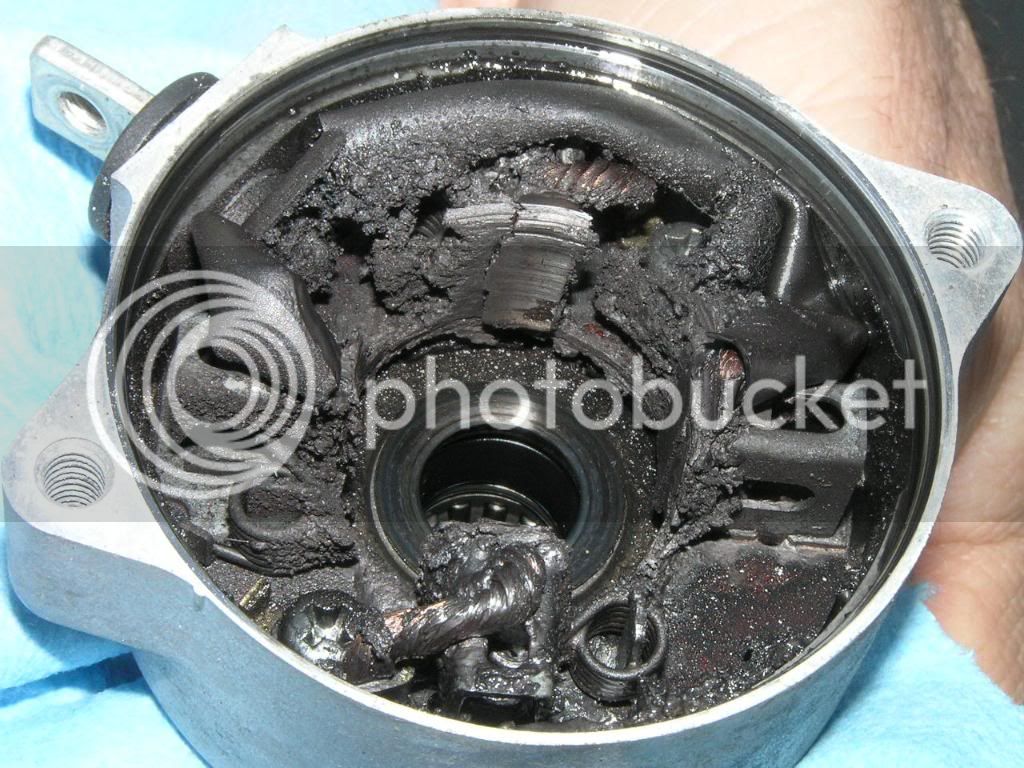
After seeing the condition of the starter, I am actually surprised it worked as well as it did these past few months. Obviously it looks terrible. Smelled bad too. Now I wish I would have cracked open the salvage starter I installed to take a gander at it. Oh well, at least it is working well and my FJR sounds and starts great now.
Much thanks to all of you who helped me in the past. Especially radman, Fred W, and Ionbeam.
Me and my FJR are in a Happy Place once again.
I have not been looking forward to this job. And I REALLY did not want to do all the work only to find out the starter was not the root cause of my problems. Well, the job wasn't as bad as I thought it would be. Don't get me wrong, it was still a major pain in the ass. It took me two days working slowly. (And not working the entire day.) But I thought it would be much worse.
Short version: The salvage starter (Cost=$90 delivered) has fixed my issue. Schwing! :yahoo: :clapping: I feel so much better now. The old starter was toast!
So here's some photos:
First the gas tank was removed, then the tool tray, and then the airbox. Nothing too hard here. But lots of cables, wires, and shit to deal with. Airbox is wedged in there pretty good and took a bit of fiddling to get it out.
No airbox, and no starter in sight:
Shit! So as the service manual said, I am going to have to remove the throttlebodies. Speaking of throttlebodies, look at the 'gunk' on these things. Yikes!
Close up of the 'gunk'. How does all that crap get there? Of course I cleaned them well before re-installing.
So off come the throttle bodies. Luckily I didn't have to drain the coolant and disconnect everything as the SM instructed. I was able to disconnect most stuff and just pull them off to the side. With throttlebodies gone, I can see the starter.
And there's the two allen bolts that keep the starter mounted. Once those are removed, starter is removed pretty easily.
Old starter on right, *new* salvage unit on left. Note oil on the old one.
That oil matches up to where starter goes into case. More seepage here. Not too concerned with 165k on the clock.
With the throttlebodies removed, I can see into the head.............
Everthing looking pretty good here to my un-trained eye.
So in went the new starter, after everthing was cleaned the throttlebodies were re-installed. The moment of truth came and the starter button was pressed.
Yowsa! That thing is spinning a million RPM compared to the old original! Woo-hoo! It WAS the starter, and problem is now fixed assuming I can get everything back together correctly.
After finishing the tedious job of re-assembling everything, I opend up the old starter. As soon as I loosened the first bolt I smelled the strong odor of burnt electrics. Similar to that smell those old electric trains would make that I had as a young lad. Well, sheeee-ut! Look what I found:
The commutator. I haver never taken apart a starter before but this can't be good.
And the brushes. Unbelievable!
After seeing the condition of the starter, I am actually surprised it worked as well as it did these past few months. Obviously it looks terrible. Smelled bad too. Now I wish I would have cracked open the salvage starter I installed to take a gander at it. Oh well, at least it is working well and my FJR sounds and starts great now.
Much thanks to all of you who helped me in the past. Especially radman, Fred W, and Ionbeam.
Me and my FJR are in a Happy Place once again.

