And the journey begins

Yamaha FJR Motorcycle Forum

Help Support Yamaha FJR Motorcycle Forum:

This site may earn a commission from merchant affiliate links, including eBay, Amazon, and others.

RadioHowie

I Miss Beemerdons!
Joined
Jun 27, 2005
Messages
7,847
Reaction score
1,007
Location
Winter Haven, FL
[SIZE=18pt]DAY ONE[/SIZE]

It's time to get going. Getting the dead motor out of my Feej in preparation for a new (for me) mill heading my way on 9/23. (Thanks Grumpy) (Thanks EVERYBODY!)

After pulling an 11 hour shift today doing various radio related crap, I wasn't real incentivised to do a lot of work on my Feej. Fortunately, all the plastic is already off, tank is off, etc., so a lot of the grunt work has already been done to drop my motor outta the frame.

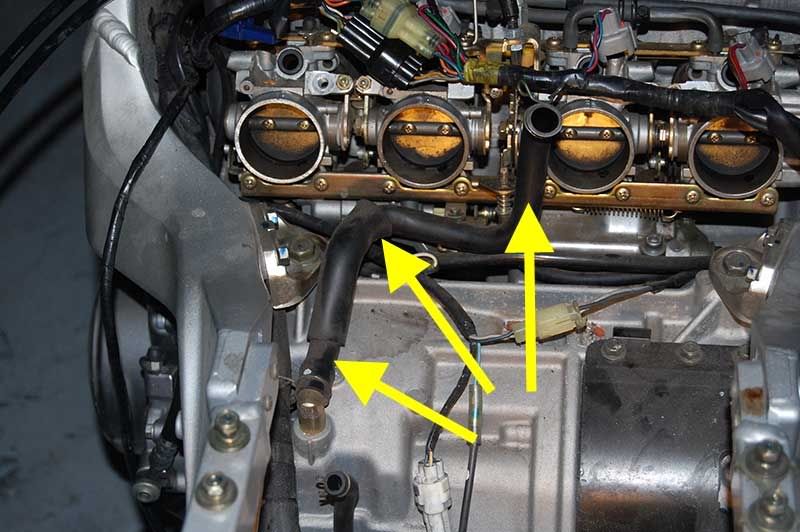
Thought I'd tackle an easy project before I called it a day.....remove the airbox. The FSM is fairly straight forward in the process with one minor exception...can't be done with the fuel rail in place. No biggie, but you'd think the manual would have mentioned that little trinket of info.

Took about a half hour to get it out, so I thought I'd take a few pics of the process to share with you dinks.

This is what the Silver Streak looks like on Day 01 of the ordeal:

day_01a.jpg


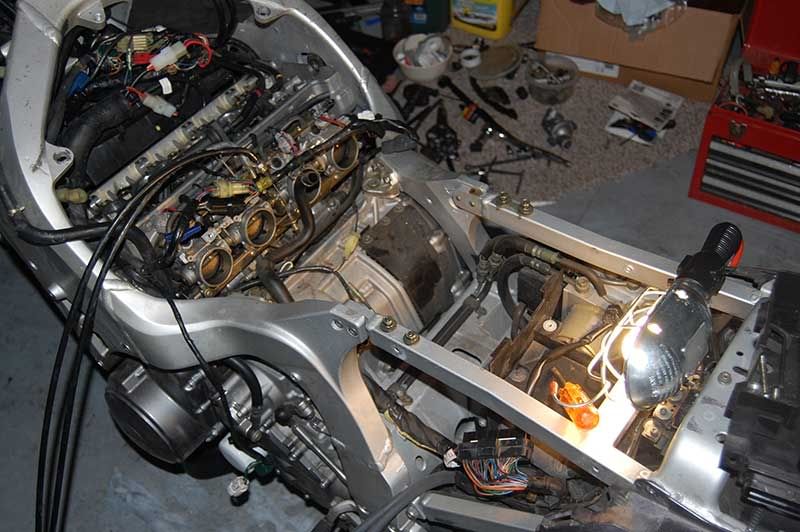
It's absolutely amazing how big that damn airbox is. Bigger than the one in my Del Sol. Getting it out reveals a lot about how the motor is hung in the frame. Makes the task seem a lot less daunting.

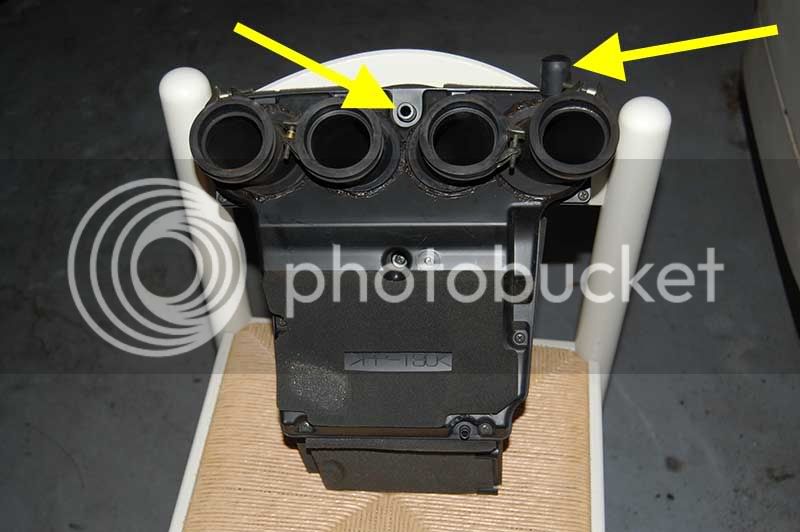
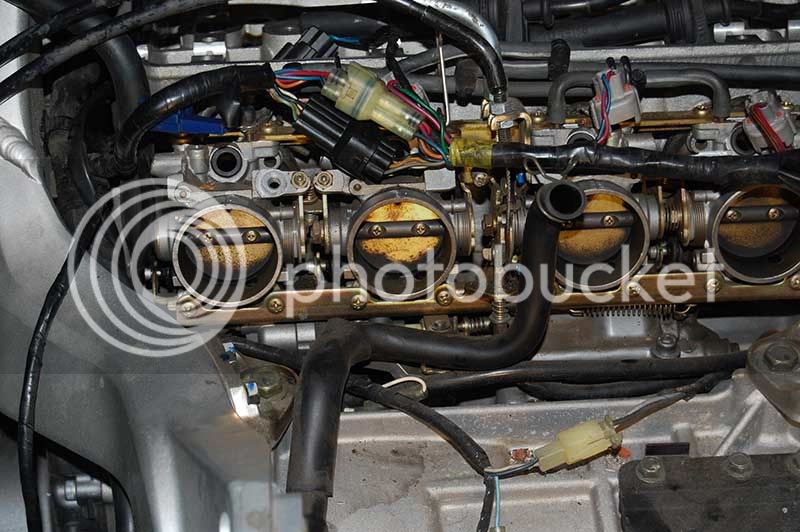
With the airbox off, you get a nice look at the throttle bodies from the airbox side:

day_01b.jpg


Yuck!!!

day_01c.jpg


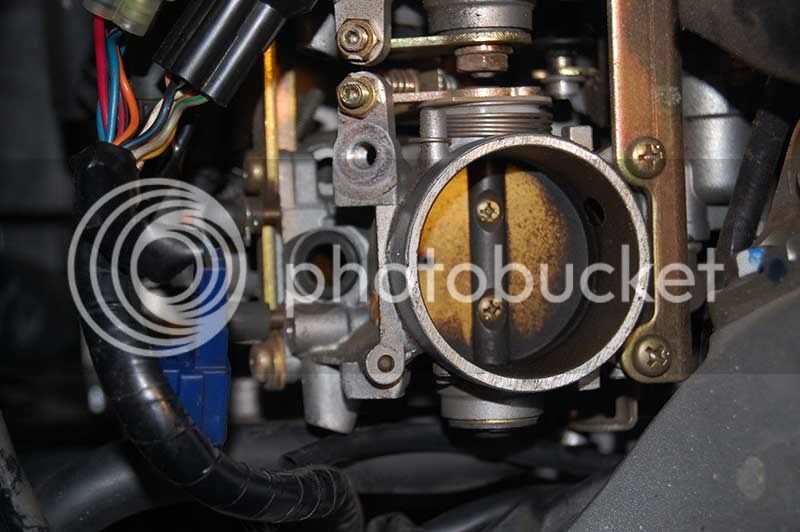
Not as bad as some I've seen in forum pics, but I wouldn't eat off 'em.

day_01d.jpg


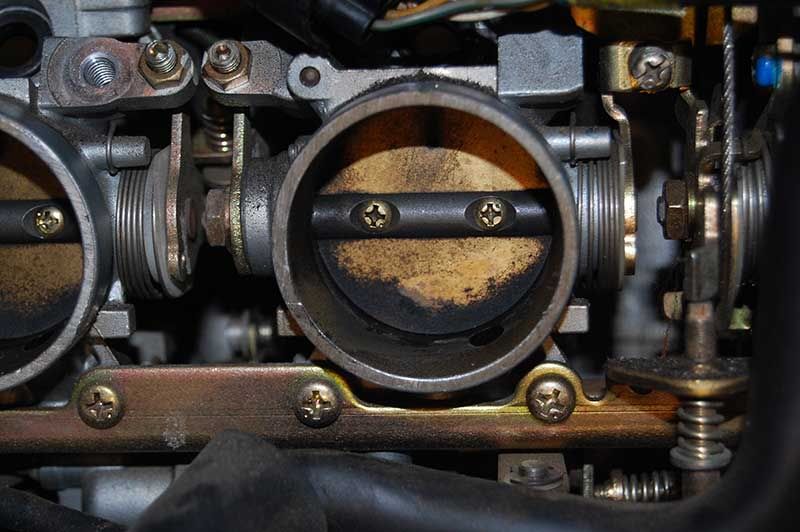
46,000 miles worth of breather blow by. Airbox interior and filter are clean as a whistle. It's all hydrocarbon buildup from the breather hose, which feeds the airbox from the wrong side of filtration. DUMB!!

I'm dunfer. Tired, cranky, and MissusManatee is calling. She gets REAL feisty at high tide, if ya know what I mean. :ph34r:

Tomorrow...off comes the exhaust, headers and radiator.

Wish me luck.

'Howie

 
Good Luck Howie, give me a holler if I can be of help, even if it's just a side by side comparision to see if things are in the right place

 
The "breather" you are talking about is the hose that comes from the PAIR system, right? Man... what a metric butt load of spooge (yeah... that's an officially sanctioned Yamaha technical term)

Hoping so, since I deep-sixed mine with the rest of the PAIR crap-o-la recently. If not, I feel a need to find the dreaded "breather" and do likewise.

Keep up the good work...

 
Last edited by a moderator:
Howie,

You going with the custom manual CCT this time, or leaving the OEM blasting cap in the new-to-you motor?

 
I've seen people put fuel filters on crankcase breathers in cars, but I never understood it. You have to constrict the hose, the fuel filter is always smaller than the hose, and that splooge will clog it up fast so that pretty soon you got no crankcase ventilation.

Same philosophy of putting the breather in front of the air filter. It'd splooge up the filter within days, maybe.

And crankcase ventilation is fairly important, from what I've heard.

RH, on reassembly, don't forget the hose under the airbox. You might not have even noticed it and just pulled it off when you lifted the box out. It's almost impossible to touch. The airbox has two hoses on top at the front, and one underneath, plus the sensor connector on top at the back. When the tank bracket goes on, the bracket the long tank bolt goes through is towards the front. I got confused today and forgot which way, had to find my pictures from a couple of weeks ago.

If you've not done the throttle bodies before, they'll seem tight in their rubber rings. Loosen the rings closer to the throttle bodies, not the ones closer to the engine. It'll take some bumping and rocking to get them loose. Looks like you've pulled the throttle cables out from the bars, which make that easier, I suppose. I removed them from the throttle bodies, and I had the cruise control link as well. Unscrew the idle screw all the way out and retain the spring and washer. Then you'll have two coolant hoses feeding the cold start fast idle assembly. When it goes back in, they'll be VERY hard to get into the rubber rings. I used a wood block and a hammer to bump them in. Make SURE they're in before you proceed with the airbox. My first trip I fought that airbox for an hour before noticing that the throttle bodies were tilted upwards, not fully inserted at the bottom. Also make sure, unlike me today, that you reinstall the idle screw before putting the airbox and tool tray back in. . . .

I almost wish it wasn't seven or eight hours to your place from here. I've never been part of a motor transplant, and it'd be fun to play.

 
Last edited by a moderator:
Prayers, greats thoughts, toes and fingers crossed for ya Howie. Hope this all works out for you and is a speedy process.

:)

 
The "breather" you are talking about is the hose that comes from the PAIR system, right? Man... what a metric butt load of spooge (yeah... that's an officially sanctioned Yamaha technical term)
Hoping so, since I deep-sixed mine with the rest of the PAIR crap-o-la recently. If not, I feel a need to find the dreaded "breather" and do likewise.

Keep up the good work...
No...NOT the PAIR hose. That's for fresh air to GO to the exhaust.

Here's the breather hose for PCV...Positive Crankcase Ventilation:

day_01e.jpg


.....and here's the airbox (what a gynormous hunk-o-plastic! :blink: )

The left arrow is where the PCV hose goes...the right arrow points to the (capped-off) PAIR outlet.

Day_01f.jpg


Howie,You going with the custom manual CCT this time, or leaving the OEM blasting cap in the new-to-you motor?
If Brodie meets with any success getting a manual CCT tooled up by APE, that's what will go in my motor. Until then, I'll cringe every time I hit the starter button on Grumpy's "old" mill.

 
I've seen people put fuel filters on crankcase breathers in cars, but I never understood it. You have to constrict the hose, the fuel filter is always smaller than the hose, and that splooge will clog it up fast so that pretty soon you got no crankcase ventilation.
Same philosophy of putting the breather in front of the air filter. It'd splooge up the filter within days, maybe.

And crankcase ventilation is fairly important, from what I've heard.
Walt, this is what has been very popular for ZRX owners dumping their airboxes, but keeping their crankcase air filtered:

62-1070.jpg


RH, on reassembly, don't forget the hose under the airbox. You might not have even noticed it and just pulled it off when you lifted the box out. It's almost impossible to touch. The airbox has two hoses on top at the front, and one underneath, plus the sensor connector on top at the back. When the tank bracket goes on, the bracket the long tank bolt goes through is towards the front. I got confused today and forgot which way, had to find my pictures from a couple of weeks ago.
From reading elsewhere on the forum, I was ready for that bitch of a hose on the bottom of the airbox. Hard to get off with one hand tied up holding the airbox up and leaving just one hand free to remove the hose.

If you've not done the throttle bodies before, they'll seem tight in their rubber rings. Loosen the rings closer to the throttle bodies, not the ones closer to the engine. It'll take some bumping and rocking to get them loose. Looks like you've pulled the throttle cables out from the bars, which make that easier, I suppose. I removed them from the throttle bodies, and I had the cruise control link as well. Unscrew the idle screw all the way out and retain the spring and washer. Then you'll have two coolant hoses feeding the cold start fast idle assembly. When it goes back in, they'll be VERY hard to get into the rubber rings. I used a wood block and a hammer to bump them in. Make SURE they're in before you proceed with the airbox. My first trip I fought that airbox for an hour before noticing that the throttle bodies were tilted upwards, not fully inserted at the bottom. Also make sure, unlike me today, that you reinstall the idle screw before putting the airbox and tool tray back in. . . .
Bookmarked!!! :thumbsup:

I almost wish it wasn't seven or eight hours to your place from here. I've never been part of a motor transplant, and it'd be fun to play.
Come on down! Francine's dyin' to meet ya! She's shy....but compliant. :rofl:

seacow.jpg


[SIZE=14pt]R U Dun yet?[/SIZE]

Those butterflies look rather seasoned.... like a wok.

Good luck Howie, get'er dun!

 
Last edited by a moderator:
Prayers, greats thoughts, toes and fingers crossed for ya Howie. Hope this all works out for you and is a speedy process.
:)
Thanks, darlin'.

If you ever get tired of whatsisname, lemme know, m'kay?

:wubsmiley: :wubsmiley: :wubsmiley:

Hope ya have a hard head Beastmaster

panhead.jpg


Just in case yer vision is bad

middle-finger.jpg


Good news man! Good luck an best wishes pisswhistler

:jester:

 
Come on down! Francine's dyin' to meet ya! She's shy....but compliant. :rofl:
seacow.jpg
I think I met her sister at EPCOT's Living Seas. Once you got past the propeller scars, she was quite nice.

(Damn, I really went there, didn't I??) :blink:

From reading elsewhere on the forum, I was ready for that bitch of a hose on the bottom of the airbox. Hard to get off with one hand tied up holding the airbox up and leaving just one hand free to remove the hose.
Actually, I was talking about getting that hose back on. It came off real easy for me. I never knew it was there until I got the box out and saw it hanging there.

I suppose if you drop the rear shock, maybe the swingarm, the hose would be real easy. . . . . :p

 
Last edited by a moderator:
Good to see progress being made Howie!

Sayin a little prayer that it all comes together without much in the way of BS... you deserve a trouble-free installation after all you've been through.

Looking forward to following along!

Don

 
Top