


Scoobyvroom
Well-known member
This is for those of you wondering if you can do the Race Tech Gold Valve install yourself.
A big thank you to Chris Dvorack, who just graduated from MMI in Arizona. He came over and gave me some pointers and helped with an extra set of hands.
I will say this, you will more than likely need two people, so buddy up. :drinks: You will also need a pretty good set of tools. I would suggest a torque wrench that can do 10-50 ft/lbs. Some bolts you won't be able to torque to spec unless you have crow's feet, I would highly recommend getting the socket head cap screw in the bottom of the fork. This bolt seals the bottom of the fork and also holds the cartridge in place. It is also screwed into aluminum and you don't want to strip this hole out. You will also want an impact wrench, to remove said bolt. You will need a hand drill with a #1 (.228 inch) drill bit. A metal saw, and also a file or off hand grinder. Non-chlorinated brake cleaner will also be used to clean the forks out. A caliper is nice but not required.
1. So to start off get the bike on the center stand and get the front wheel off the ground. Remove the brake calipers, fender, axle and then the wheel.
2. Undo the two lower pinch bolts on the lower triple.
3. While supporting the fork leg loosen the top pinch bolt and carefully slide the fork leg out.
4. Repeat on the other side.

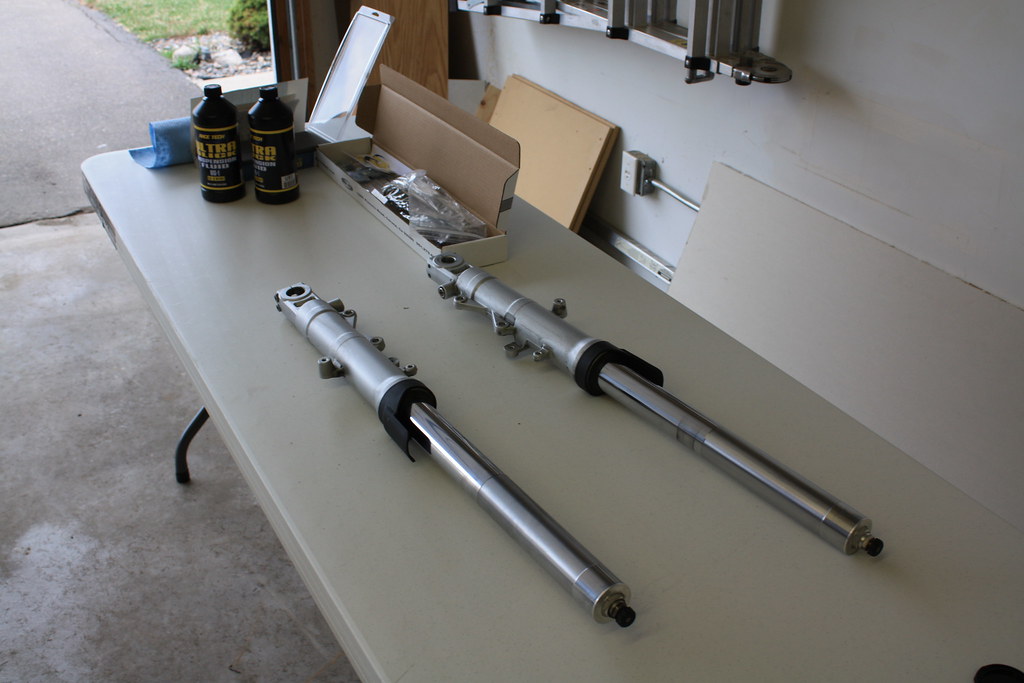
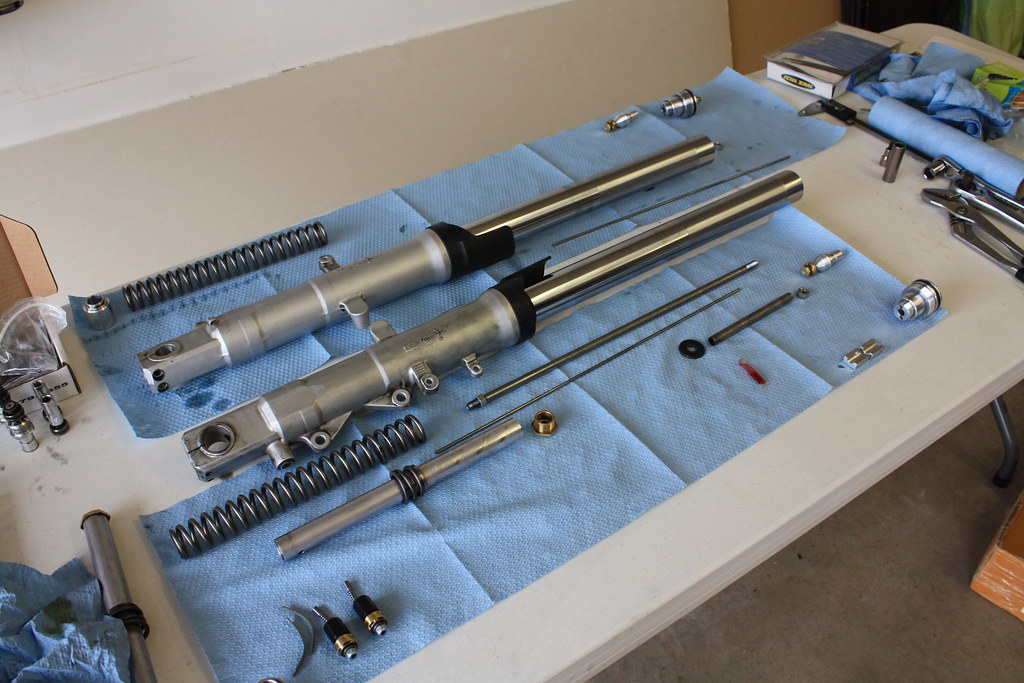
5.Get a nice clean area. I used this 3x8 plastic table. If you use a plastic table be careful with the brake cleaner.
6.You will need lots of paper towels.
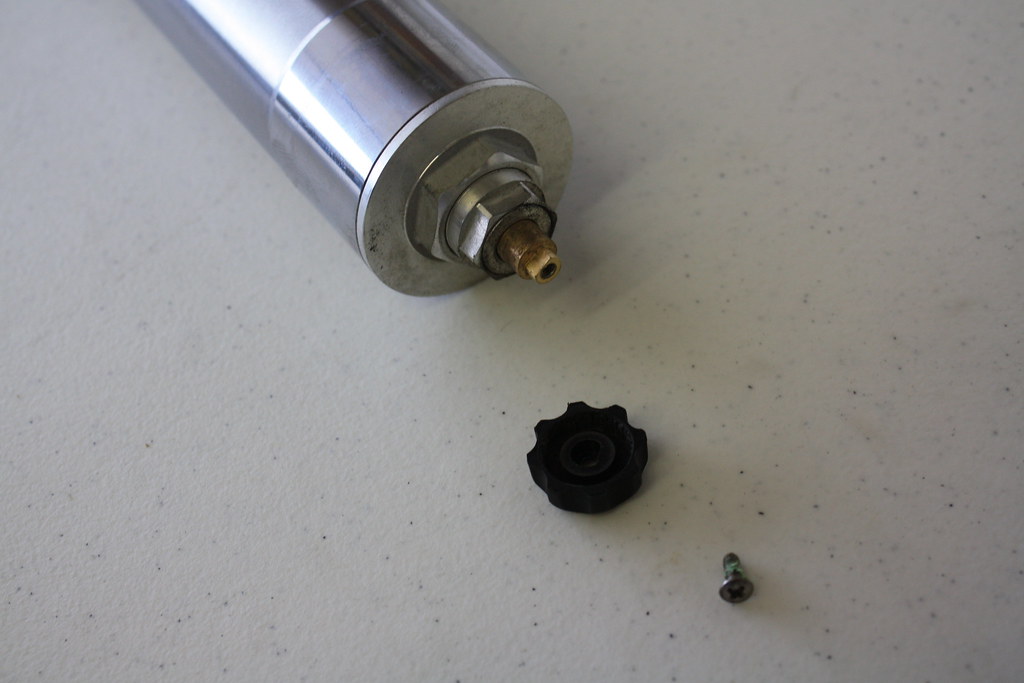
7. Remove the rebound adjustment knob by undoing the Phillips head screw. Put these parts in the plastic baggy.
8. Using a 17mm socket crank the preload adjustment all the way in.
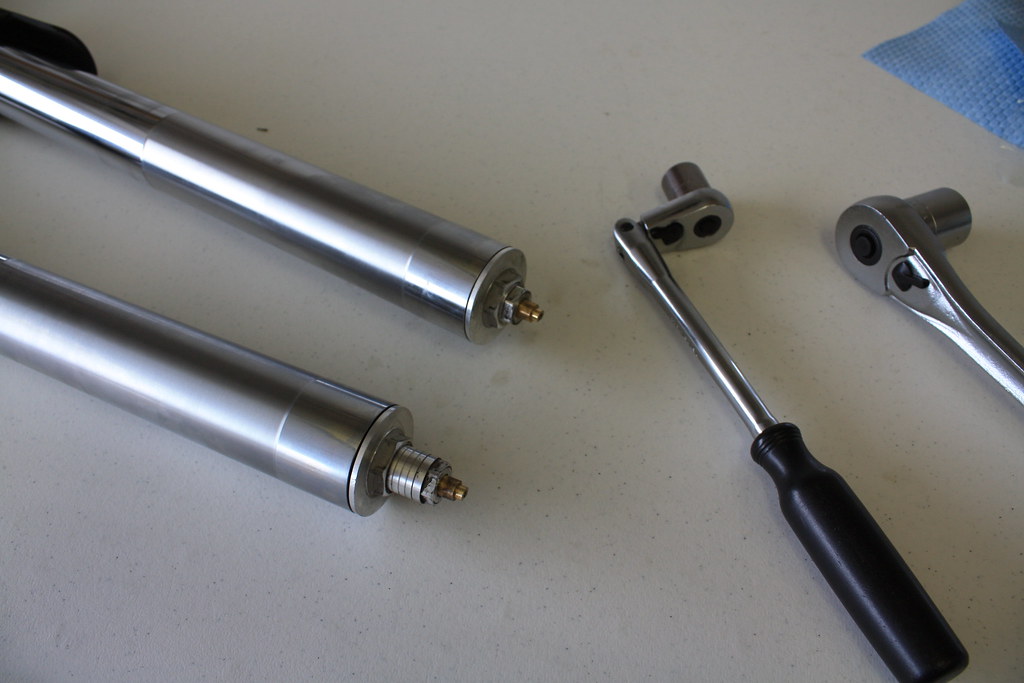
9. Use an impact or if you don't have access to one, install the fork back in the bike and tighten down the top pinch and loosen the fork cap.
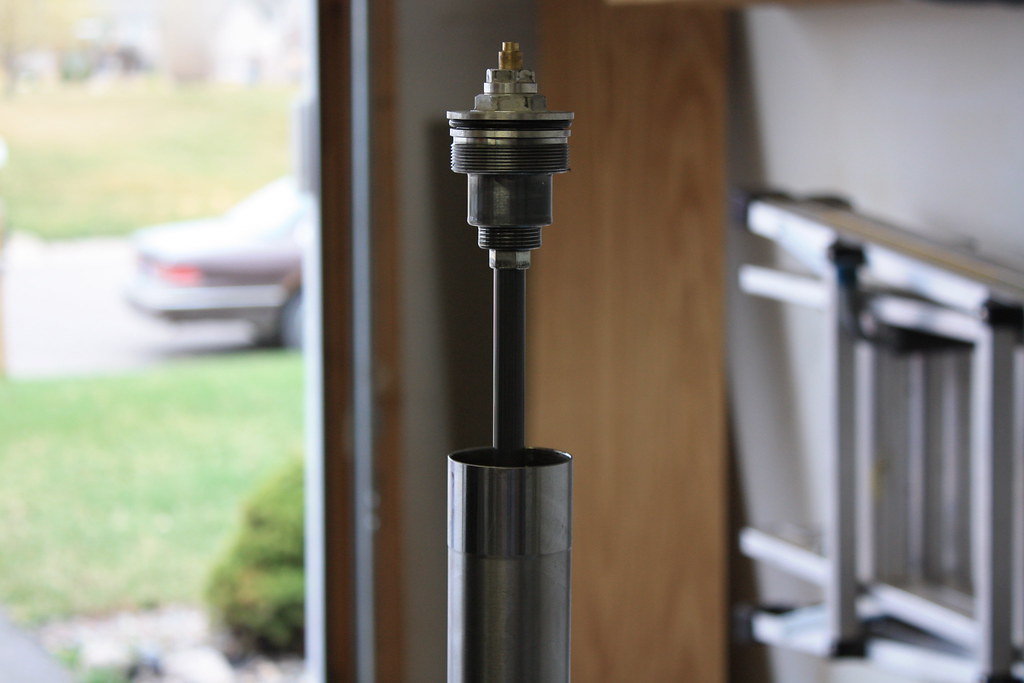
10. TIP THE FORK UPRIGHT and undo the fork cap from the inner fork leg.
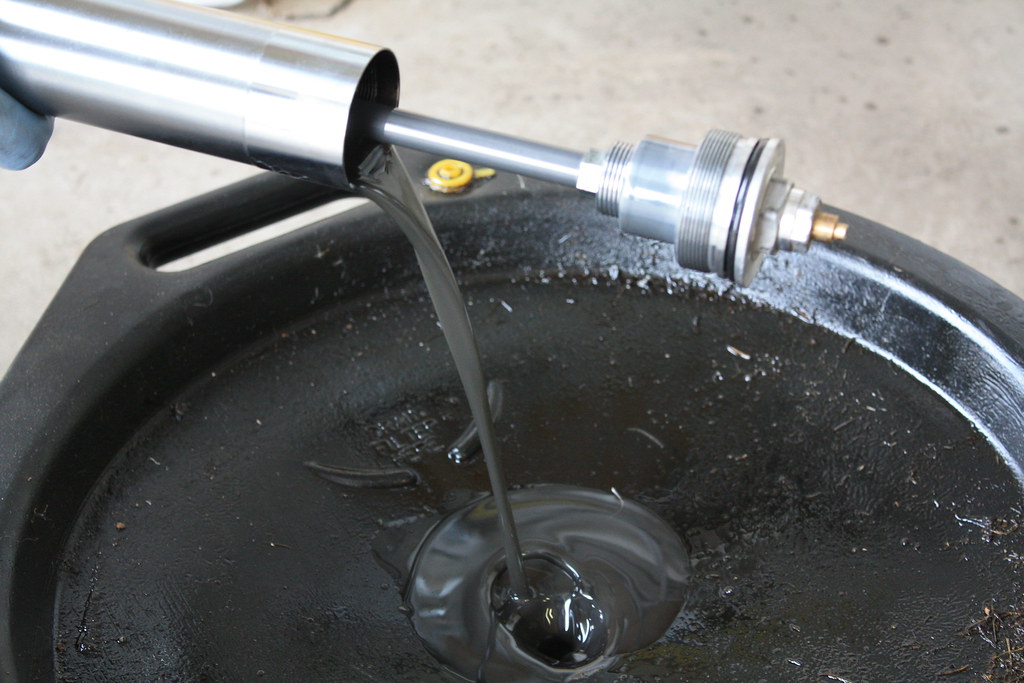
11. Pour out the fork oil into a waste oil container.
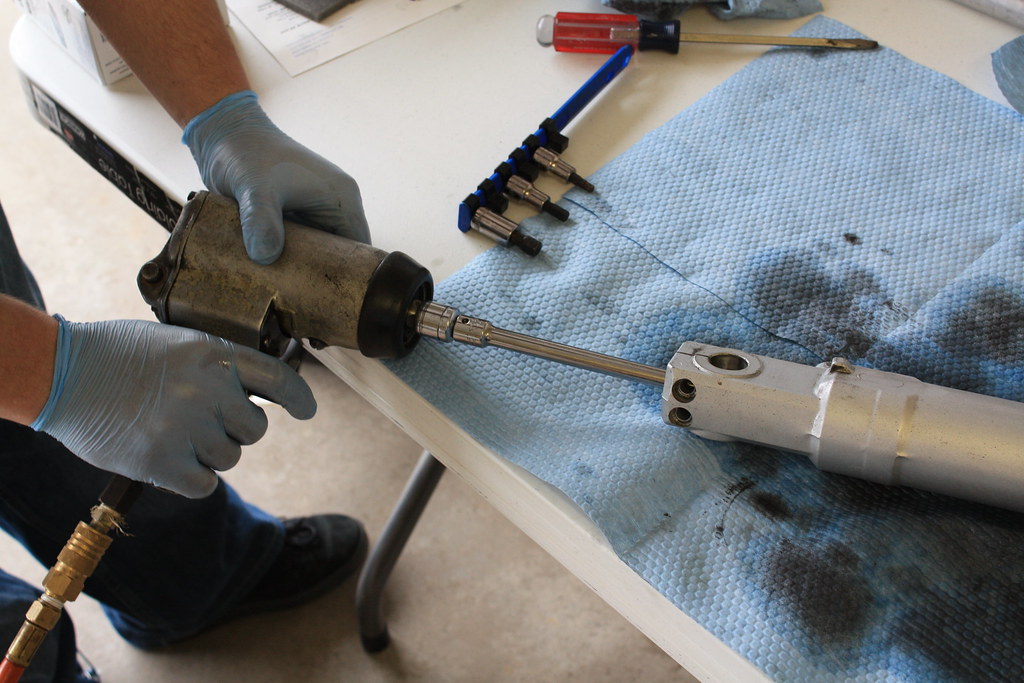
12. Using an impact remove the bolt in the bottom of the fork leg, you will have to remove the two axle pinch bolts. You may need to reinstall the fork cap a bit and then compress the fork leg to put tension on the cartridge. This will stop it from spinning.
13. Remove the cap with the cartridge.
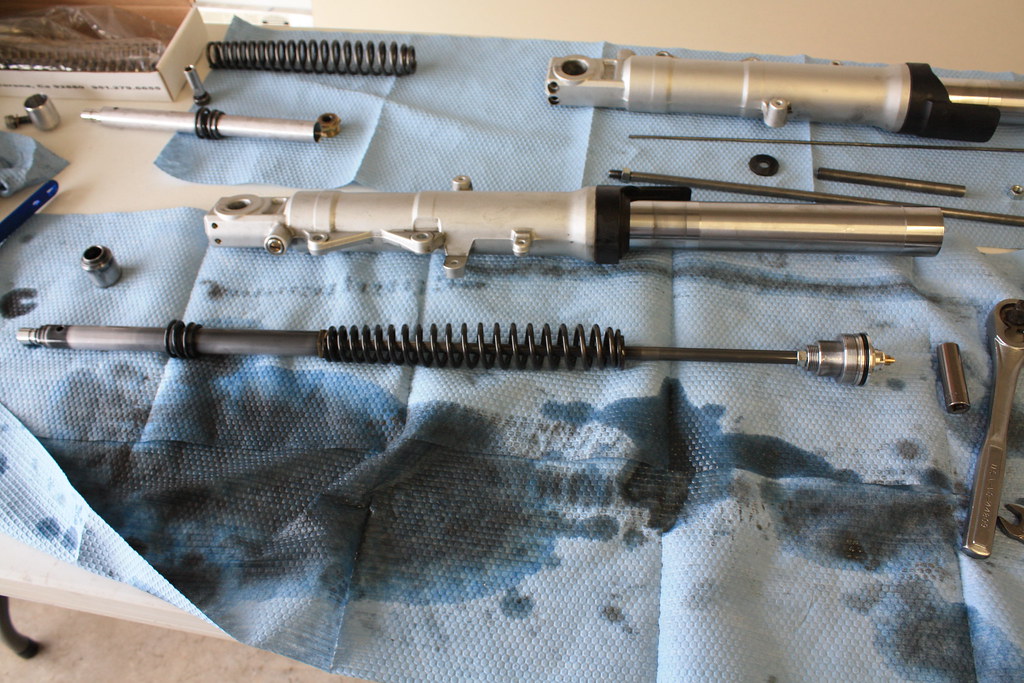
14. There is a ring piece that is in the bottom the fork leg. This is to lock the leg before it bottoms out. Tip the fork leg over and get this piece out. You can see it just above the left side of the cartridge. (see picture)
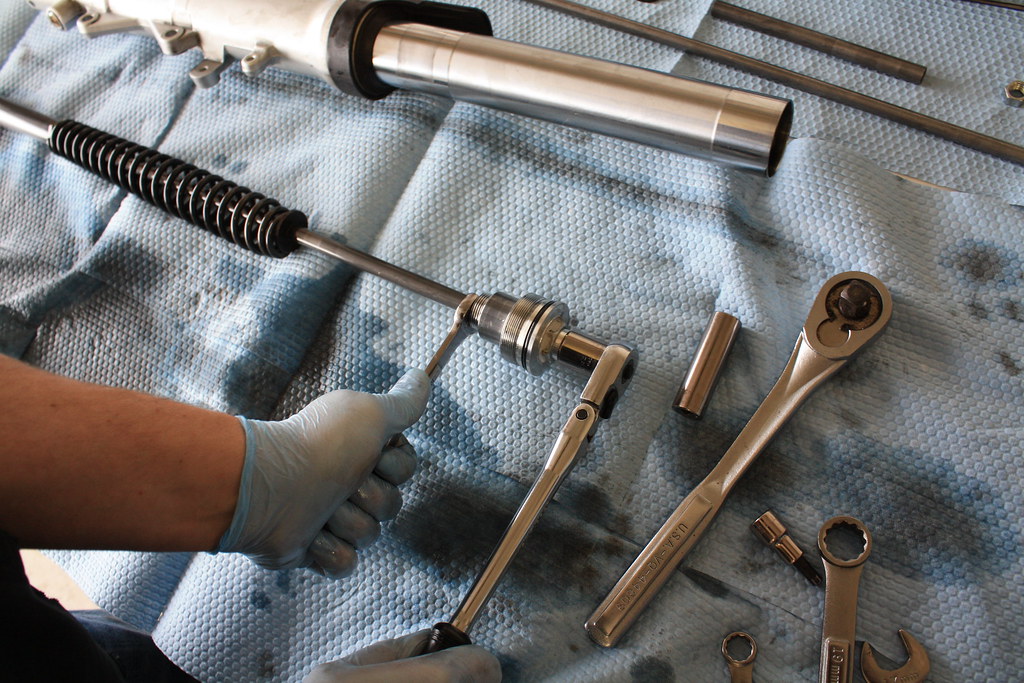
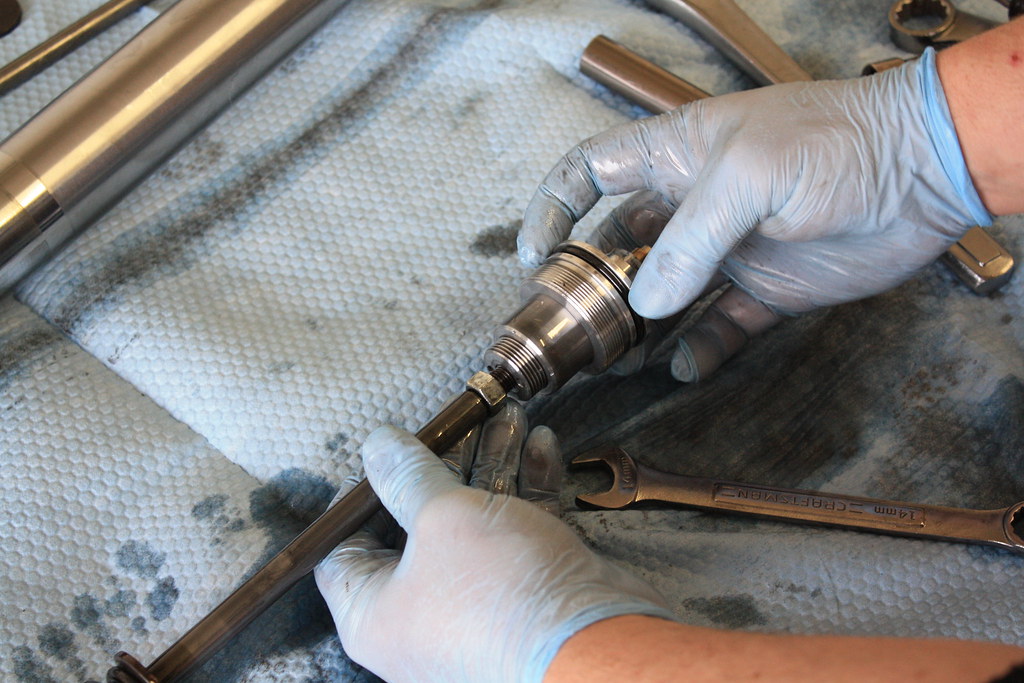
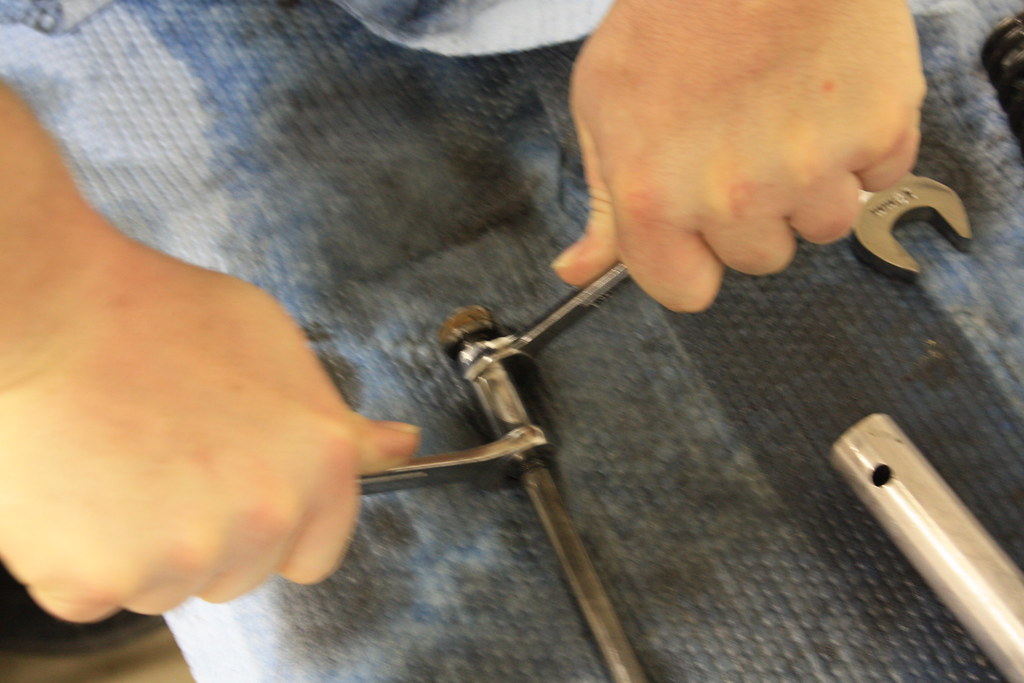
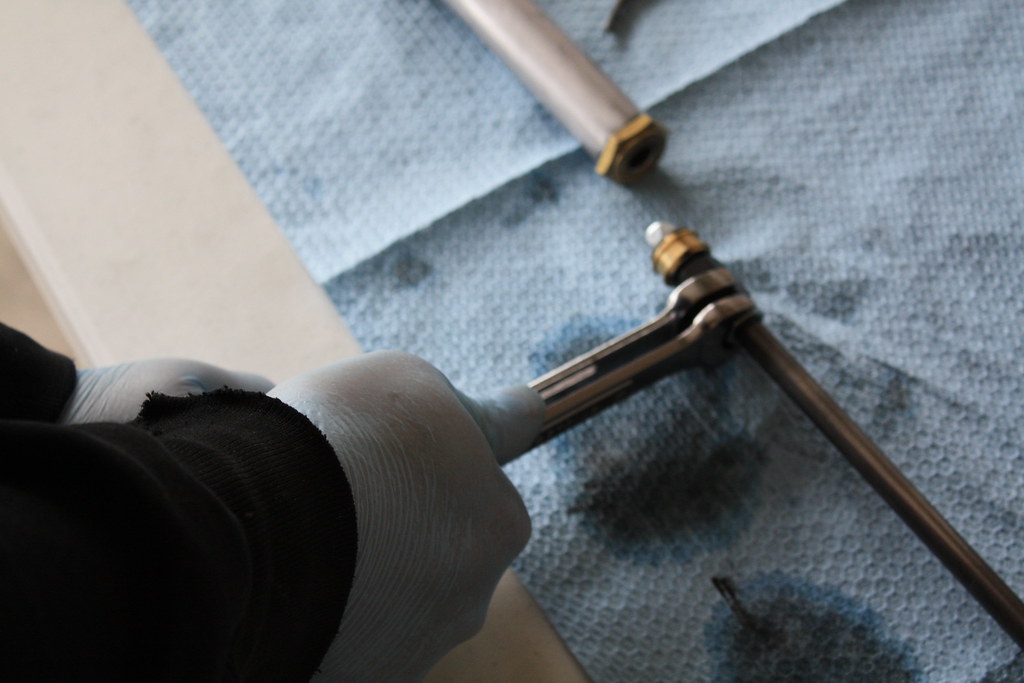
14. Using a 14mm wrench on the locknut and a 17mm on the spring preload undo the lock nut.
15. Remove fork cap and set in a safe place. You don't want this rolling off the table.
16. If you have a caliper push down the rebound adjustment rod (thin rod inside of dampening rod) When the adjustment rod stops traveling downward measure the height from the top of the rod to the top of the dampener rod. Write this down.
17. Remove rebound adjustment rod.
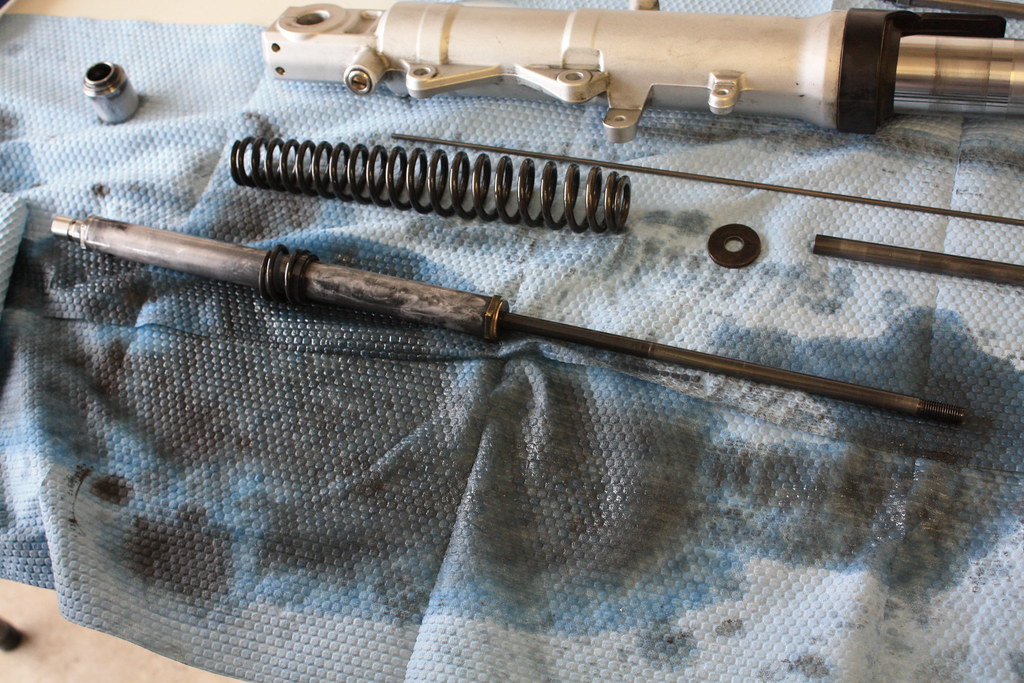
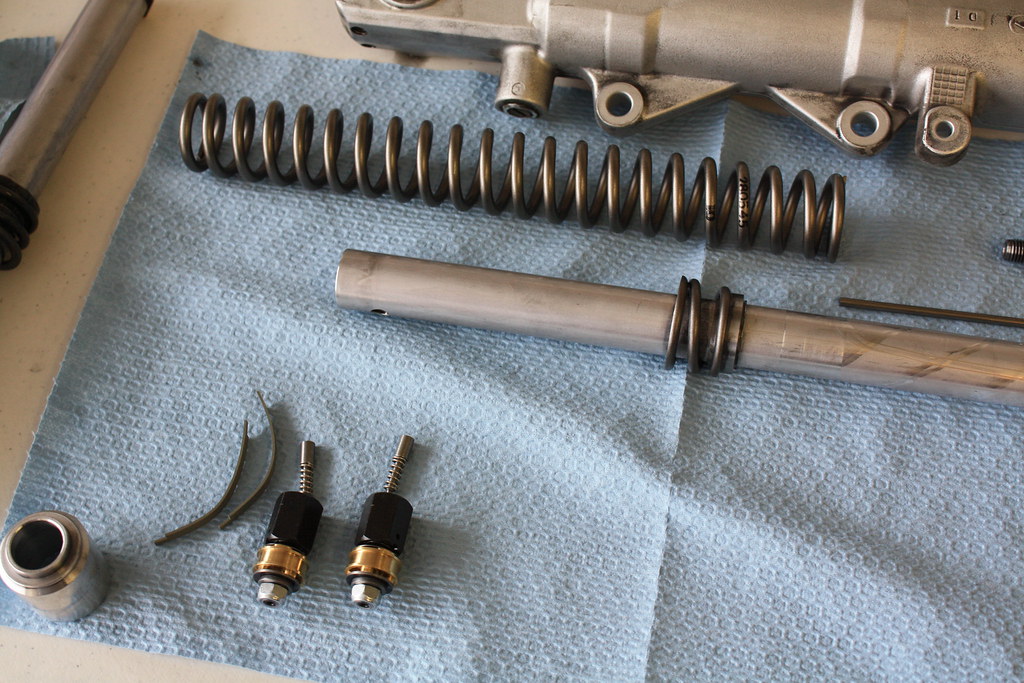
18. Remove the locknut, spacer, washer, and the spring. DO NOT PUMP THE DAMPNING ROD
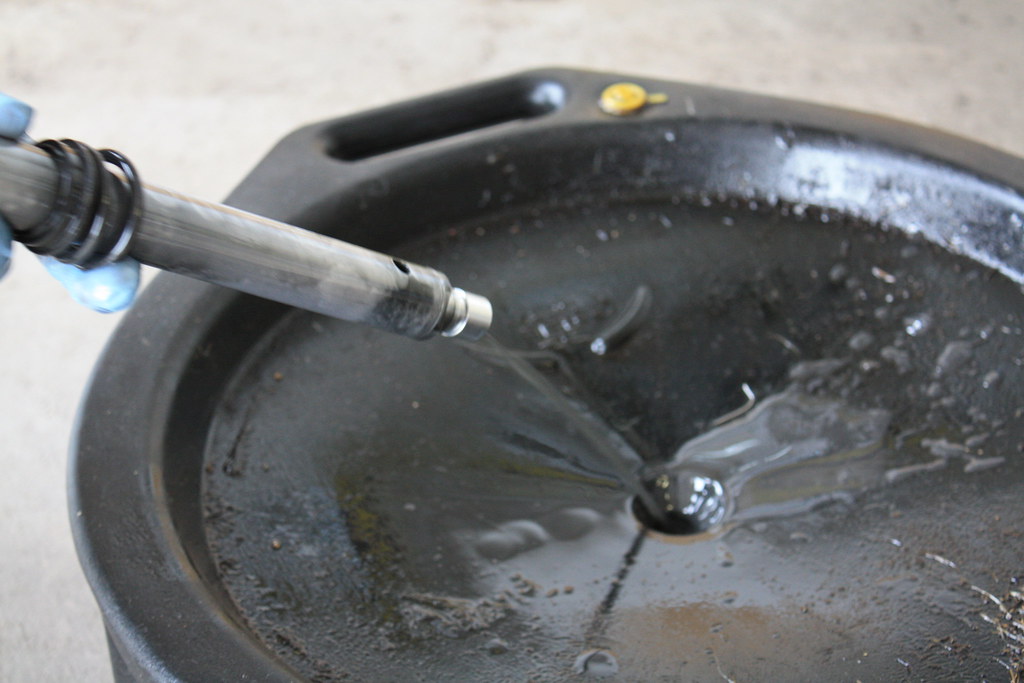
19. Carry the cartridge to you waste oil container and slowly pump the dampening road to force the oil out.
20. You will need to hold on to the cartridge without deforming it. Use soft jaws or put the brass portion of the cartridge in a vise.
21. Heat the end of the cartridge using a propane torch or something similar. Be careful aluminum has a low melting temp do not stay in one place to long. Heat it for 10-15 seconds and then try to remove the compression valve body. It should come pretty easily once the loctite is liquid. You may be able to smell the loctite once it is loose.
22. Carefully slide the dampening rod out of the cartridge. Take care of when the threads reach the sealing surface on the brass portion of the cartridge.
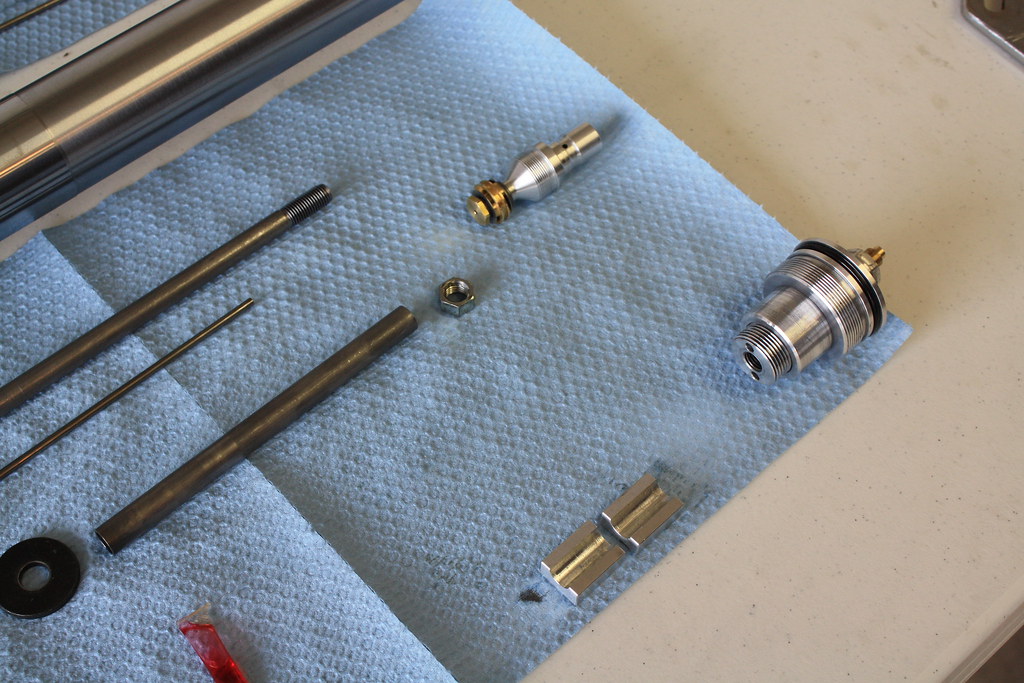
23. Undo the locknut, and remove the rebound valve.
24. If the locknut backs off but the valve is stuck use the included soft jaws and clamp them on the damning rod. Remove the valve.

25. You will now have everything apart that we need. Make sure to use brake cleaner and clean everything. I used a bunched up paper towel and pushed it down the fork tube and also inside the cartridge. Using the dampening rod to push it back out. Be careful!! Don't just jam a paper towel in there you don't want bits of it floating in your new fork oil. Clean is key here wipe everything down.
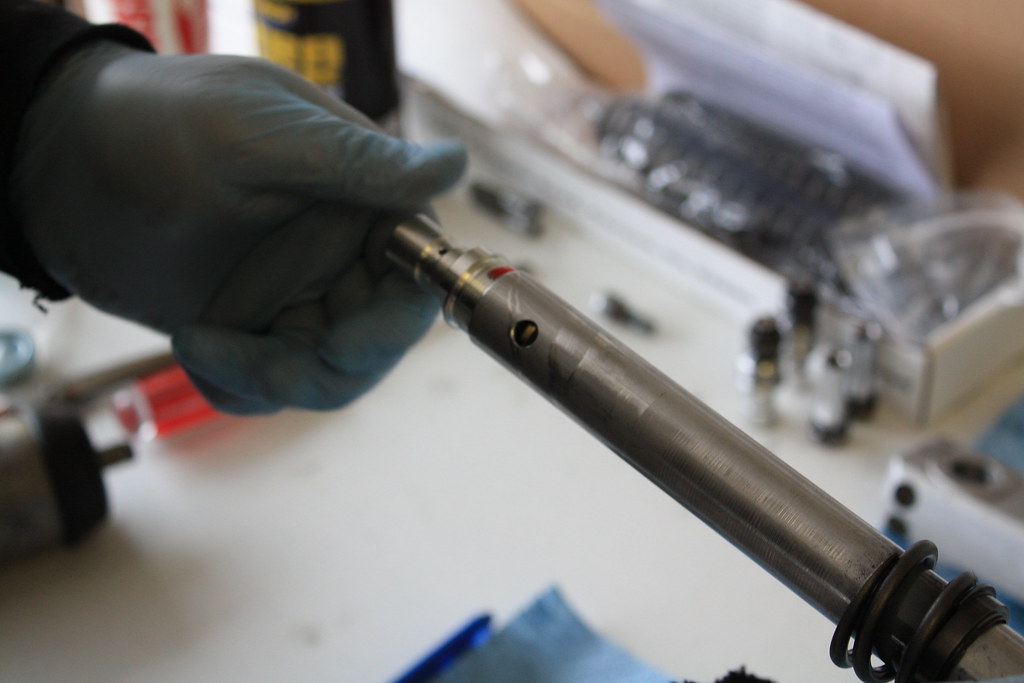
26. This is where you will need to do some drilling. :dribble: Using the #1 drill bit in a hand drill carefully line up and drill down 1" into each of the dampener rods where the rebound valve attaches. Depth just needs to allow the needle to retract into the rod.
27. Take this time to check Race Techs website. Make sure you compression and rebound shim stacks are correct.
28. After drilling out the rod, insert the NEW needle and spring then screw on the rebound valve. Using the caliper measure the compressed rebound adjustment rod length. Now subtract your first number from this one. It says in the install manual that it should be .870, I ended up with .880 what can I say I am a perfectionist. .870 will need to be removed from end of the rebound adjustment rod. Do this however you feel comfortable. Luckily I work at a machine shop and just did all this at work. :assassin:
Sorry no pics.
29. remove the adjustment rod and loctite and install the rebound valves.
30. Make sure to install the NEW needle and spring before the valve body goes on.
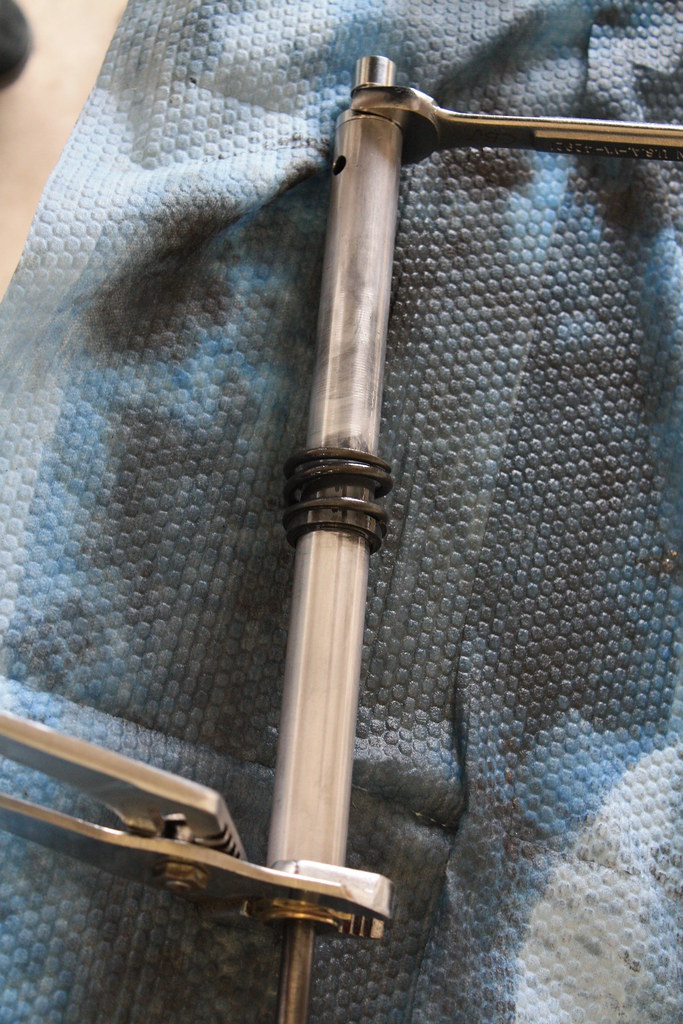
31. Install the new piston seal that came with the kit. When sliding this into the cartridge make sure the overlap is not lined up with the cross holes otherwise it can get caught and damaged.
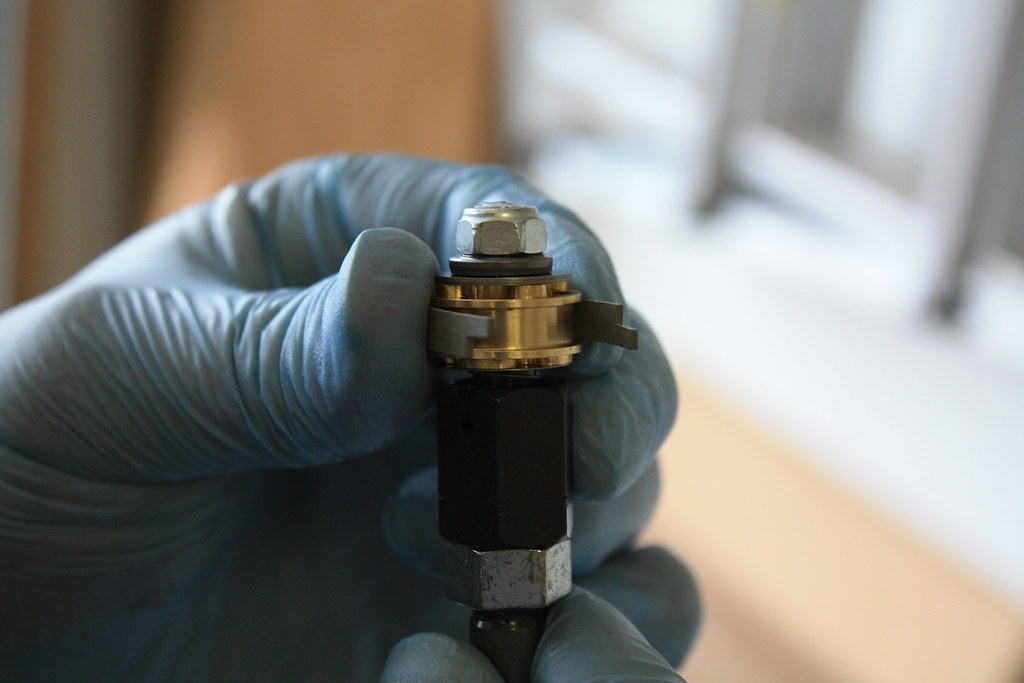
32. Install O-ring on compression valve body. Add two drops 180 degrees apart on the 3rd of 4th thread in. This is enough to lock it and allows it to be smeared over the length of the thread. Too much and it will mush out and cause problems.

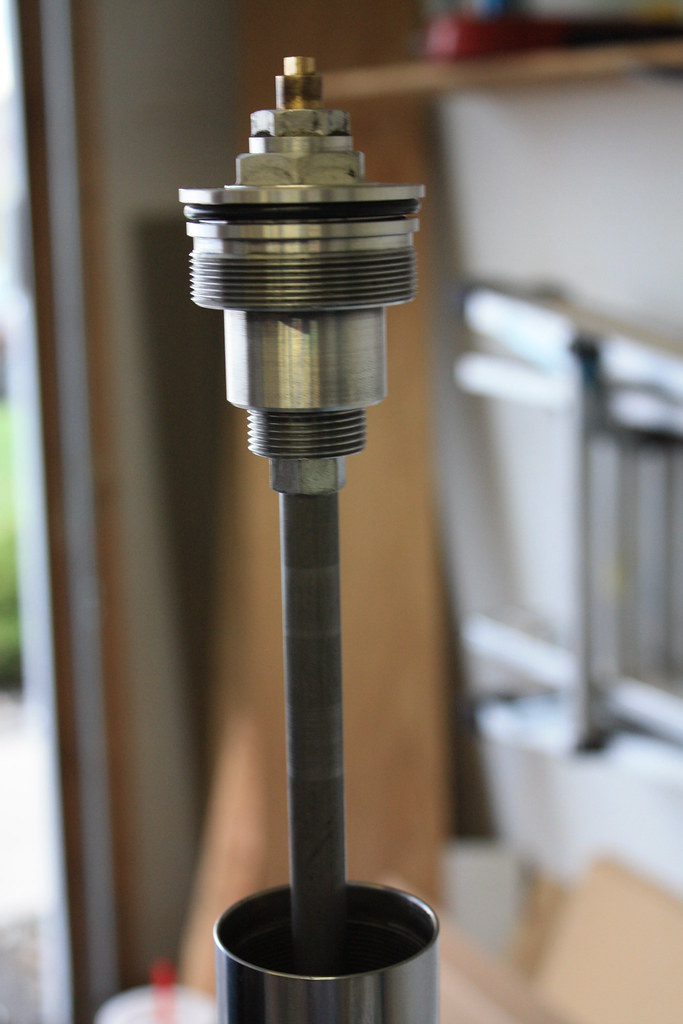
The business end all together and looking good.
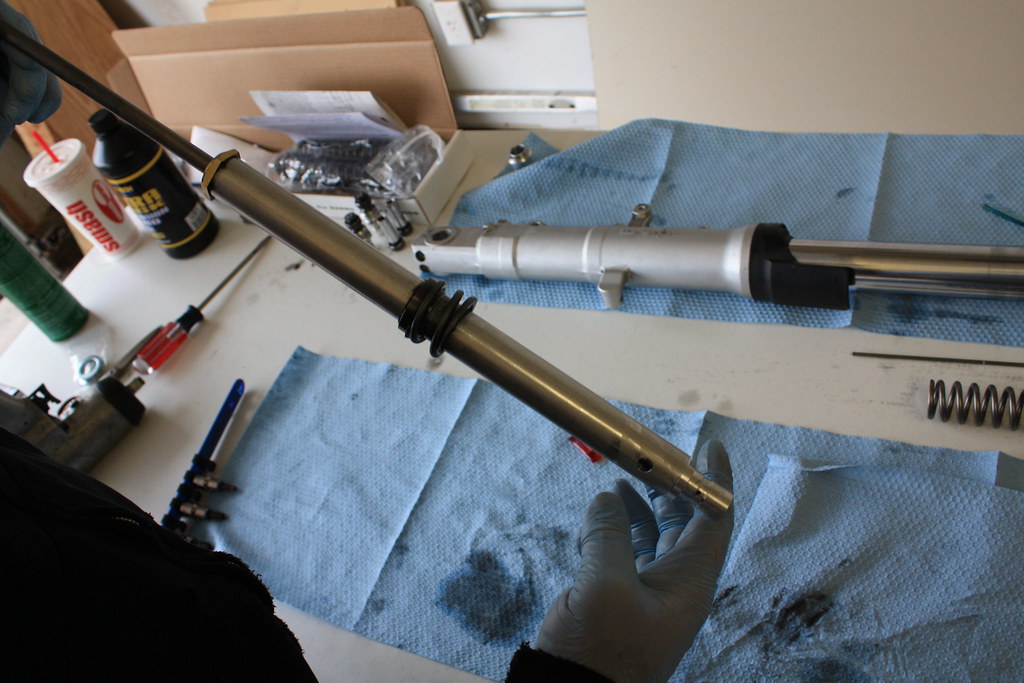
33. Reinstall the cartridge into the fork. Make sure not to forget the locking ring on the bottom. It will only go in one way. You may need to temporarily install the spring, washer, spacer, lock nut and cap. Then thread the cap in to stop the cartridge from spinning. I did not and was able to tighten down then toque the bolt to spec. When installing this bolt do not forget the crush washer. Remove cap, nut, spacer, washer, and spring, if you installed it to tighten the bolt.
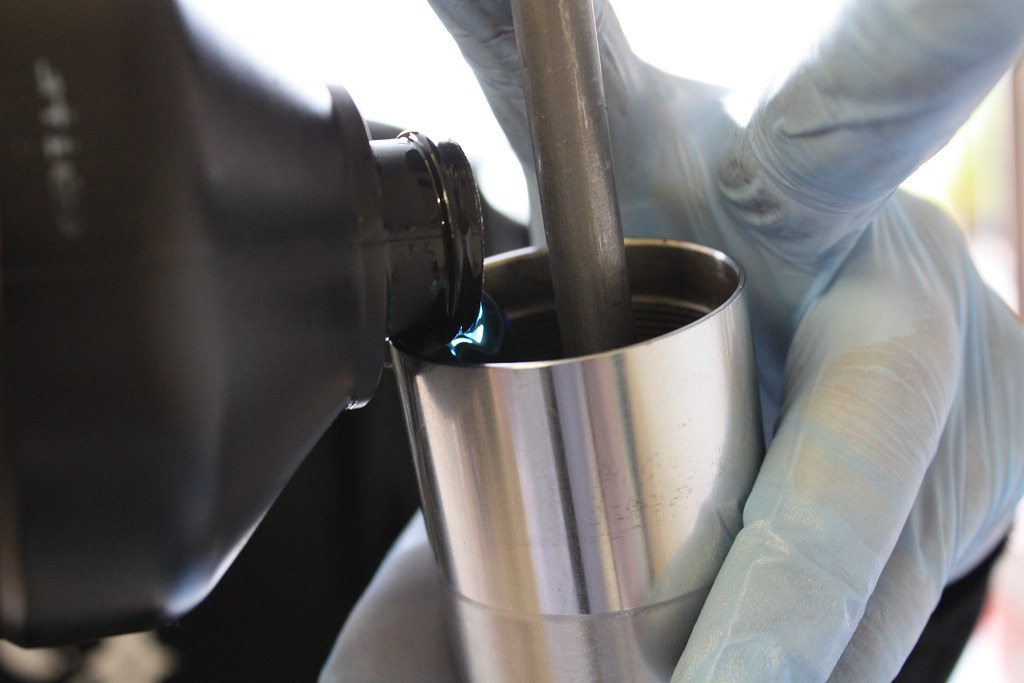
34. Stand the fork upright and add the new fork fluid. Once you cover the cartridge, pump the dampening rod up and down. Quickly at first then slow until fluid comes out of the top of the rod. This removes any air in the cartridge and allows you to get a precise measurement of the fluid level.
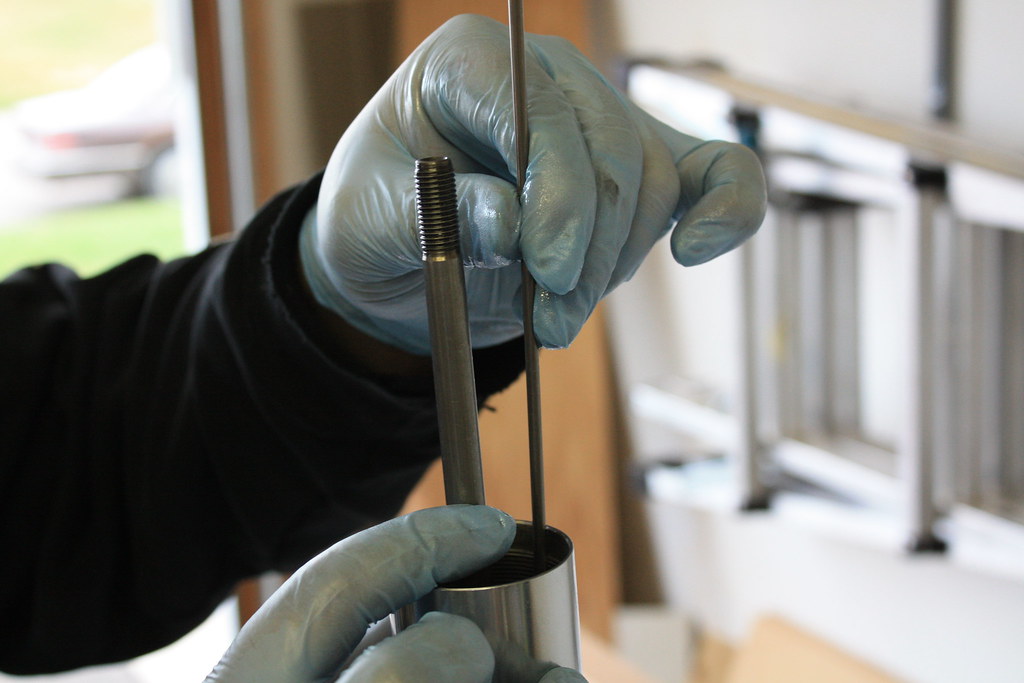
35. To correctly measure the fluid level extend the inner fork tube completely. From the top edge of the fork tube to the fluid level should be 110mm. Level should be checked with spring removed.
36. I measured 110mm on the rebound adjusting rod then slid it down until you can see it contact the surface of the fluid.
37. Install the spring (tapered side down), washer, spacer, and nut. Don't forget to install the rebound adjustment rods. Install the cap and loctite that as well.
38. Reinstall the rebound adjustment knobs.
Reinstall your forks, wheel, fender, and calipers. :good:
Make sure to set your suspension is set to the numbers Race Techs website says....
I bounced on mine a bit just to make sure everything seemed o.k. and nothing seemed way out of the ordinary.
The Race Tech Gold Valve kit and springs transformed this bike. The front just glides over bumps around corners while I can feel the rear hitting each one. The front now holds an effortlessly tight line. By far the best mod I have done to the bike. :yahoo:
A big thank you to Chris Dvorack, who just graduated from MMI in Arizona. He came over and gave me some pointers and helped with an extra set of hands.
I will say this, you will more than likely need two people, so buddy up. :drinks: You will also need a pretty good set of tools. I would suggest a torque wrench that can do 10-50 ft/lbs. Some bolts you won't be able to torque to spec unless you have crow's feet, I would highly recommend getting the socket head cap screw in the bottom of the fork. This bolt seals the bottom of the fork and also holds the cartridge in place. It is also screwed into aluminum and you don't want to strip this hole out. You will also want an impact wrench, to remove said bolt. You will need a hand drill with a #1 (.228 inch) drill bit. A metal saw, and also a file or off hand grinder. Non-chlorinated brake cleaner will also be used to clean the forks out. A caliper is nice but not required.
1. So to start off get the bike on the center stand and get the front wheel off the ground. Remove the brake calipers, fender, axle and then the wheel.
2. Undo the two lower pinch bolts on the lower triple.
3. While supporting the fork leg loosen the top pinch bolt and carefully slide the fork leg out.
4. Repeat on the other side.
5.Get a nice clean area. I used this 3x8 plastic table. If you use a plastic table be careful with the brake cleaner.
6.You will need lots of paper towels.
7. Remove the rebound adjustment knob by undoing the Phillips head screw. Put these parts in the plastic baggy.
8. Using a 17mm socket crank the preload adjustment all the way in.
9. Use an impact or if you don't have access to one, install the fork back in the bike and tighten down the top pinch and loosen the fork cap.
10. TIP THE FORK UPRIGHT and undo the fork cap from the inner fork leg.
11. Pour out the fork oil into a waste oil container.
12. Using an impact remove the bolt in the bottom of the fork leg, you will have to remove the two axle pinch bolts. You may need to reinstall the fork cap a bit and then compress the fork leg to put tension on the cartridge. This will stop it from spinning.
13. Remove the cap with the cartridge.
14. There is a ring piece that is in the bottom the fork leg. This is to lock the leg before it bottoms out. Tip the fork leg over and get this piece out. You can see it just above the left side of the cartridge. (see picture)
14. Using a 14mm wrench on the locknut and a 17mm on the spring preload undo the lock nut.
15. Remove fork cap and set in a safe place. You don't want this rolling off the table.
16. If you have a caliper push down the rebound adjustment rod (thin rod inside of dampening rod) When the adjustment rod stops traveling downward measure the height from the top of the rod to the top of the dampener rod. Write this down.
17. Remove rebound adjustment rod.
18. Remove the locknut, spacer, washer, and the spring. DO NOT PUMP THE DAMPNING ROD
19. Carry the cartridge to you waste oil container and slowly pump the dampening road to force the oil out.
20. You will need to hold on to the cartridge without deforming it. Use soft jaws or put the brass portion of the cartridge in a vise.
21. Heat the end of the cartridge using a propane torch or something similar. Be careful aluminum has a low melting temp do not stay in one place to long. Heat it for 10-15 seconds and then try to remove the compression valve body. It should come pretty easily once the loctite is liquid. You may be able to smell the loctite once it is loose.
22. Carefully slide the dampening rod out of the cartridge. Take care of when the threads reach the sealing surface on the brass portion of the cartridge.
23. Undo the locknut, and remove the rebound valve.
24. If the locknut backs off but the valve is stuck use the included soft jaws and clamp them on the damning rod. Remove the valve.
25. You will now have everything apart that we need. Make sure to use brake cleaner and clean everything. I used a bunched up paper towel and pushed it down the fork tube and also inside the cartridge. Using the dampening rod to push it back out. Be careful!! Don't just jam a paper towel in there you don't want bits of it floating in your new fork oil. Clean is key here wipe everything down.
26. This is where you will need to do some drilling. :dribble: Using the #1 drill bit in a hand drill carefully line up and drill down 1" into each of the dampener rods where the rebound valve attaches. Depth just needs to allow the needle to retract into the rod.
27. Take this time to check Race Techs website. Make sure you compression and rebound shim stacks are correct.
28. After drilling out the rod, insert the NEW needle and spring then screw on the rebound valve. Using the caliper measure the compressed rebound adjustment rod length. Now subtract your first number from this one. It says in the install manual that it should be .870, I ended up with .880 what can I say I am a perfectionist. .870 will need to be removed from end of the rebound adjustment rod. Do this however you feel comfortable. Luckily I work at a machine shop and just did all this at work. :assassin:
Sorry no pics.
29. remove the adjustment rod and loctite and install the rebound valves.
30. Make sure to install the NEW needle and spring before the valve body goes on.
31. Install the new piston seal that came with the kit. When sliding this into the cartridge make sure the overlap is not lined up with the cross holes otherwise it can get caught and damaged.
32. Install O-ring on compression valve body. Add two drops 180 degrees apart on the 3rd of 4th thread in. This is enough to lock it and allows it to be smeared over the length of the thread. Too much and it will mush out and cause problems.
The business end all together and looking good.
33. Reinstall the cartridge into the fork. Make sure not to forget the locking ring on the bottom. It will only go in one way. You may need to temporarily install the spring, washer, spacer, lock nut and cap. Then thread the cap in to stop the cartridge from spinning. I did not and was able to tighten down then toque the bolt to spec. When installing this bolt do not forget the crush washer. Remove cap, nut, spacer, washer, and spring, if you installed it to tighten the bolt.
34. Stand the fork upright and add the new fork fluid. Once you cover the cartridge, pump the dampening rod up and down. Quickly at first then slow until fluid comes out of the top of the rod. This removes any air in the cartridge and allows you to get a precise measurement of the fluid level.
35. To correctly measure the fluid level extend the inner fork tube completely. From the top edge of the fork tube to the fluid level should be 110mm. Level should be checked with spring removed.
36. I measured 110mm on the rebound adjusting rod then slid it down until you can see it contact the surface of the fluid.
37. Install the spring (tapered side down), washer, spacer, and nut. Don't forget to install the rebound adjustment rods. Install the cap and loctite that as well.
38. Reinstall the rebound adjustment knobs.
Reinstall your forks, wheel, fender, and calipers. :good:
Make sure to set your suspension is set to the numbers Race Techs website says....
I bounced on mine a bit just to make sure everything seemed o.k. and nothing seemed way out of the ordinary.
The Race Tech Gold Valve kit and springs transformed this bike. The front just glides over bumps around corners while I can feel the rear hitting each one. The front now holds an effortlessly tight line. By far the best mod I have done to the bike. :yahoo:
Last edited by a moderator:


")