


So, here is the scenario...
My trusty pillion (TMJ) and I are due to celebrate another rotation around the sun together pretty soon. It'll be 34 times since our nuptials come December 11th, to be precise. Anyway, she is a somewhat diminutive person (4'12" and only ~105 lbs soaking wet) so she does get chilled rather easily while on on the back of the bike, especially when the mercury starts to dip. She has been longing for some heated gear to stave off the onset of hypothermia. Well, if she is willing to ride around on the back of a murdercycle with me, who am I to argue?
I recently bought her a Warm'nSafe full jacket liner and their dual portable temp controller (I'll eventually get her either gloves or pants liners too) as an early Anni gift. This morning I decided to do something about wiring up the necessary power for her new jacket liner.
Up until now, I have made do with a single switched power terminal strip up in the nose section. It powers the heattroller for the heated grips and gloves (using a Y harness to the gloves) and provides a switched power source for the Datel Panel Meter. The rest of my electronica (intercom, GPS, radar detector) is powered out of my tank bag, which plugs into a single "always hot" Powerlet jack in the "D" panel. I just unplug the tank bag whenever I get off the bike.
To power heated liners would require a power source further back in the bike, like underneath the seat. I decided that I could have this power source be "always hot" as we would be unplugging the heated gear any time we were getting off the bike anyways. I have an extra BlueSea fuse panel on the shelf, but I just do not have enough room under my seats for it. I could have bought a Fuzeblock (I actually have one on the V-strom) but I don't think really need anything that fancy for just powering heated gear.
Instead, I picked up a few bits and pieces at Radio Shack and fabricated my own little power distribution box.
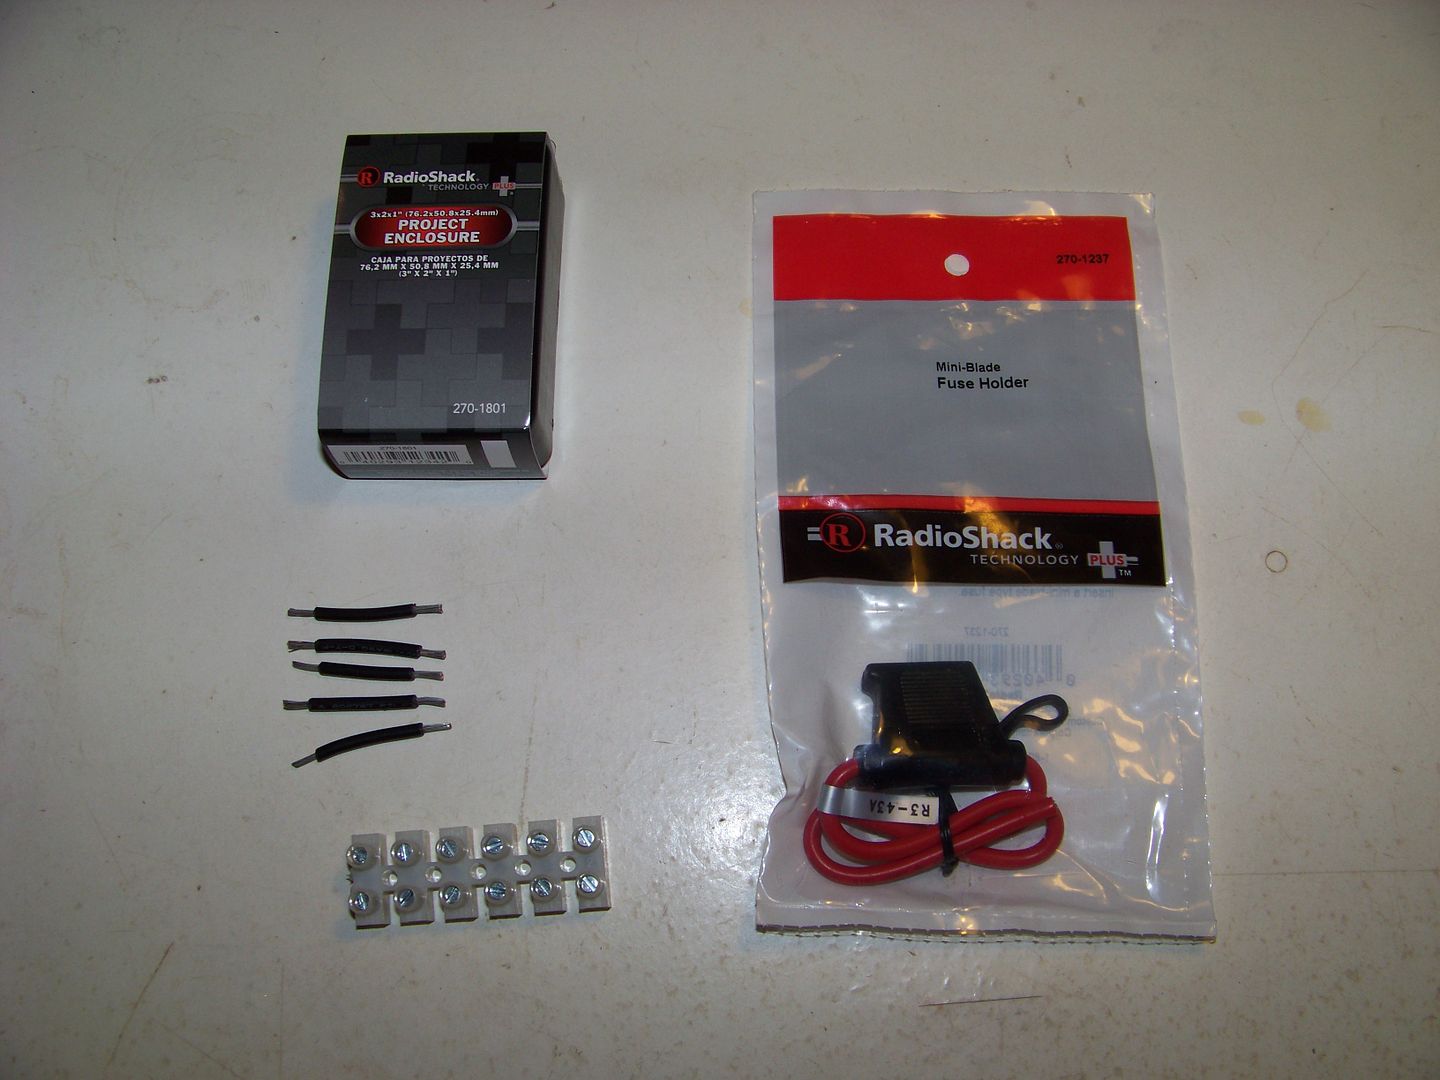
Here's what I bought:
One small plastic project box (3"x2"x1")
One in line mini-blade fuse holder
One euro style terminal strip (cut in half)
Some supplies that already had on hand and used:
One 10-12 gauge heat shrink type ring lug
One 10-12 gauge heat shrink type butt splice
A bunch of red 12 gauge wire
A short piece of 16 gauge black wire
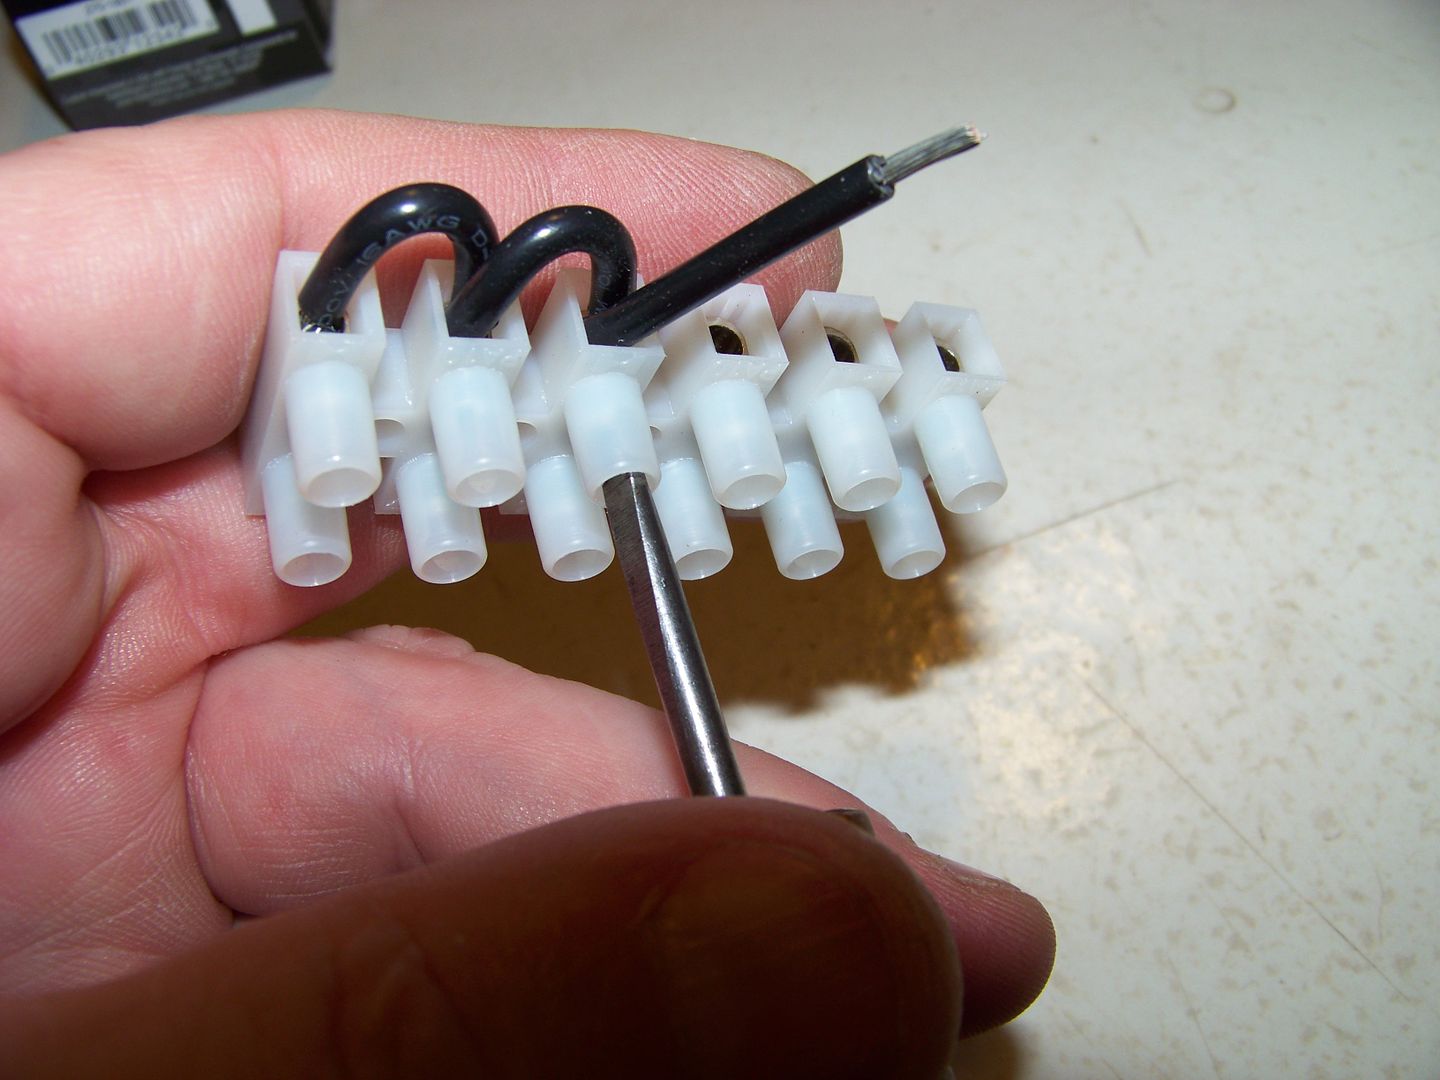
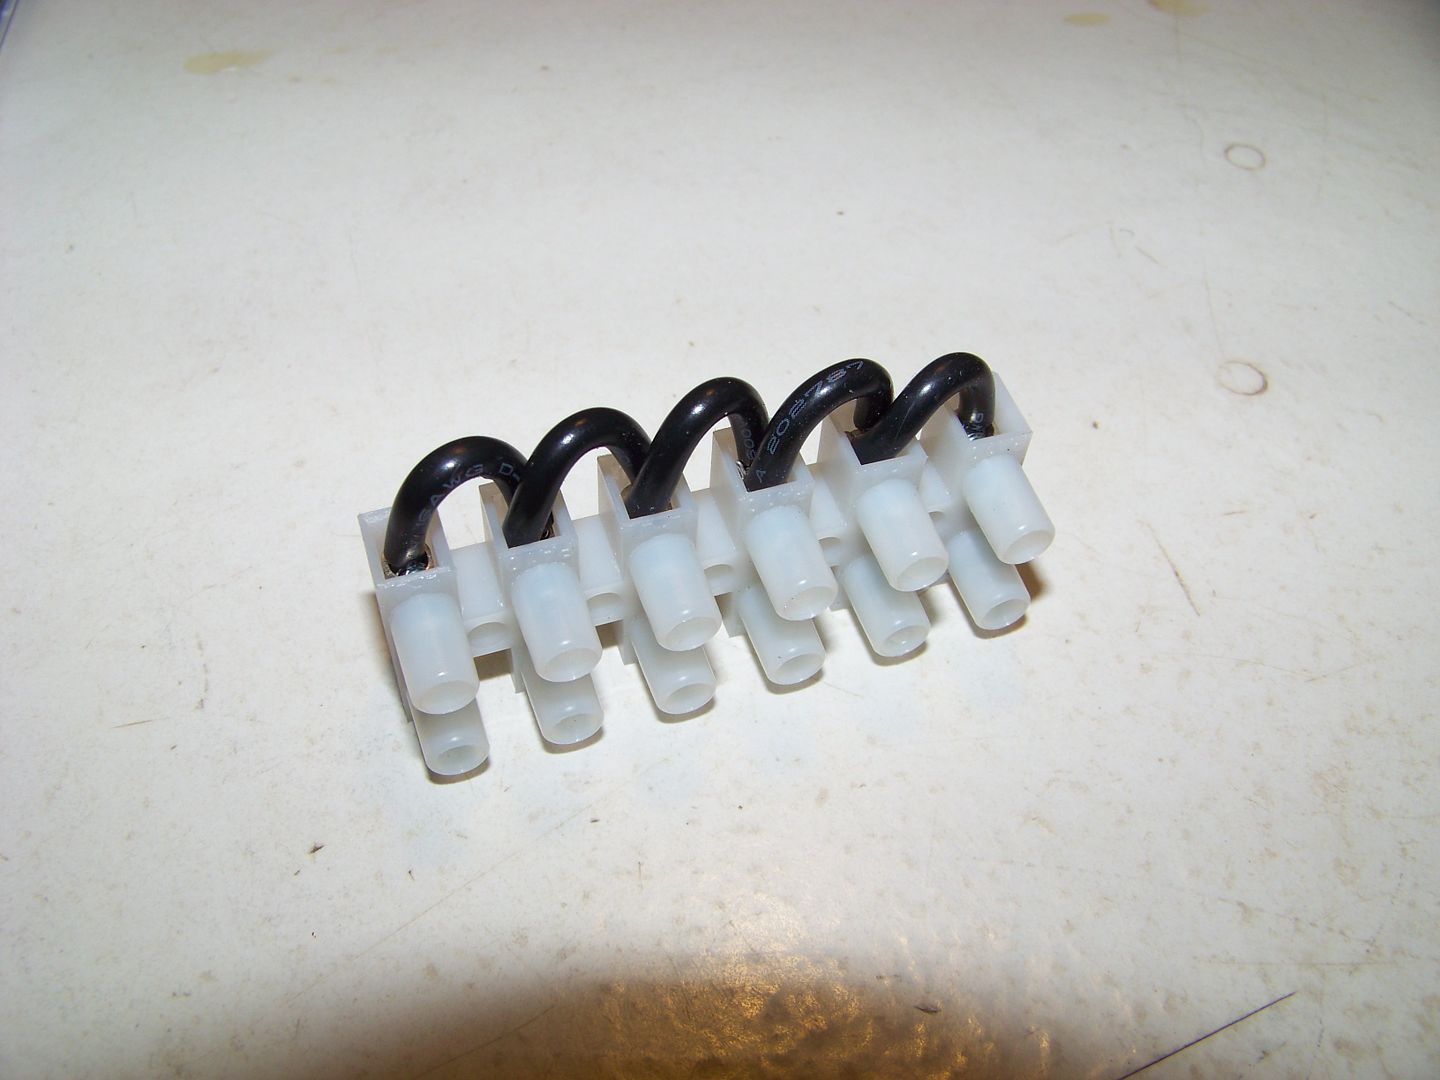
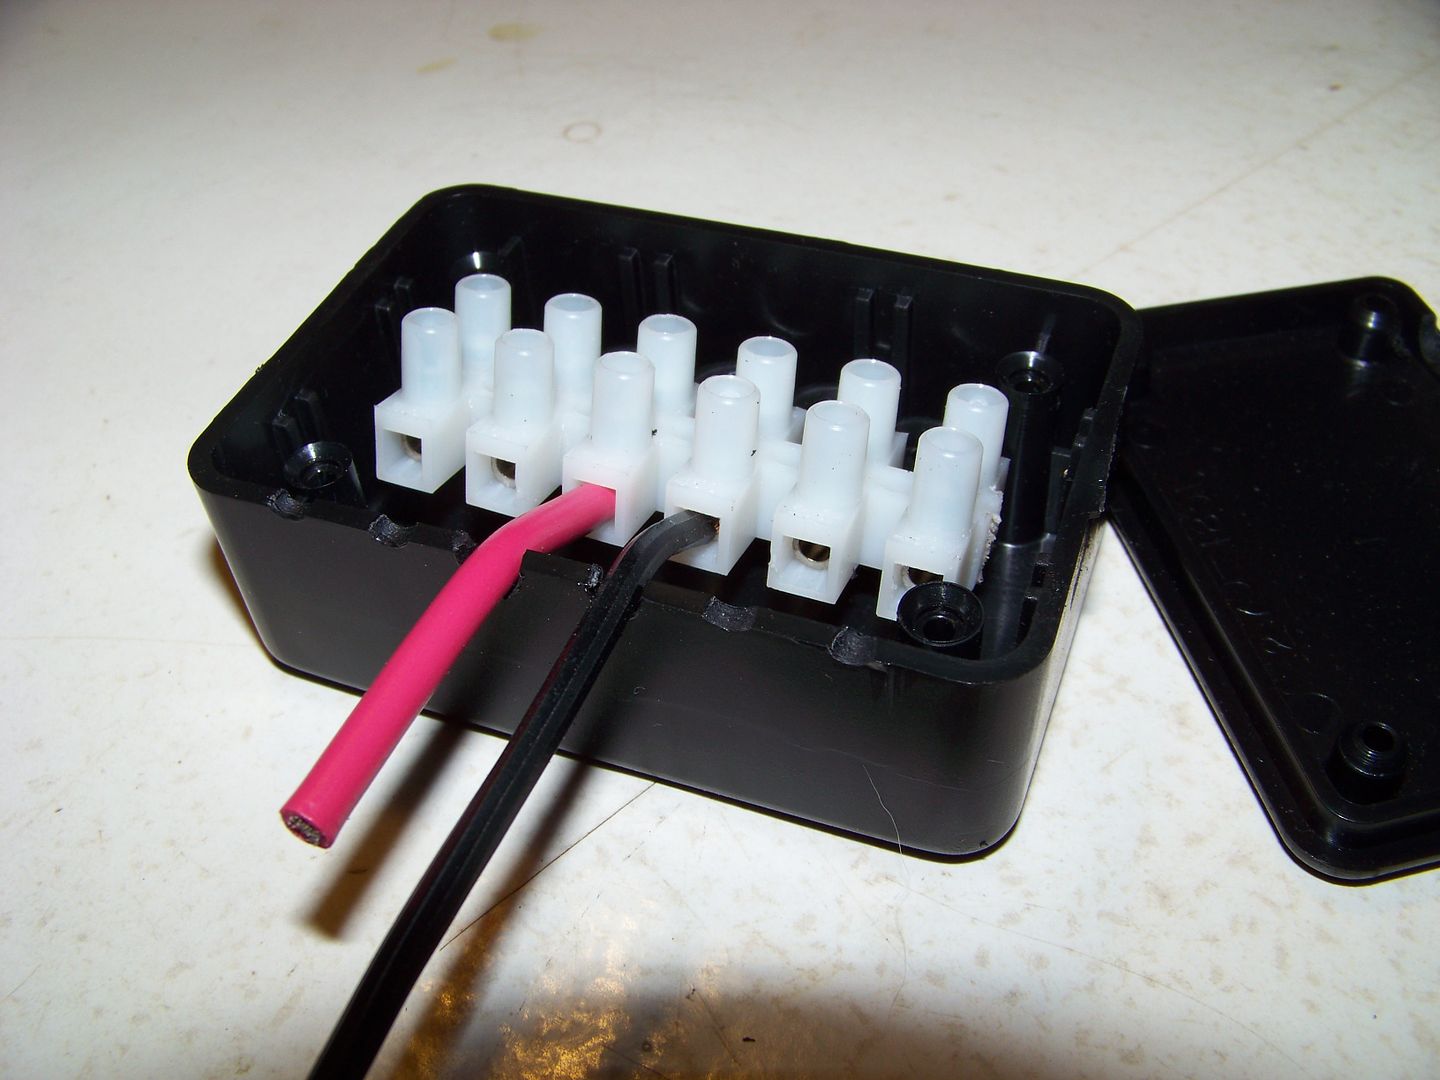
I like these euro style terminal strips as you don't have to crimp ring lugs on the ends of the wires. You just strip, twist, and jam them in, then tighten up the set screws. I used the 16 gauge wire to make 5 short jumper wires, and then daisy chained all of one side of the euro style terminal strip together.
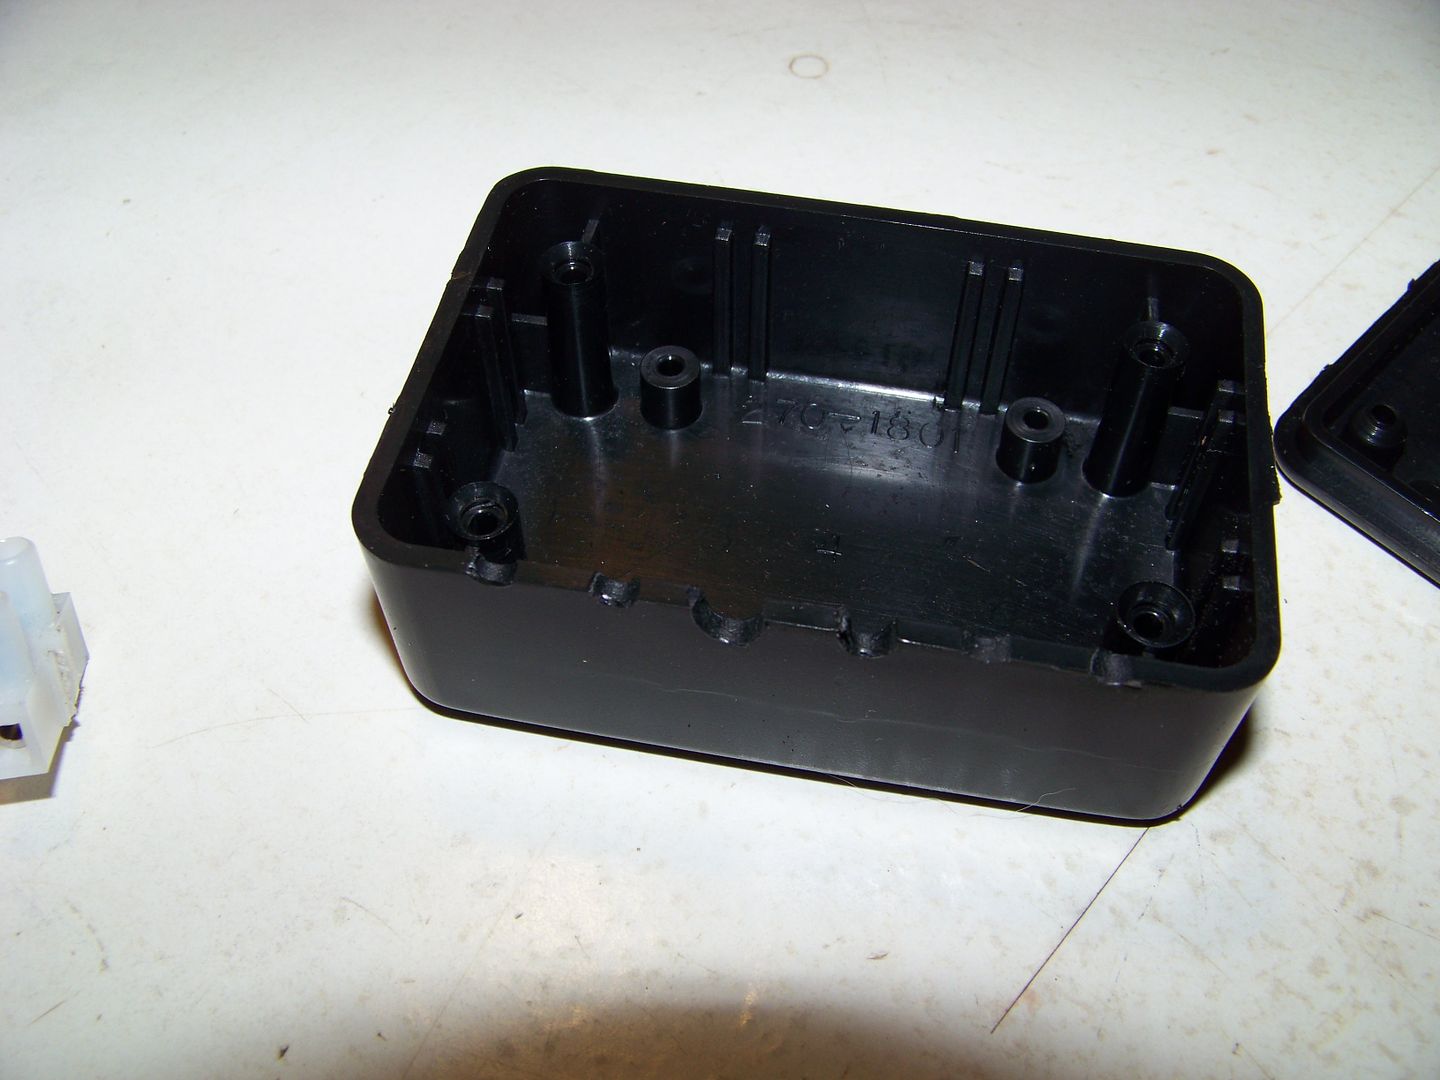
The project box is just to keep the 12V strip from shorting out against anything under the seat. It really doesn't need to be water tight. The terminal strip fits neatly inside the box. (stub of 12 gauge wire just for test fitting) I'll only be using a single output lead for now, but will have 4 more terminals to add more output cables in the future. Maybe I'll get myself a heated liner someday...
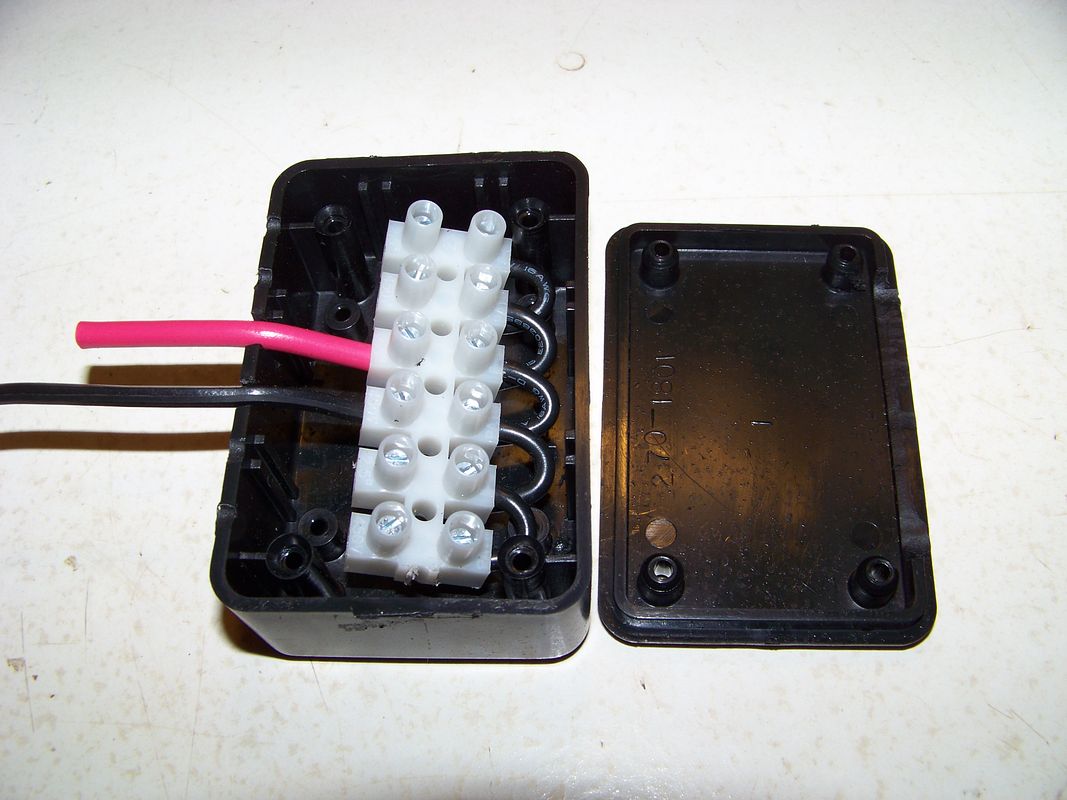
I used a Dremel rotary tool to remove the lip on one edge of the project box's top and then to cut appropriate sized notches in the deeper section of the box for the wire entry.
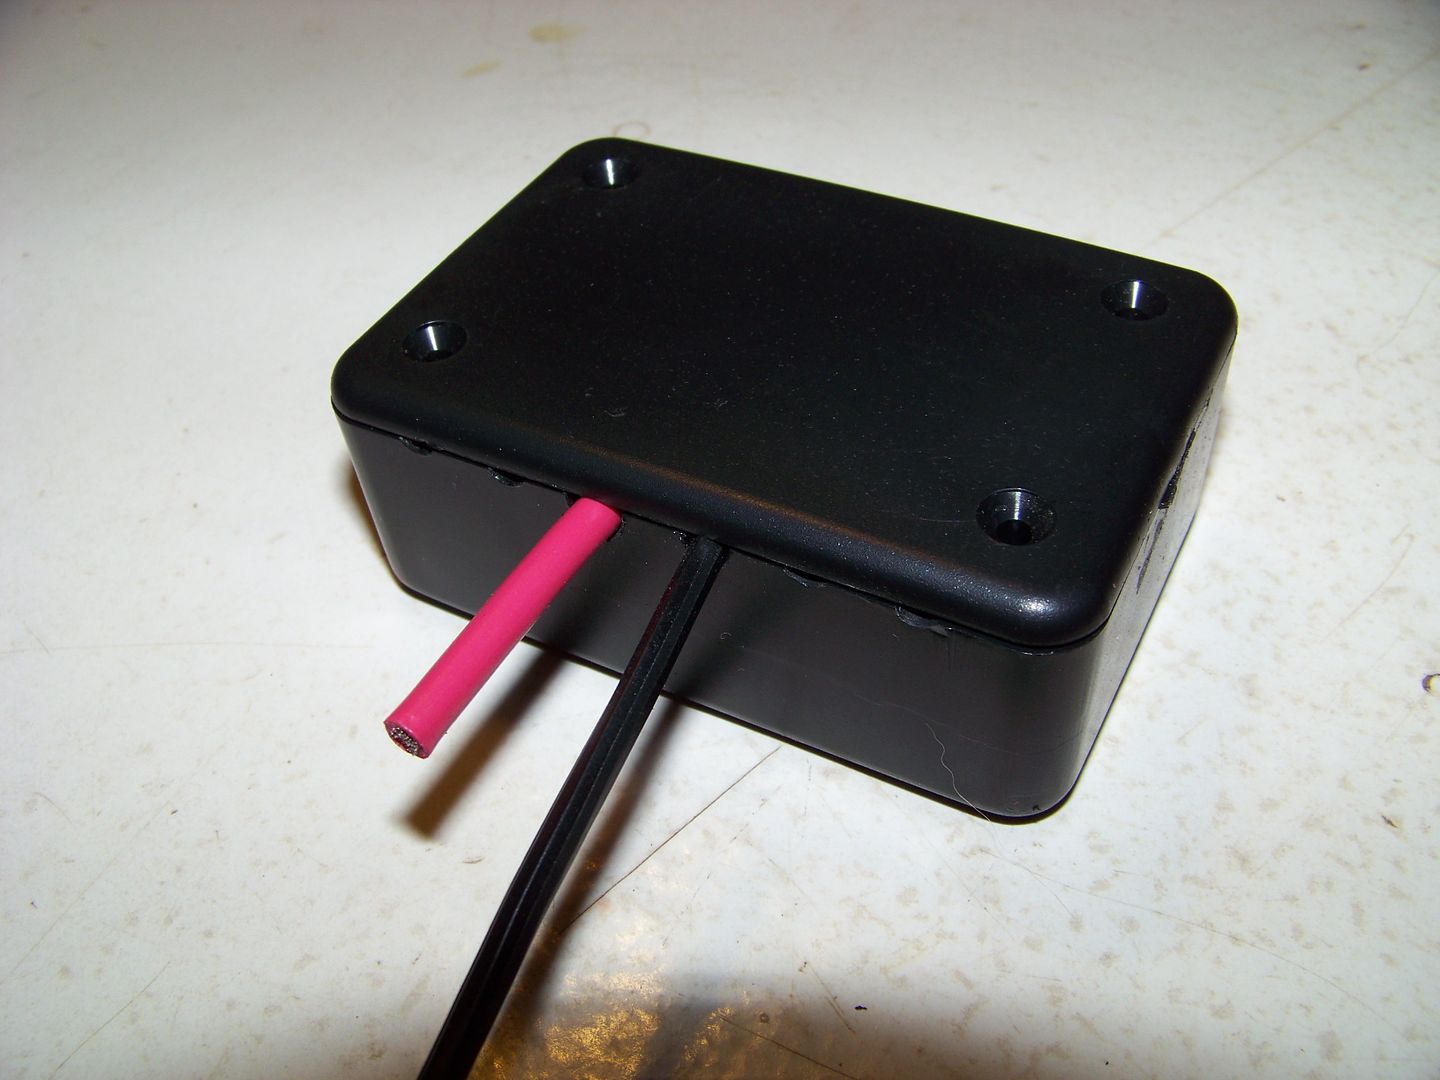
I spliced the Rat Shack in-line fuse holder to a long section of my red 12 gauge wire, and put the ring lug on the other end of the fuse holder, and inserted a 30amp fuse in it. Installed that onto the positive battery terminal (after disconnecting the negative terminal of course) and ran the wire up along the left side of the bike, inserting the wire into the split loom previously installed for my AVCC, up to the area of the tool tray underneath the seat. Leaving enough slack for serviceability I cut the 12 gauge run to length, stripped it back and installed it in place of the stub in the strip. Here's the new box located neatly in the tool tray.
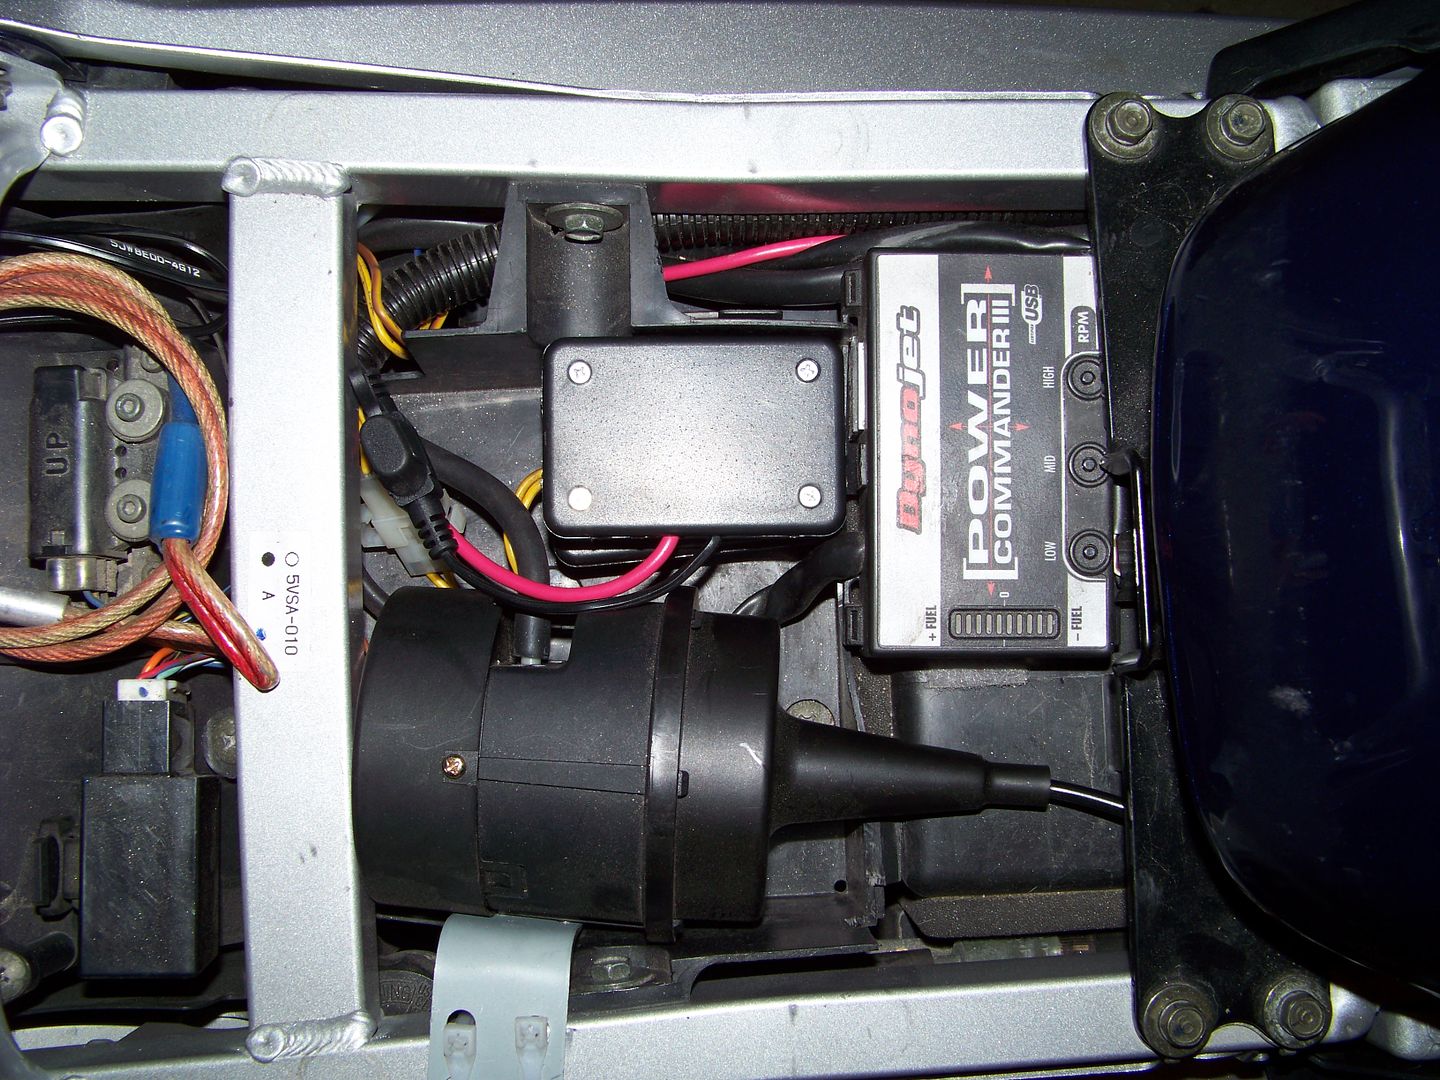
I'd already used up more than half of the tool tray with my AVCC servo, and underneath the new PDB is another identical project box with my HID headlight time delay circuit in it.
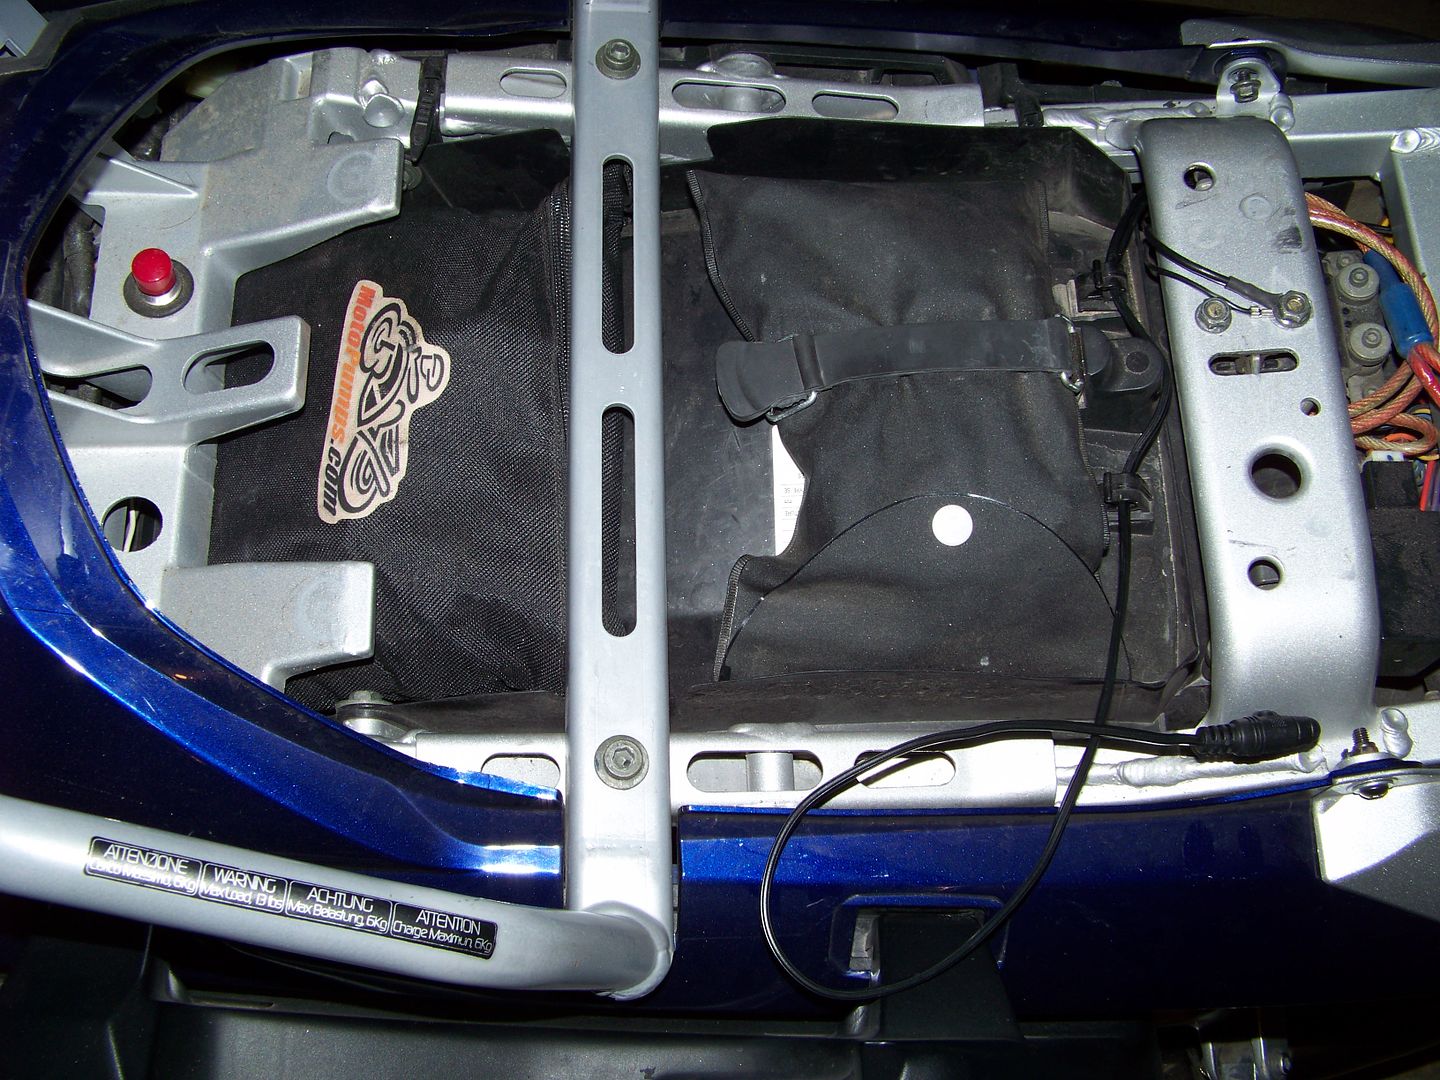
Naturally, I've had to relocate my tools further back underneath the passenger seat. And here you can see the location I used to pick up a frame ground (latch bolt/nut) and the new power cord that I'll run out from under the seat to hook up to TMJ's new heated liner when she wants to use it.
Almost forgot. Total cash outlay (today) for this project was less than $6. Probably less than $10 total including the supplies I already had.
My trusty pillion (TMJ) and I are due to celebrate another rotation around the sun together pretty soon. It'll be 34 times since our nuptials come December 11th, to be precise. Anyway, she is a somewhat diminutive person (4'12" and only ~105 lbs soaking wet) so she does get chilled rather easily while on on the back of the bike, especially when the mercury starts to dip. She has been longing for some heated gear to stave off the onset of hypothermia. Well, if she is willing to ride around on the back of a murdercycle with me, who am I to argue?
I recently bought her a Warm'nSafe full jacket liner and their dual portable temp controller (I'll eventually get her either gloves or pants liners too) as an early Anni gift. This morning I decided to do something about wiring up the necessary power for her new jacket liner.
Up until now, I have made do with a single switched power terminal strip up in the nose section. It powers the heattroller for the heated grips and gloves (using a Y harness to the gloves) and provides a switched power source for the Datel Panel Meter. The rest of my electronica (intercom, GPS, radar detector) is powered out of my tank bag, which plugs into a single "always hot" Powerlet jack in the "D" panel. I just unplug the tank bag whenever I get off the bike.
To power heated liners would require a power source further back in the bike, like underneath the seat. I decided that I could have this power source be "always hot" as we would be unplugging the heated gear any time we were getting off the bike anyways. I have an extra BlueSea fuse panel on the shelf, but I just do not have enough room under my seats for it. I could have bought a Fuzeblock (I actually have one on the V-strom) but I don't think really need anything that fancy for just powering heated gear.
Instead, I picked up a few bits and pieces at Radio Shack and fabricated my own little power distribution box.
Here's what I bought:
One small plastic project box (3"x2"x1")
One in line mini-blade fuse holder
One euro style terminal strip (cut in half)
Some supplies that already had on hand and used:
One 10-12 gauge heat shrink type ring lug
One 10-12 gauge heat shrink type butt splice
A bunch of red 12 gauge wire
A short piece of 16 gauge black wire
I like these euro style terminal strips as you don't have to crimp ring lugs on the ends of the wires. You just strip, twist, and jam them in, then tighten up the set screws. I used the 16 gauge wire to make 5 short jumper wires, and then daisy chained all of one side of the euro style terminal strip together.
The project box is just to keep the 12V strip from shorting out against anything under the seat. It really doesn't need to be water tight. The terminal strip fits neatly inside the box. (stub of 12 gauge wire just for test fitting) I'll only be using a single output lead for now, but will have 4 more terminals to add more output cables in the future. Maybe I'll get myself a heated liner someday...
I used a Dremel rotary tool to remove the lip on one edge of the project box's top and then to cut appropriate sized notches in the deeper section of the box for the wire entry.
I spliced the Rat Shack in-line fuse holder to a long section of my red 12 gauge wire, and put the ring lug on the other end of the fuse holder, and inserted a 30amp fuse in it. Installed that onto the positive battery terminal (after disconnecting the negative terminal of course) and ran the wire up along the left side of the bike, inserting the wire into the split loom previously installed for my AVCC, up to the area of the tool tray underneath the seat. Leaving enough slack for serviceability I cut the 12 gauge run to length, stripped it back and installed it in place of the stub in the strip. Here's the new box located neatly in the tool tray.
I'd already used up more than half of the tool tray with my AVCC servo, and underneath the new PDB is another identical project box with my HID headlight time delay circuit in it.
Naturally, I've had to relocate my tools further back underneath the passenger seat. And here you can see the location I used to pick up a frame ground (latch bolt/nut) and the new power cord that I'll run out from under the seat to hook up to TMJ's new heated liner when she wants to use it.
Almost forgot. Total cash outlay (today) for this project was less than $6. Probably less than $10 total including the supplies I already had.
Last edited by a moderator:
