CraigRegs
Well-known member
**NOTE: I've since moved the Kristas to my '15ES. Not much different than the '07, but here are a few photos in post #21 of this thread.
I recently bought a set of Clearwater Krista aux lights for my '07. While the provided installation instructions are good, I thought I'd document and post my install as a guide for others. There's really no major wiring skills required; the lights come with plug 'n' play clips for connecting each light and the dimmer switch to the Krista relay and wiring harness. A series of wires attached to the relay get connected to the on/off switch; switched power (from the low beam wire); the high beam; and the horn to flash the lights full bright when you hit the horn. (These last two connections are optional.)
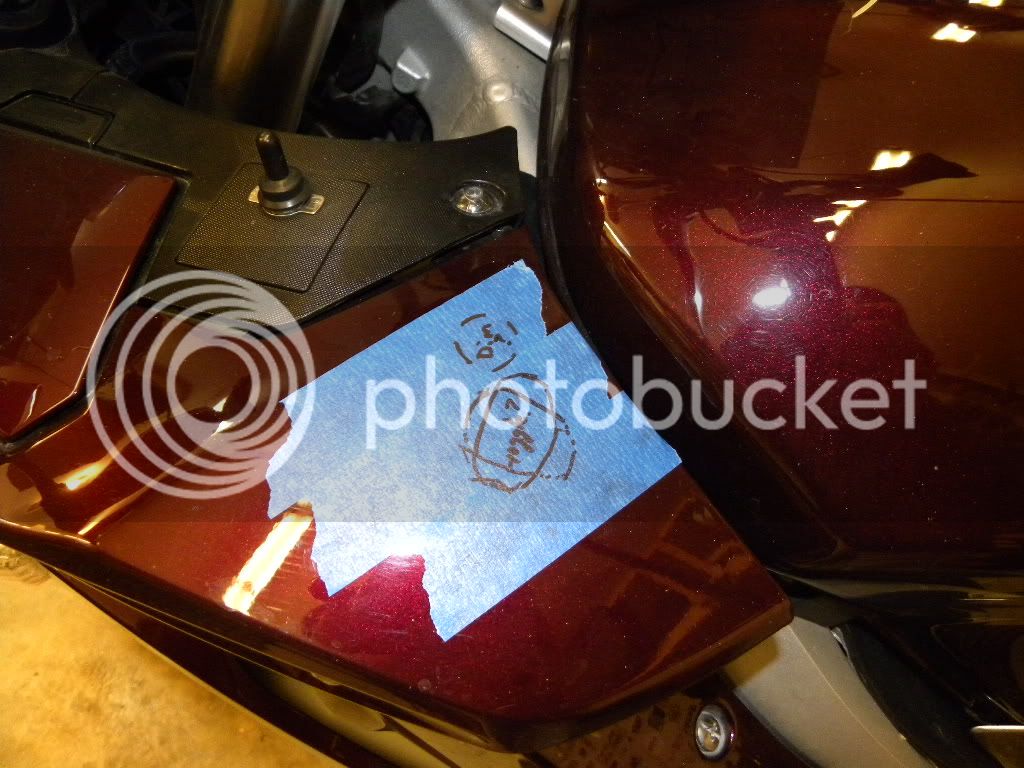
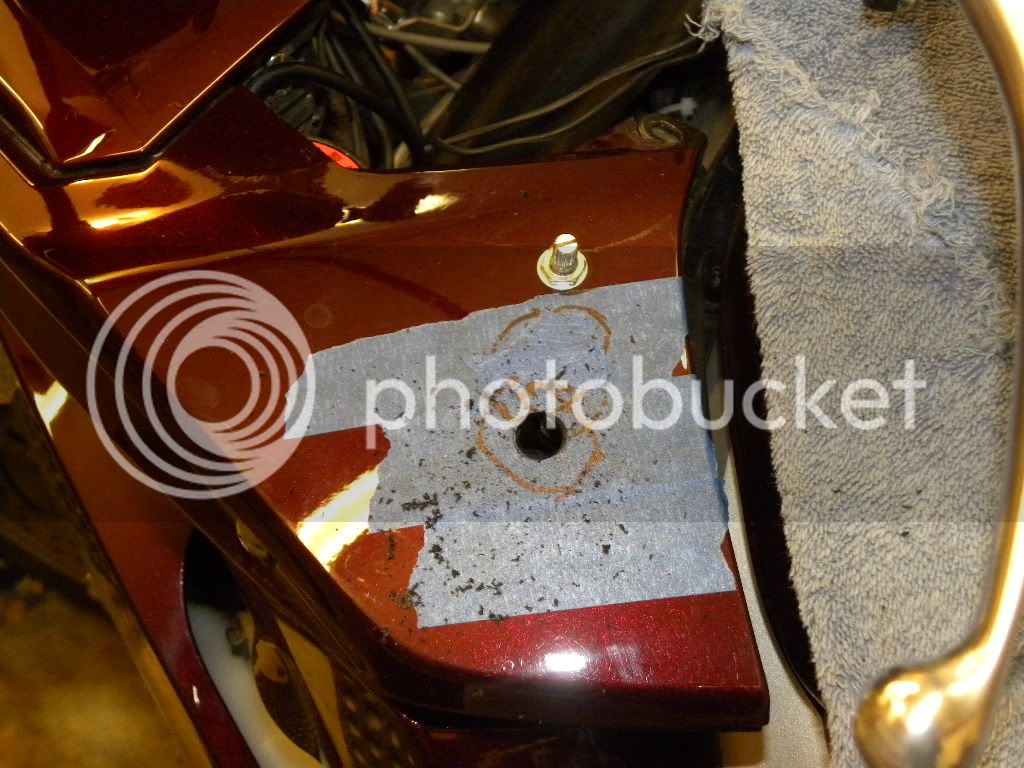
First order of business was finding a location for the on/off switch and dimmer. I put blue tape on the left fairing and traced around the switches. This was my first layout:
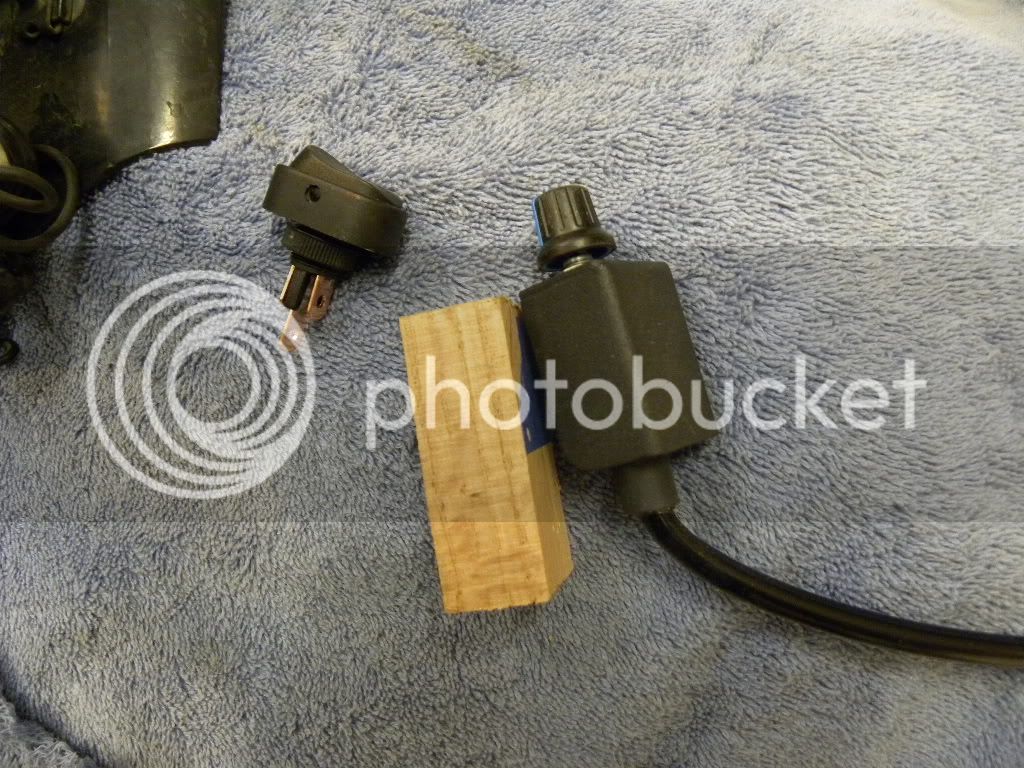
To check that I had sufficient room behind the panel for the dimmer, I cut a block of wood about the same size and tucked it under the panel to confirm it would fit. (I ended up removing the metal bracket shown around the switch in the photo.)
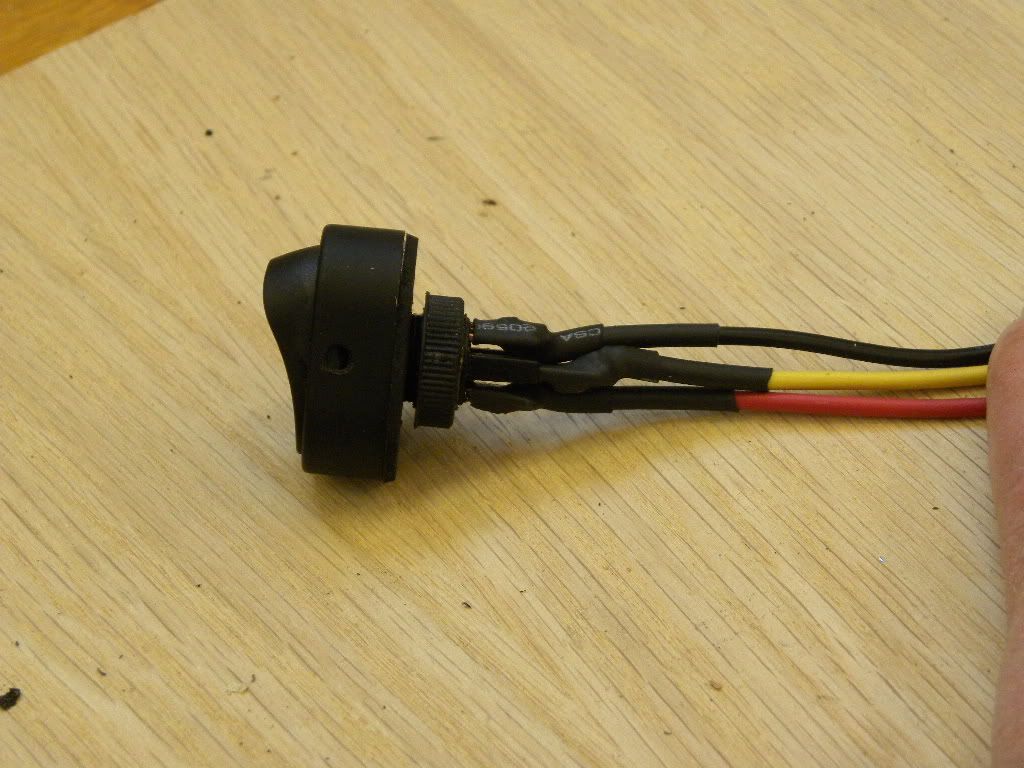
After drilling the hole for the dimmer, I temporarily installed the dimmer and tried working it with my heaviest gloves on. As a result, I moved the location for the on/off switch further back to allow more finger room around the dimmer.
The wires from the Krista relay weren’t long enough to reach the on/off switch, so I soldered 16”-long leads to the switch. Then I discovered it wouldn't fit through the round hole. Some filing elongated the hole.
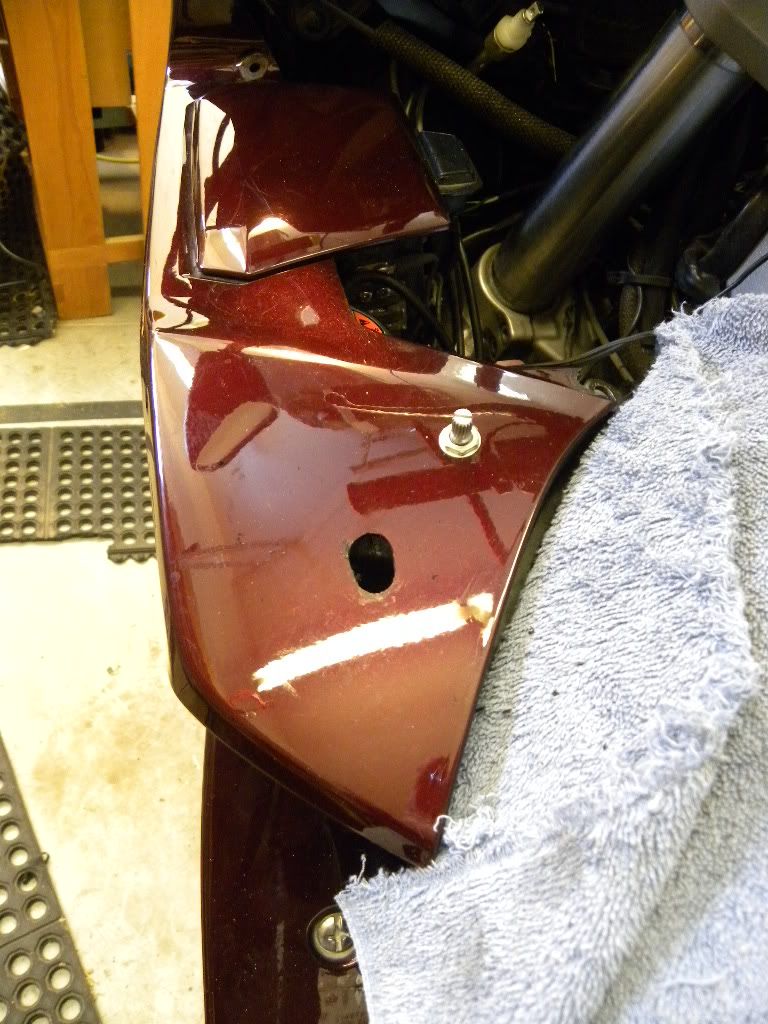
I cut a gasket from an old inner tube to go under the on/off switch, then mounted the switch, but didn’t solder the wires to the relay wires yet.
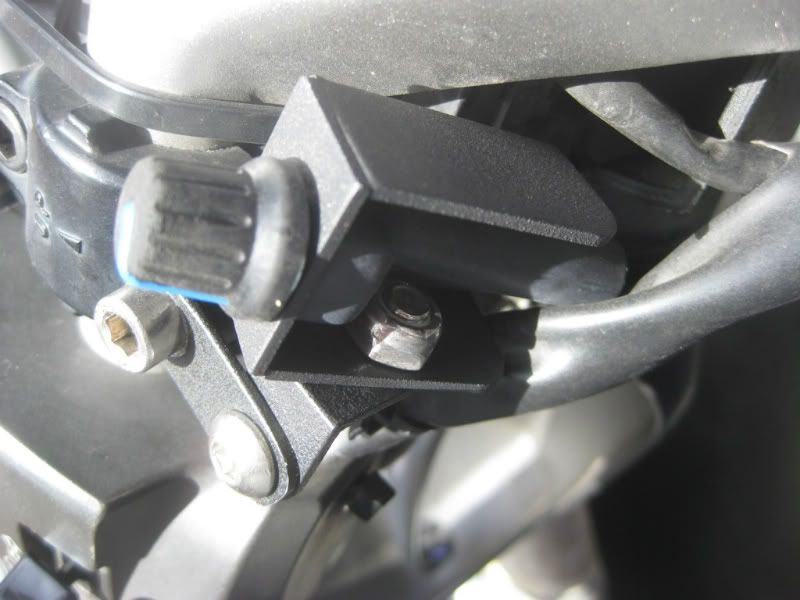
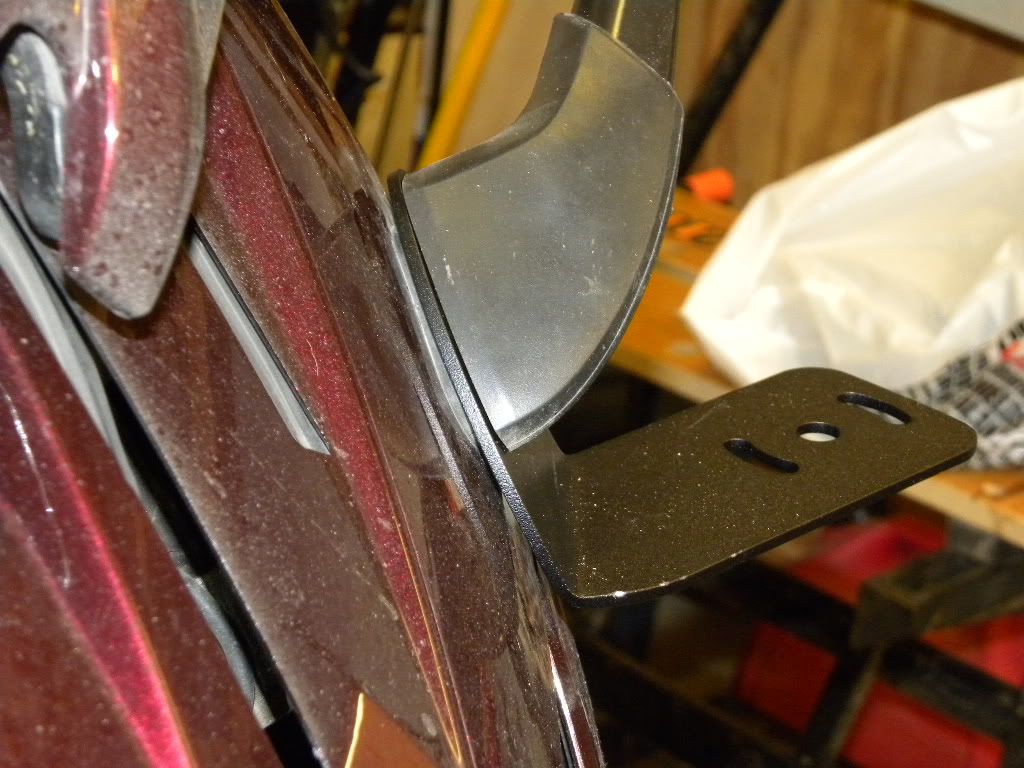
Mounting the brackets was easy, they fit right between the mirror brackets and the fairing. Note that I have the FZ1 mirrors.
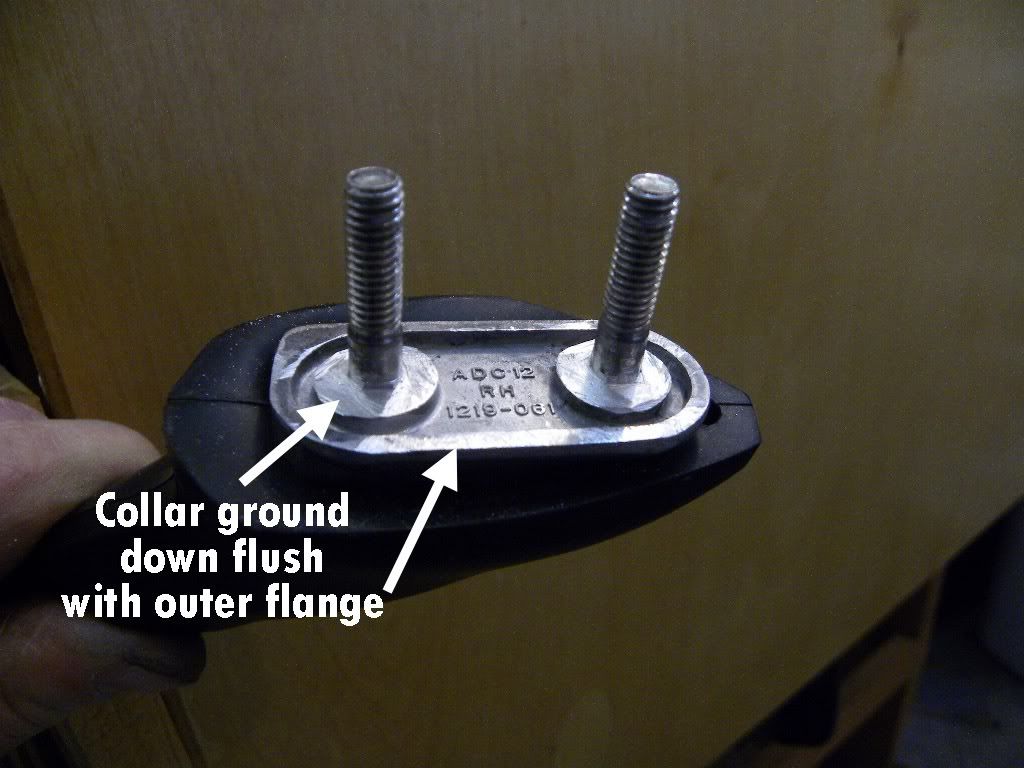
However, the thickness of the brackets reduced the exposed length of the threaded studs on the mirrors, and there was just barely enough stud to thread on the lock nuts. So I ground down the collar around each stud to gain about another 1/8" of stud length.
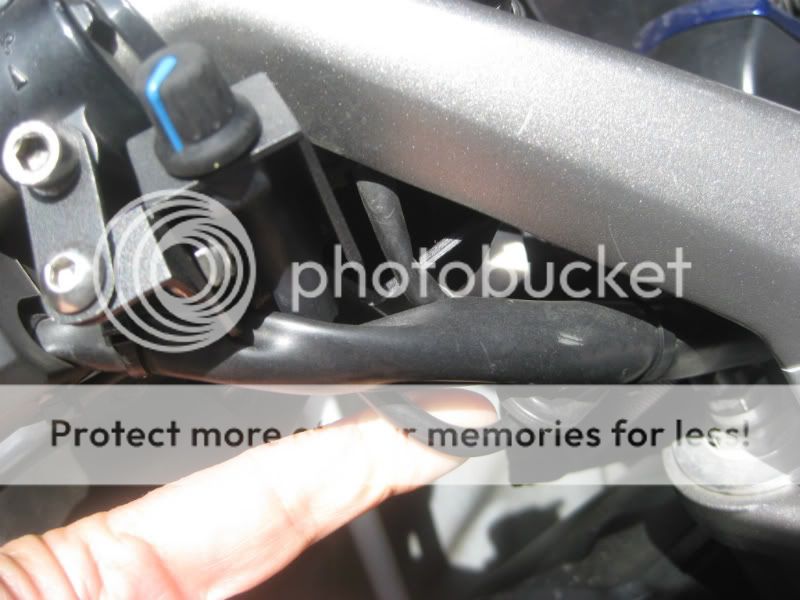
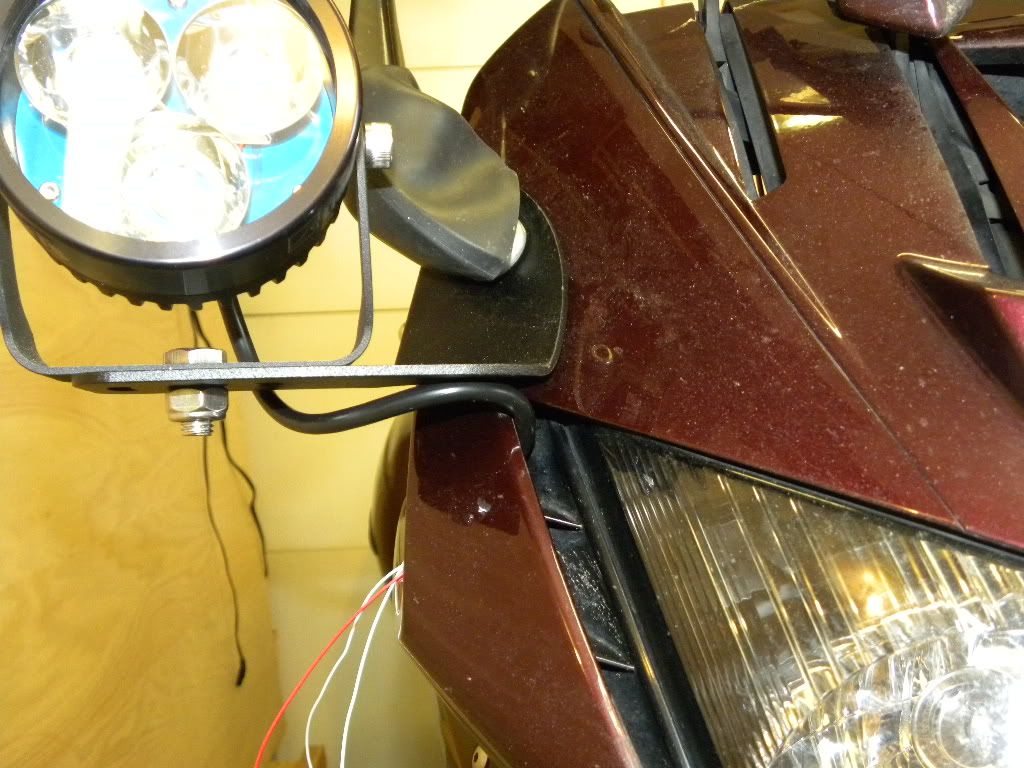
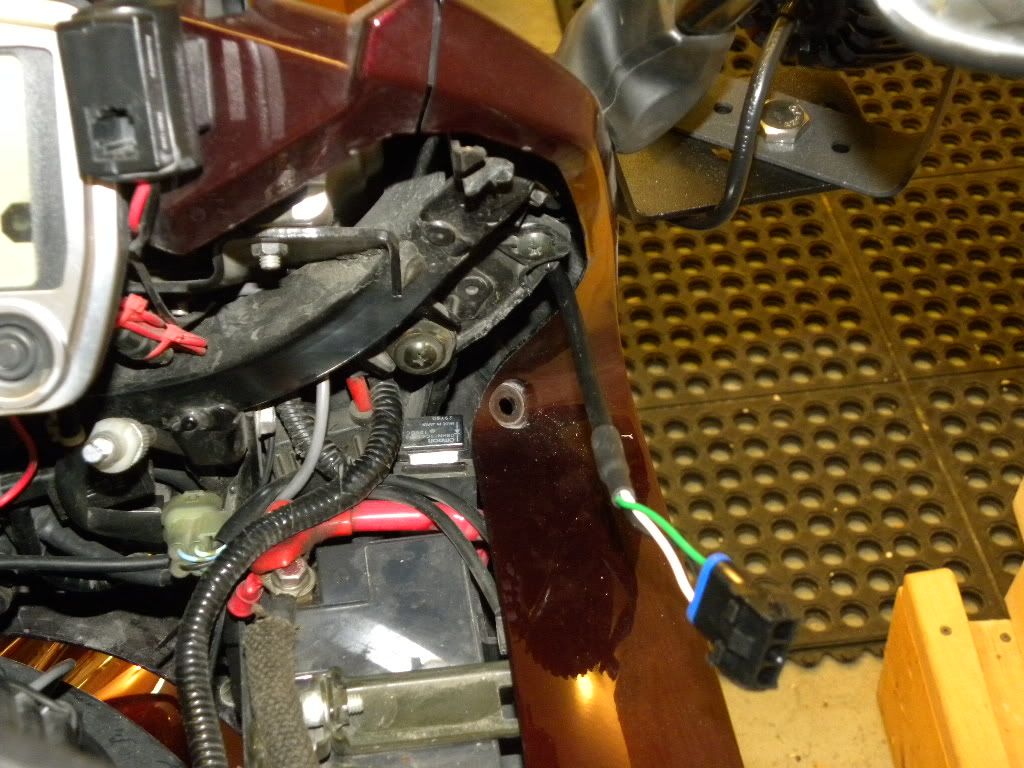
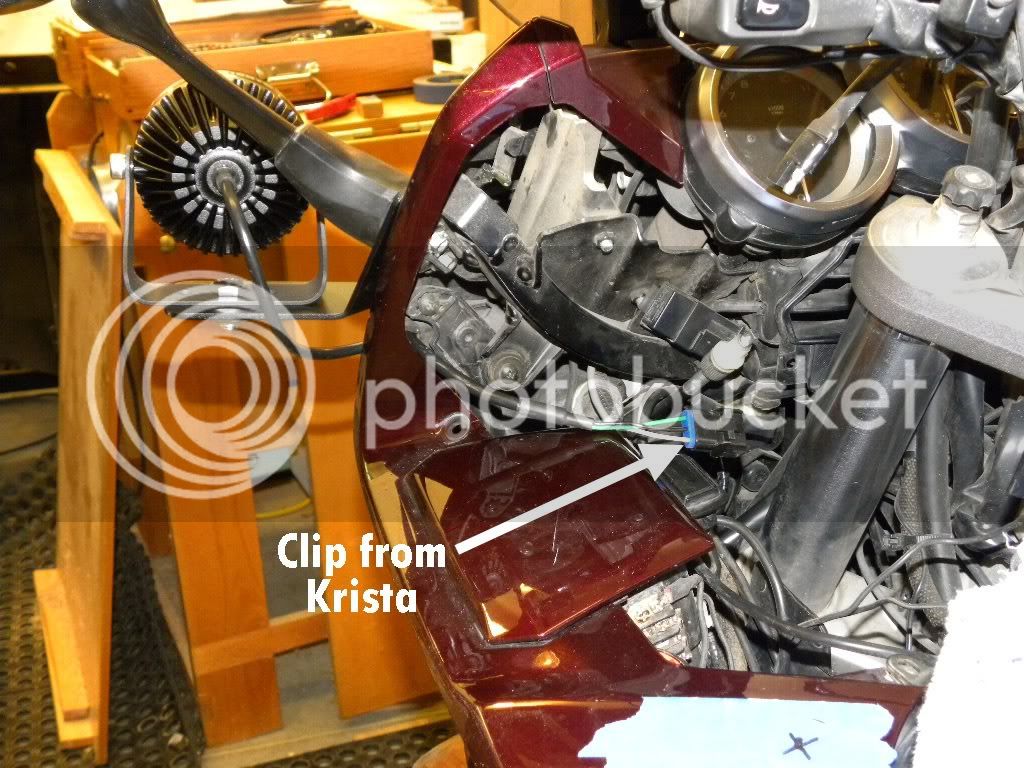
After attaching the lights to the brackets, I fed the cables through the vents in the front fairing.
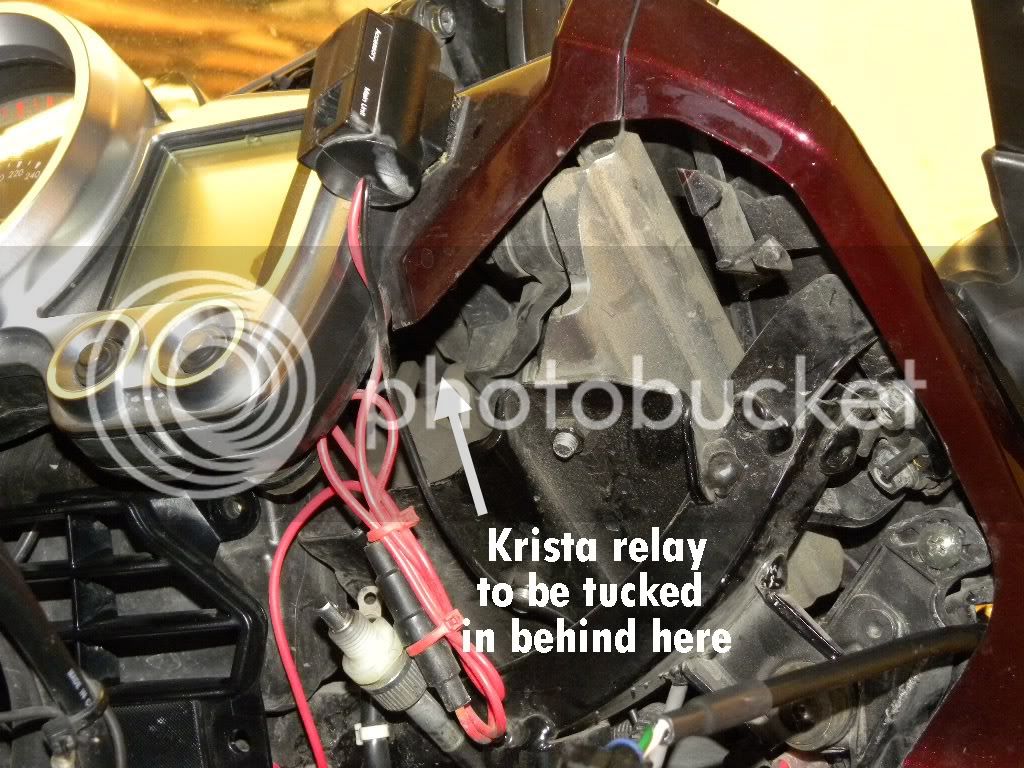
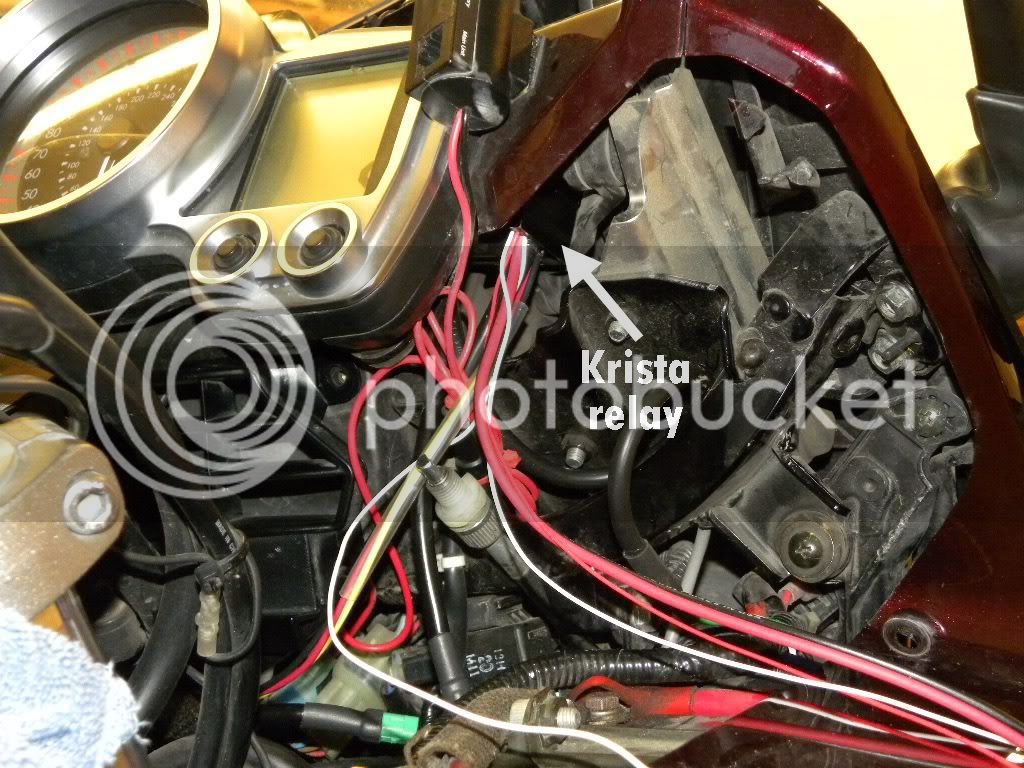
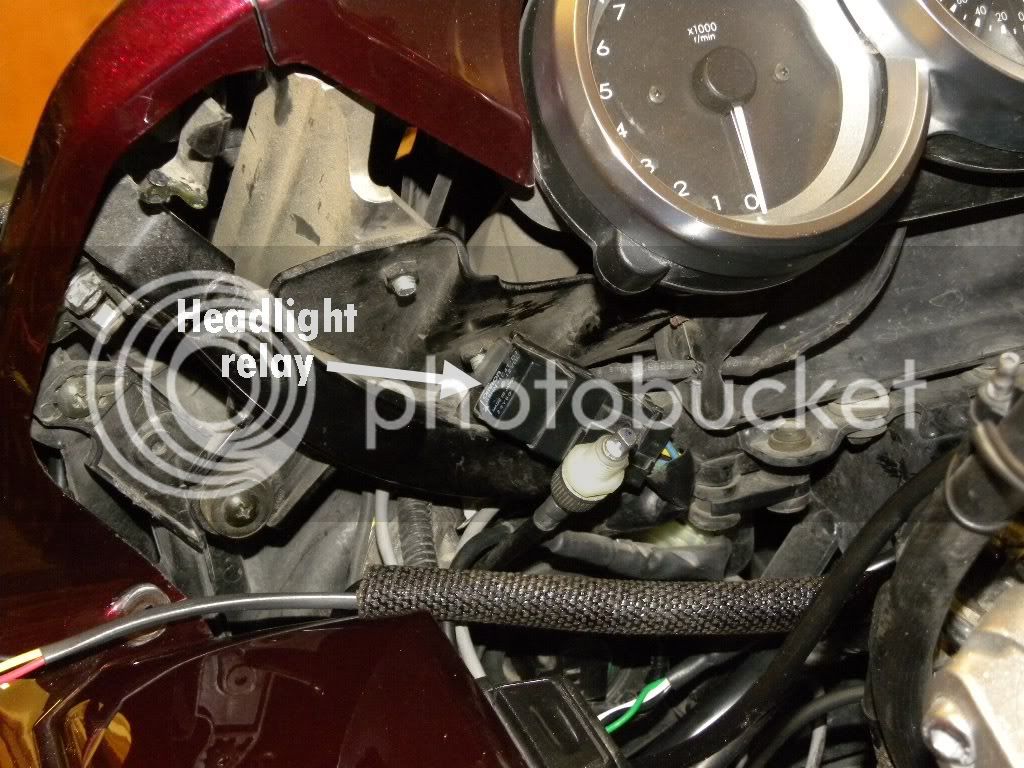
The Krista relay needed a home and I found the area behind the speedo to be just large enough. The windshield mechanism just grazes it in the fully raised position:
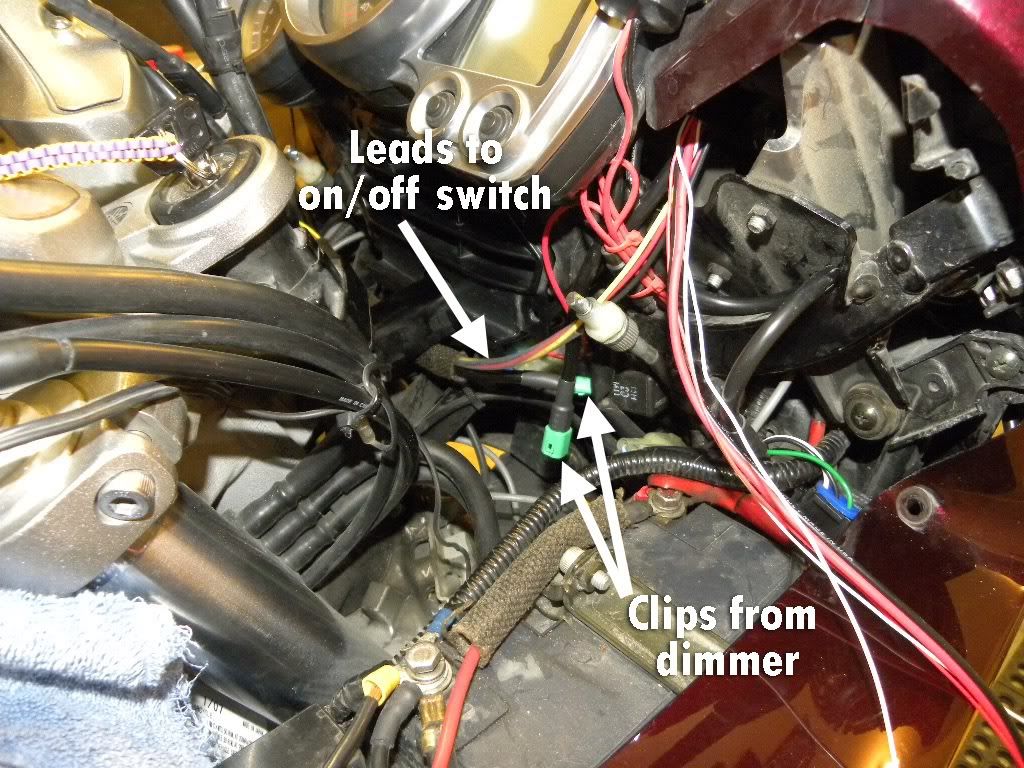
I ran the wires for the on/off switch and the cable for the dimmer through a wiring loom to protect them and fed the loom through the bracing under the dash:
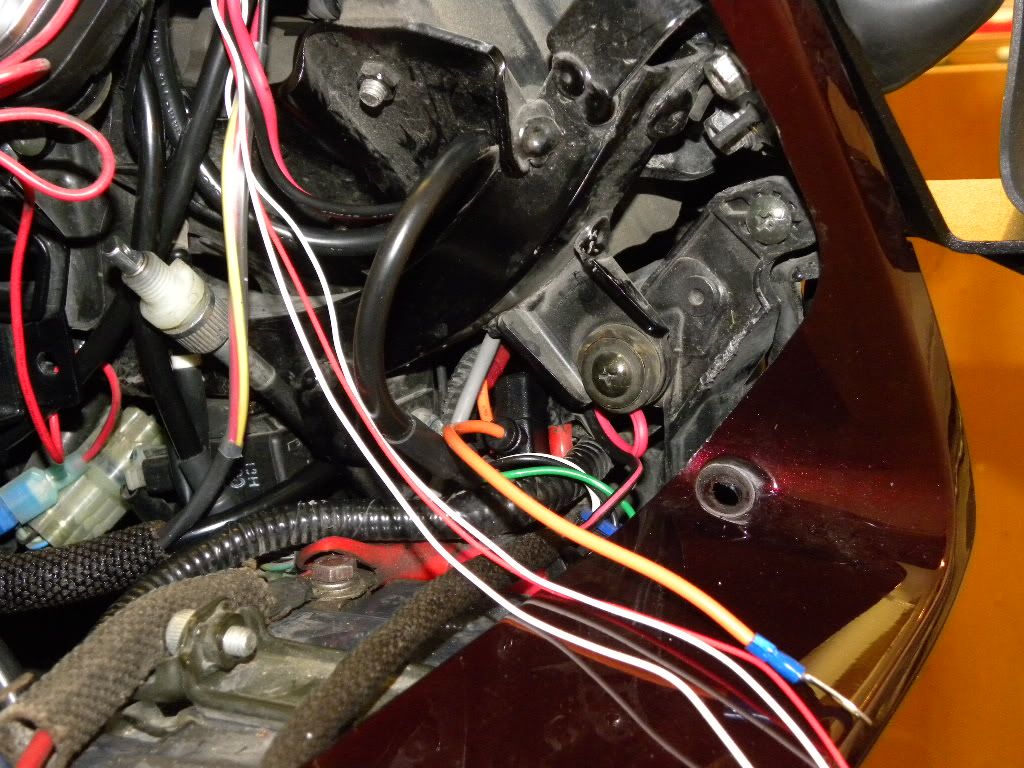
The Krista fuse lead (attached to the orange wire) found a home in the fairing just above and behind the battery. The provided power and ground lead was much longer than needed so I clipped off the excess and crimped on new (provided) ring terminals.
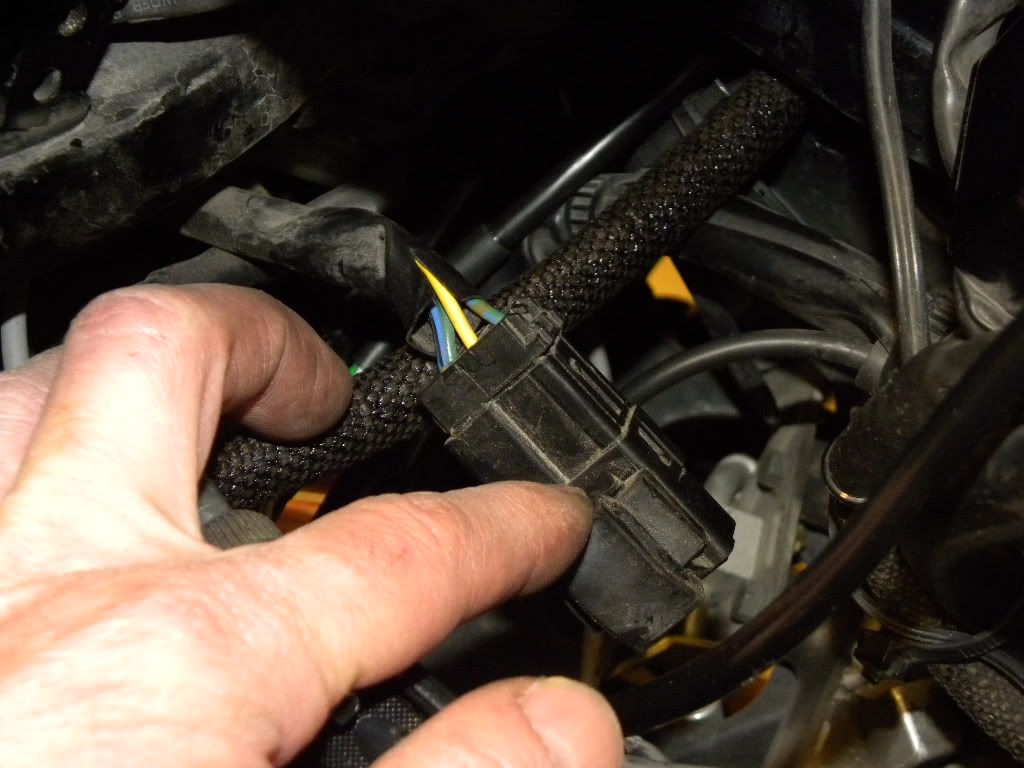
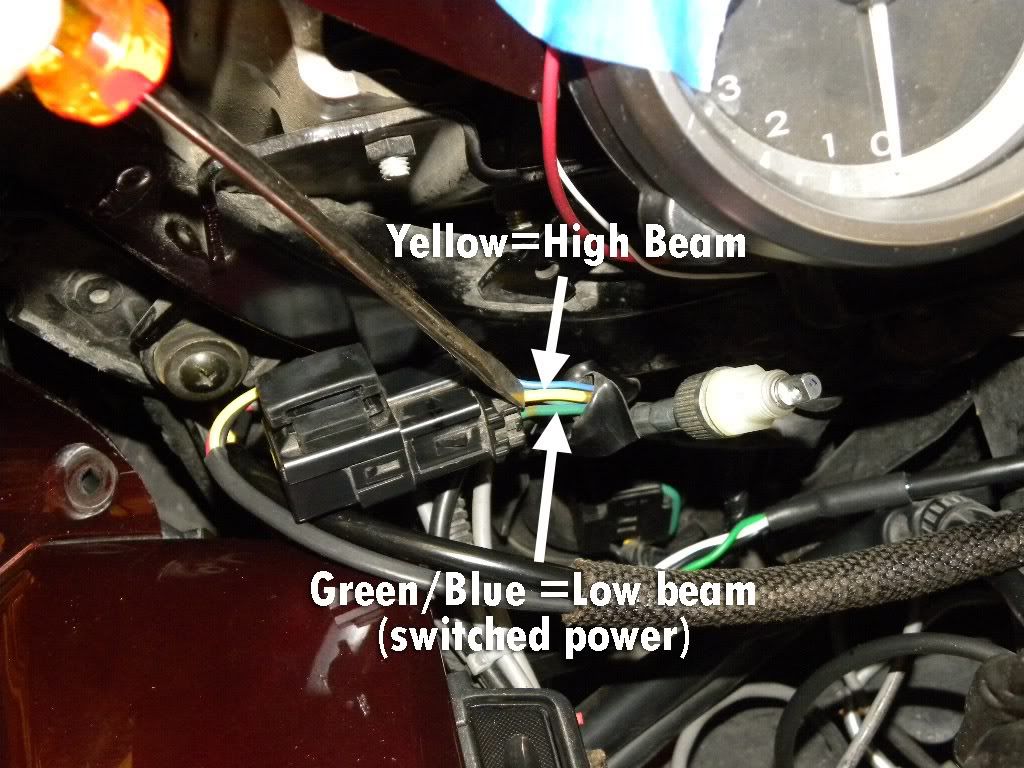
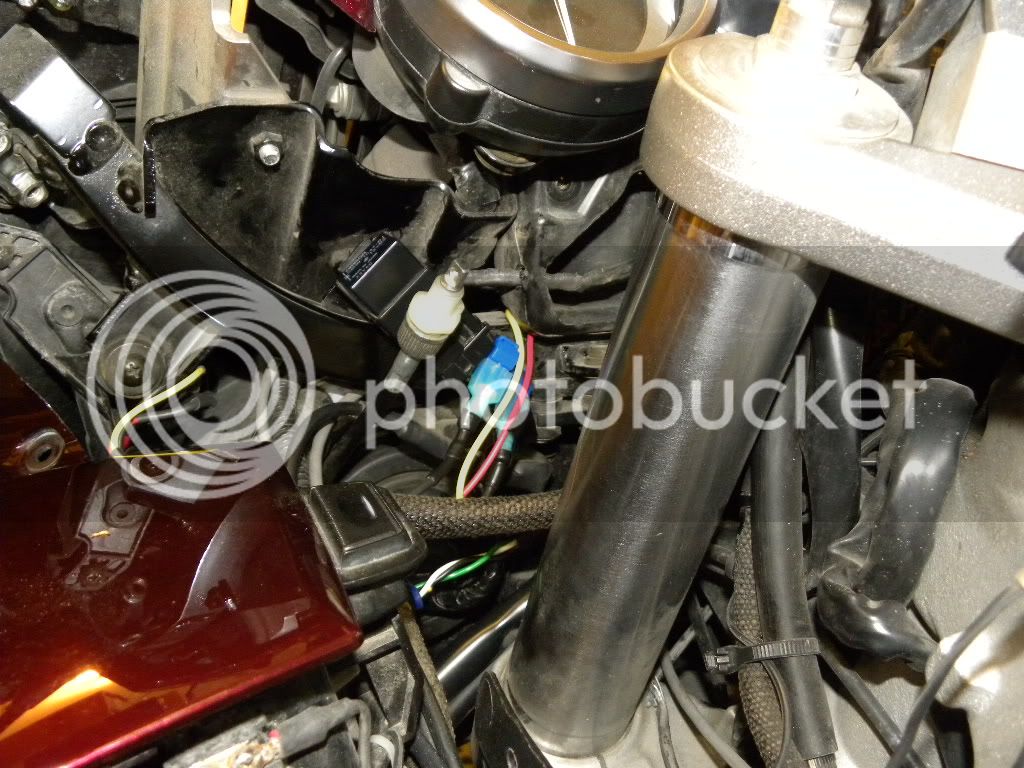
Now we need switched power to the Krista relay. That comes from the low beam wire. Tapping into the high beam wire with a second lead allows switching the Kristas to full-on when throwing the hi-beam switch. As mentioned earlier, the high-beam switching is optional and you don’t have to hook it up if you don’t want to. Here's the relay with the necessary wires:
The relay just lifts up to remove it from its mounting post. I cut back the flexible plastic shroud that covers the wire bundle to allow access to the wires.
The Posi-taps supplied with the Kristas were too small for the 16-gauge wire here, so I bought T-taps from the auto parts store. Here they are in place:
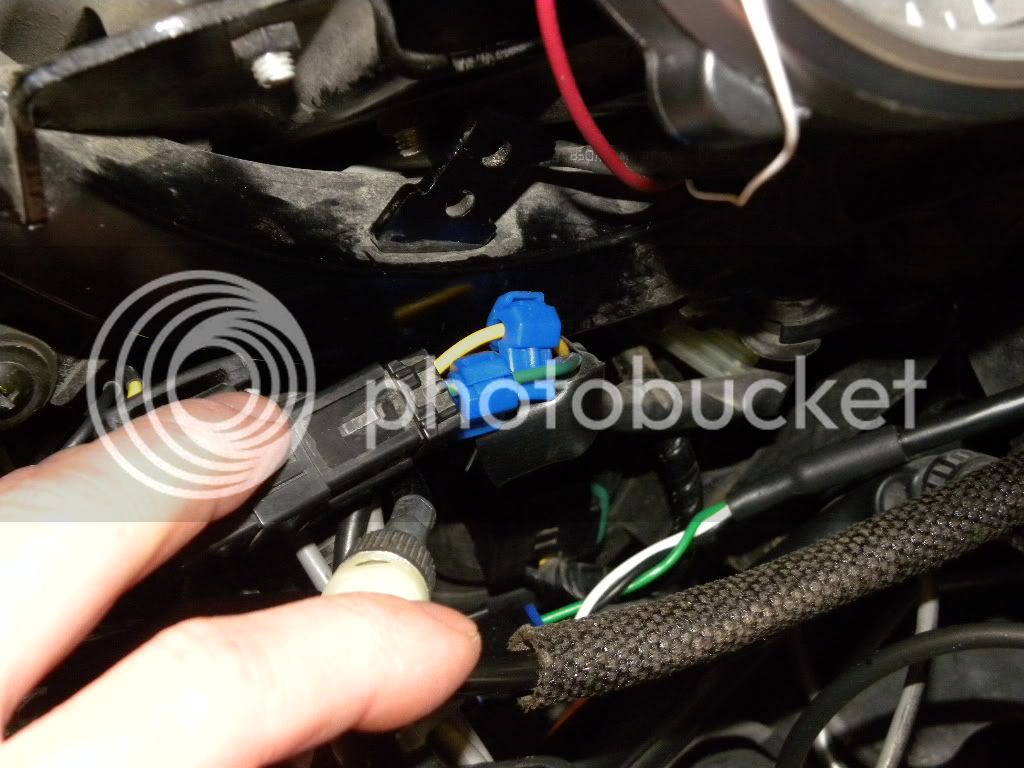
And here are the leads from the Krista relay attached to the taps with the headlight relay mounted back in place:
I also wired up the horn option which turns the Kristas on full bright when sounding the horn. Sorry, no pics of that, but it’s simply attaching the wire to a post on the horn relay.
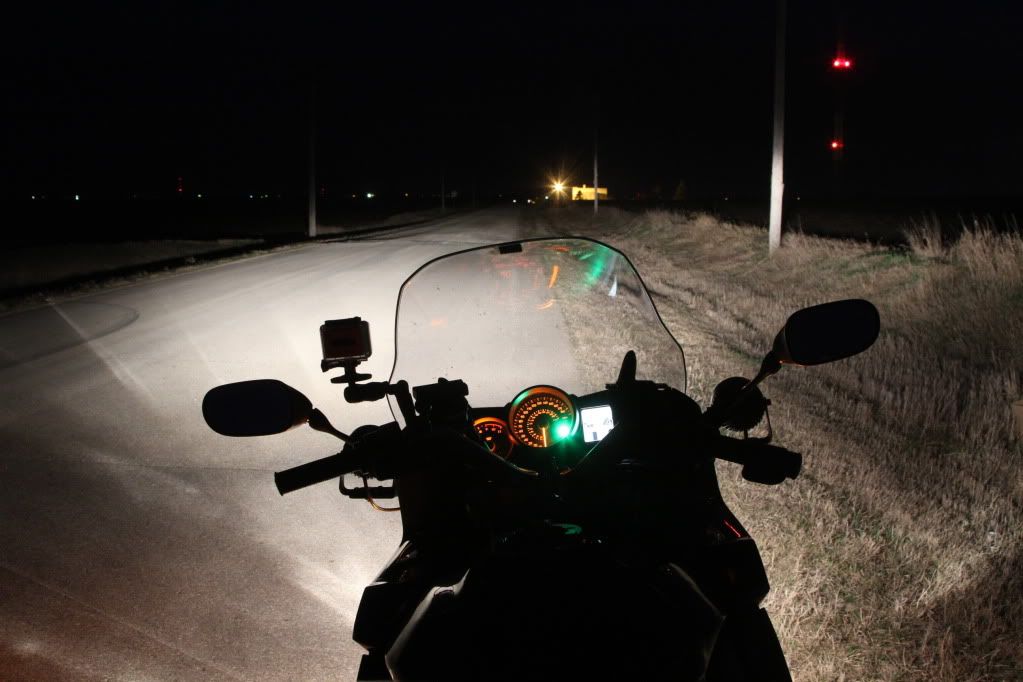
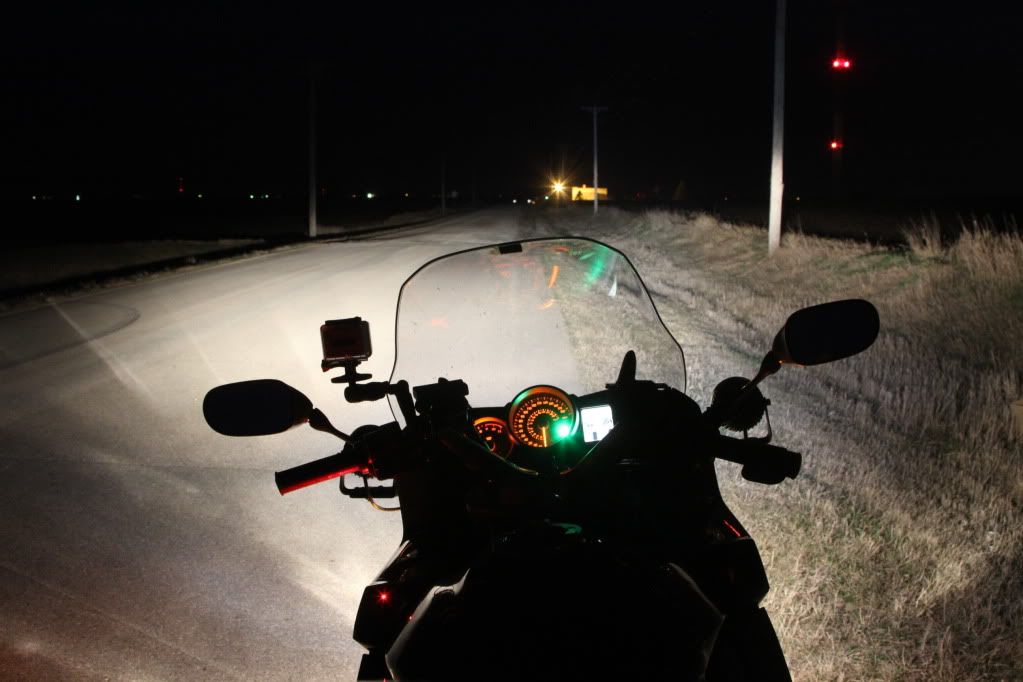
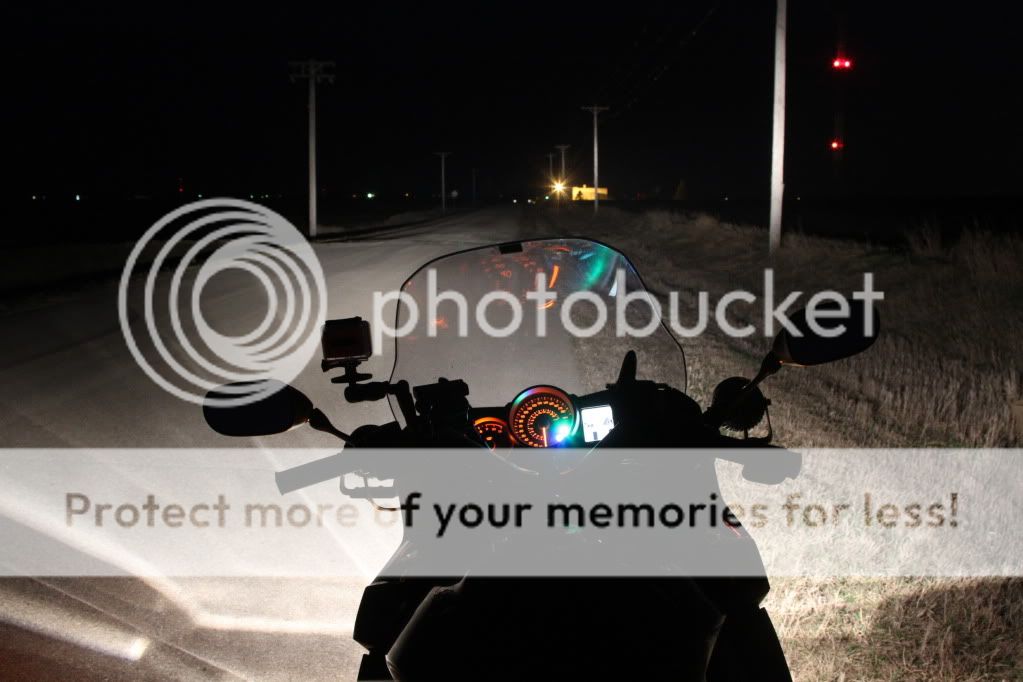
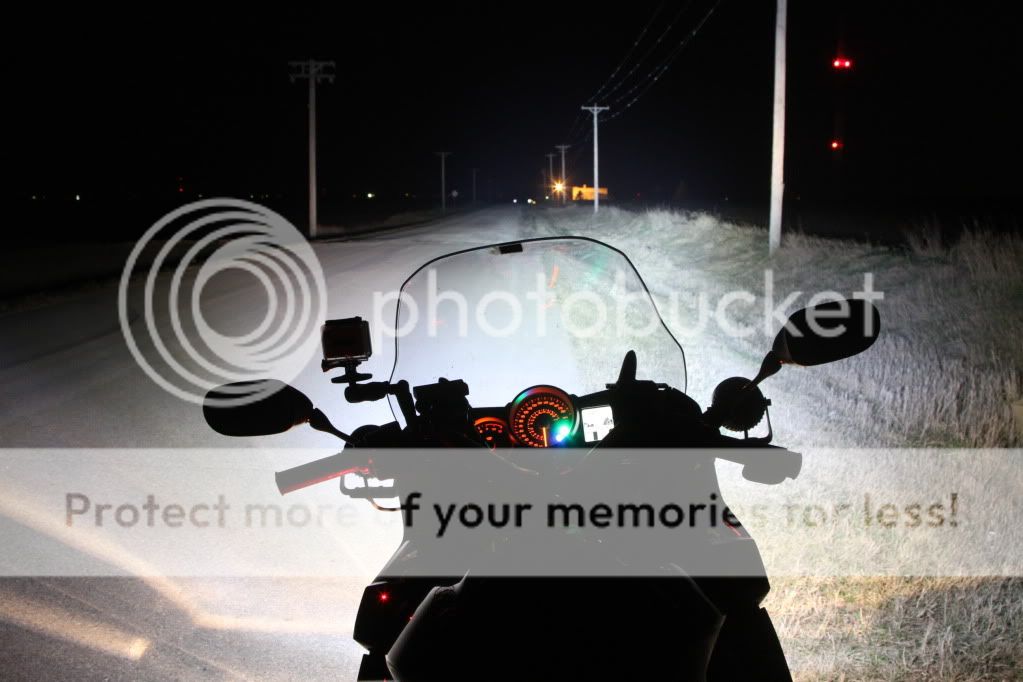
With everything in place, I soldered the switch wires to the relay leads, attached the positive and negative cables to the battery posts, and tested things out. It works great. As soon as the weather allows, I'll get night-time photos and videos to show the results.
I recently bought a set of Clearwater Krista aux lights for my '07. While the provided installation instructions are good, I thought I'd document and post my install as a guide for others. There's really no major wiring skills required; the lights come with plug 'n' play clips for connecting each light and the dimmer switch to the Krista relay and wiring harness. A series of wires attached to the relay get connected to the on/off switch; switched power (from the low beam wire); the high beam; and the horn to flash the lights full bright when you hit the horn. (These last two connections are optional.)
First order of business was finding a location for the on/off switch and dimmer. I put blue tape on the left fairing and traced around the switches. This was my first layout:
To check that I had sufficient room behind the panel for the dimmer, I cut a block of wood about the same size and tucked it under the panel to confirm it would fit. (I ended up removing the metal bracket shown around the switch in the photo.)
After drilling the hole for the dimmer, I temporarily installed the dimmer and tried working it with my heaviest gloves on. As a result, I moved the location for the on/off switch further back to allow more finger room around the dimmer.
The wires from the Krista relay weren’t long enough to reach the on/off switch, so I soldered 16”-long leads to the switch. Then I discovered it wouldn't fit through the round hole. Some filing elongated the hole.
I cut a gasket from an old inner tube to go under the on/off switch, then mounted the switch, but didn’t solder the wires to the relay wires yet.
Mounting the brackets was easy, they fit right between the mirror brackets and the fairing. Note that I have the FZ1 mirrors.
However, the thickness of the brackets reduced the exposed length of the threaded studs on the mirrors, and there was just barely enough stud to thread on the lock nuts. So I ground down the collar around each stud to gain about another 1/8" of stud length.
After attaching the lights to the brackets, I fed the cables through the vents in the front fairing.
The Krista relay needed a home and I found the area behind the speedo to be just large enough. The windshield mechanism just grazes it in the fully raised position:
I ran the wires for the on/off switch and the cable for the dimmer through a wiring loom to protect them and fed the loom through the bracing under the dash:
The Krista fuse lead (attached to the orange wire) found a home in the fairing just above and behind the battery. The provided power and ground lead was much longer than needed so I clipped off the excess and crimped on new (provided) ring terminals.
Now we need switched power to the Krista relay. That comes from the low beam wire. Tapping into the high beam wire with a second lead allows switching the Kristas to full-on when throwing the hi-beam switch. As mentioned earlier, the high-beam switching is optional and you don’t have to hook it up if you don’t want to. Here's the relay with the necessary wires:
The relay just lifts up to remove it from its mounting post. I cut back the flexible plastic shroud that covers the wire bundle to allow access to the wires.
The Posi-taps supplied with the Kristas were too small for the 16-gauge wire here, so I bought T-taps from the auto parts store. Here they are in place:
And here are the leads from the Krista relay attached to the taps with the headlight relay mounted back in place:
I also wired up the horn option which turns the Kristas on full bright when sounding the horn. Sorry, no pics of that, but it’s simply attaching the wire to a post on the horn relay.
With everything in place, I soldered the switch wires to the relay leads, attached the positive and negative cables to the battery posts, and tested things out. It works great. As soon as the weather allows, I'll get night-time photos and videos to show the results.
Last edited by a moderator: