MadMax
Member
O.K. "I GIVE UP". I have been avoiding posting this question here for hours. I got scolded by some guy for asking what he deemed to be stupid ass questions when installing my MCL risers. Jeez!!! I am somewhat mechanically inclined; but, I'm also smart enough to know what I don't know and will ask before I mess things up and have people say, "you should have asked". I have been told by no less than 3 people plus Garauld himself that fairing/cowling removal is "NOT REQUIRED" to install these on a Gen II [2008]. Well, you got me. Removing the bottom fairing/cowling bolt loosens that part somewhat; but, it is no help in accessing the right front most bolt with an allen wrench. So, having said all that and making myself sound like, not just a moron, but, a complete and total moron, how in the heck do you access the bolts for removal to install these, especially the one for the right side, on a Gen II [2008]? The instructions, short of telling me which parts go on which side, are otherwise, essentially useless. Thank you in advance.
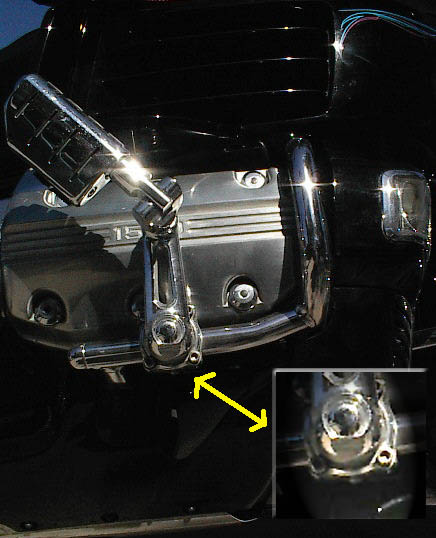
For anybody who is scratching their heads, at the following link, the first picture in the thread, shows the bracket mounted behind the fairing/cowling. Everybody says removal of the fairing/cowling is not necessary. No wrench will fit back there to remove the current bolt. Then, I will be inserting a spacer, a bracket and, at least to start, a 2+inch long bolt with allen wrench (2 1/2 to 3 inches clearance needed). Really? No removal required? Thanks in advance. First picture in this link shows my problem area (well problem area covered up with bolt and hole behind plastic.
https://https://www.fjrforum.com/forum/index.php?showtopic=125205
Maybe my hunch is correct and those who have told me otherwise are wrong and the plastic does need removed. It sure looks that way. If so, please guide me on the minimum removal necessary to get there. I have a service manual on order that will hopefully provide some "service for dummies" type of explanation. Thank you in advance.