Installed Race Tech 0.95 springs on my previous '06. You're right, the instructions [or lack thereof] from RT is pretty pathetic.
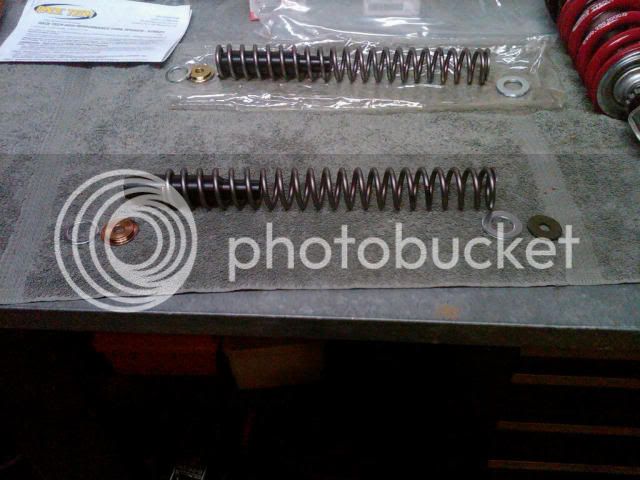
The stack up shown in the pic below is correct EXCEPT the bronze machined guide goes on top, into the
larger ID of the spring. From the bottom, thin washer [fits on top of dampener assembly], spring [small end down], bronze guide, OEM washer and lastly cut to length spacer. The package included several large washers that are meant for preload adjustment. I didn't use any.
Hope this helps!
--G
Just went through this today on BigOgre's bike (an '04 1st gen). He had a Yamaha shop install Race Tech Springs (1.0kg/mm) when they were also replacing the oil seals. After they did the work he immediately began to notice clicking metallic noises when the forks were even slightly compressed, worse when on the real roads, that appeared to be coming from the forks. At CFR a couple of us listened to them and agreed the sound seemed to be coming from inside the fork legs. We made plans then to dig into them later.
Today we (finally) had a chance to pull off the fork legs and found most of the parts seen in the above quoted post. He had no washers underneath the springs, but had the funny torpedo shaped black delrin spacer thingee on the damper shaft with the spring over it. The bronze stepped washer was on the top of the spring with a steel washer over that.
One problem that we immediately found was that the shop had installed the stock length top spacers back into the forks which put about 50mm of preload on the new Race Tech springs. This was made apparent when the lock nut shot across my garage when we released the tension.
I'm pretty sure that what making the noise was that the black delrin torpedo spacers, which are free to slide up and down the damper shaft, probably worked their way up the shaft and then the spring was allowed to work off to one side on the bottom, where it sits on top of the (flat) cartridge top. Once the spring is off center the black spacer would no longer be able to drop down anymore (as far) to help in maintaining the spring centering. Seems like a bad design to me.
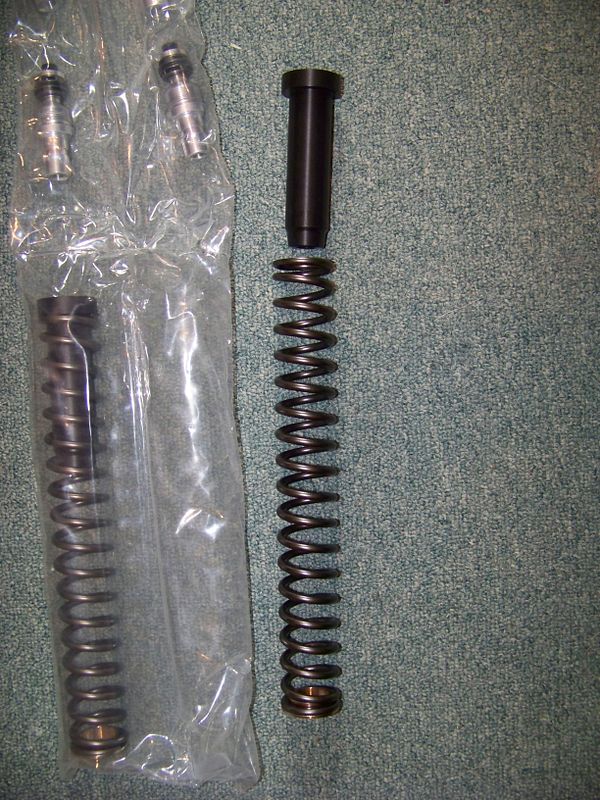
To fix the problem we decided to put the brass lipped washer on the bottom of the spring, to hold the spring centered and also protect the top of the cartridge. Then we installed the springs with a pair of GP Suspension spring buffers (I had on hand waiting to go into my own forks) on the top of the springs to perform the same centering duties up there. They look like this:
It's the black thingee in the picture above.
By installing these spring buffers it holds the spring concentrically centered on the damper shaft, so the spring cannot work its way off center and rub on the inside of the fork legs. But, also being captured at the top of the spring stack, it means that the damper shaft does not ride up and down inside of that soft spacer and potentially wear it.
The above damper adds 10mm to the spring stack-up dimension, so you do need to account for that when you measure and cut your top spacers. Before the change, using only the Race Tech supplied parts, we had a 99mm space between the installed spring stack-up and the lock-nut underneath the fork cap (with the cap installed and the nut locked up). After installing the GP buffers that space decreased to ~ 89 mm. We ended up cutting those spacers a lot.
Some new fork oil and these components re-installed, we made some sag measurements on the bike and got ~25mm of static sag (just the bike weight) and 35mm of dynamic sag (rider weight on the bike). My experience says that this will still be on the sporty/stiff side of the suspension compromise. These are the sags that I have been running on my bike for the past several years and I might want to go a bit softer sprung for dealing with real world roads. But it's bound to be shit ton better than the way that they were installed previously.
I wish we had done sag measurement before, but I'm guessing we had zero static sag and just a little dynamic sag with all of that preload. I'll wait to hear from Mike (BigOgre) on what the results were, but I'm guessing he will be very pleased.


")