


MajBach
Well-known member
I thought I would take this opportunity while doing some extensive maintenance on my bike to post some pics of my very own farkle. I've benefited on countless occasions from others taking the time to upload their mods, it's only fair I do the same; as seemingly trivial in comparison.
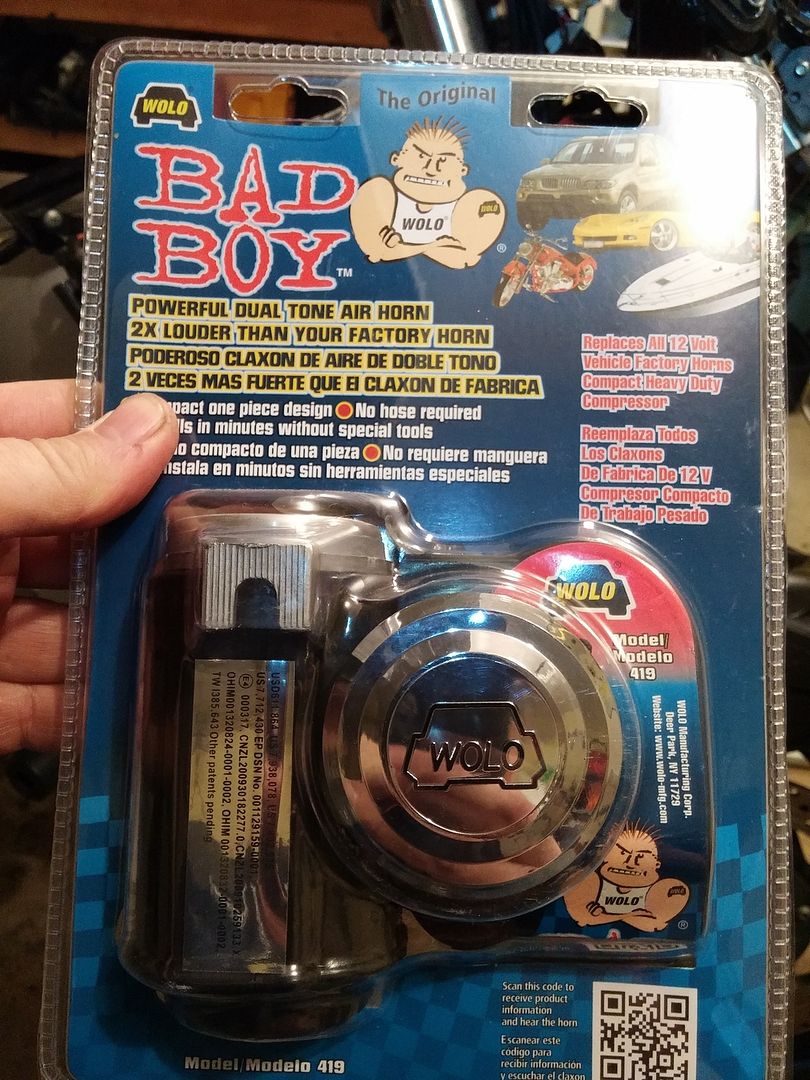
Like many of you, I have never been satisfied with the stock horn, and, seeing as I live in a forest rat infested area, I shopped around and purchased an aftermarket horn. This one came from Horrible Freight and was around $30. It comes with a bolt and a relay but no wires. It will work without the relay but it does draw significant current so I would recommend using the relay. Despite being a relatively cheap, my first one lasted three years before it started to lose it's umphh. And trust me, it has ummph. In a closed garage, the volume of this horn would hurt the ears. It's easily the best attention-getter for the price. I'm happy to pay $10/year for one - assuming that that is it's life span. On the other hand, I use mine A LOT!
In my pics, I have all of the plastic off on the bike but you can do this install without removing any plastic save the panel on top of the battery.
It took me some time to figure out how to wire the horn as well. As memory serves, there are four leads running to the stock horn(s). I taped off one pair and used the other pair to run to the relay. I also ran a grounding wire from the -ve terminal of the horn to one of the bolts on the rad.
By the way, despite using a compressor, it IS instantaneous. No delay whatsoever.
First thing you'll need is a couple of feet of some thin flatbar. I used this from a local autoparts store. Has to be thin enough to bend easily in a vice.
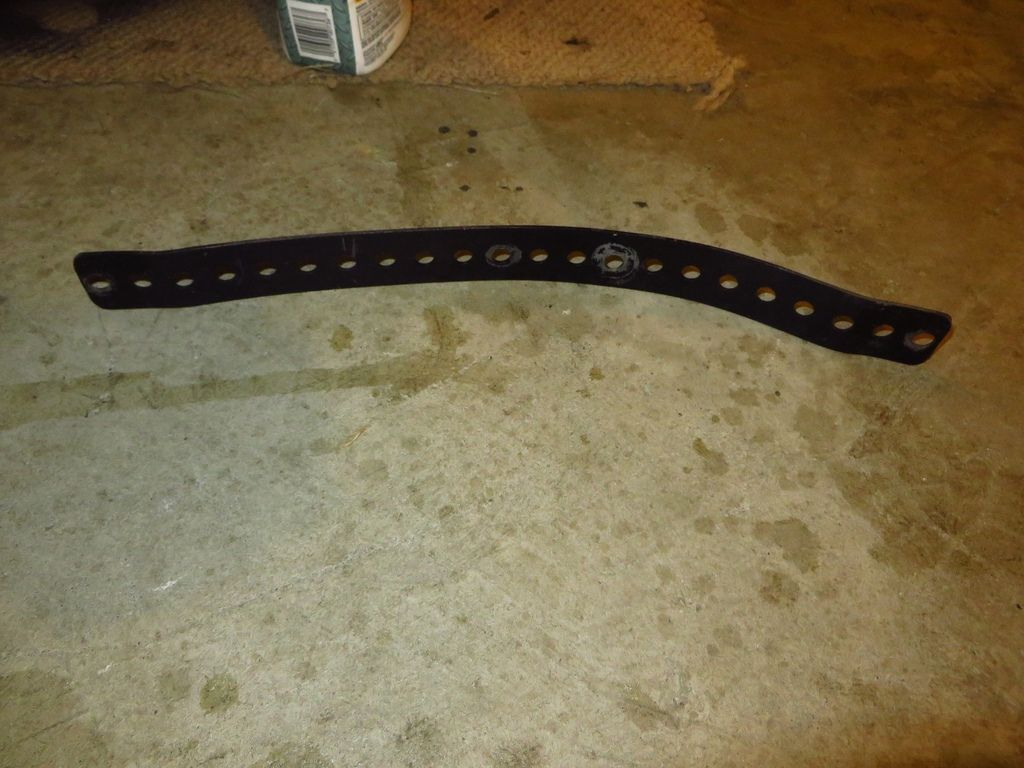
Then, I bent the bar to approximately the curvature of the radiator, bending the outer inch or so back the other direction for a flat mounting surface.

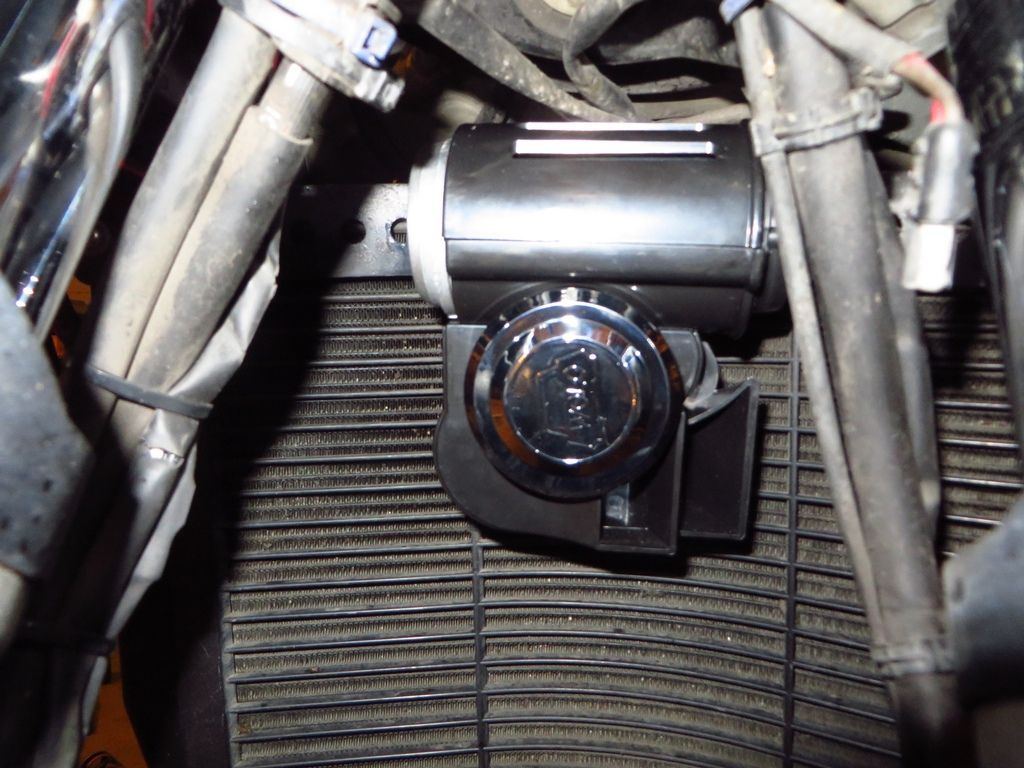
Its easy enough to bolt on the horn to the flatbar using the bolt provided but you need to offset it from center. The forks do swing freely from side-to-side with no contact to the horn, even when fully compressed.
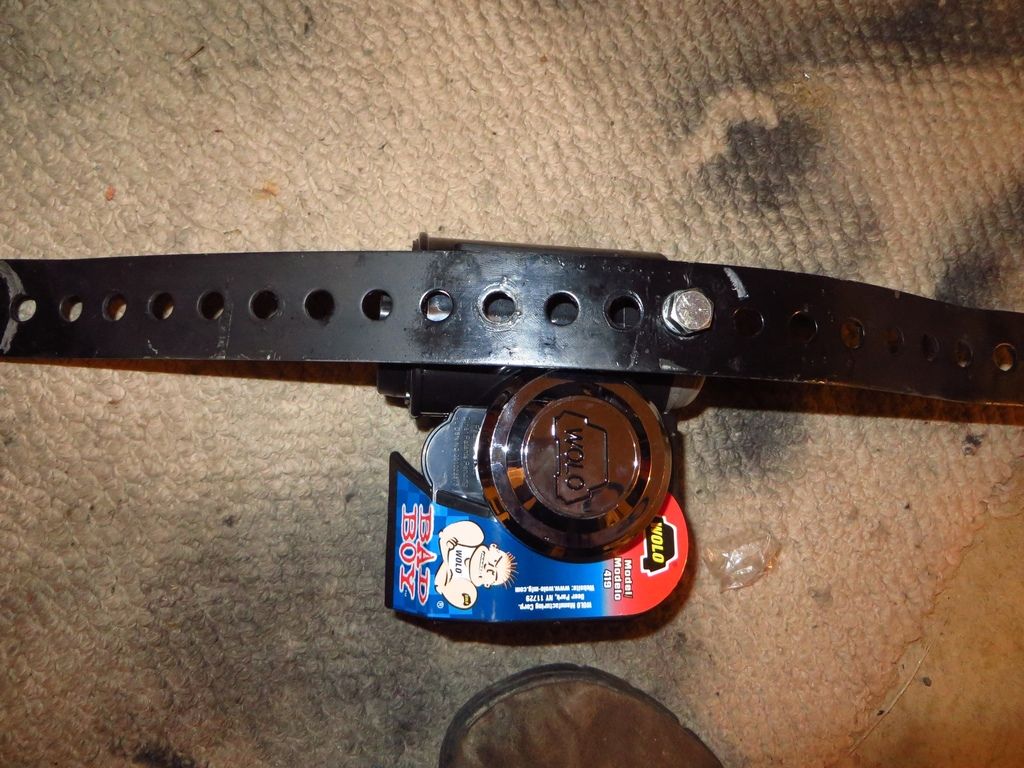
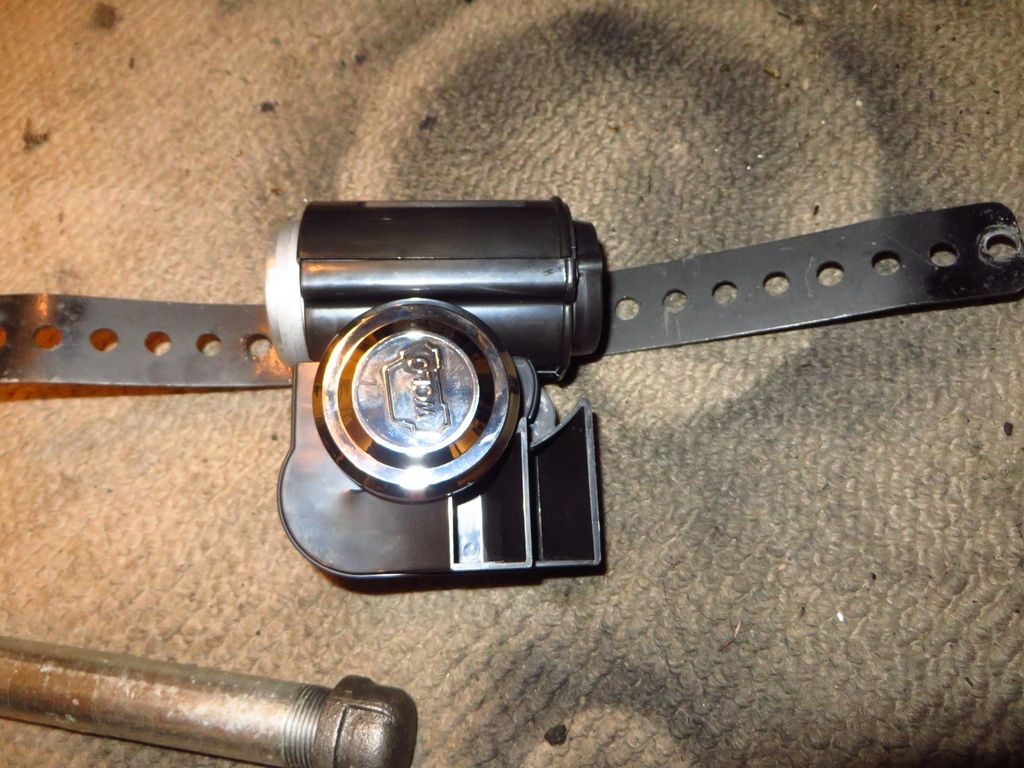
Mount the flatbar to the two bolts that hold the upper part of the radiator (as seen in the second pic). From there, it's a simple matter of running the wires to the horn. I did run into some frustration on my first install as when I turned the forks at slow speed to the extent of their movement, I often dislodged one of the wires. Make sure you run enough wire from the relay so that the forks don't interfere with them. I also found using a zip tie on the horn itself secures the wires.
Despite it's position as shown here, I have not noticed an increase in engine temps. It doesn't seem to block too much of the rad nor does it seem to suffer from exposure to water.
Somewhere on this forum I did see a video of someone who had installed this horn on a different bike and recorded the sound it made versus stock from three different distances. It was quite informative. I'll try and find the link and post it.
Like many of you, I have never been satisfied with the stock horn, and, seeing as I live in a forest rat infested area, I shopped around and purchased an aftermarket horn. This one came from Horrible Freight and was around $30. It comes with a bolt and a relay but no wires. It will work without the relay but it does draw significant current so I would recommend using the relay. Despite being a relatively cheap, my first one lasted three years before it started to lose it's umphh. And trust me, it has ummph. In a closed garage, the volume of this horn would hurt the ears. It's easily the best attention-getter for the price. I'm happy to pay $10/year for one - assuming that that is it's life span. On the other hand, I use mine A LOT!
In my pics, I have all of the plastic off on the bike but you can do this install without removing any plastic save the panel on top of the battery.
It took me some time to figure out how to wire the horn as well. As memory serves, there are four leads running to the stock horn(s). I taped off one pair and used the other pair to run to the relay. I also ran a grounding wire from the -ve terminal of the horn to one of the bolts on the rad.
By the way, despite using a compressor, it IS instantaneous. No delay whatsoever.
First thing you'll need is a couple of feet of some thin flatbar. I used this from a local autoparts store. Has to be thin enough to bend easily in a vice.
Then, I bent the bar to approximately the curvature of the radiator, bending the outer inch or so back the other direction for a flat mounting surface.
Its easy enough to bolt on the horn to the flatbar using the bolt provided but you need to offset it from center. The forks do swing freely from side-to-side with no contact to the horn, even when fully compressed.
Mount the flatbar to the two bolts that hold the upper part of the radiator (as seen in the second pic). From there, it's a simple matter of running the wires to the horn. I did run into some frustration on my first install as when I turned the forks at slow speed to the extent of their movement, I often dislodged one of the wires. Make sure you run enough wire from the relay so that the forks don't interfere with them. I also found using a zip tie on the horn itself secures the wires.
Despite it's position as shown here, I have not noticed an increase in engine temps. It doesn't seem to block too much of the rad nor does it seem to suffer from exposure to water.
Somewhere on this forum I did see a video of someone who had installed this horn on a different bike and recorded the sound it made versus stock from three different distances. It was quite informative. I'll try and find the link and post it.
Last edited by a moderator:
") Oh yea, you still have the option of replacing the stock horns with a set of PIAA slimline horns like I did and then you'll really make a lot of noise when all 3 horns honk together. :crazy:
Oh yea, you still have the option of replacing the stock horns with a set of PIAA slimline horns like I did and then you'll really make a lot of noise when all 3 horns honk together. :crazy: 
