


UselessPickles
Making Grand Canyon replicas from air boxes...
WARNING! Read this post: https://www.fjrforum.com/forum//index.php?showtopic=120044
While waiting for my Holeshot header to get ceramic coated, I decided I might as well go all in with the performance mods and open up my airbox to minimize restrictions on the engine's air intake. Wicked Webby already proved that enlarging the opening into the airbox can result in significant performance increases (especially in the mid-range) when matched with aftermarket slip-ons and fueling adjustments (click here for details). I've provided lots of details and photos here of my modification in hopes that it will give others that are interested in this mod the courage to go through with it.
First of all, I HIGHLY recommend removing the airbox from the bike before working on it (Step 6). It makes life so much easier, especially when it comes to cleaning out all the plastic shavings from trimming the airbox. Removal of the airbox is actually required to use the air filter mounting hardware that I chose, which allows removal of both air filters from one side of the bike for cleaning. If you want to go with simple nuts and bolts installation, you can manage to do everything with the airbox on the bike, but I think it's worth the extra time to remove it. Now let's begin...
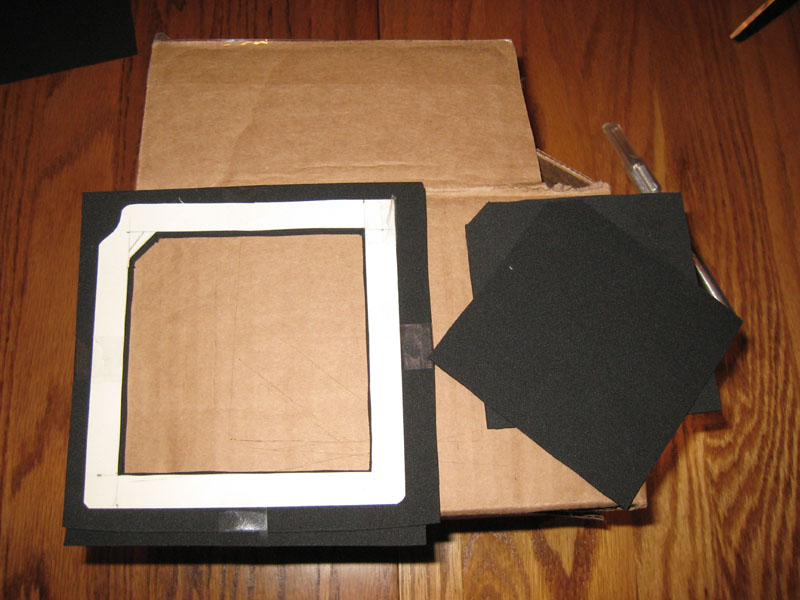
Step 1: Create templates for your custom air filters and mounting brackets.
Note: Removal of the airbox is not yet necessary; just need to remove the air filter cover. I'll tell you when it's time to remove the airbox.
Use the stock air filter cover to create a template for the left-side air filter and mounting bracket. I accomplished this by rubbing a pencil all over the edges of the air filter cover, then pressing/rubbing a thick piece of paper (card stock) against the air filter cover. This will give you outlines of the outer and inner edge of the airbox; cut along those lines. I had to cut a large oval hole in the paper to allow it to sit flat around the funnel.
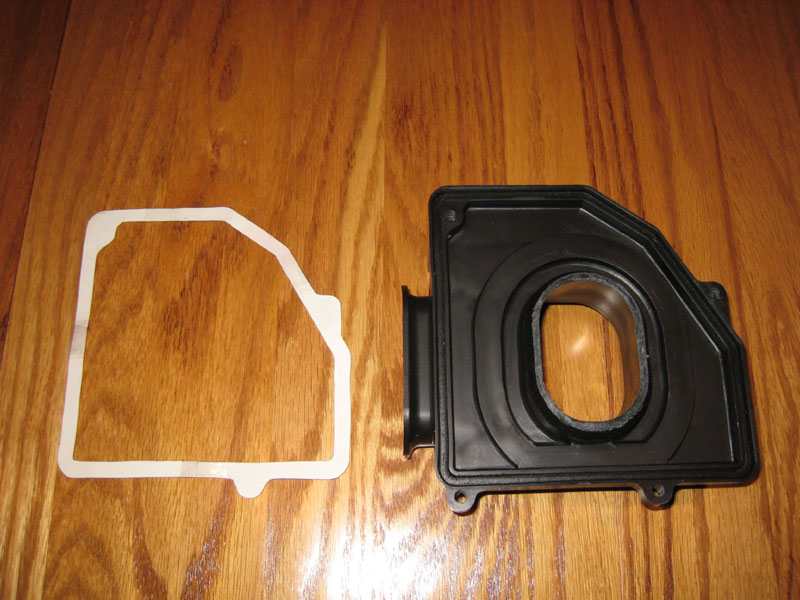
The template for the right-side air filter needs to fit inside the left-side template (because it needs to fit inside the airbox), but can be square to maximize the opening and simplify fabrication of the filter and mounting bracket. I made the frame about 1/2 inch thick.
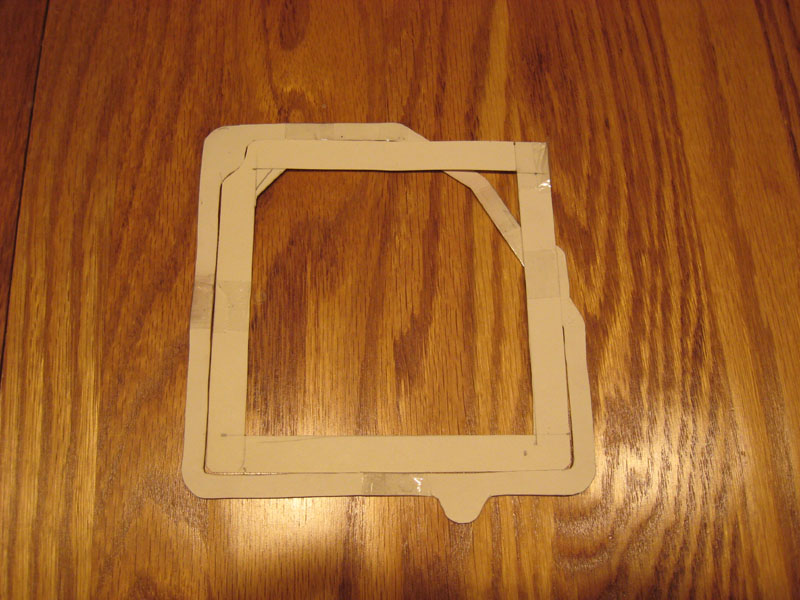
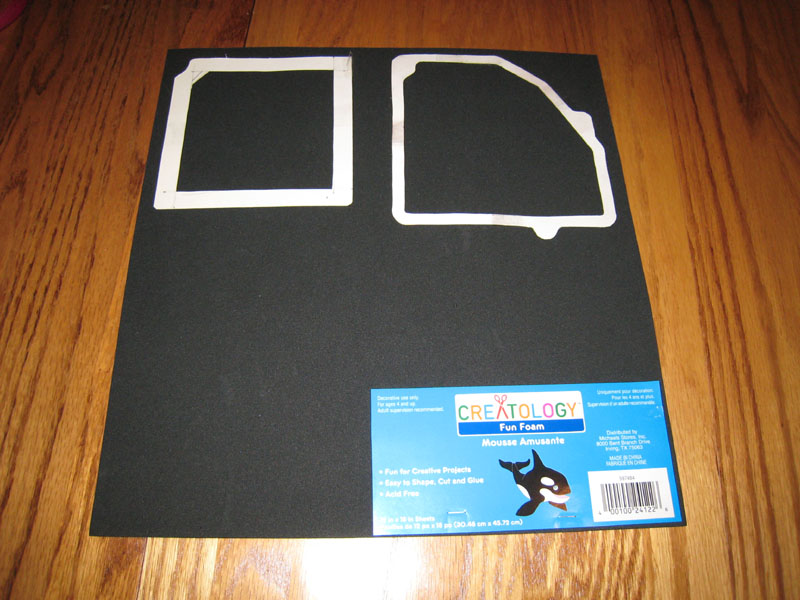
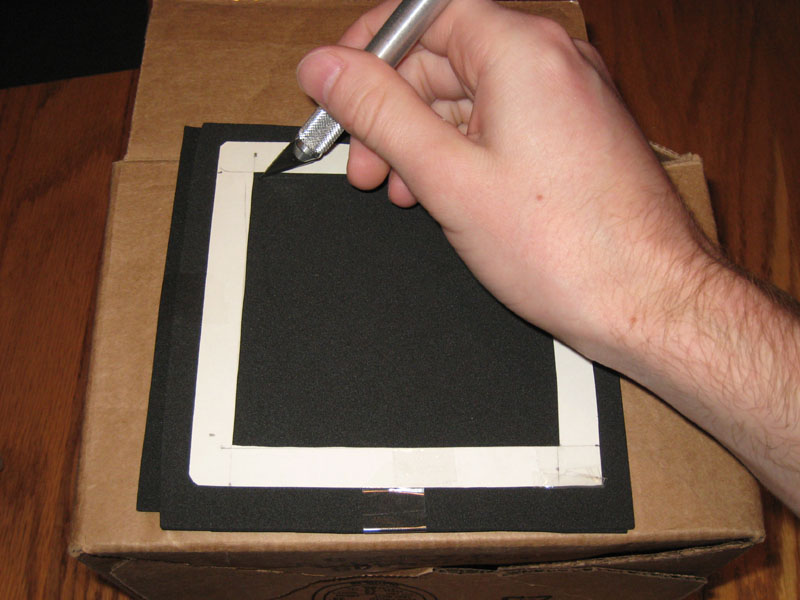
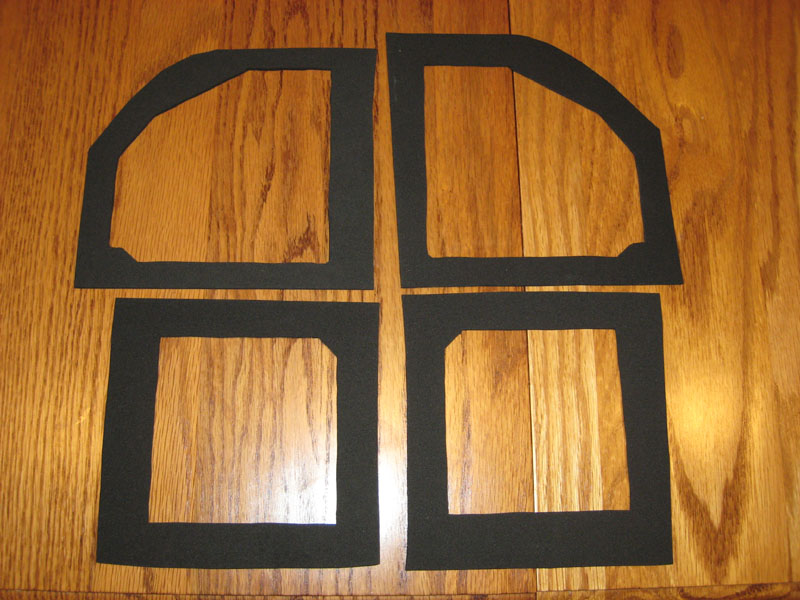
Step 2: Create frames for the air filter material.
I found this nice thin rubber foam stuff at a craft store. It seems to squish nicely and create a good seal. Start by roughly cutting the outer shape of the templates out of the foam. Leave some excess foam around the edges - this will be trimmed as a final step to make sure all the edges are even. You'll need 2 pieces of foam for each filter.

For each air filter, stack the pair of foam pieces on top of each other and trim out the center. I left a small amount of excess foam on the inside edge of the templates.
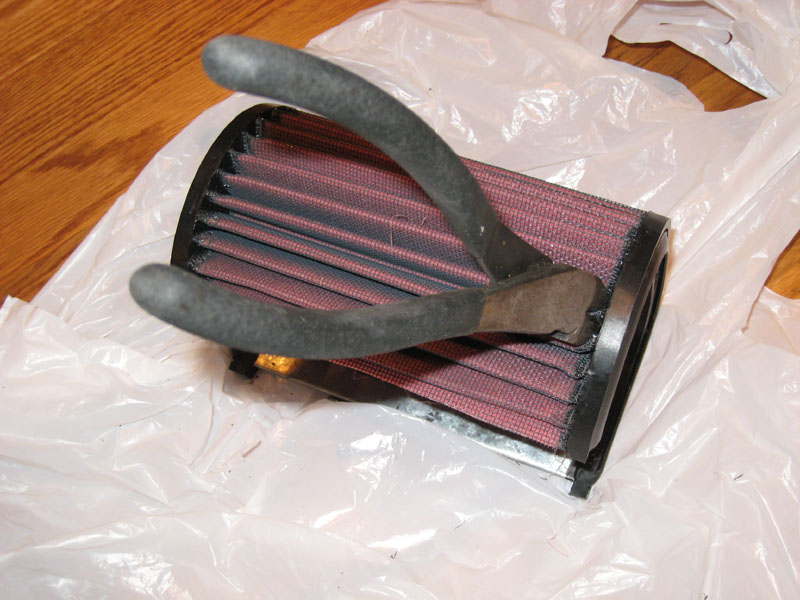
Step 3: Obtain cleanable air filter material.
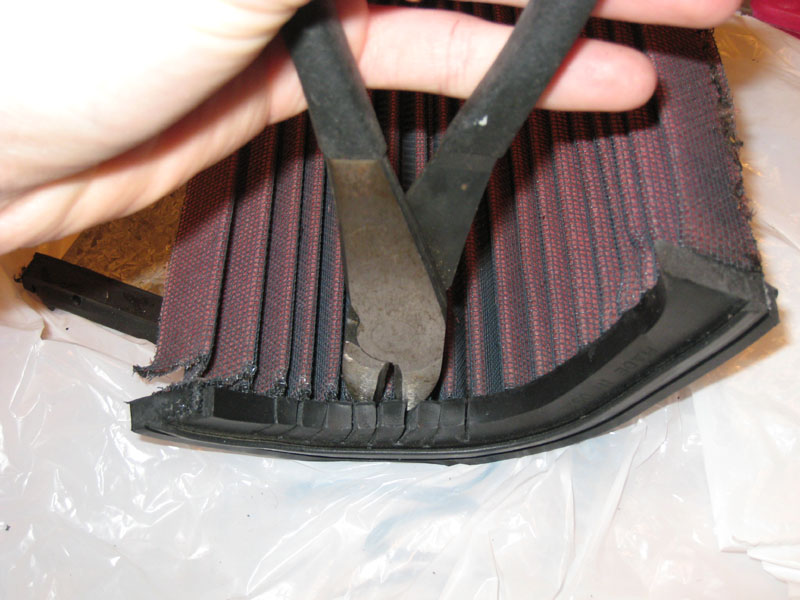
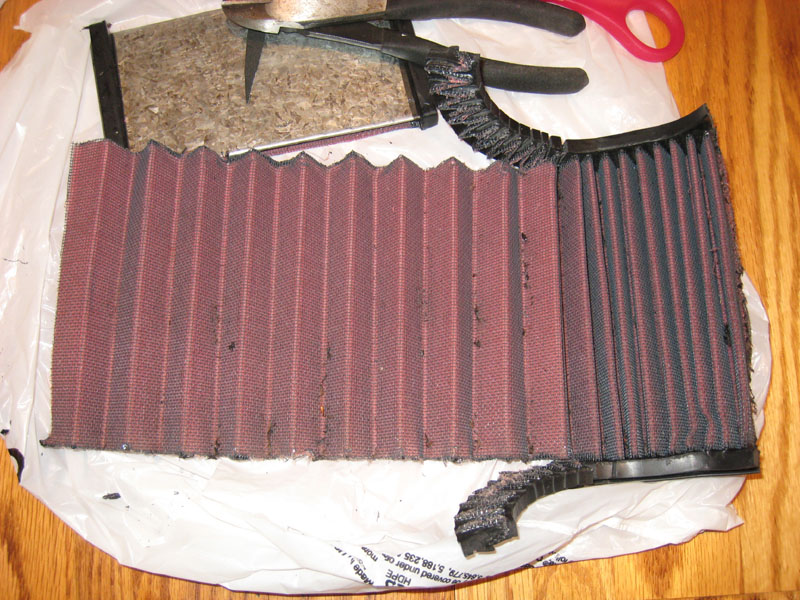
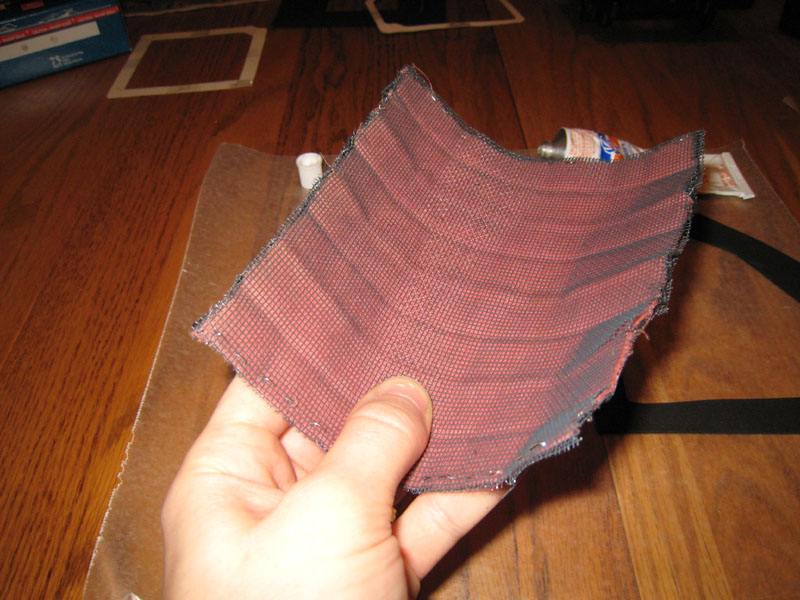
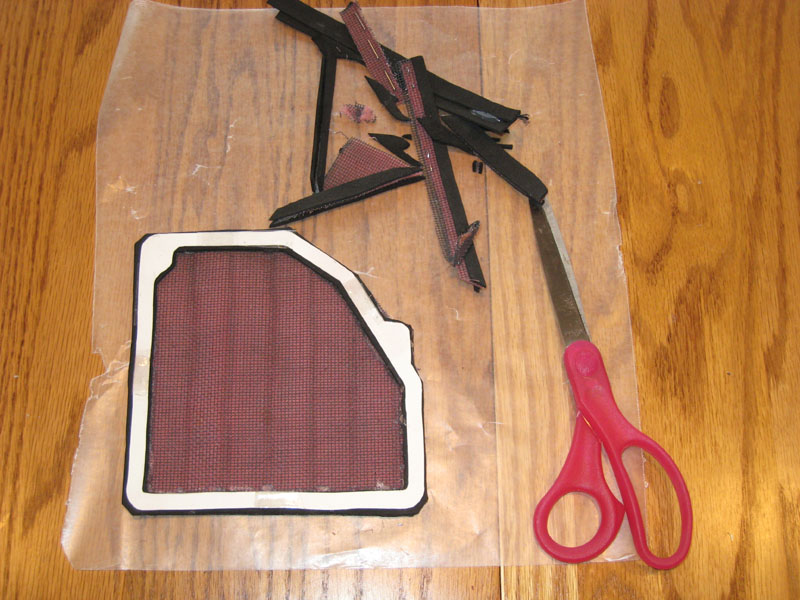
I already had a K&N air filter for my FJR. It has plenty of material to make 2 sets of custom air filters with room to spare... at least in length. The width is just about exactly the right size for the left-side filter, so you need to be careful to not waste material when removing it from the air filter housing. I used a combination of wire cutters and scissors to excavate the material.
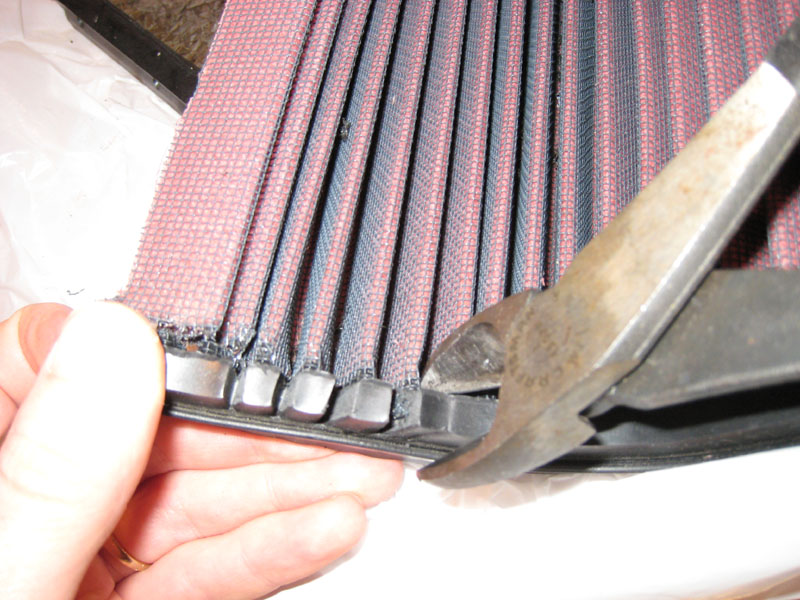
Snip the pleats from one side:
Snipping the rubber edging makes it more flexible and easier to work with:
Snip the pleats from the other side:
Ta-da!
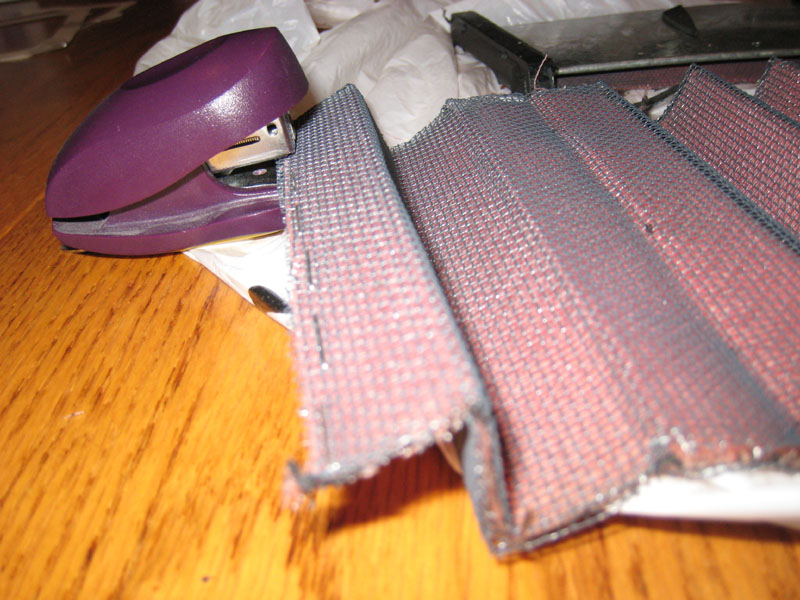
I stapled the edge to keep the layers from separating while I worked with the filter material:
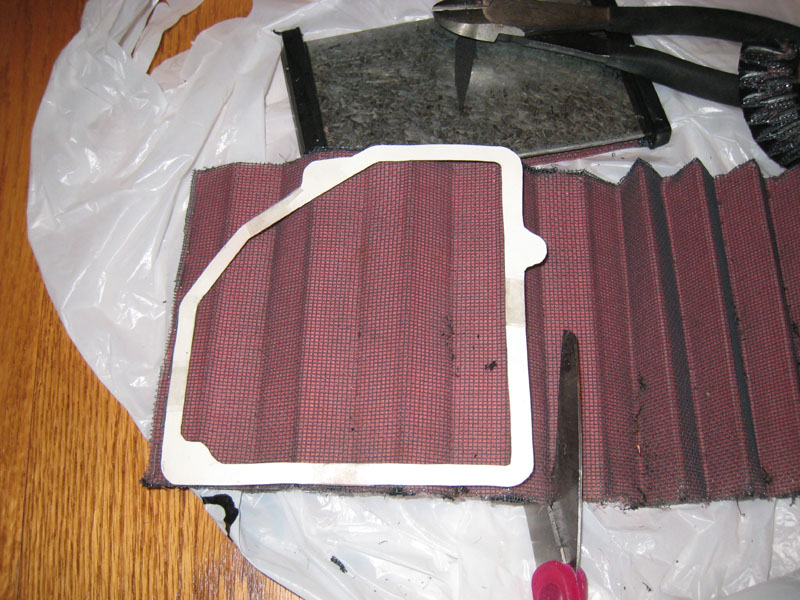
Then cut the material to size based on my templates (leave some excess!):
Curling the filter material perpendicular to the pleats helps to flatten it:
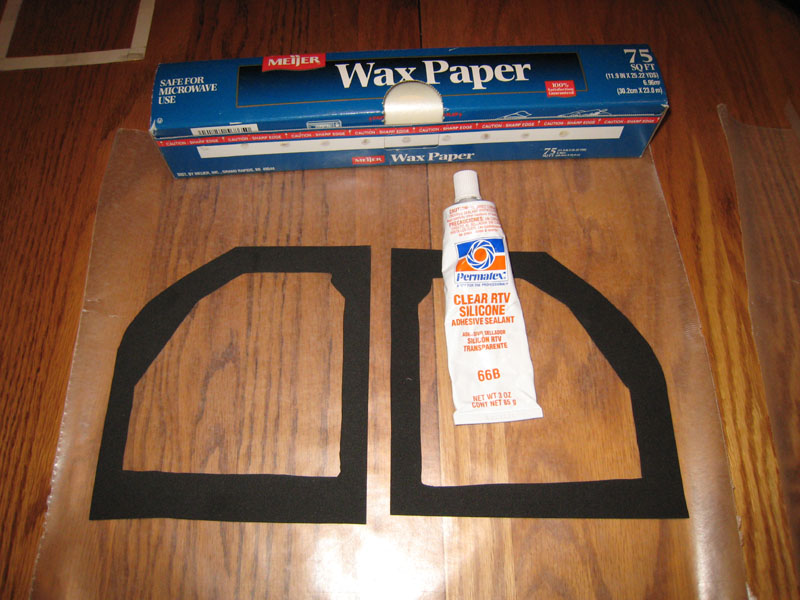
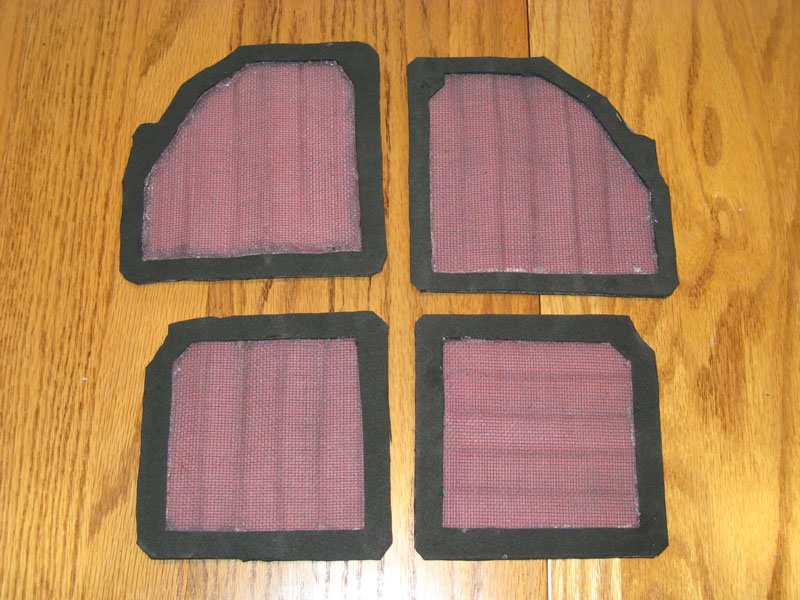
Step 4: Assemble your custom air filters.
I used some silicone adhesive to glue the frames to the filter material. This seems to provice a nice strong bond that is also flexible and a good seal. Get some wax paper ready to avoid a sticky mess.
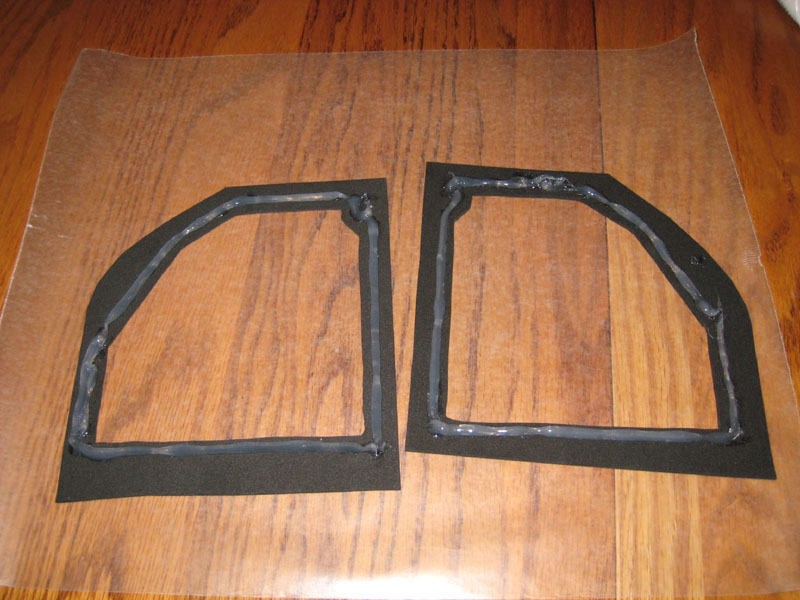
Apply a bead of silicone around the entire frame. Don't apply it too close to the inside edge, or else you'll get lots of excess glue squishing out on the filter material where you want air to flow.
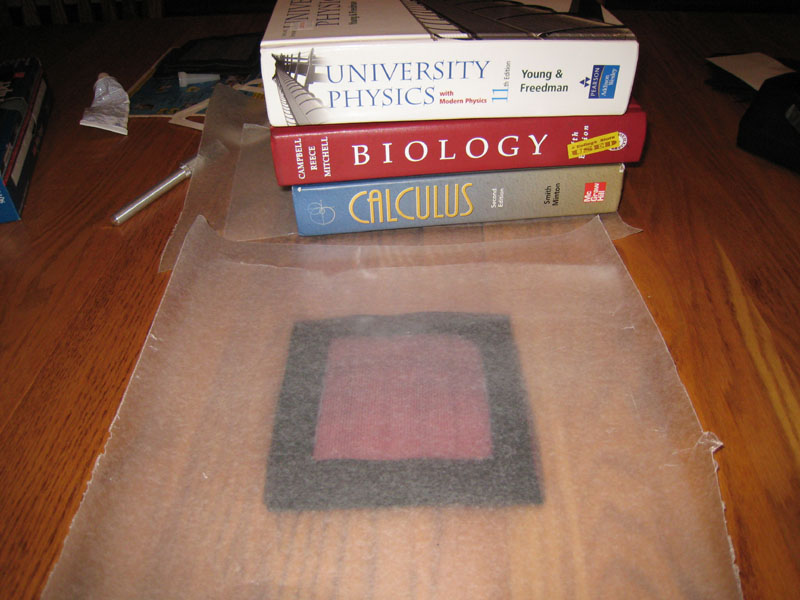
Sandwich the filter material between the 2 frame pieces. Be sure to align the inner edges of the 2 frame pieces together. Press the sandwiched air filters with those college books that have been collecting dust. you should immediately check that everything stayed aligned and wipe off excess glue, then put the books back on it overnight to dry (with a sheet of wax paper on each side of the filter).
After the glue has dried (I gave mine about 24 hours), trim the air filters to match your templates:
I made 2 sets of filters. When it's time to clean the air filters, I'll always have a clean set to install immediately so I can ride while the other set is drying. Keep in mind that these filters may become dirty more quickly than the stock filter because of reduced total filter surface area. I plan to check mine at every oil change.
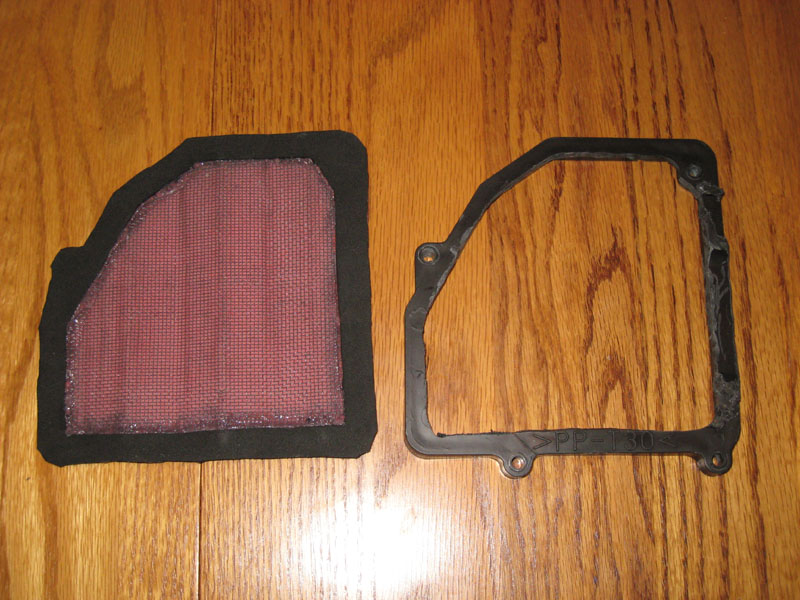
Step 5: Create mounting brackets for the filters.
The left-side bracket is easy. Just trim the stock air filter cover (did I mention that you'll really want to have a Dremel handy for this project?):
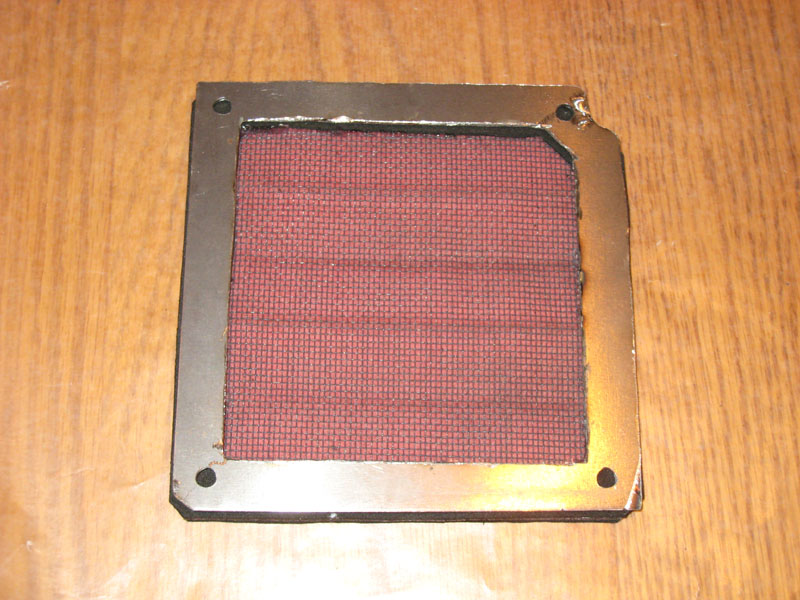
The right-side bracket needs to be fabricated. Wicked Webby used a sheet of plexiglass. My plexiglass must have been more brittle than his, because it shattered when I tried to drill screw holes through it. I ended up using a small sheet of 16 gauge steel that I found at a hardware store for $6. I also used up 3 reinforced cutting wheels for my Dremel to cut it out.
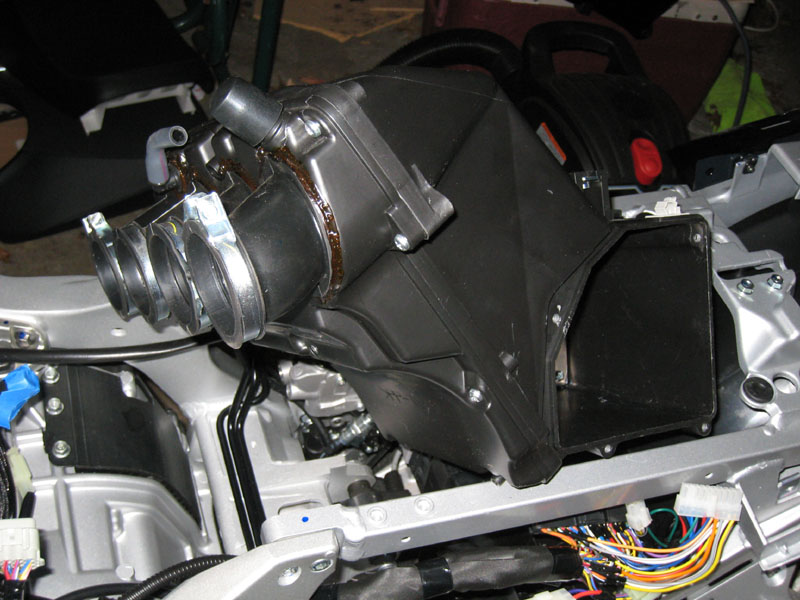
Step 6: Remove the airbox.
This requires the removal of the gas tank, fuel rail and tool tray. I took some photos while re-installing everything, so I may be able to post separate threads with step-by-step instructions for removing all this junk.
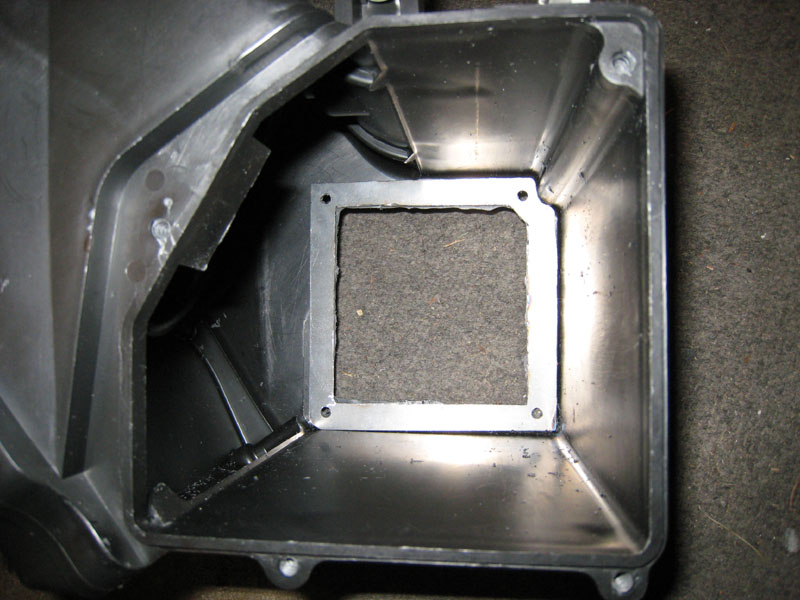
Step 7: Trim airbox and install mounting hardware.
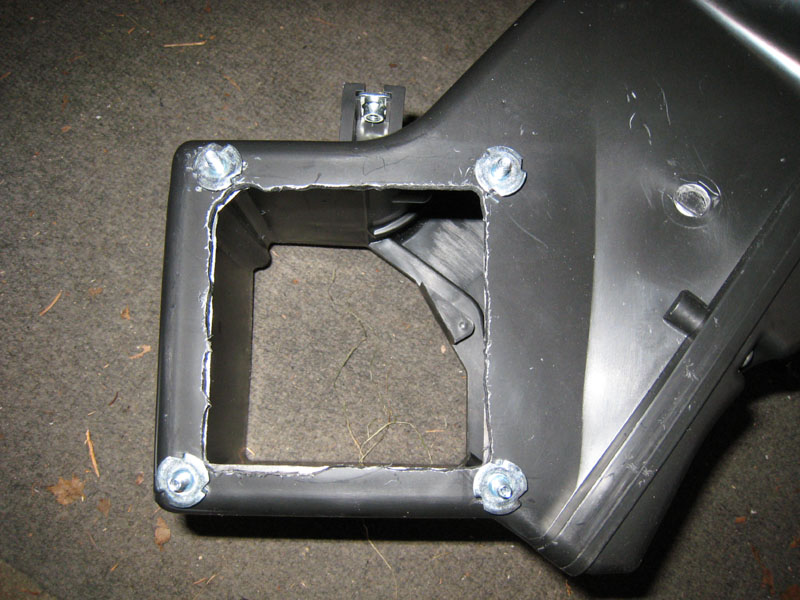
Place the right-hand filter mounting bracket inside the airbox to mark and drill mounting bolt holes and to cut a hole matching the inside edge of the bracket. I suggest cutting the hole a bit too small for now, then trimming it after you can actually mount the bracket in its final position.
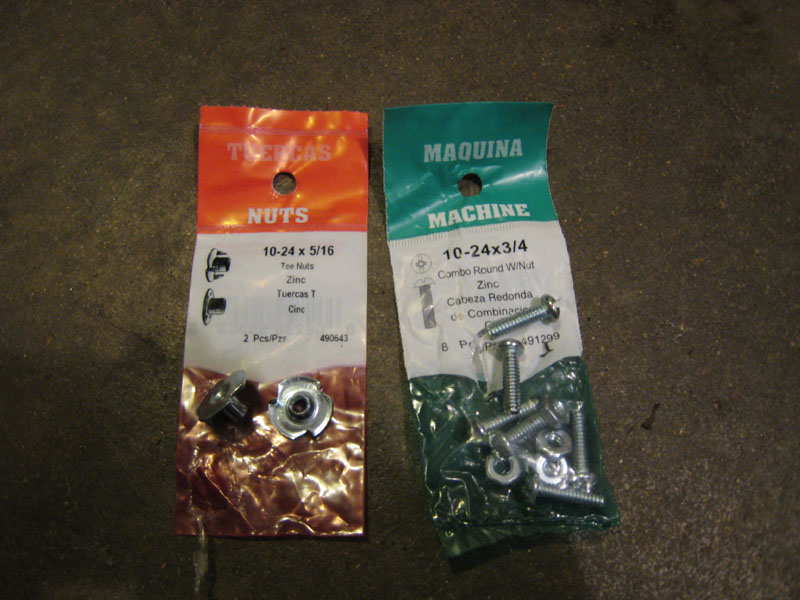
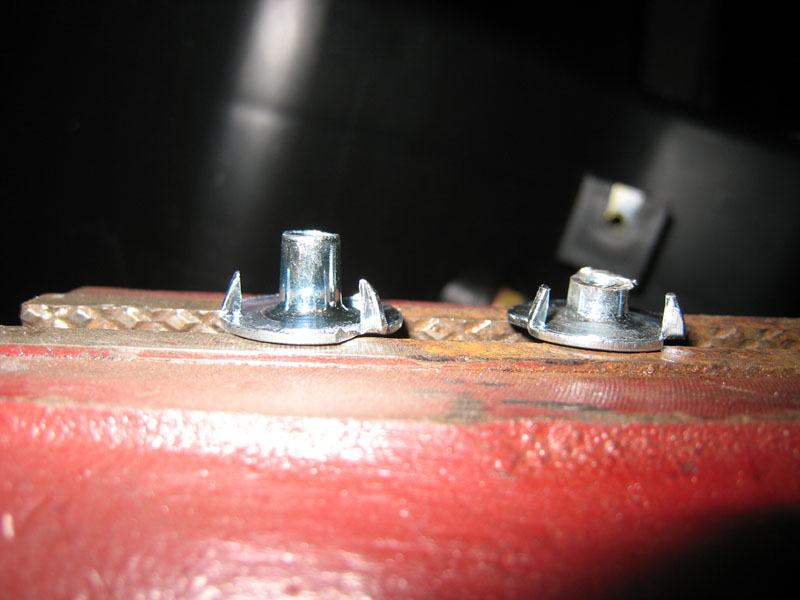
I found these nifty nut/washer/spiky things. I think they're meant to be hammered into wood to provide a threaded hole:
The shafts of these nut things are a bit too long. I trimmed them with a Dremel cut-off wheel so they matched the thickness of the airbox wall.
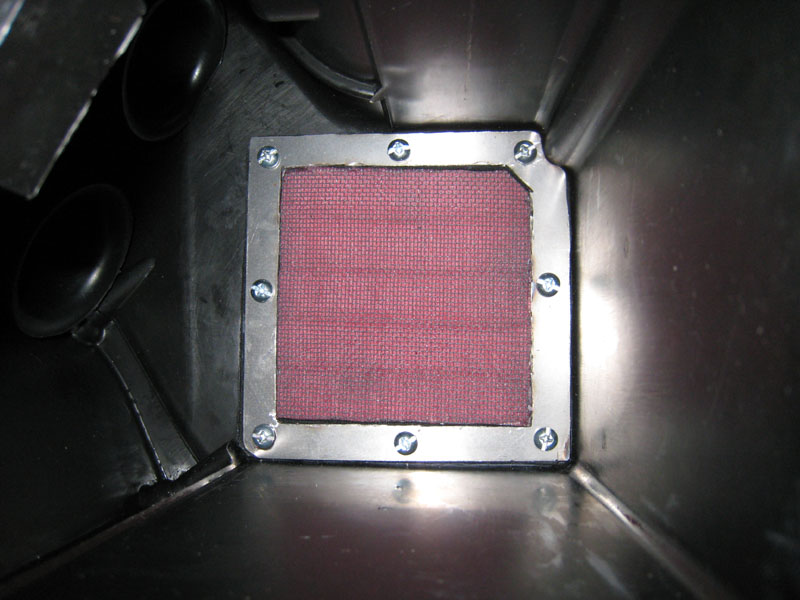
Those nut things didn't like being hammered into the plastic airbox. I placed them in the holes, tested that they lined up with the holes in the bracket, then hammered them a bit just to mark where the spikes wanted to go. then I drilled 1/16 inch holes for each spike, gobbed some silicone adhesive around the holes, and hammered the nuts in place. The spikes will hold the nut in place while you tighten the bolts and the silicone adhesive will prevent you from pushing the nuts out of the back of the airbox (it also seals up those little holes for the spikes). Now the right-side filter can be easily removed and mounted from the left side of the bike with only a screwdriver.
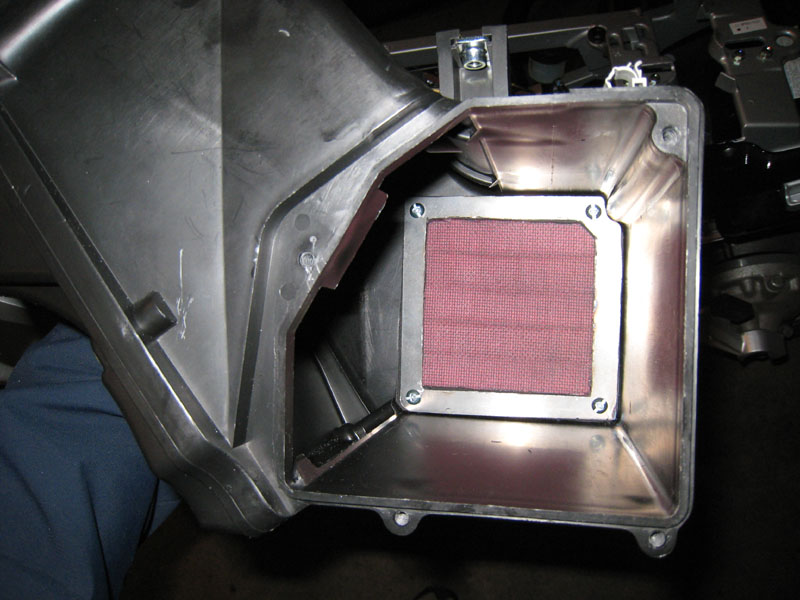
Step 8: Re-install the airbox and install the custom air filters.
Be sure to perform any final trimmings of the airbox then thoroughly clean it (hose it out, wipe it out and dry it) to make sure you don't get any plastick shavings in your engine.
The bolts I got for the right-side filter were way too long. i think 1/2 inch bolts should work. I saved myself the money and a trip to the store by just shortening the bolts I already had (Dremel saves the day again!).
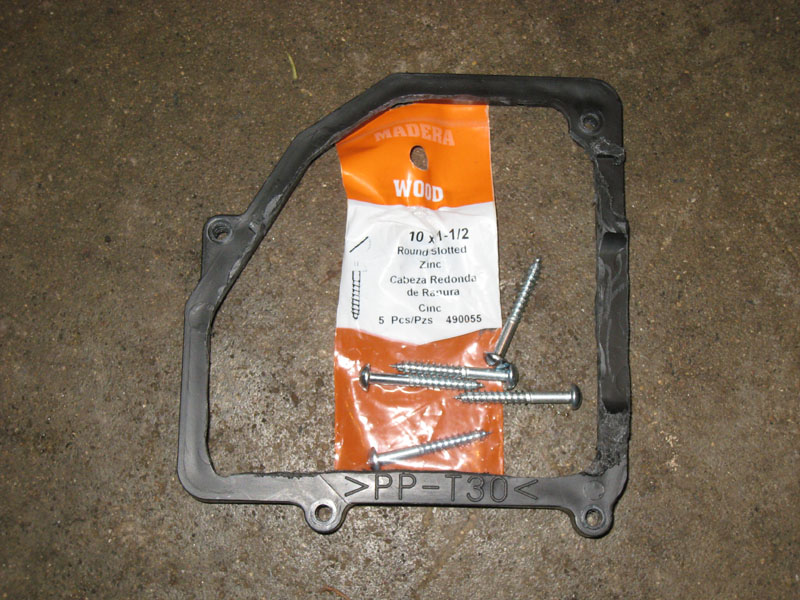
For the left-side filter, the stock screws were a bit too short due to the thickness of the custom air filter's frame. These wood screws worked well:
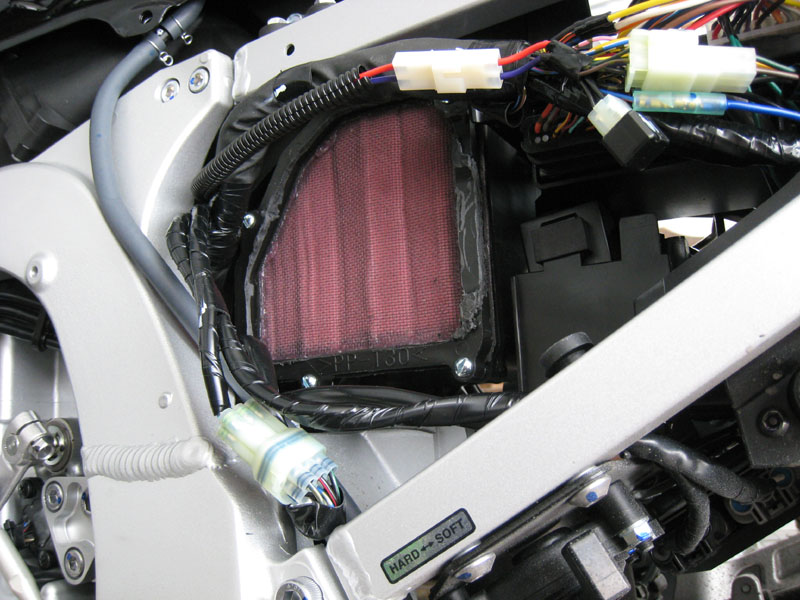
When mounting the left-side filter, you may find it easier if you remove the bolts/screw holding the front of the tool tray down. The left-front bracket of the tool tray overlaps the top-right edge of the airbox a bit. Lift it up and the air filter and bracket will go on easily. It'll be a bit tight, but the front brackets of the tool tray will go back into place with the custom air filter installed.
===========
UPDATE
===========
Per Wicked Webby's recommendation, I added 4 more screws to the right-side filter to prevent leakage past the seal:
I also discovered that the silicone adhesive doesn't hold those nuts in place too strongly. I popped one off the air box while applying pressure and trying to get a screw started. I tried epoxy now, but am having doubts about it. I think the final solution will be some good duct tape framing the hole on the right side of the air box. The nuts only need to be held in place enough so that they won't pop out. The spikes driven into the plastic will take care of holding them from rotating as you tighten the screws.
While waiting for my Holeshot header to get ceramic coated, I decided I might as well go all in with the performance mods and open up my airbox to minimize restrictions on the engine's air intake. Wicked Webby already proved that enlarging the opening into the airbox can result in significant performance increases (especially in the mid-range) when matched with aftermarket slip-ons and fueling adjustments (click here for details). I've provided lots of details and photos here of my modification in hopes that it will give others that are interested in this mod the courage to go through with it.
First of all, I HIGHLY recommend removing the airbox from the bike before working on it (Step 6). It makes life so much easier, especially when it comes to cleaning out all the plastic shavings from trimming the airbox. Removal of the airbox is actually required to use the air filter mounting hardware that I chose, which allows removal of both air filters from one side of the bike for cleaning. If you want to go with simple nuts and bolts installation, you can manage to do everything with the airbox on the bike, but I think it's worth the extra time to remove it. Now let's begin...
Step 1: Create templates for your custom air filters and mounting brackets.
Note: Removal of the airbox is not yet necessary; just need to remove the air filter cover. I'll tell you when it's time to remove the airbox.
Use the stock air filter cover to create a template for the left-side air filter and mounting bracket. I accomplished this by rubbing a pencil all over the edges of the air filter cover, then pressing/rubbing a thick piece of paper (card stock) against the air filter cover. This will give you outlines of the outer and inner edge of the airbox; cut along those lines. I had to cut a large oval hole in the paper to allow it to sit flat around the funnel.
The template for the right-side air filter needs to fit inside the left-side template (because it needs to fit inside the airbox), but can be square to maximize the opening and simplify fabrication of the filter and mounting bracket. I made the frame about 1/2 inch thick.
Step 2: Create frames for the air filter material.
I found this nice thin rubber foam stuff at a craft store. It seems to squish nicely and create a good seal. Start by roughly cutting the outer shape of the templates out of the foam. Leave some excess foam around the edges - this will be trimmed as a final step to make sure all the edges are even. You'll need 2 pieces of foam for each filter.
For each air filter, stack the pair of foam pieces on top of each other and trim out the center. I left a small amount of excess foam on the inside edge of the templates.
Step 3: Obtain cleanable air filter material.
I already had a K&N air filter for my FJR. It has plenty of material to make 2 sets of custom air filters with room to spare... at least in length. The width is just about exactly the right size for the left-side filter, so you need to be careful to not waste material when removing it from the air filter housing. I used a combination of wire cutters and scissors to excavate the material.
Snip the pleats from one side:
Snipping the rubber edging makes it more flexible and easier to work with:
Snip the pleats from the other side:
Ta-da!
I stapled the edge to keep the layers from separating while I worked with the filter material:
Then cut the material to size based on my templates (leave some excess!):
Curling the filter material perpendicular to the pleats helps to flatten it:
Step 4: Assemble your custom air filters.
I used some silicone adhesive to glue the frames to the filter material. This seems to provice a nice strong bond that is also flexible and a good seal. Get some wax paper ready to avoid a sticky mess.
Apply a bead of silicone around the entire frame. Don't apply it too close to the inside edge, or else you'll get lots of excess glue squishing out on the filter material where you want air to flow.
Sandwich the filter material between the 2 frame pieces. Be sure to align the inner edges of the 2 frame pieces together. Press the sandwiched air filters with those college books that have been collecting dust. you should immediately check that everything stayed aligned and wipe off excess glue, then put the books back on it overnight to dry (with a sheet of wax paper on each side of the filter).
After the glue has dried (I gave mine about 24 hours), trim the air filters to match your templates:
I made 2 sets of filters. When it's time to clean the air filters, I'll always have a clean set to install immediately so I can ride while the other set is drying. Keep in mind that these filters may become dirty more quickly than the stock filter because of reduced total filter surface area. I plan to check mine at every oil change.
Step 5: Create mounting brackets for the filters.
The left-side bracket is easy. Just trim the stock air filter cover (did I mention that you'll really want to have a Dremel handy for this project?):
The right-side bracket needs to be fabricated. Wicked Webby used a sheet of plexiglass. My plexiglass must have been more brittle than his, because it shattered when I tried to drill screw holes through it. I ended up using a small sheet of 16 gauge steel that I found at a hardware store for $6. I also used up 3 reinforced cutting wheels for my Dremel to cut it out.
Step 6: Remove the airbox.
This requires the removal of the gas tank, fuel rail and tool tray. I took some photos while re-installing everything, so I may be able to post separate threads with step-by-step instructions for removing all this junk.
Step 7: Trim airbox and install mounting hardware.
Place the right-hand filter mounting bracket inside the airbox to mark and drill mounting bolt holes and to cut a hole matching the inside edge of the bracket. I suggest cutting the hole a bit too small for now, then trimming it after you can actually mount the bracket in its final position.
I found these nifty nut/washer/spiky things. I think they're meant to be hammered into wood to provide a threaded hole:
The shafts of these nut things are a bit too long. I trimmed them with a Dremel cut-off wheel so they matched the thickness of the airbox wall.
Those nut things didn't like being hammered into the plastic airbox. I placed them in the holes, tested that they lined up with the holes in the bracket, then hammered them a bit just to mark where the spikes wanted to go. then I drilled 1/16 inch holes for each spike, gobbed some silicone adhesive around the holes, and hammered the nuts in place. The spikes will hold the nut in place while you tighten the bolts and the silicone adhesive will prevent you from pushing the nuts out of the back of the airbox (it also seals up those little holes for the spikes). Now the right-side filter can be easily removed and mounted from the left side of the bike with only a screwdriver.
Step 8: Re-install the airbox and install the custom air filters.
Be sure to perform any final trimmings of the airbox then thoroughly clean it (hose it out, wipe it out and dry it) to make sure you don't get any plastick shavings in your engine.
The bolts I got for the right-side filter were way too long. i think 1/2 inch bolts should work. I saved myself the money and a trip to the store by just shortening the bolts I already had (Dremel saves the day again!).
For the left-side filter, the stock screws were a bit too short due to the thickness of the custom air filter's frame. These wood screws worked well:
When mounting the left-side filter, you may find it easier if you remove the bolts/screw holding the front of the tool tray down. The left-front bracket of the tool tray overlaps the top-right edge of the airbox a bit. Lift it up and the air filter and bracket will go on easily. It'll be a bit tight, but the front brackets of the tool tray will go back into place with the custom air filter installed.
===========
UPDATE
===========
Per Wicked Webby's recommendation, I added 4 more screws to the right-side filter to prevent leakage past the seal:
I also discovered that the silicone adhesive doesn't hold those nuts in place too strongly. I popped one off the air box while applying pressure and trying to get a screw started. I tried epoxy now, but am having doubts about it. I think the final solution will be some good duct tape framing the hole on the right side of the air box. The nuts only need to be held in place enough so that they won't pop out. The spikes driven into the plastic will take care of holding them from rotating as you tighten the screws.
Last edited by a moderator:
")

