HeliBars Installation experience

Yamaha FJR Motorcycle Forum

Help Support Yamaha FJR Motorcycle Forum:

This site may earn a commission from merchant affiliate links, including eBay, Amazon, and others.

phroenips

Pronounced "Free-nips"...it's just a
Joined
Mar 1, 2010
Messages
1,005
Reaction score
77
Location
Lone Tree, CO
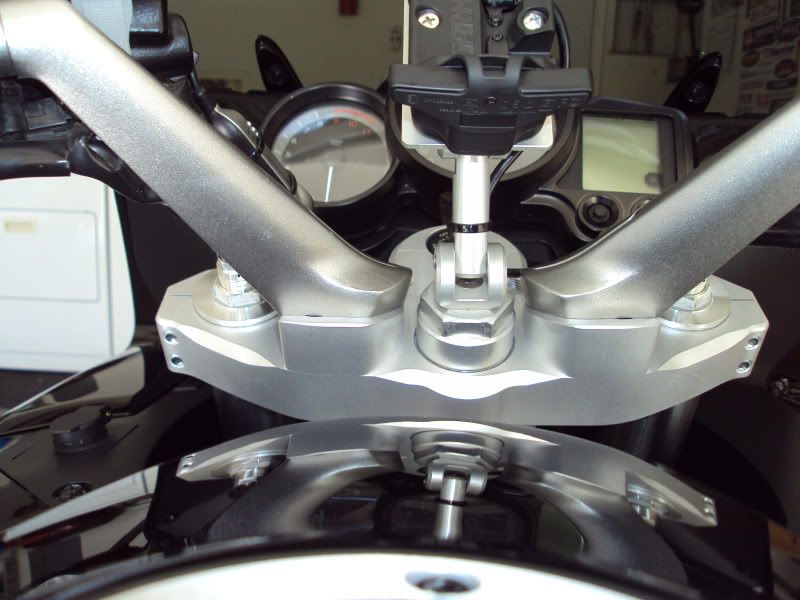
Given the recent group buy (of which I participated), I thought I'd give my recount of installing a set of HeliBars and risers on a Gen2 (2007, specifically).

HeliBars gives you very good and comprehensive instructions, including color photos. The text for the triple clamp instructions is on their website (pdf), but they seem to have forgotten to include the photos here. They come with complete instructions with the product.

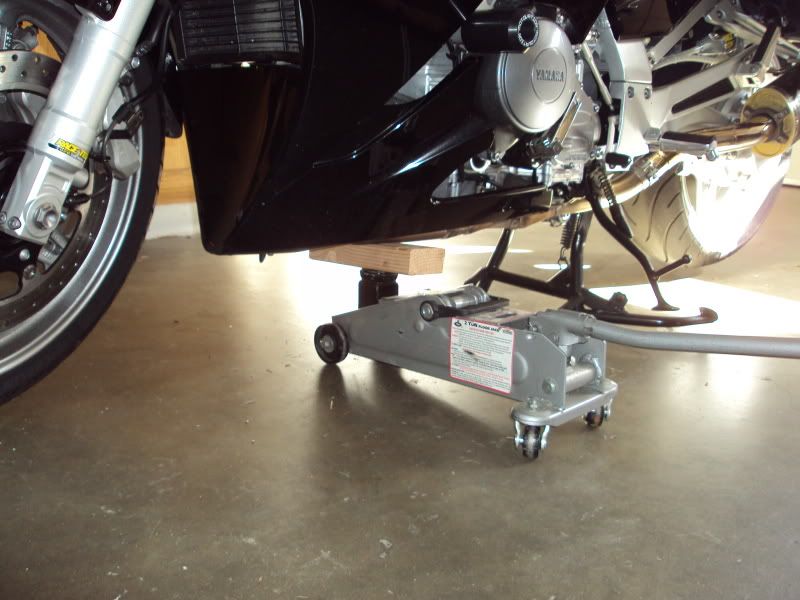
It's pretty straight forward, although I had trouble with step 1 (apply enough weight to the rear so that the front end is in the air), and step 11 (remove the ignition switch from the stock triple tree).

For step 1, I reached way down to find my old Boy Scout knot tying skills and came up with this:

FJR_Raisethefrontend1.JPG


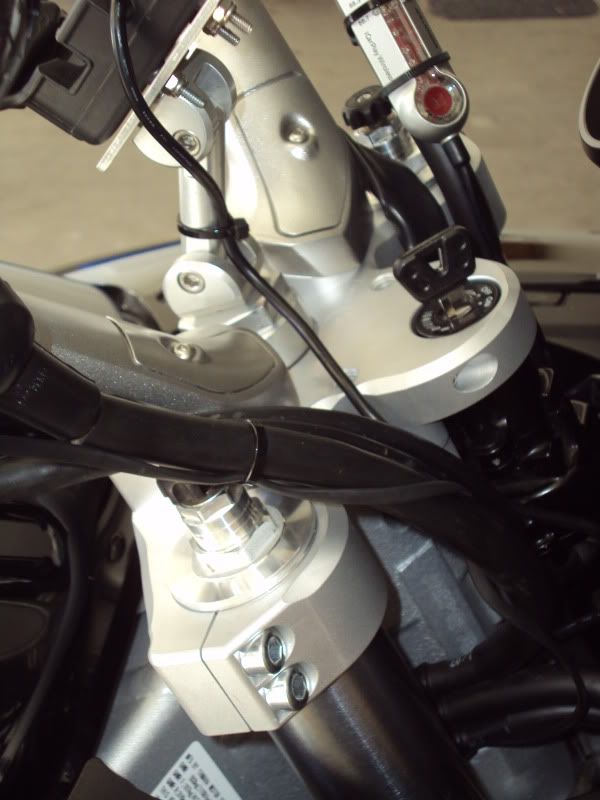
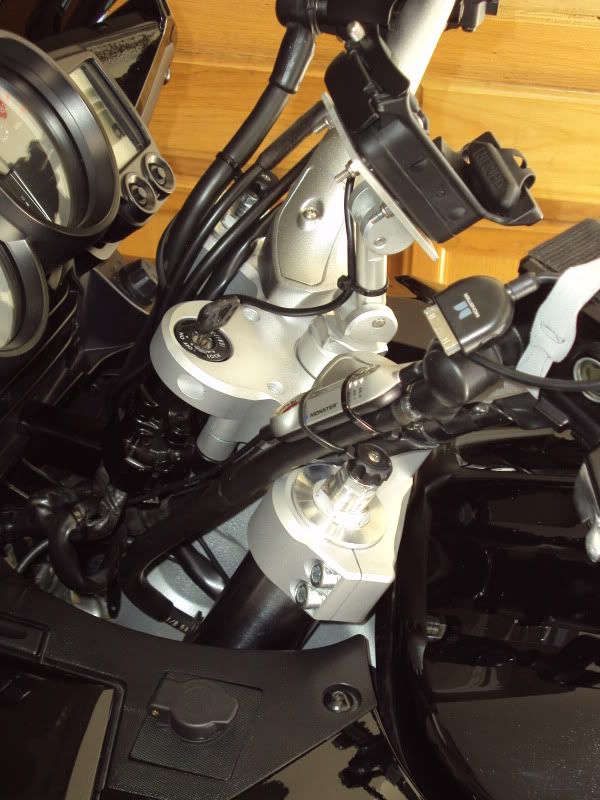
As for removing the ignition switch, they make it sound and look so easy in their instructions! I eventually got it, but it took a little work.

We have two FJRs which we installed them on. Took maybe around 3 hours for the first one, but we got the second one done in 1 - 1.5 hours.

 
I haven't done a road test yet (we finished close to midnight last night), but sitting on it standing still I like it better. It may detract a little from hitting it hard in the twisties, but should make the leisurely rides that much more comfortable.

 
Perfect timing. My Heli will be here today and I am planning to install tonight. I have already read the online instructions and like you was wondering where the pictures were. I have a ride planned on sunday to give it a test :D

 
I have already read the online instructions and like you was wondering where the pictures were.
Alot of the pictures that folks posted about the ignition switch faliure/fix will apply. Getting the ignition switch out, and reinstalling it after the fix is pretty much the same job.

 
I have already read the online instructions and like you was wondering where the pictures were.
I was going to post a scanned copy of the pictures, but the first page of the document says that all text and pictures are protected by copyright. I'm going to email them and see if maybe they can include the pics online. (They have the pics included for the riser instructions).

 
Impressed you can drill the safety bolts out without a drill press. Kept breaking drill bits so I gave up on using a hand drill and borrowed my dads drill press instead.

 
If you have some type of rack on the back of your bike, a properly cut 2X4 wedged between the rack and the ceiling works well holding the front wheel off the ground.

 
I have already read the online instructions and like you was wondering where the pictures were.
Alot of the pictures that folks posted about the ignition switch faliure/fix will apply. Getting the ignition switch out, and reinstalling it after the fix is pretty much the same job.

The pictures and directions provided are spot on. My Heli was delivered at 1pm and I was finished with the install by 4. The drilling sucked but wasnt too bad. I didnt remove my tank but I can see where it would help with drilling the bolts.

As for step 1. I use the same trick I use for tire changes, a jack and a 2x4 under my header pipes to lift the front off the ground. The old clamp slid right off and the Heli slid right back on.

5-1-10.jpg


Sorry, I didnt take pics of the actual install becasue the two pages that come with the Heli are all you need.

5-1-10051.jpg


5-1-10050.jpg


5-1-10054.jpg


Last edited by a moderator:
Excellent pic's I just got mine in the mail today but don't think I'll be installing them until next weekend...

Can't wait to hear how you like them...

 
As for step 1. I use the same trick I use for tire changes, a jack and a 2x4 under my header pipes to lift the front off the ground. The old clamp slid right off and the Heli slid right back on.
5-1-10.jpg
I thought about doing that, but wasn't sure if the headers could support that weight without sustaining damage. Obviously they can.

 
Just finished my installation. The most difficult step for me was cutting the wire cage, not much room and crummy side cutter don't help. I didn't do step 15, couldn't see a problem with the cable routing. Side to side movement of the bars revealed no increase in rpm. Curious if others took the throttle housing apart and re-located the cables. I hope that re-torquing the loose steering head bearing nut will take care of my clunk. Haven't gone for a test ride yet, maybe tomorrow.

 
Just finished my installation. The most difficult step for me was cutting the wire cage, not much room and crummy side cutter don't help. I didn't do step 15, couldn't see a problem with the cable routing. Side to side movement of the bars revealed no increase in rpm. Curious if others took the throttle housing apart and re-located the cables. I hope that re-torquing the loose steering head bearing nut will take care of my clunk. Haven't gone for a test ride yet, maybe tomorrow.
I rerouted my throttle cables because I also installed the extra risers.

In other news, I was finally able to go out for a quick ride today, despite the billion mile per hour winds here. I really like it, the Helibars put more emphasis on the "Touring" side of "Sport Touring"

 
In other news, I was finally able to go out for a quick ride today, despite the billion mile per hour winds here. I really like it, the Helibars put more emphasis on the "Touring" side of "Sport Touring"
I got in 300 miles today with the new Heli and we are going to be good friends. It took all of the pressure off my wrists and I think it even helped my back from getting sore with the more upright sitting position.

I went up Palomar Mountain early this morning and scraped a peg for the very first time. Yes it scared me :eek: Not sure if the Heli had anything to do with that or the fact that the local Paparazzi was set up in the corner and I saw him ahead of time and was showing off a little. I am going to buy this picture from him tonight.

bike pics

palomar.jpg


Last edited by a moderator:
FYI, Heli has great customer servive.

I was a dumbass and broke the small bolt that holds the screw for the cover plate (see borrowed pic). One quick call to Heli and they quickly sent me a free replacement.

I had to reroute the cables.

fjr%20heli.jpg


Are you folks using the forward or rear mounting holes ? Mine is due to arrive today.. thanks

 
Last edited by a moderator:
I got in 300 miles today with the new Heli and we are going to be good friends. It took all of the pressure off my wrists and I think it even helped my back from getting sore with the more upright sitting position.

I went up Palomar Mountain early this morning and scraped a peg for the very first time. Yes it scared me :eek: Not sure if the Heli had anything to do with that or the fact that the local Paparazzi was set up in the corner and I saw him ahead of time and was showing off a little. I am going to buy this picture from him tonight.

bike pics

palomar.jpg
Nice picture! At first I thought it was my bike.
 
Actually I read the date. But as I purchased my 09 in 2020 I thought ( for a fleeting second) that my bike could have started life up on Palomar Mountain.
Anyway, nice bike.
 
Top