


Clever marketing will get people every time. No, I really didn't install a proper drag chute, but I did the next best thing. I added more storage.
The inspiration came from THIS thread. Brodie has some great pictures up and a good description. I'm more of a visual learner so when I did this I took pictures. Brodie also used the Pelican 1120. That's kinda small, but usable for most people. The goal of this project for me was to have a place to keep the bike cover. I could not fit my UV2000 XL in the 1120, so I bumped up to the 1150. It's larger and the coversmooshes in tightly fits just fine if I don't rush and roll up the cover tightly. (EDIT)
First, you're going to drill into factory plastic and cut factory wiring. (Don't worry, it's easy) If this scares you, please go elsewhere.
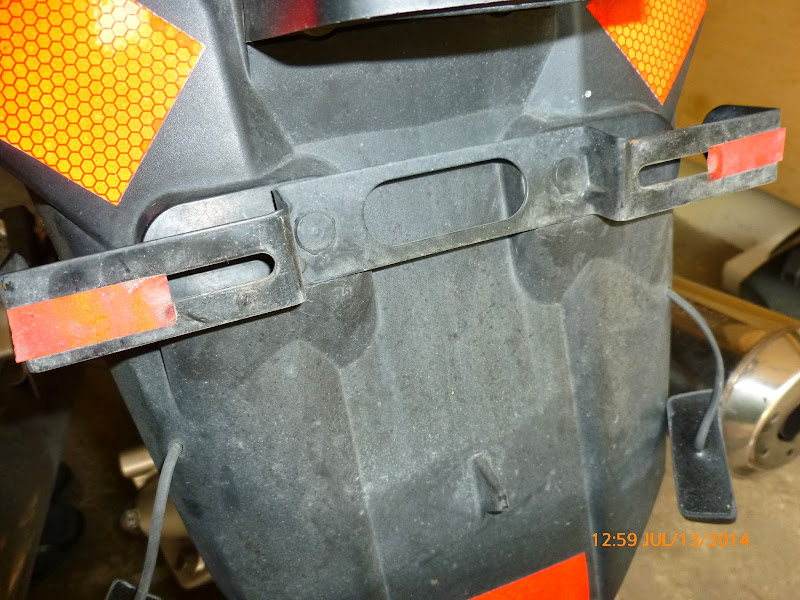
Second, begin by removing your license plate and whatever else you have fastened with your license plate (I have a helmut guardian lock).
This will leave your bike's butt looking similar to this;
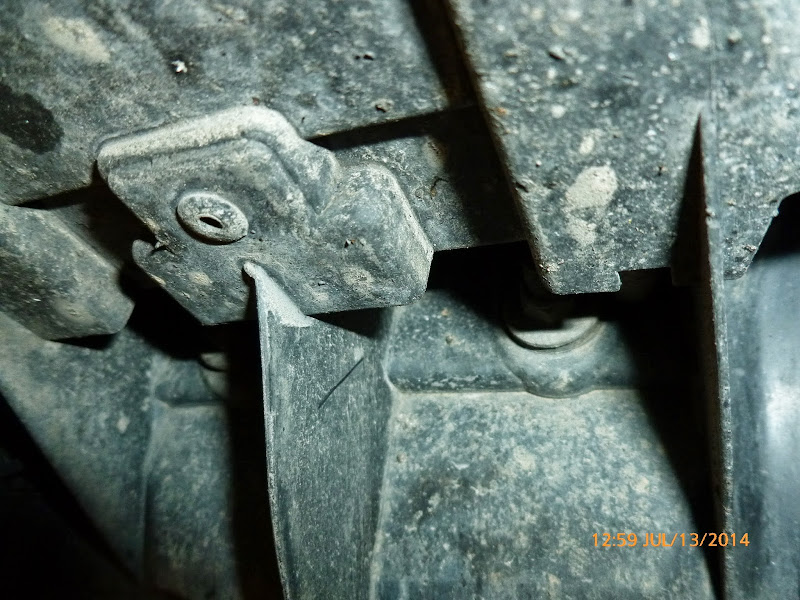
On the underside there are two nuts that need unnutting;

If you want to save these factory bits, find a good please to keep them. They will not be reused for this project.
Next, you'll need to remove the light that shines on the license plate. To do that, there are two screws holding it on. It's best to do this before you mount the box. (just a suggestion)
(pretend I aimed the camera better than I did here)
Let that hang off to the side for now.
Let's begin...
The 1150 has found stand-offs on the bottom. I used a 1/4" drill bit and drilled into the center of them. Next, I set the case on the splash guard and drilled through the plastic on the bike. Brodie mentions using 6mm bolts, which is also fine. I used 1/4" because that's what my closest retailer had in cheap bulk bins. I purchased 4 x 1/4" x 2" bolts, with 2 flat washers per bolt and 1 nylon locking nut per bolt to secure the box to the splash guard. While I made it work, it might be good to get 2 1/2" long for the bottom two holes. I used 2" and...well, it works, but it wasn't easy to start the nut on the bolt threads.
Secure the box to the splash guard to make sure your holes line up. I held the box up to the splash guard and drilled through it. While I did manage to get this done myself, it might be best if you're beer drinking buddy held the box on the bike. He/she can still maintain a safe grip on their beverage of choice.
BEFORE you mount the box to the bike, line up the license plate on the top cover of the box. Drill your holes and mount the license plate.
Next, place the box, and whatever accessory you had with it, on the splash guard. (you'll do the light stuff next). It should look something like this;
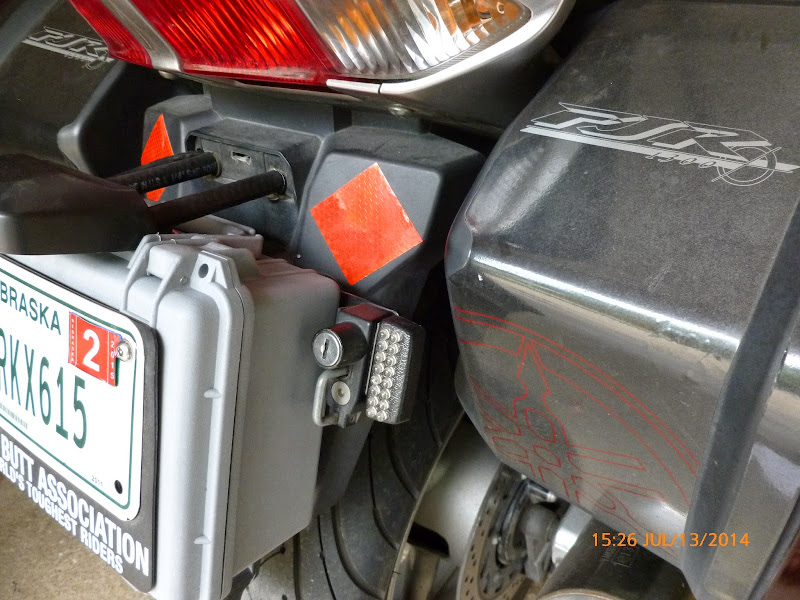
The helmet guardian still functions as expected!
Now for the light. I purchase 5" long 1/4" bolts, with washers and lock nuts. I also purchase a foot of 1/4" fuel line from the local auto parts store. I did have to drill out a larger hole on the light mount to make this work. This is where 6mm bolts might work better. As you can see in the picture above (and below) the light extends out beyond the box, illumiates the plate and does not interfere with the lid openy-closey.
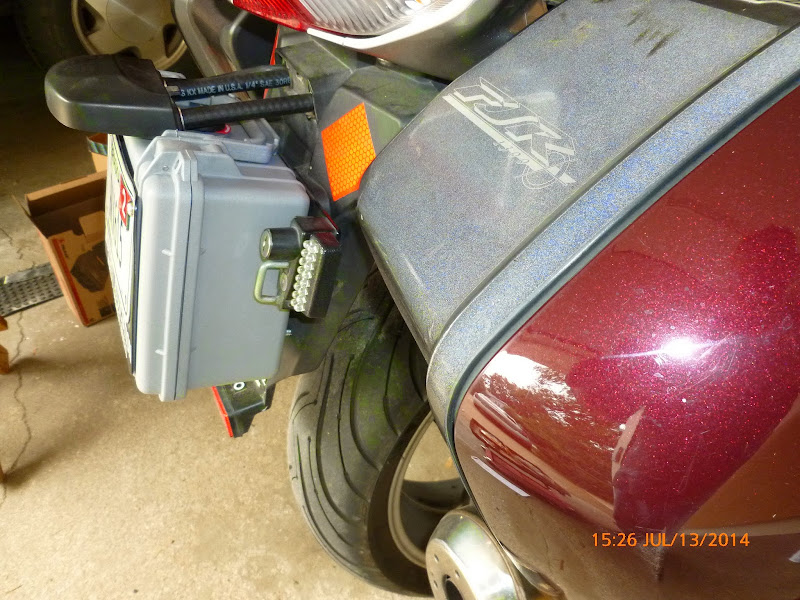
The box can serve many purposes, which is why I really like this project. For me, it's a place to secure the bike cover. The box can accomodate a pad lock so you could use it to secure things as well. The latch feels secure enough to hold it and did well on my shake-down ride of 20 miles. If you want I'm sure you could easily add some sort of clip through the box holes to make it more secure.
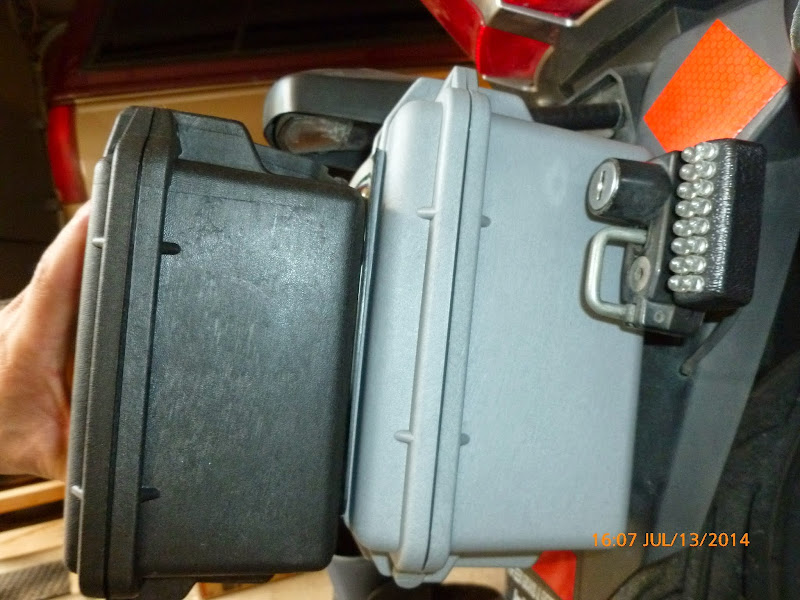
Here's a comparison of the 1120 and 1150
As the link to Brodie's pictures also shows, you could mount lights or whatever you wanted (within reason) to the boxes themselves. They are really sturdy. I thought about mounting my hyperlites to the Pelican box, but I couldn't find my wire stretcher.
Oh, that's the other thing. The license plate wire isn't long enough. Remove the rear seat. Along the clutch side of the bike there's a wiring trough. In that space are the looms for the rear lights. The loom for the two (blue/black) wires for the license plate light is on the bottom. I spliced in an extra 4" of wire. Brodie is better at this and he said 3". I hear size doesn't matter so do whatever makes you happy. When you have it done, turn on the ignition key to make sure it works. Fix it if it doesn't. Once it does and you're happy, gently, gently, gently tug the wires at the light until you have enough length to make it extend over the box.
Thread the bolts through the fuel line. I used white lithium grease to make it easier. Lube makes everything easier...except stopping. So I've heard.
Tighten that up with the washers and lock nuts. Tell your beer drinking buddy they can let go of the box now. Grab a beer as a reward for completing this project.
Now go ride.
Addendum 1:
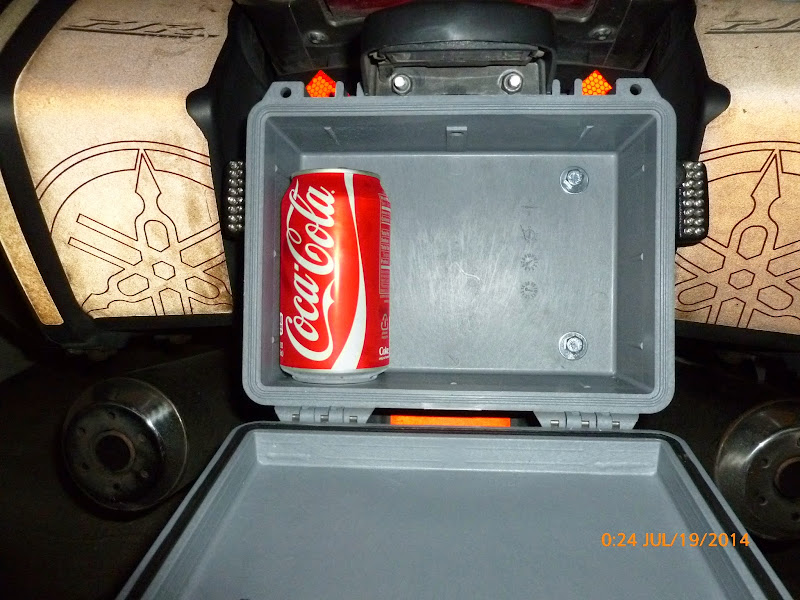
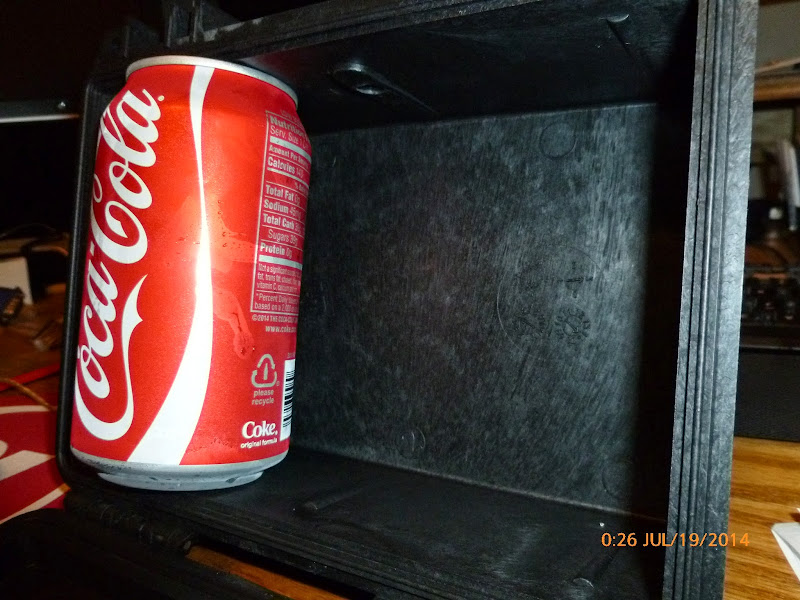
Here are some pics for reference that should show what these cases can hold.
Pelican 1150
Pelican 1120 (the can barely fits and doesn't not slide to the bottom of the case)
The inspiration came from THIS thread. Brodie has some great pictures up and a good description. I'm more of a visual learner so when I did this I took pictures. Brodie also used the Pelican 1120. That's kinda small, but usable for most people. The goal of this project for me was to have a place to keep the bike cover. I could not fit my UV2000 XL in the 1120, so I bumped up to the 1150. It's larger and the cover
First, you're going to drill into factory plastic and cut factory wiring. (Don't worry, it's easy) If this scares you, please go elsewhere.
Second, begin by removing your license plate and whatever else you have fastened with your license plate (I have a helmut guardian lock).
This will leave your bike's butt looking similar to this;
On the underside there are two nuts that need unnutting;
If you want to save these factory bits, find a good please to keep them. They will not be reused for this project.
Next, you'll need to remove the light that shines on the license plate. To do that, there are two screws holding it on. It's best to do this before you mount the box. (just a suggestion)
(pretend I aimed the camera better than I did here)
Let that hang off to the side for now.
Let's begin...
The 1150 has found stand-offs on the bottom. I used a 1/4" drill bit and drilled into the center of them. Next, I set the case on the splash guard and drilled through the plastic on the bike. Brodie mentions using 6mm bolts, which is also fine. I used 1/4" because that's what my closest retailer had in cheap bulk bins. I purchased 4 x 1/4" x 2" bolts, with 2 flat washers per bolt and 1 nylon locking nut per bolt to secure the box to the splash guard. While I made it work, it might be good to get 2 1/2" long for the bottom two holes. I used 2" and...well, it works, but it wasn't easy to start the nut on the bolt threads.
Secure the box to the splash guard to make sure your holes line up. I held the box up to the splash guard and drilled through it. While I did manage to get this done myself, it might be best if you're beer drinking buddy held the box on the bike. He/she can still maintain a safe grip on their beverage of choice.
BEFORE you mount the box to the bike, line up the license plate on the top cover of the box. Drill your holes and mount the license plate.
Next, place the box, and whatever accessory you had with it, on the splash guard. (you'll do the light stuff next). It should look something like this;
The helmet guardian still functions as expected!
Now for the light. I purchase 5" long 1/4" bolts, with washers and lock nuts. I also purchase a foot of 1/4" fuel line from the local auto parts store. I did have to drill out a larger hole on the light mount to make this work. This is where 6mm bolts might work better. As you can see in the picture above (and below) the light extends out beyond the box, illumiates the plate and does not interfere with the lid openy-closey.
The box can serve many purposes, which is why I really like this project. For me, it's a place to secure the bike cover. The box can accomodate a pad lock so you could use it to secure things as well. The latch feels secure enough to hold it and did well on my shake-down ride of 20 miles. If you want I'm sure you could easily add some sort of clip through the box holes to make it more secure.
Here's a comparison of the 1120 and 1150
As the link to Brodie's pictures also shows, you could mount lights or whatever you wanted (within reason) to the boxes themselves. They are really sturdy. I thought about mounting my hyperlites to the Pelican box, but I couldn't find my wire stretcher.
Oh, that's the other thing. The license plate wire isn't long enough. Remove the rear seat. Along the clutch side of the bike there's a wiring trough. In that space are the looms for the rear lights. The loom for the two (blue/black) wires for the license plate light is on the bottom. I spliced in an extra 4" of wire. Brodie is better at this and he said 3". I hear size doesn't matter so do whatever makes you happy. When you have it done, turn on the ignition key to make sure it works. Fix it if it doesn't. Once it does and you're happy, gently, gently, gently tug the wires at the light until you have enough length to make it extend over the box.
Thread the bolts through the fuel line. I used white lithium grease to make it easier. Lube makes everything easier...except stopping. So I've heard.
Tighten that up with the washers and lock nuts. Tell your beer drinking buddy they can let go of the box now. Grab a beer as a reward for completing this project.
Now go ride.
Addendum 1:
Here are some pics for reference that should show what these cases can hold.
Pelican 1150
Pelican 1120 (the can barely fits and doesn't not slide to the bottom of the case)
Last edited by a moderator:


")
