• If you have bought, sold or gained information from our Classifieds, please donate to FJRForum and give back.

    You can become a Supporting Member or just click here to donate.

GenII fuse box bracket

Yamaha FJR Motorcycle Forum

Help Support Yamaha FJR Motorcycle Forum:

This site may earn a commission from merchant affiliate links, including eBay, Amazon, and others.

road runner

Well-known member
Joined
Mar 24, 2007
Messages
1,158
Reaction score
84
Location
Mechanicville, NY
Hey Gang

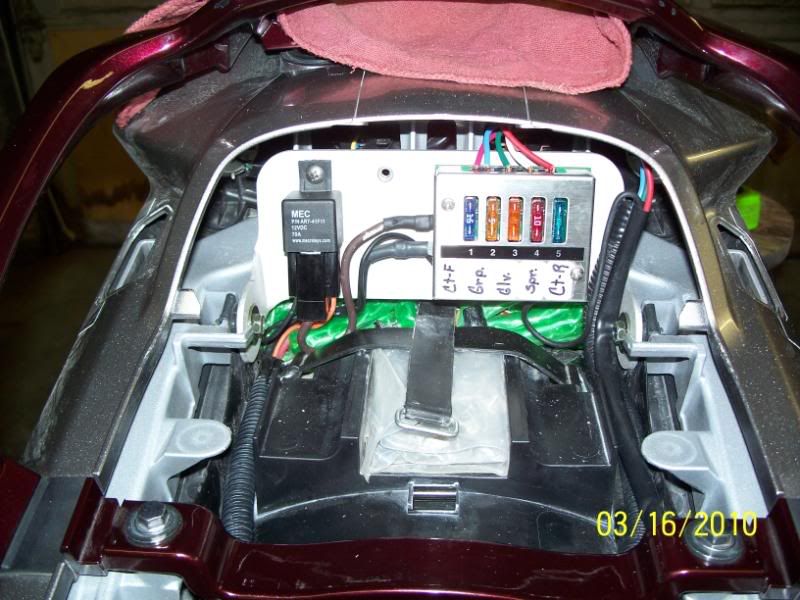
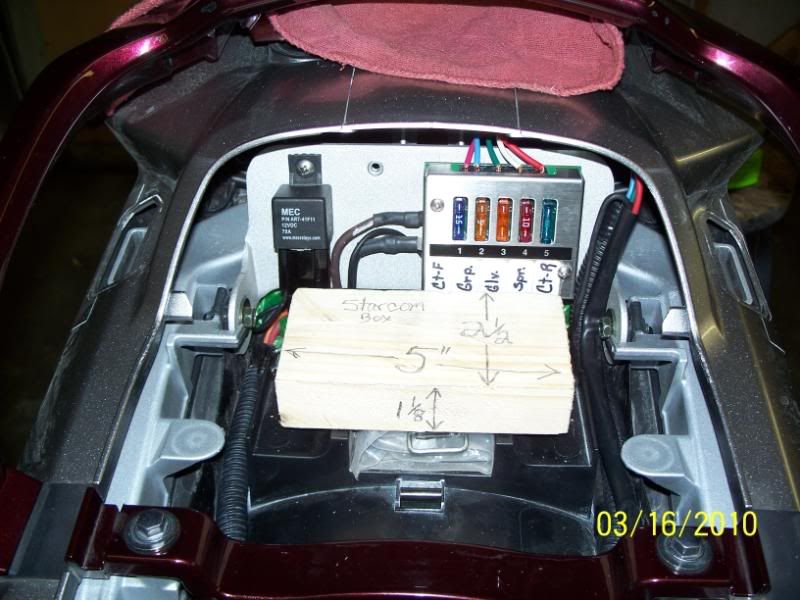
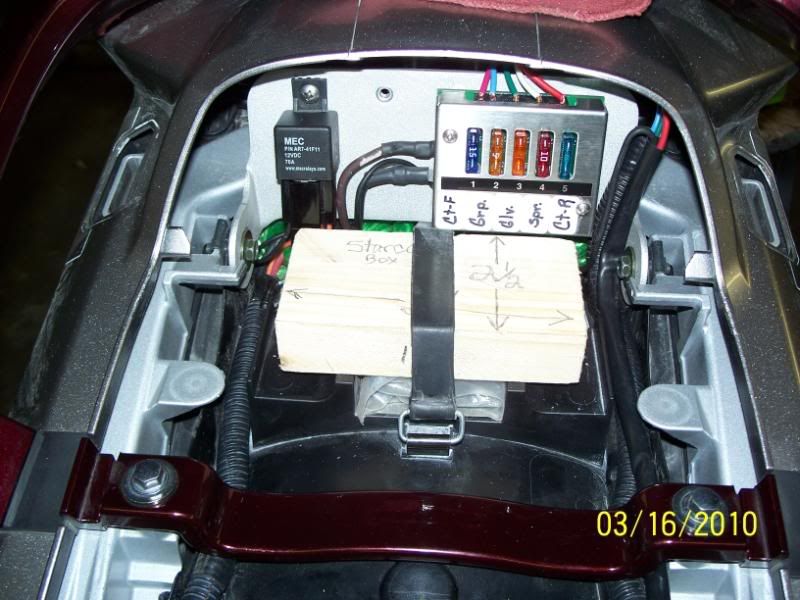
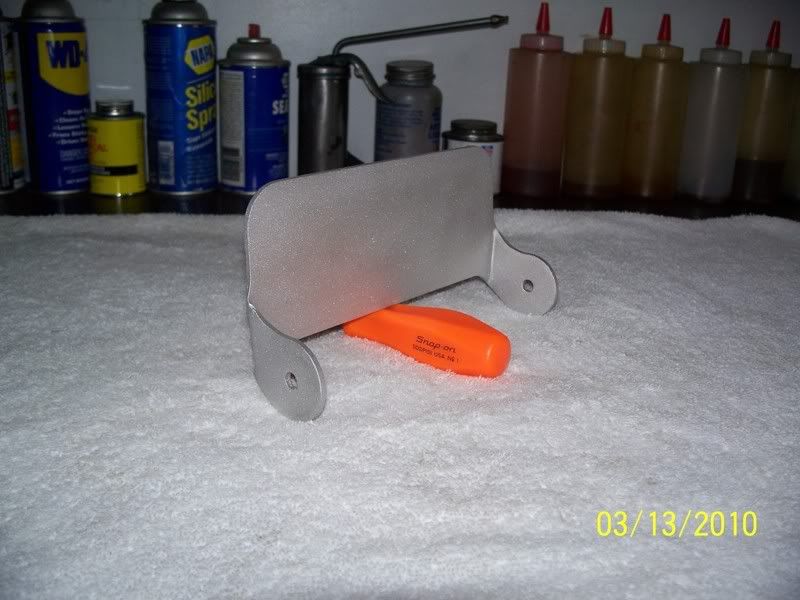
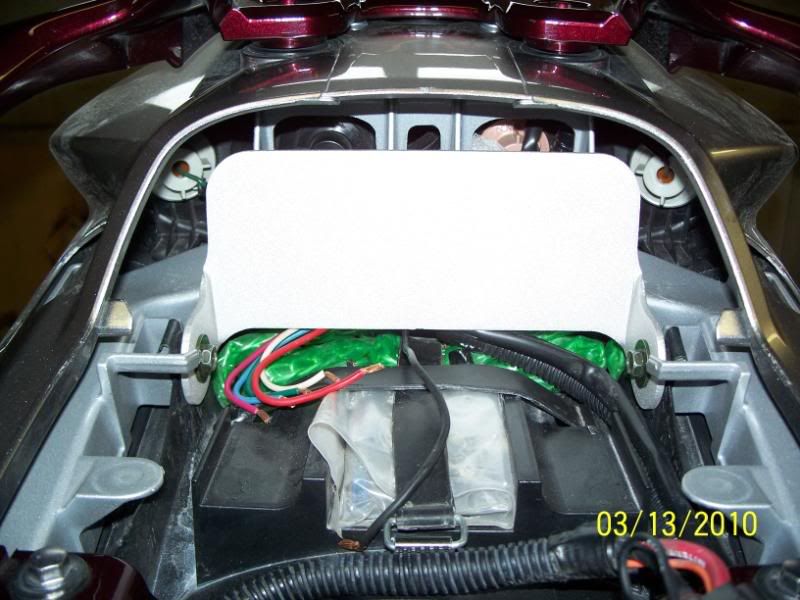
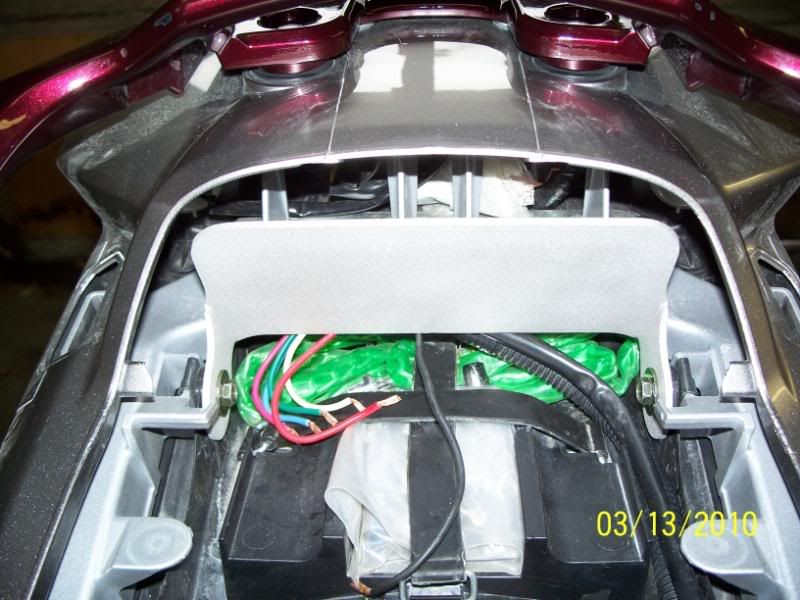
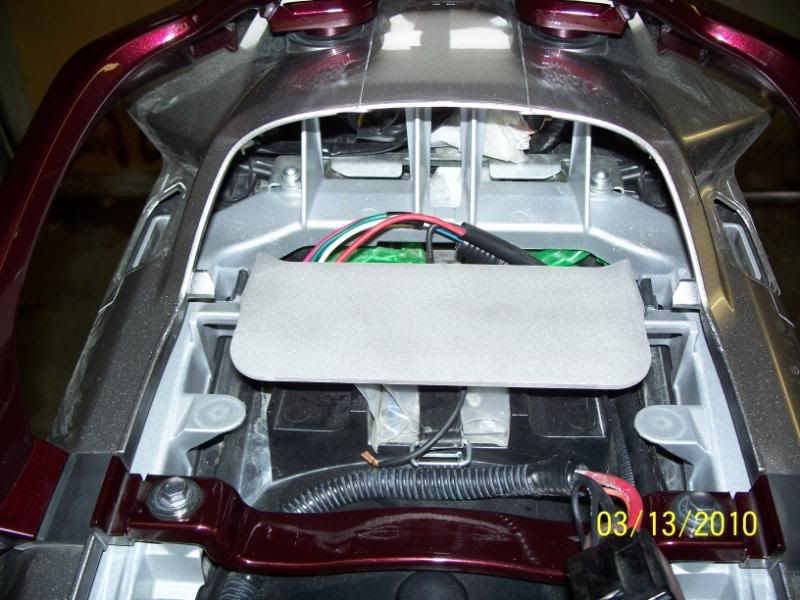
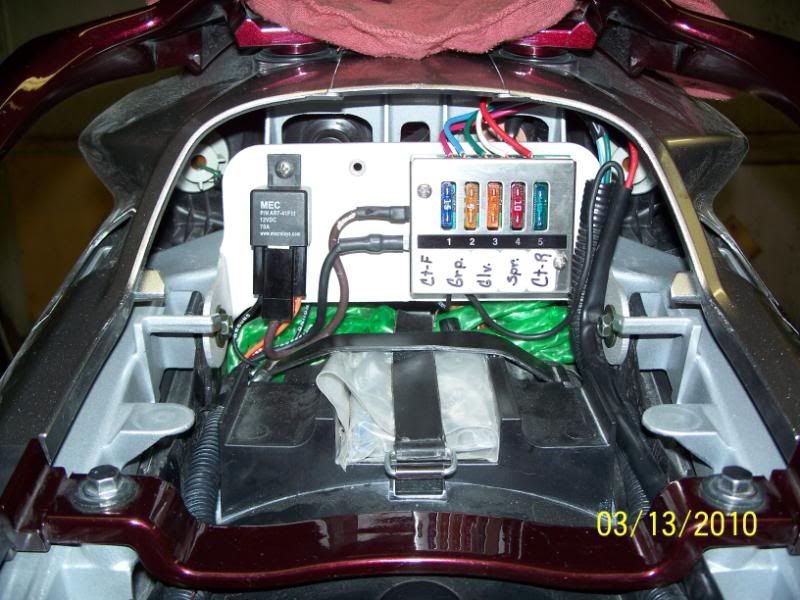
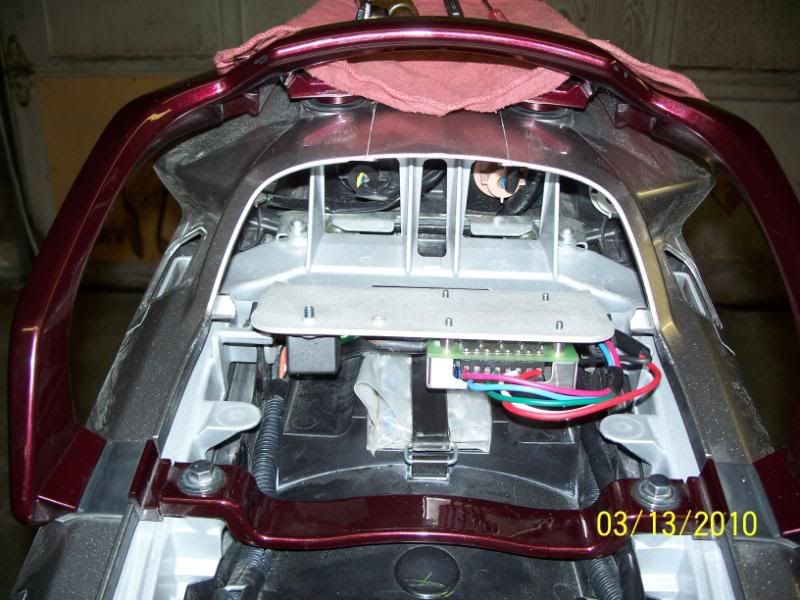
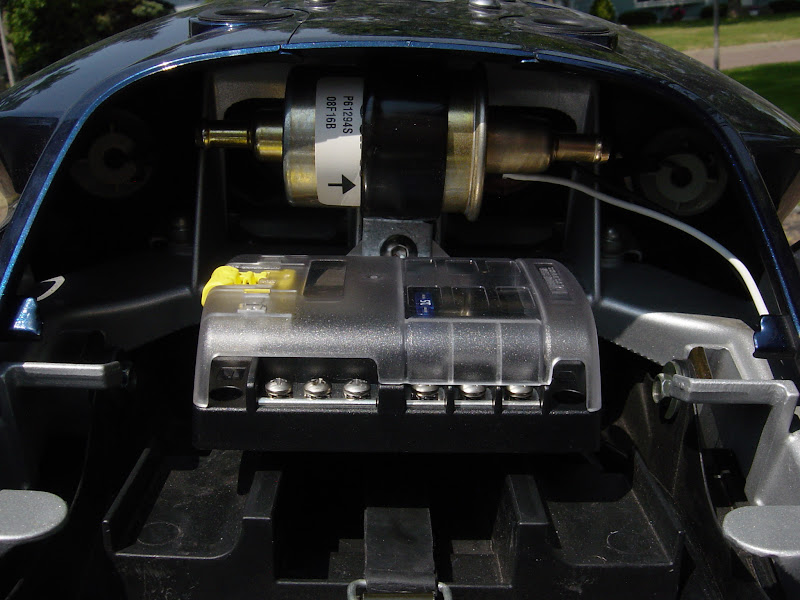
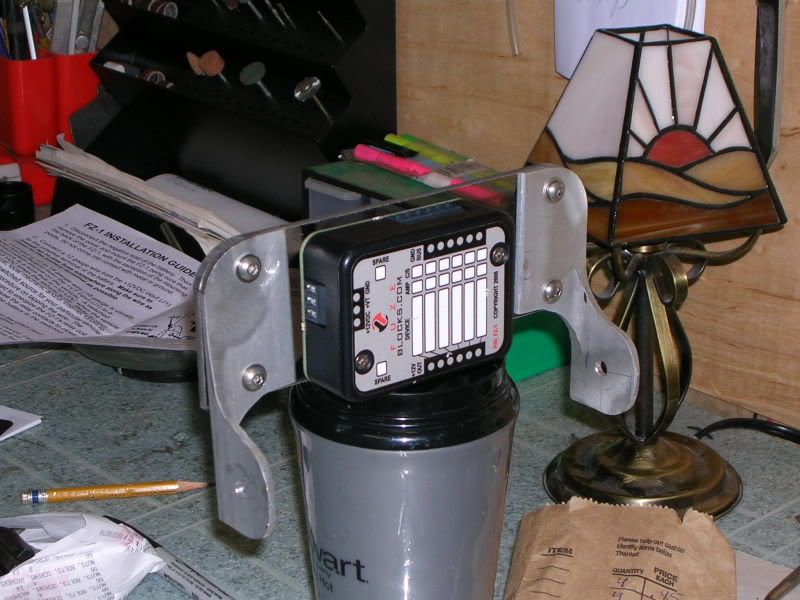
Thanks to input from fellow Forum members I have redesigned my Gen II fuse box bracket. It's one piece of 1/8" aluminum, mounts to existing fender bolts, and tips forward to access tail light bulbs. I have made 10 of these, and have 8 left for sale. I can make more if needed.


100_0484.jpg


100_0487.jpg


100_0488.jpg


100_0489.jpg


100_0491.jpg


100_0492.jpg


The price is $40.00 shipped to the lower 48 states.

To purchase thru paypal my email is [email protected] or just email me for alternate payment. When using paypal please use the personal tab.
Once I have received payment I'll ship it out.

Thanks; Art

 
Last edited by a moderator:
I like it.

May I offer a suggestion?

Offer another version that will accept both the accessory fuse panel and a auxiliary fuel pump.


A stable design like yours would be perfect for this!

 
I like what youv'e done.

DSCN1050.jpg


My home brew one with the two angles and the Lexan works fine but wastes mounting space! With what you have done I think I could adjust the two holes that mount the bracket to the inner fender a little closer to center line and I could get a Starcom on one side and my FZ1 fuse block on the other.

Good work, I like it.

 
Pretty darn cool, Art. Looks like there is plenty of room to put a fuse panel and relay on one side and other stuff (like a Starcom1 or Autocom) on the other. :thumbsup:

Too bad (for me) that it won't work on the uber-gens. :glare:

 
All good ideas guys.

If I do what Panman said then one could mount things to both sides like Fred and Joe said. This batch is made a little to close to the rear to do that, but maybe I'll redesign it again if there is a need.

Time to get out the poster paper again.

Thanks for the input; Art

 
After looking at it installed, there may be enough room behind it for a Starcom. I may have to leave the bracket tipped a little forward, or move the pivot point a little. According to Starcoms web site the dimensions are 1x2x3 & 1x3x5 for the 3 different models. Is this correct ? If so, how much room would we need to install a Starcom and be able to hook up the wires ? I plan on making a dummy Starcom out of wood to mock it up, and see if it will work. I just need a dimension.

 
Very nice Art! I'll have to do that the next time around. Right now I have a Blue Sea in my tool tray and the Starcom behind but every inch counts under there so it looks like you have a good solution.

 
(Fred W @ Mar 14 2010, 02:55 PM) <{POST_SNAPBACK}>Pretty darn cool, Art. Looks like there is plenty of room to put a fuse panel and relay on one side and other stuff (like a Starcom1 or Autocom) on the other.
thumbsup.gif


Too bad (for me) that it won't work on the uber-gens.
glare.gif
Hey Fred,

I would also like to do this on my '05, how much modification would be req'd to get a setup like this?

 
Last edited by a moderator:
Awesome work road runner! Just what I'd imagined when I suggested a one piece bent design. :)

I do like the idea of making room to use both sides but what is the size of the flat area on the front?

Now to see if I have room in the budget... :dribble:

 
Awesome work road runner! Just what I'd imagined when I suggested a one piece bent design. :) I do like the idea of making room to use both sides but what is the size of the flat area on the front?

Now to see if I have room in the budget... :dribble:
The flat mounting area is 3"x7", but if you want it to fold flat you need to mount whatever is going on it a little in from each side like I did, so it clears the seat hooks on the frame.

100_0491.jpg


100_0492.jpg


Art, Starcom 1 Advance Length 2 3/8 Width 2 1/4 Height 1 Would guess Length with room for plug-in and control knobs would be 4 3/8. Could send you email pictures if you need them.
Thanks,

So if I made room for 4 1/2" length x 2 1/2" width x 1" hight, that would be enough room ? If so I think it will go on the back of the bracket.

Also, if I were to put the Starcom on the back of my bracket would that be OK, or do you need access to knobs ?

If it went on the back side it would have to lay flat on the bracket and horizontal. Would that be OK ?

A pic is worth a 1000 words, so that would be great. email; [email protected]

Thanks ; Art

 
Well I tried putting the fuses or Starcom on the back side of the bracket, and it's just to close to the rear frame. Maybe if the bracket was redesigned it may work, but then I'm not sure it would tilt forward as this one does. I did come up with an idea for mounting a Starcom in front of the bracket. I don't have a Starcom so I used a piece of wood cut to the size of the smaller Starcoms. I must warn you this is a very complicated mounting idea. :D

Unhook the rubber strap;

100_0494.jpg


Set the starcom in place;

100_0495.jpg


Hook up the strap;

100_0496.jpg


Not very fancy ,but it does fit with the seat on. So for now I'm going to leave the bracket as it is.

 
Top