I mentioned a while back that I had experimented with making a mod to the 3rd Gen's windshield angle similarly to how many folks modified their 1st (and even some 2nd) Gens in the past. The concept is to change the angle of the windshield and, especially for the 1st Gens, to increase the air gap at the bottom of the shield above the faring surface to reduce the vacuum behind the shield in an attempt to reduce turbulence and buffeting.
Since my experiments have been relatively successful, I've decided to go ahead document what I've done (so far), so that other 3rd Gen folks can do some of the same, or maybe they will spin off of this with something even better.
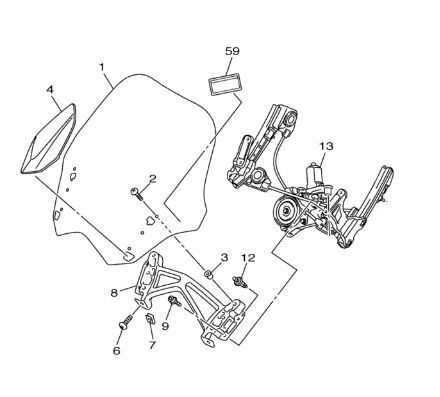
To get started, lets take a look at the windshield mechanism on the 3rd Gens. Refer to the parts layout below:
After removing the two painted trim covers, (#4) the windshield is mounted to the part that I'll call the "windshield carrier" (#8) with six plastic screws (#2) threaded into six rubber captive well nuts (#3). Once the shield is removed you are left with the carrier bolted to the two articulating arms on either side of the Drive Unit Assembly that (#13) protrude through the two slots in the front faring. The carrier itself is mounted to the arms using four 6mm x 12mm long flange head cap screws (#9).
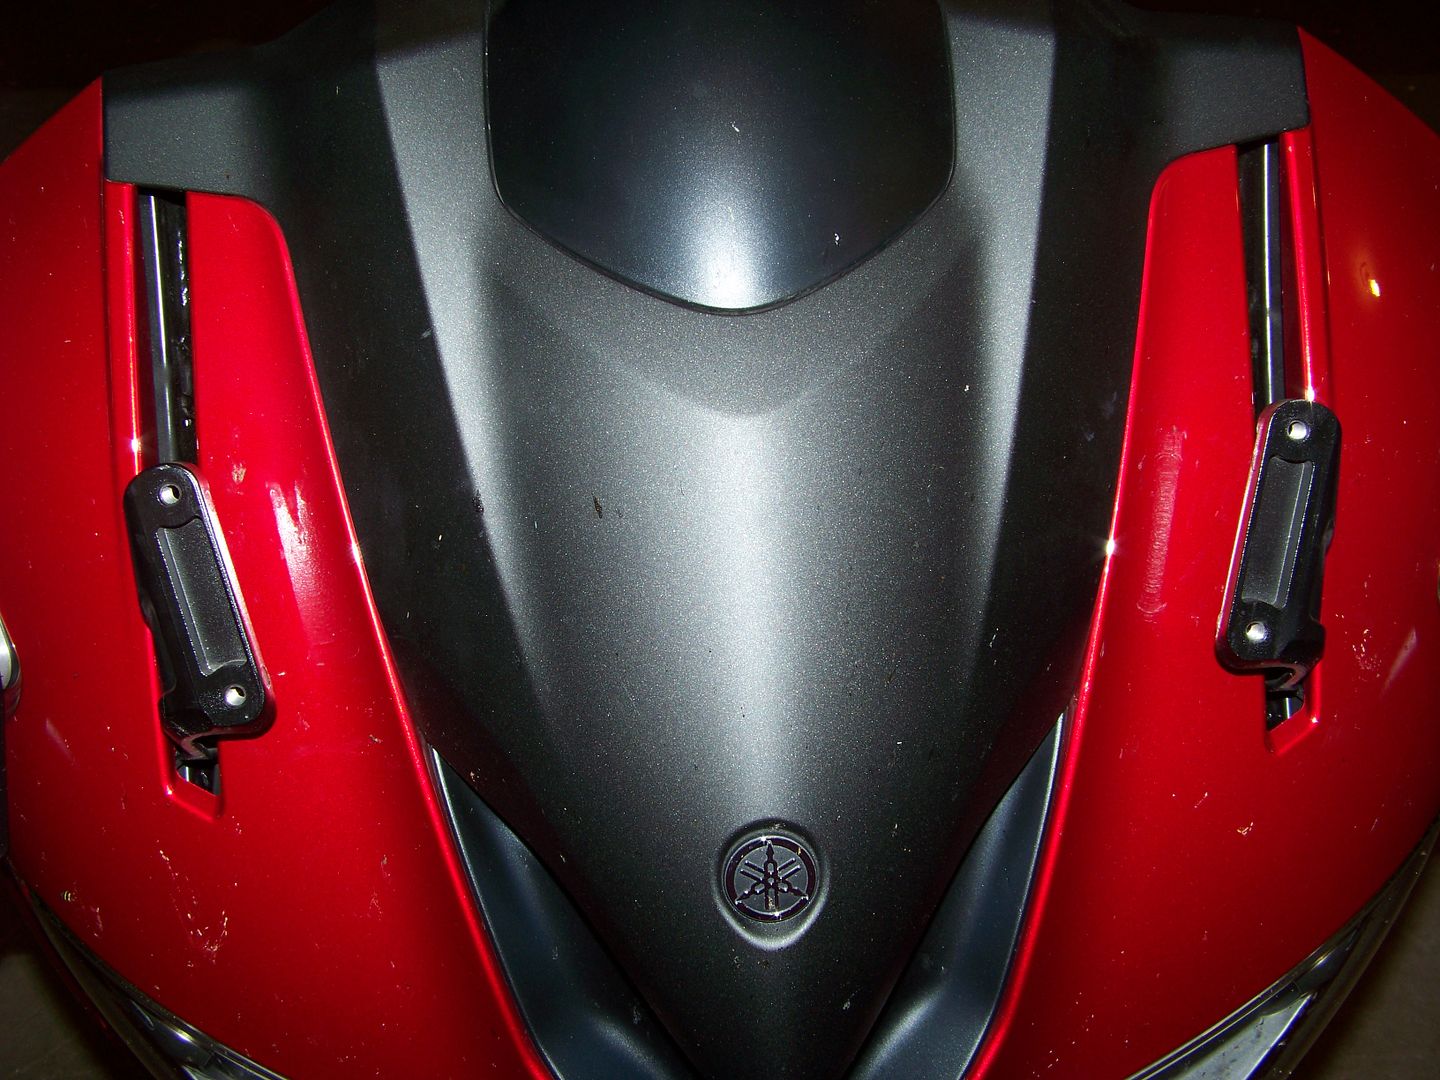
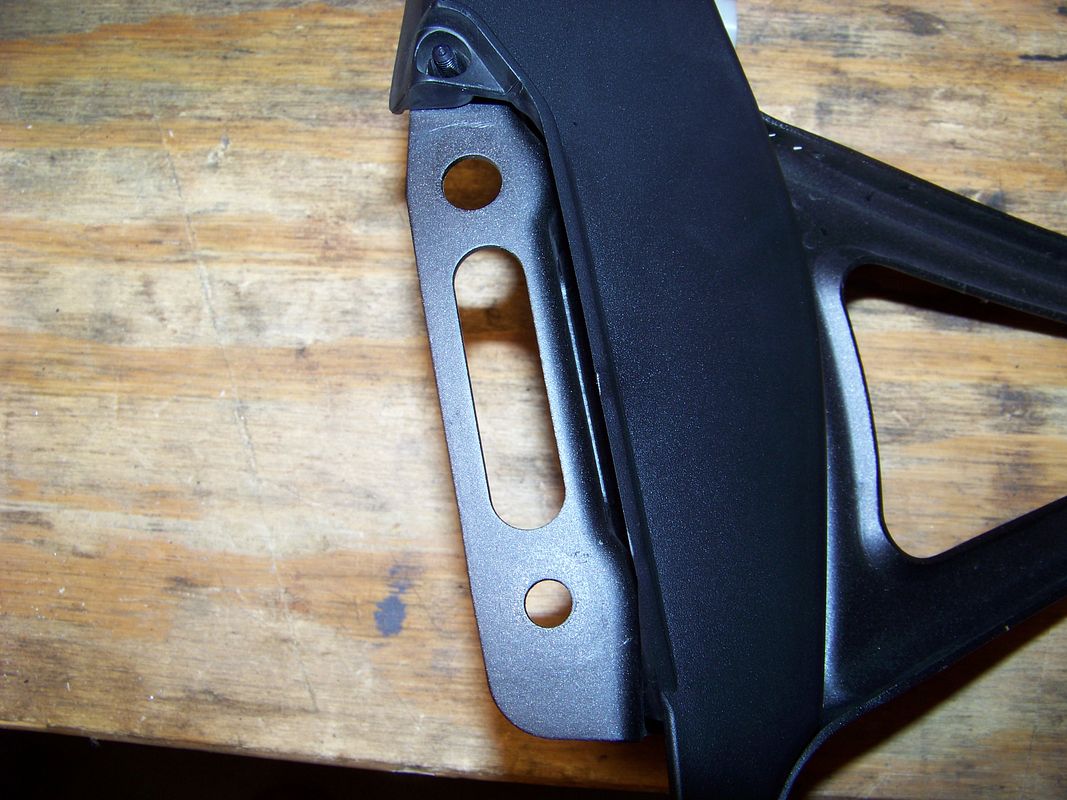
After removing the four cap screws the whole carrier assembly can be lifted off and you are looking at the arms of the Drive Unit Assembly.
Note the angled relationship of of the two arms to each other. Here's a closer look at one of the two arms
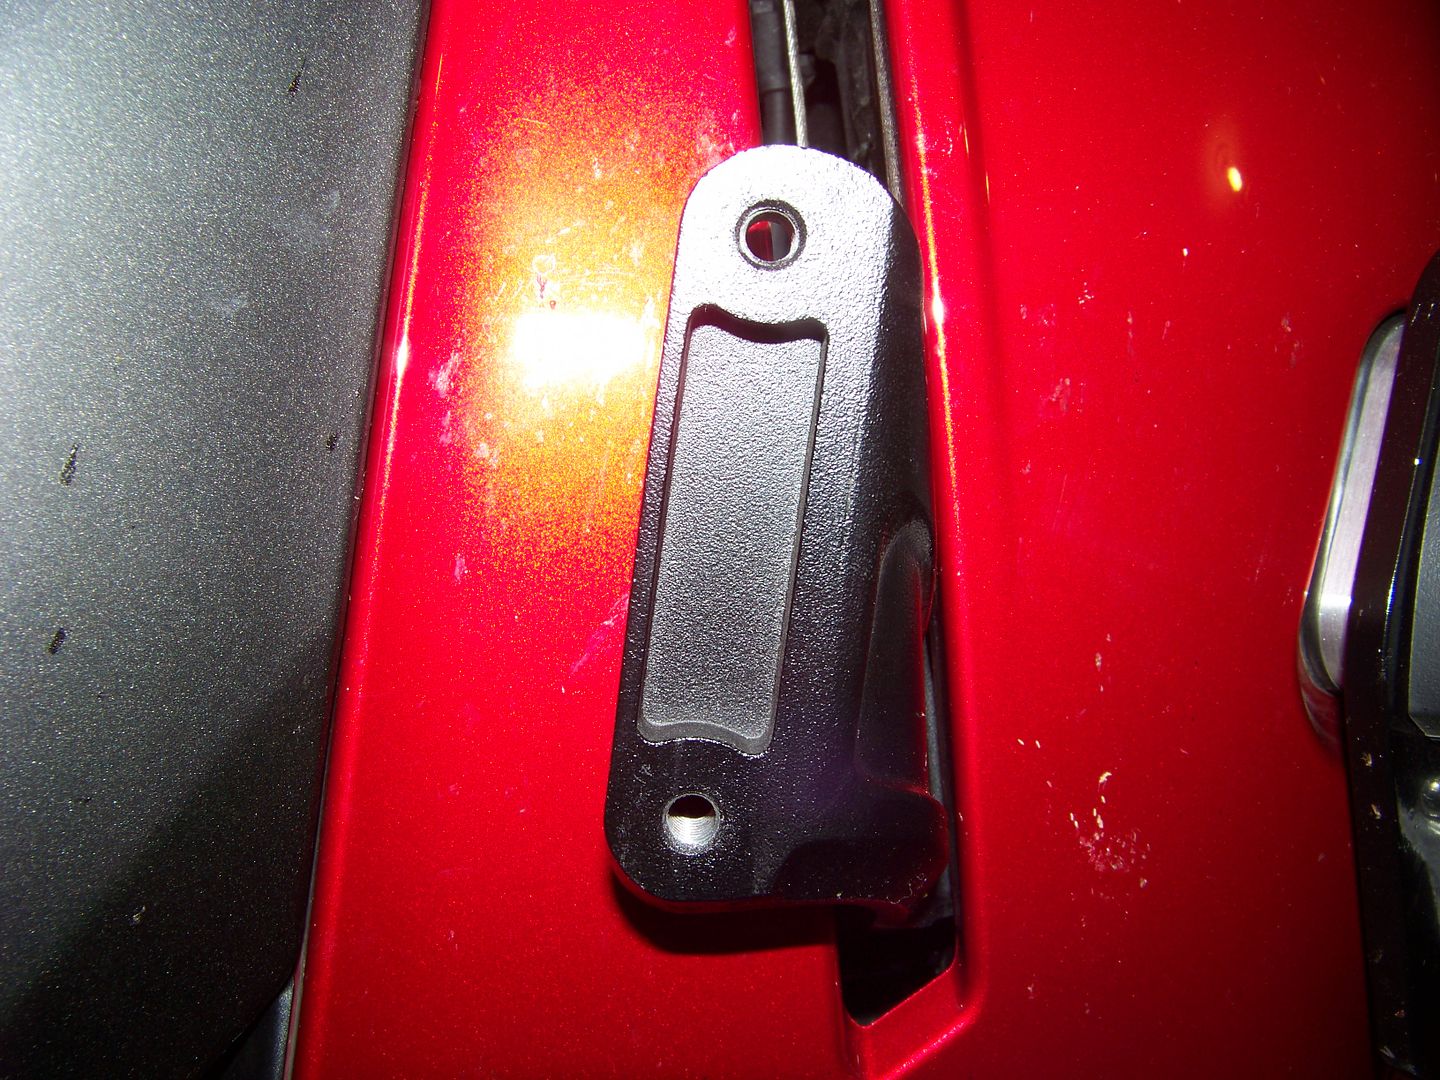
And the back side of the carrier assembly mounting area
Seems simple enough to install some spacers and modify the angle that the carrier mounts to the moving arms and thereby change the shield angle. The parts that I used were pretty cheap and readily available, I used two 6mm x 20mm Allen head cap screws, and two short spacers that I manually cut from a single plastic 1/4" ID, 1/2" OD x 1" length plastic spacer bought at Home Despot.
The picture below shows two of the 20mm screws and plastic spacers along with two of the four stock 12mm long screws that will be used in the top two holes.
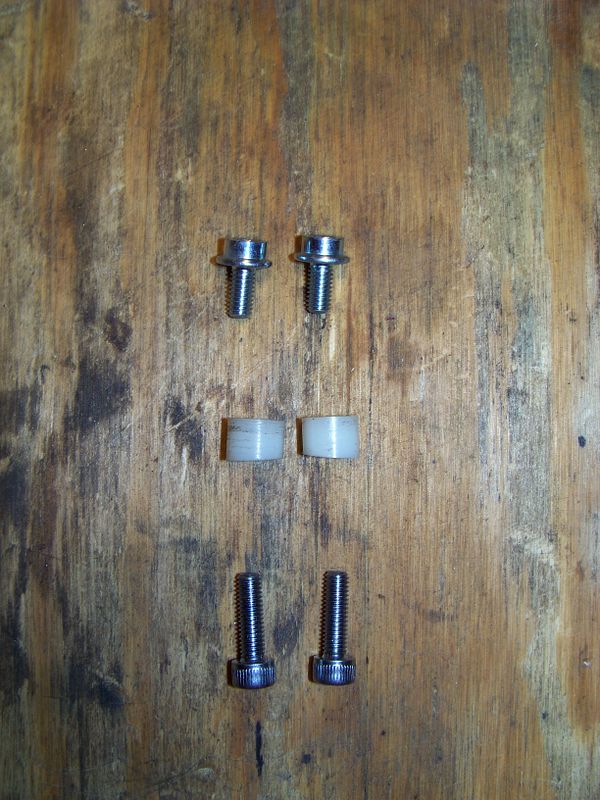
I first cut the 1" spacer in half lengthwise, with a slight angle ~ 10 degrees on the cut, and then filed the beveled ends of the two down to exact (and nearly identical) length of 10mm at the longer side of the bevels.
Installed the two beveled spacers in the bottom cap screw locations with the fatter sides down, using the longer 20mm cap screws. This will tilt the carrier and windshield back further towards the rider.
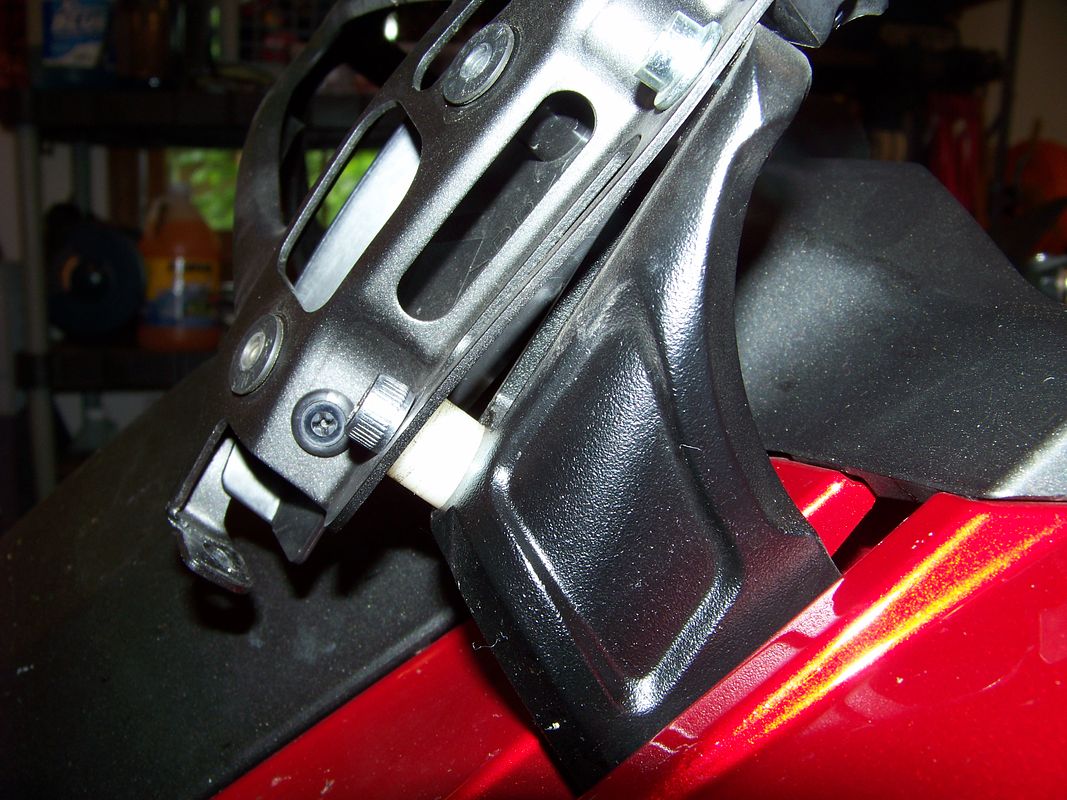
The carrier assembly is a relatively thin steel plate and will flex a bit as you tighten it up. If you over do it you may bend the steel to the new angles, but that should be no big deal. It's easy enough to get them tight enough that they will not come loose, even with the slightly skewed hardware.
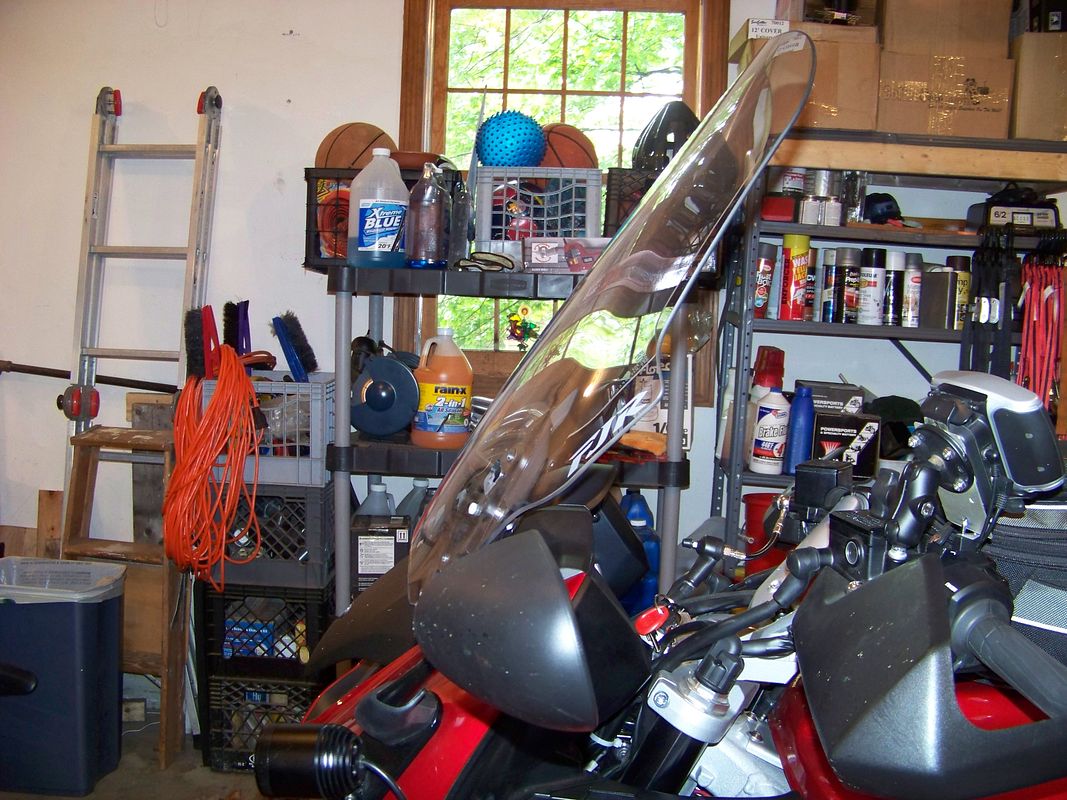
Now for the results with the Yamaha Accessories Touring Windshield mounted:
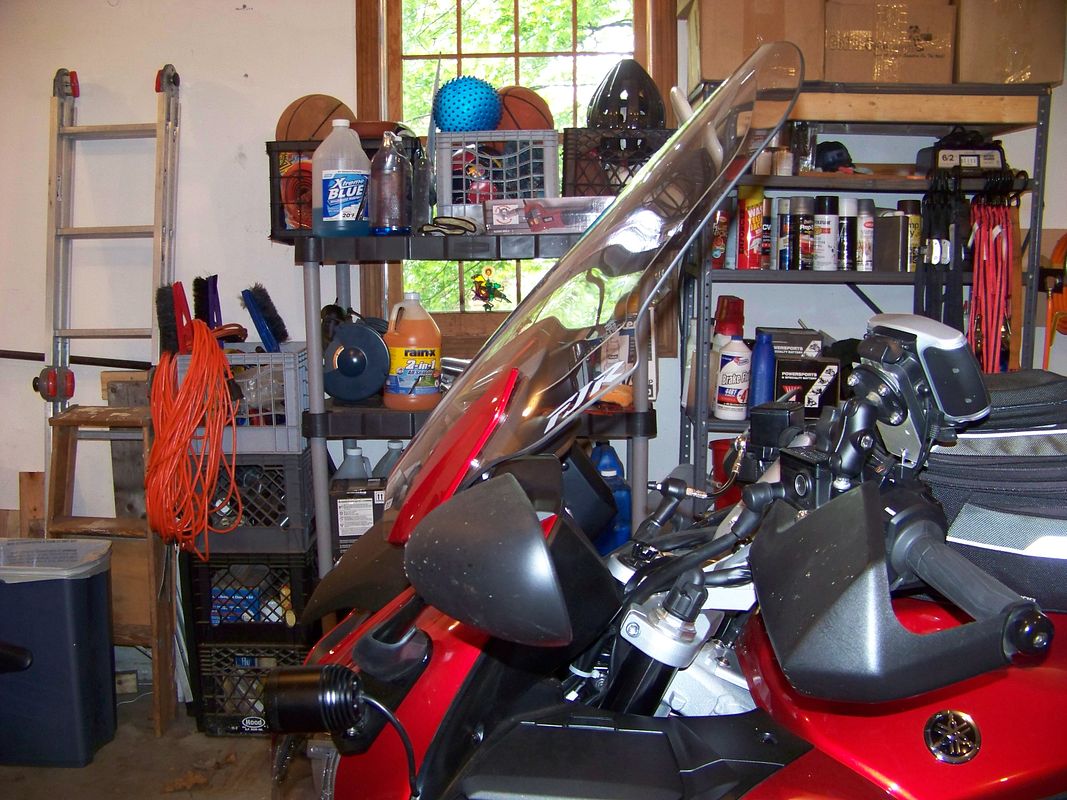
Windshield at maximum height in stock configuration:
Angle is -34 degrees from vertical (steep) and the height above the steering stem nut is 22 1/8"
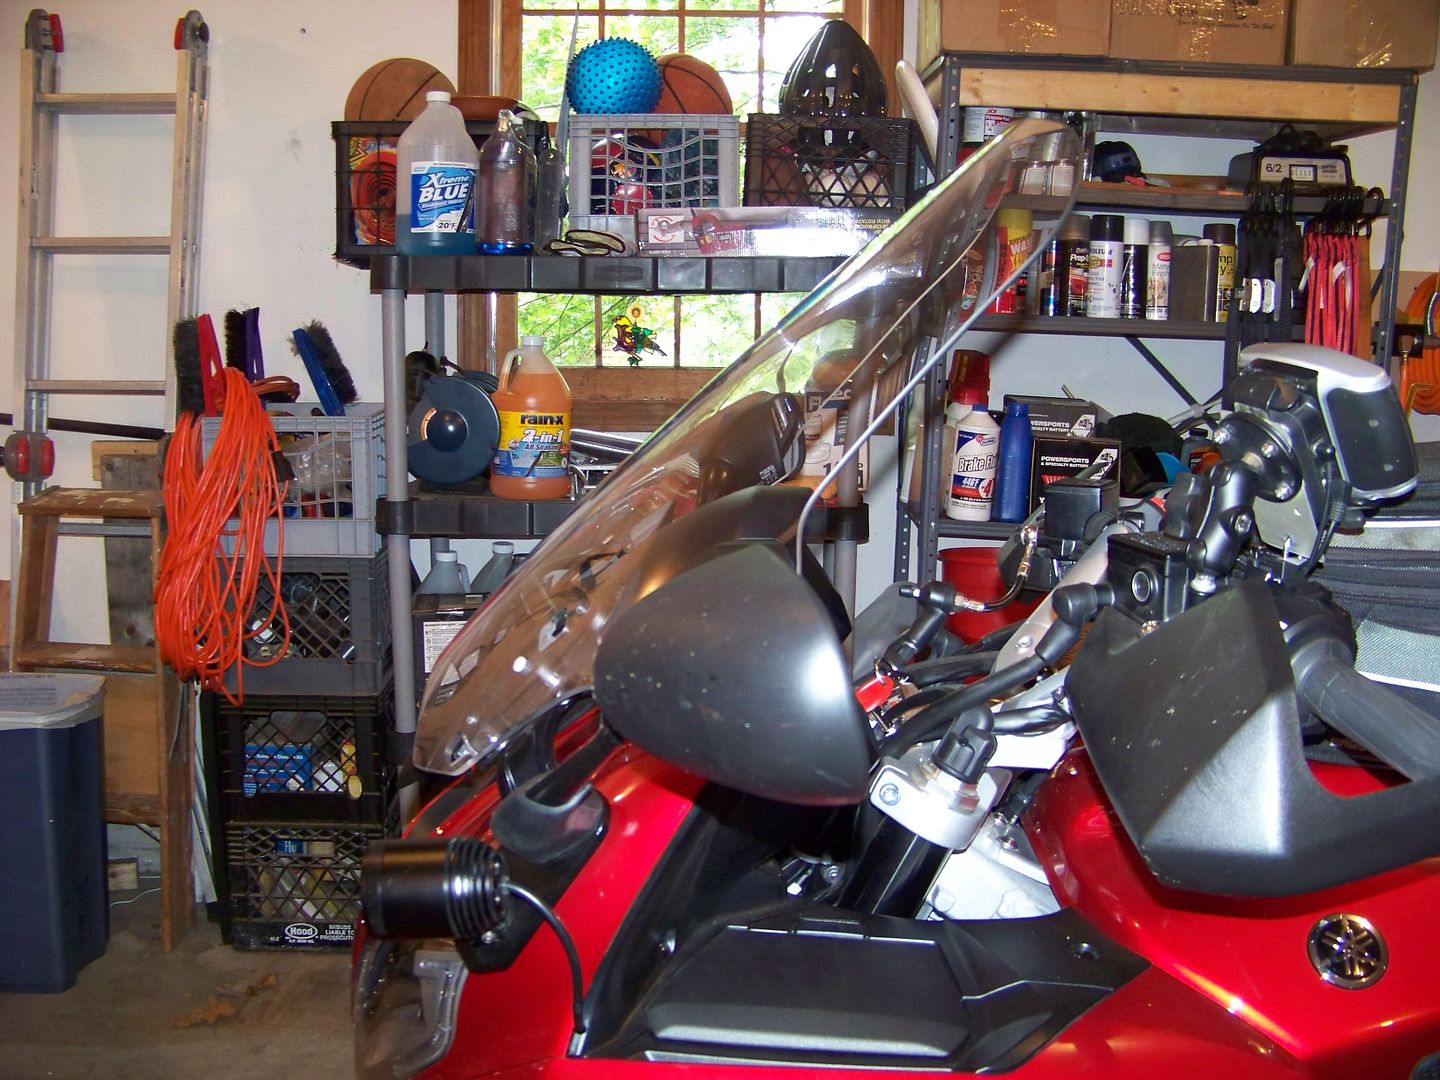
Compared to Windshield at maximum height with the 10mm spacers installed
Angle is tilted back -41.6 degrees and height is still 21" above the stem nut, so a loss of 1 1/8" height but an increased tilt of 7 1/2 degrees.
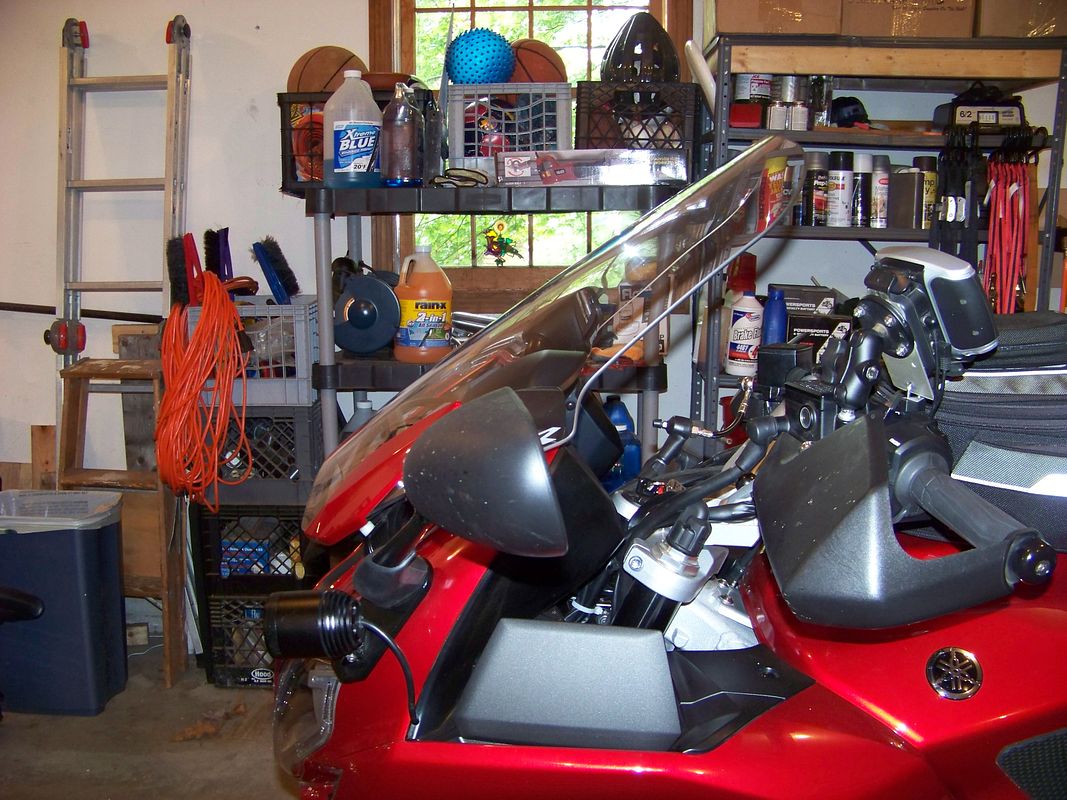
Now, the stock windshield config at minimum height is 16 3/4" above the stem nut and at a -46.6 degree angle
And the minimum height with the spacers installed is 15 1/4" and a 54 degree angle from vertical.
To summarize the measurements,
The shield stock goes from 16 3/4" to 22 1/8" height and -46.6 to -34 degree tilt from vertical.
The spacers will go from 15 1/4" to 21" height at from -54.0 to -41.6 degrees tilt from vertical.
After a few days of mixed use, on and off the highway, I can say there is definite improvement on both ends of the shield's range. Whereas, (with the touring windshield mounted) there used to be a lot of turbulence and buffeting of my head with the shield fully up, now the fully up position is actually usable. And with the increased angle and lower shield top at the lowest position you can get enough cooling airflow to you upper body to be able to run a bigger shield during the hotter weather, so you'll be prepared for those occasions when it cools off (in the mountains) or you hit some bad weather without roasting yourself on the nice days.
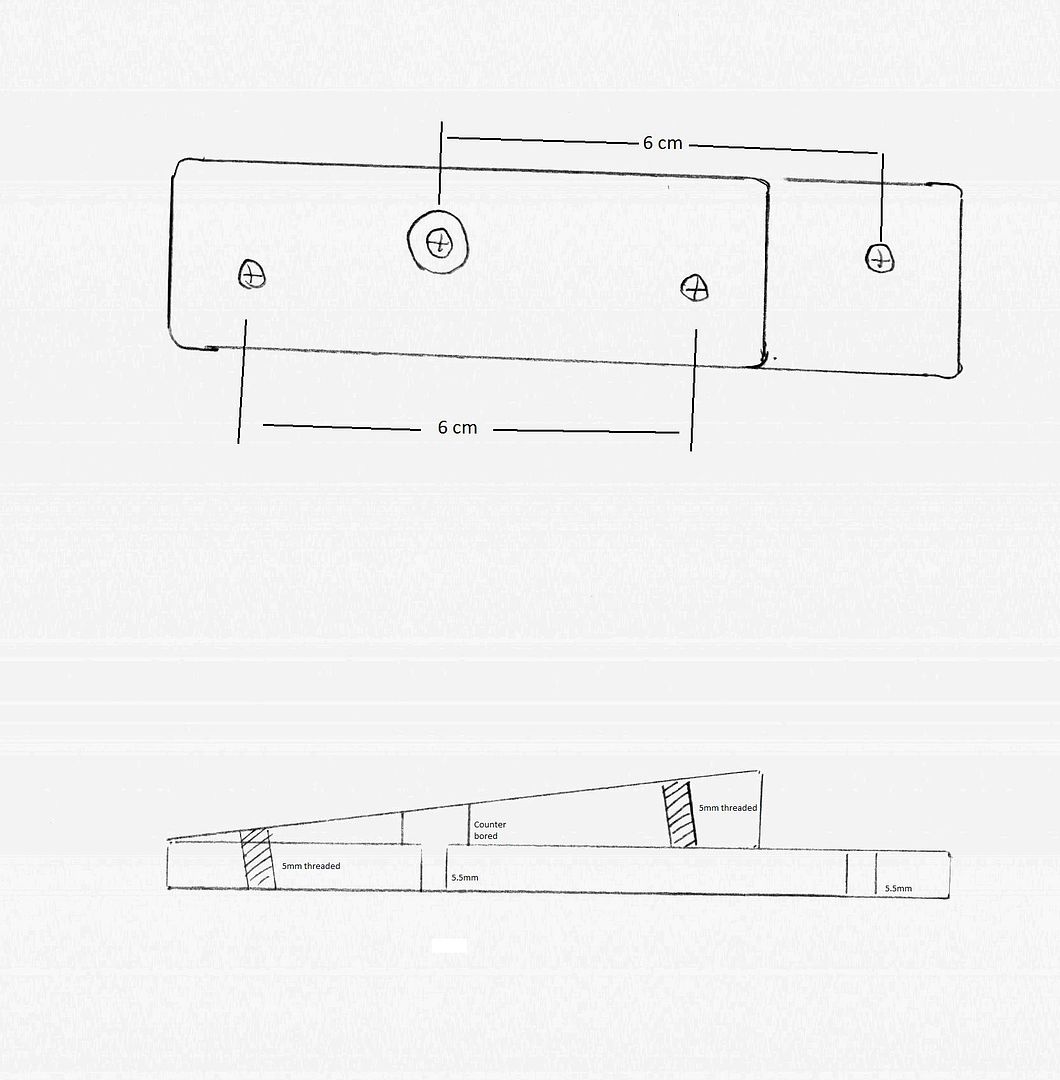
I've made some measurements of the mounting area, screw spacings, and the spacing of the two arms to each other at the four screw holes as the next step may be to fabricate something a little bit more elegant such as an interface between the arms and the carrier. Ideally I would like to shift the carrier assembly both back in the angle (as the spacers do) but also upwards in that plane about an inch or so to regain some of the lost height from the new angle.
The tricky part will be that the two arms are angled to each other, so moving the new screw holes upwards will be at an angle to the two screw holes. Not a big deal, just something that needs to be calculated in the design. In the meantime, this works pretty well, and could actually be used with an even taller windshield such as a Cee Bailey 23" or CalSci XL and still be livable in the heat of summer.
Disclaimer: This is my experience with a Yamaha Touring windshield on an FJR with a Russell Daylong seat in the low position and HeliBars Riser plate installed with the bars twisted all the way forward. I am 6'2" tall and wear a 32" inseam dress pants. Your experiences with your setup and your body shape may differ.
[edited to correct the cap screw size to 6mm per post by NightShine]
Since my experiments have been relatively successful, I've decided to go ahead document what I've done (so far), so that other 3rd Gen folks can do some of the same, or maybe they will spin off of this with something even better.
To get started, lets take a look at the windshield mechanism on the 3rd Gens. Refer to the parts layout below:
After removing the two painted trim covers, (#4) the windshield is mounted to the part that I'll call the "windshield carrier" (#8) with six plastic screws (#2) threaded into six rubber captive well nuts (#3). Once the shield is removed you are left with the carrier bolted to the two articulating arms on either side of the Drive Unit Assembly that (#13) protrude through the two slots in the front faring. The carrier itself is mounted to the arms using four 6mm x 12mm long flange head cap screws (#9).
After removing the four cap screws the whole carrier assembly can be lifted off and you are looking at the arms of the Drive Unit Assembly.
Note the angled relationship of of the two arms to each other. Here's a closer look at one of the two arms
And the back side of the carrier assembly mounting area
Seems simple enough to install some spacers and modify the angle that the carrier mounts to the moving arms and thereby change the shield angle. The parts that I used were pretty cheap and readily available, I used two 6mm x 20mm Allen head cap screws, and two short spacers that I manually cut from a single plastic 1/4" ID, 1/2" OD x 1" length plastic spacer bought at Home Despot.
The picture below shows two of the 20mm screws and plastic spacers along with two of the four stock 12mm long screws that will be used in the top two holes.
I first cut the 1" spacer in half lengthwise, with a slight angle ~ 10 degrees on the cut, and then filed the beveled ends of the two down to exact (and nearly identical) length of 10mm at the longer side of the bevels.
Installed the two beveled spacers in the bottom cap screw locations with the fatter sides down, using the longer 20mm cap screws. This will tilt the carrier and windshield back further towards the rider.
The carrier assembly is a relatively thin steel plate and will flex a bit as you tighten it up. If you over do it you may bend the steel to the new angles, but that should be no big deal. It's easy enough to get them tight enough that they will not come loose, even with the slightly skewed hardware.
Now for the results with the Yamaha Accessories Touring Windshield mounted:
Windshield at maximum height in stock configuration:
Angle is -34 degrees from vertical (steep) and the height above the steering stem nut is 22 1/8"
Compared to Windshield at maximum height with the 10mm spacers installed
Angle is tilted back -41.6 degrees and height is still 21" above the stem nut, so a loss of 1 1/8" height but an increased tilt of 7 1/2 degrees.
Now, the stock windshield config at minimum height is 16 3/4" above the stem nut and at a -46.6 degree angle
And the minimum height with the spacers installed is 15 1/4" and a 54 degree angle from vertical.
To summarize the measurements,
The shield stock goes from 16 3/4" to 22 1/8" height and -46.6 to -34 degree tilt from vertical.
The spacers will go from 15 1/4" to 21" height at from -54.0 to -41.6 degrees tilt from vertical.
After a few days of mixed use, on and off the highway, I can say there is definite improvement on both ends of the shield's range. Whereas, (with the touring windshield mounted) there used to be a lot of turbulence and buffeting of my head with the shield fully up, now the fully up position is actually usable. And with the increased angle and lower shield top at the lowest position you can get enough cooling airflow to you upper body to be able to run a bigger shield during the hotter weather, so you'll be prepared for those occasions when it cools off (in the mountains) or you hit some bad weather without roasting yourself on the nice days.
I've made some measurements of the mounting area, screw spacings, and the spacing of the two arms to each other at the four screw holes as the next step may be to fabricate something a little bit more elegant such as an interface between the arms and the carrier. Ideally I would like to shift the carrier assembly both back in the angle (as the spacers do) but also upwards in that plane about an inch or so to regain some of the lost height from the new angle.
The tricky part will be that the two arms are angled to each other, so moving the new screw holes upwards will be at an angle to the two screw holes. Not a big deal, just something that needs to be calculated in the design. In the meantime, this works pretty well, and could actually be used with an even taller windshield such as a Cee Bailey 23" or CalSci XL and still be livable in the heat of summer.
Disclaimer: This is my experience with a Yamaha Touring windshield on an FJR with a Russell Daylong seat in the low position and HeliBars Riser plate installed with the bars twisted all the way forward. I am 6'2" tall and wear a 32" inseam dress pants. Your experiences with your setup and your body shape may differ.
[edited to correct the cap screw size to 6mm per post by NightShine]
Last edited by a moderator:
")