I'm at 75k miles. THere is a dusting of snow on the streets and it's a Saturday that I have nothing much planned. Time to check the valves on the Feej. The last two times I checked them, all of he clearances wee good. Always on the tighter end of spec, but definitely good to go.
Unfortunately, try as I might, I couldn't manage to jam a .006" feeler gauge under the intake valves this time. Boo Hoo! I tried to convince myslef that .005" would be OK for another 25k miles, but if I lunched my valves because I was too lazy to adjust them I would never be able to forgive myself.
All of the Exhaust valves are still good at a loose .008" (can barely still get a .009 in there), but every one of the intakes has closed down enough to require reshim. The prior two checks they were all at .006" with varying degrees of tightness. Now they are all at .005 with the same vary degrees.
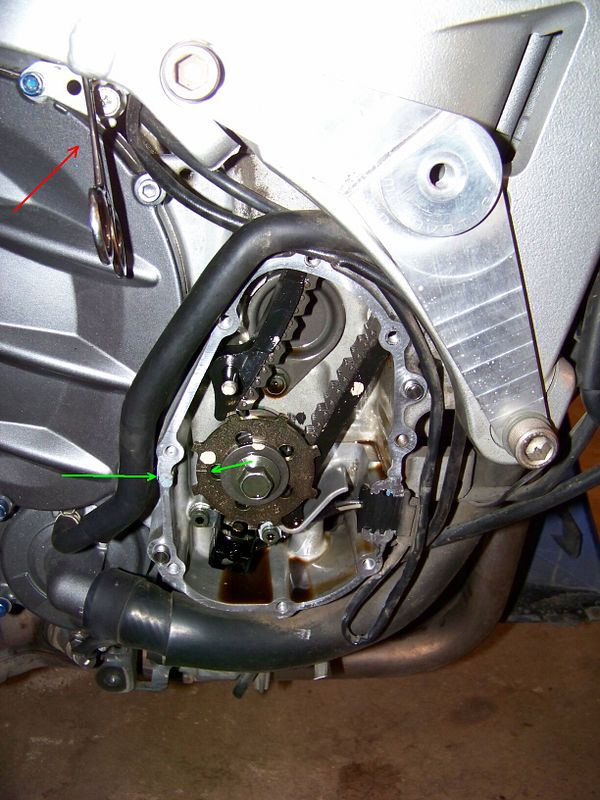
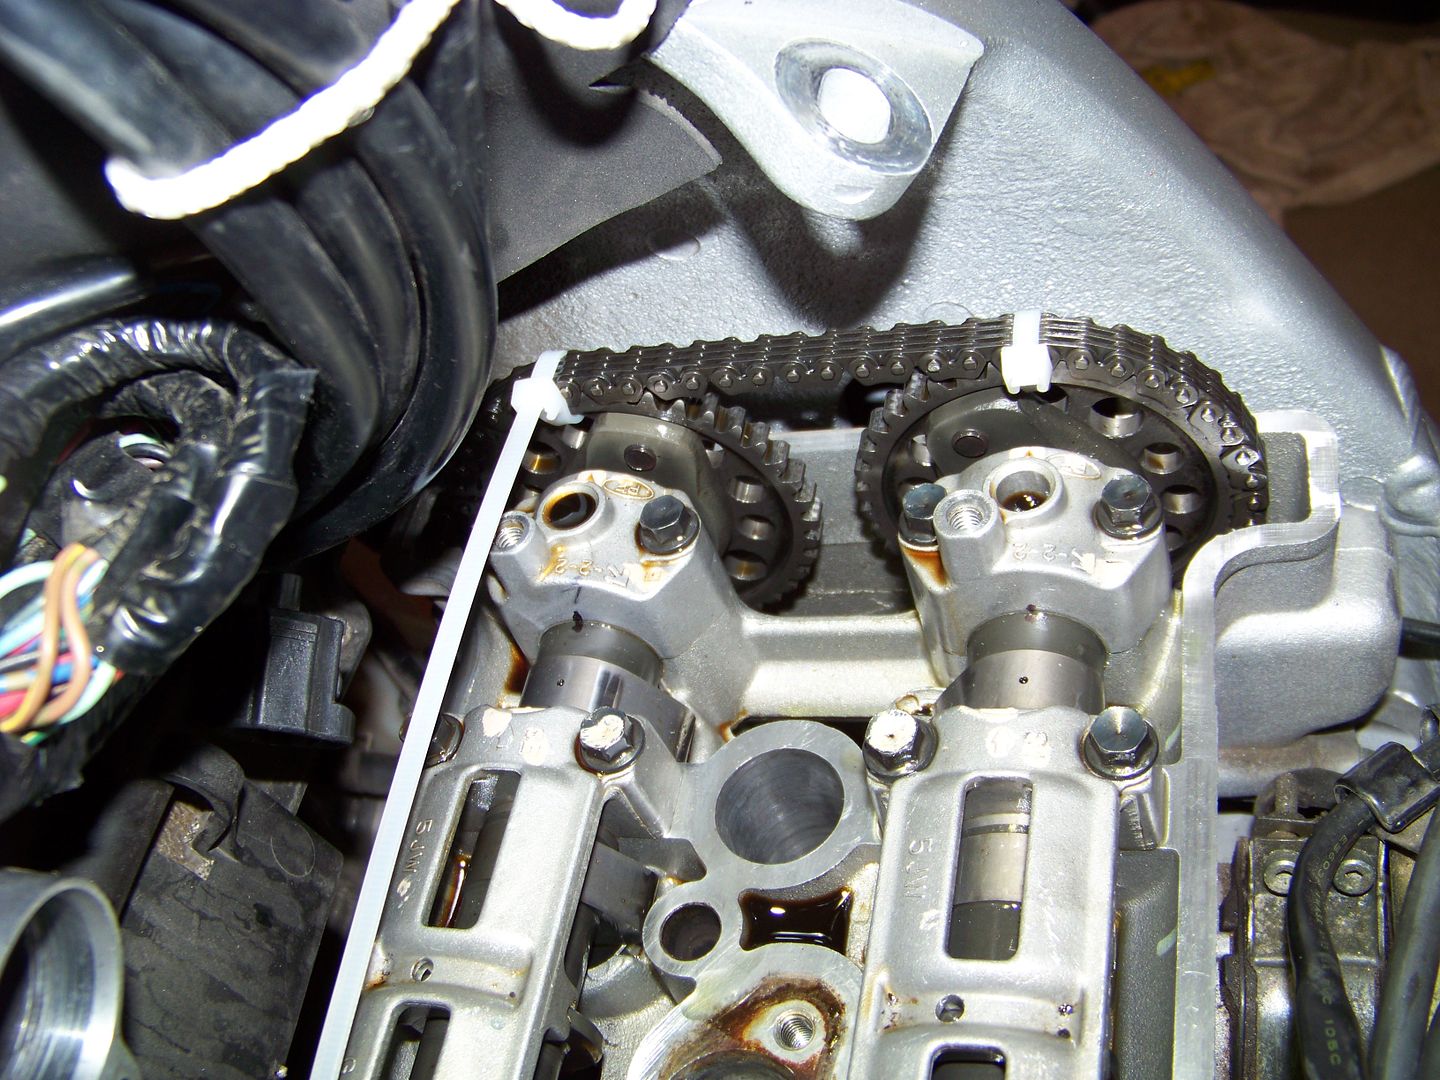
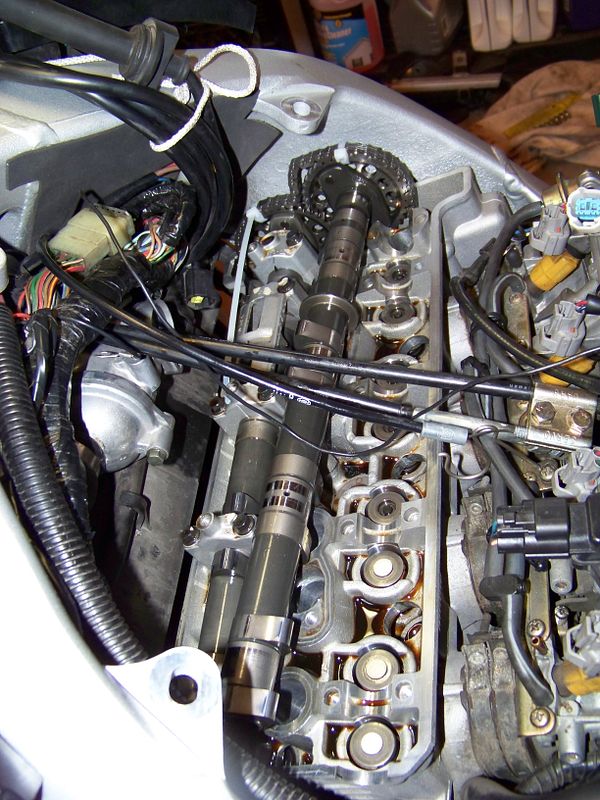
I've bit the proverbial bullet and decided to go ahead and adjust them in to spec, so I now have my cams tywrapped to the chain, the tensioner slacked off, and the intake cam and shims are all out. One thing I found is that the shims, after 75k miles, no longer show any markings of what they once were. I can see they were ink marked at one time, but the print is now completely illegible. No problemo... 'cause I got me a micrometer. After measuring the shims I was pretty surpised to find the shims were all so close in thickness. I guess that says a lot about Yamaha's manufacturing tolerances, eh?
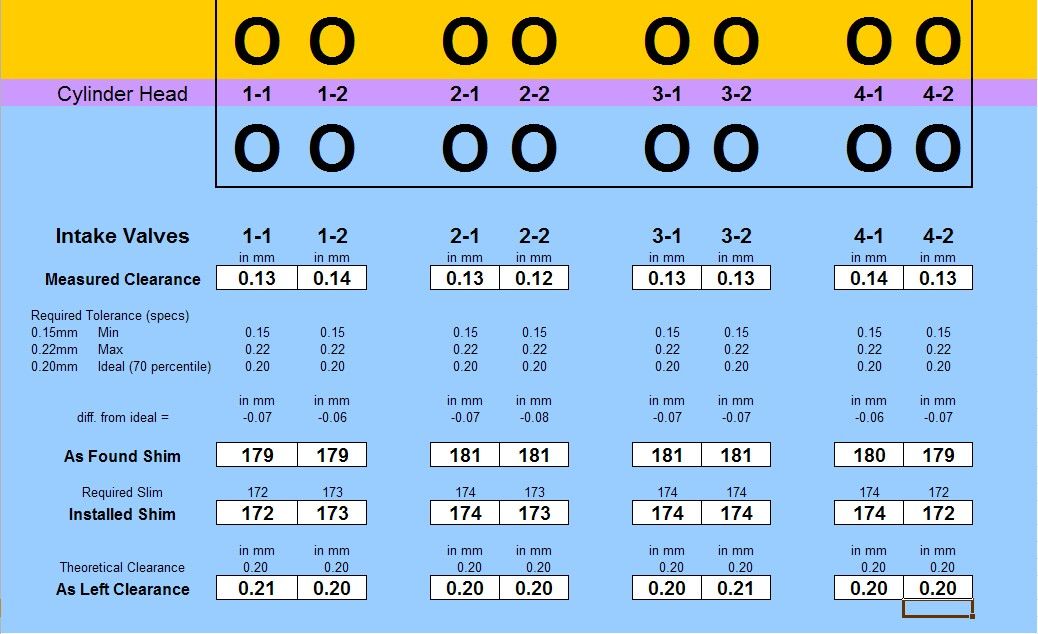
All of my intake shims are either 1.79, 1.80 or 1.81 mm. Since they are all too tight now, and the shims are only available in .05mm increments, that says I'll need 8 new 1.75mm shims. I think I may investigate getting Honda shims as I understand they come in smaller increments and will allow me to fully exercise my anal retentive mechanical creativity, and place the new clearances precisely in the middle of the spec range. Hey... why not?
Follow-up to come
Unfortunately, try as I might, I couldn't manage to jam a .006" feeler gauge under the intake valves this time. Boo Hoo! I tried to convince myslef that .005" would be OK for another 25k miles, but if I lunched my valves because I was too lazy to adjust them I would never be able to forgive myself.
All of the Exhaust valves are still good at a loose .008" (can barely still get a .009 in there), but every one of the intakes has closed down enough to require reshim. The prior two checks they were all at .006" with varying degrees of tightness. Now they are all at .005 with the same vary degrees.
I've bit the proverbial bullet and decided to go ahead and adjust them in to spec, so I now have my cams tywrapped to the chain, the tensioner slacked off, and the intake cam and shims are all out. One thing I found is that the shims, after 75k miles, no longer show any markings of what they once were. I can see they were ink marked at one time, but the print is now completely illegible. No problemo... 'cause I got me a micrometer. After measuring the shims I was pretty surpised to find the shims were all so close in thickness. I guess that says a lot about Yamaha's manufacturing tolerances, eh?
All of my intake shims are either 1.79, 1.80 or 1.81 mm. Since they are all too tight now, and the shims are only available in .05mm increments, that says I'll need 8 new 1.75mm shims. I think I may investigate getting Honda shims as I understand they come in smaller increments and will allow me to fully exercise my anal retentive mechanical creativity, and place the new clearances precisely in the middle of the spec range. Hey... why not?
Follow-up to come

")