Fixing that sticking rear brake pedal for good

Yamaha FJR Motorcycle Forum

Help Support Yamaha FJR Motorcycle Forum:

This site may earn a commission from merchant affiliate links, including eBay, Amazon, and others.

ToyQuest

Well-known member
Joined
May 6, 2011
Messages
76
Reaction score
2
Location
Lexington, NC
I've grown tied of disassembling/reassembling the rear brake pedal just to keep it lubed. I decided to fix it for good when I had it off today. :D

The GenII rear brake pedal shaft is already counterbore from the back side making the fix pretty simple. (Not sure about the Gen 1 fitment)

I turned down a press fit bushing to go into the pedal shaft counterbore. The diameter for mine pedal shaft counterbore was .394". I turned the bushing .397x.500 with a oversize lip and thread it for a 1/4x28 zerk fitting. I drill a single .100 hole in the shaft in the recessed lube carrier area.

It then was as simple as pressfitting the bushing, install the zerk fitting and reassembling - for the last time

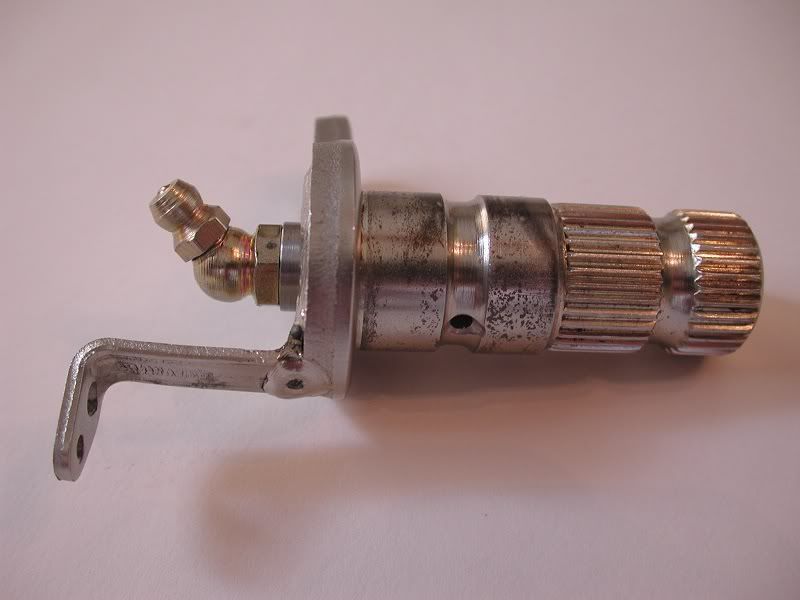
Below are all of the pics. I did end up using a straight zerk fitting rather than the 45 degree one pictured here for optimal ease of use. Now it is a 10 second operation to lube the pedal.

Now time to one of the CNC owner/operators here to turn a batch down for everyone. Hint...Hint...

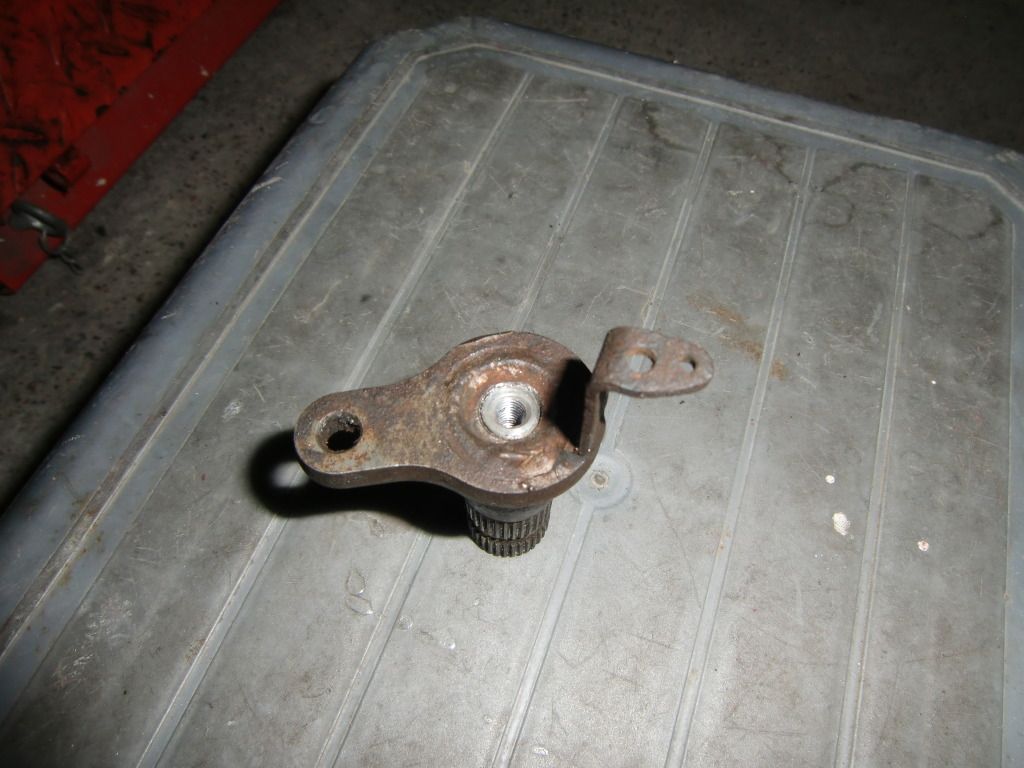
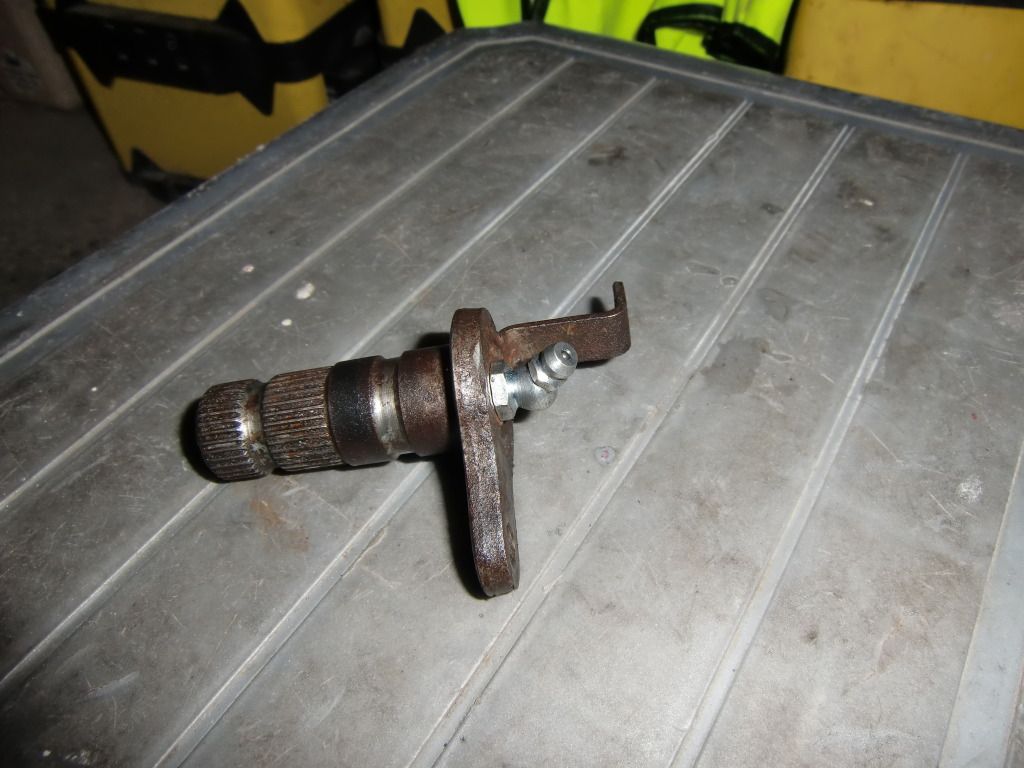
Brake pedal shaft, press fit bushing, zerk fitting

7833c545.jpg


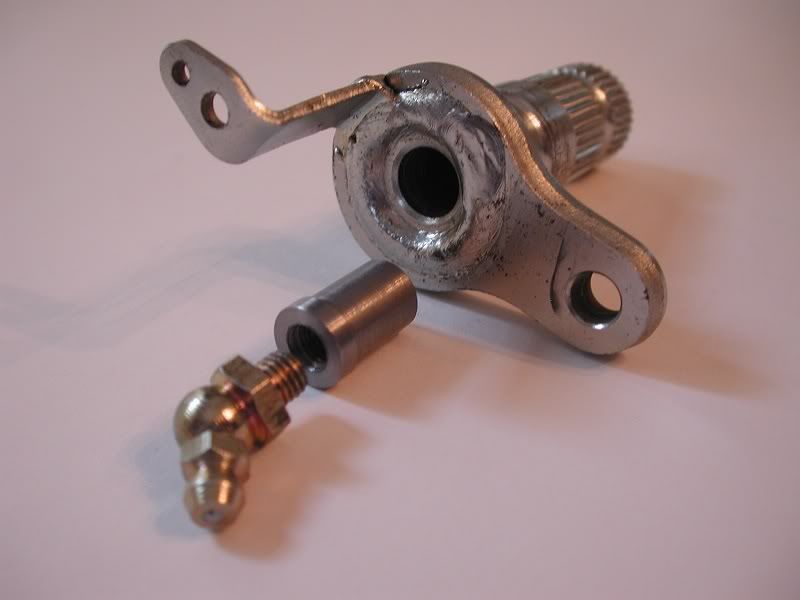
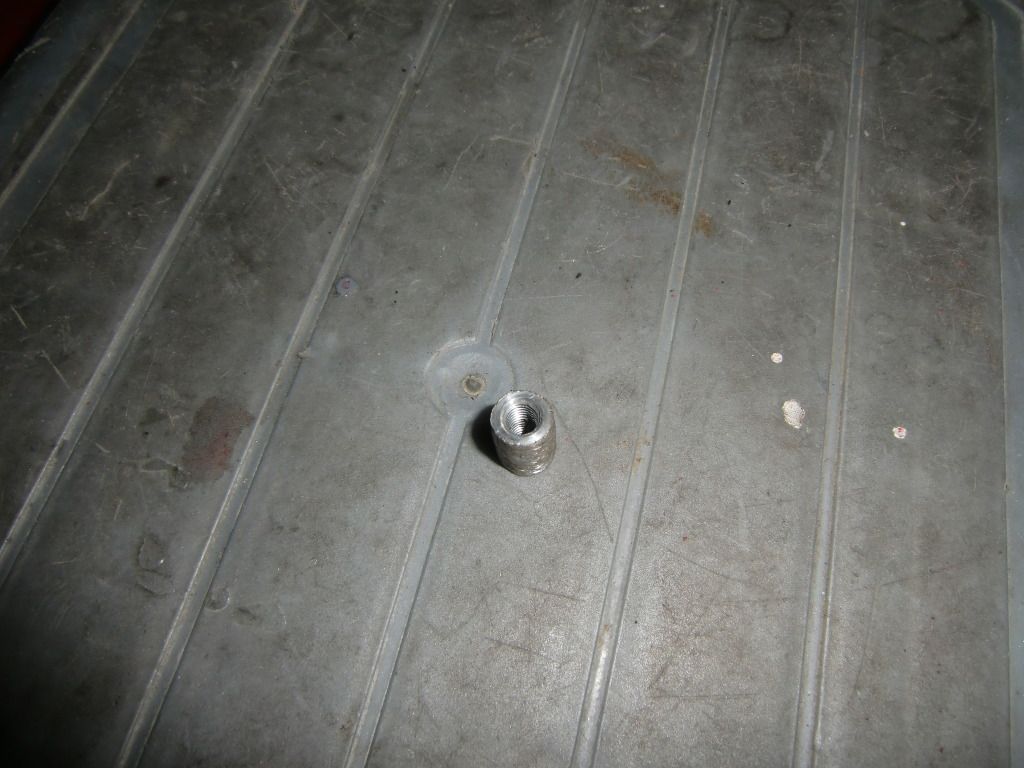
Before being pressed in

4d464ba3.jpg


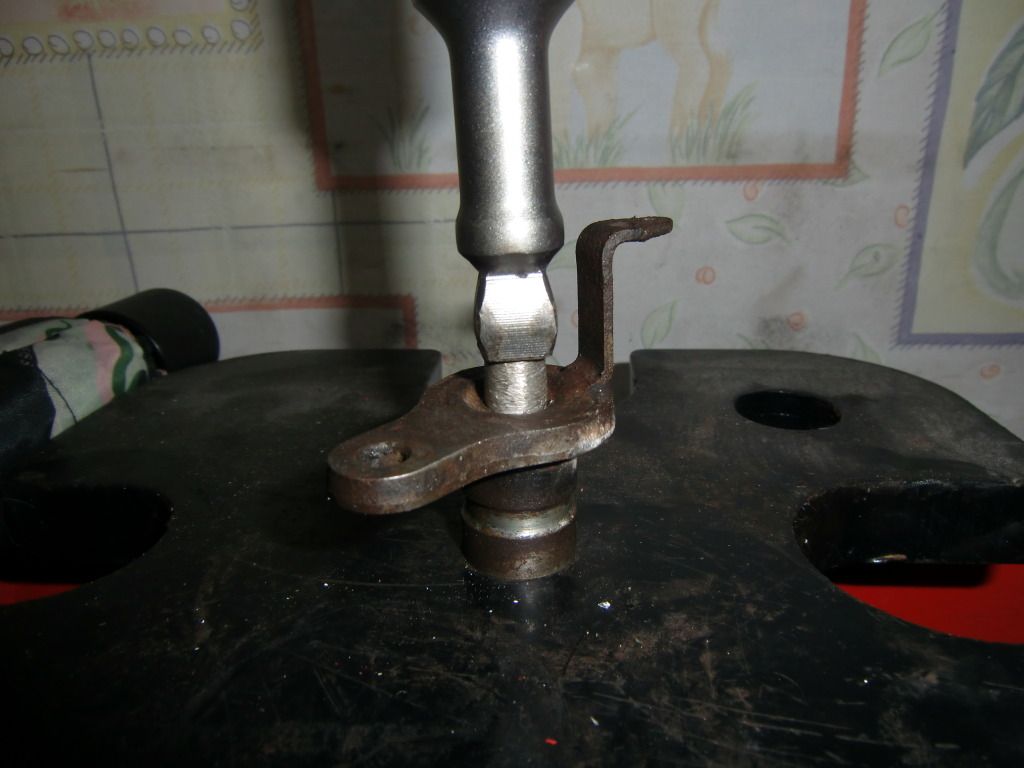
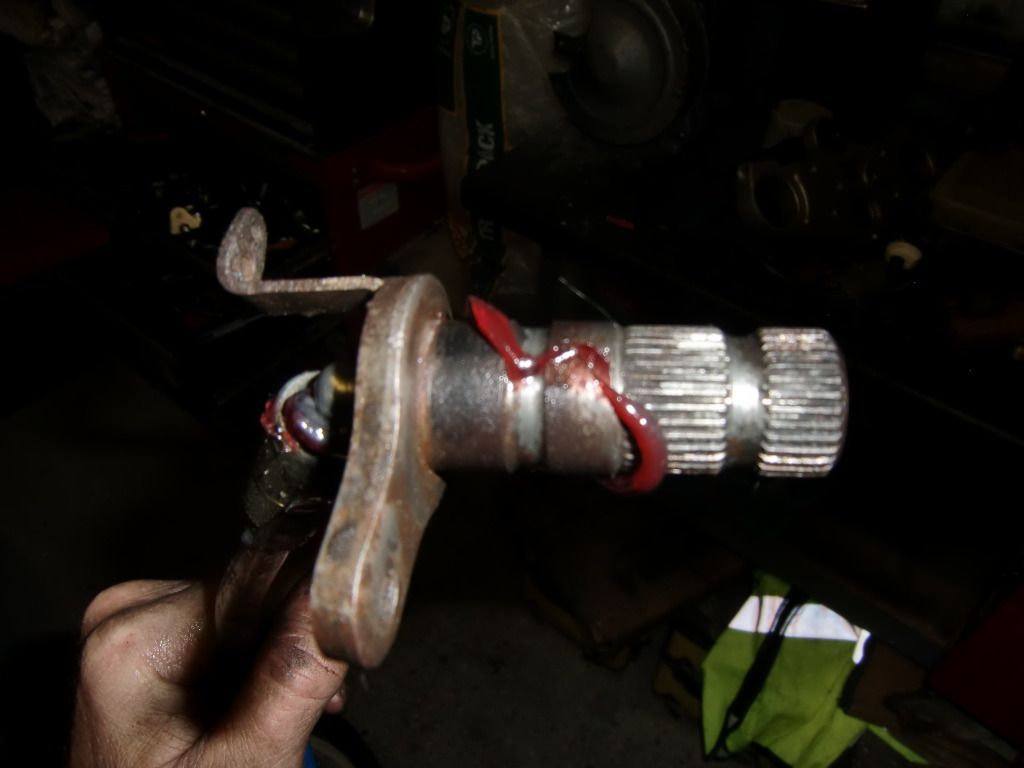
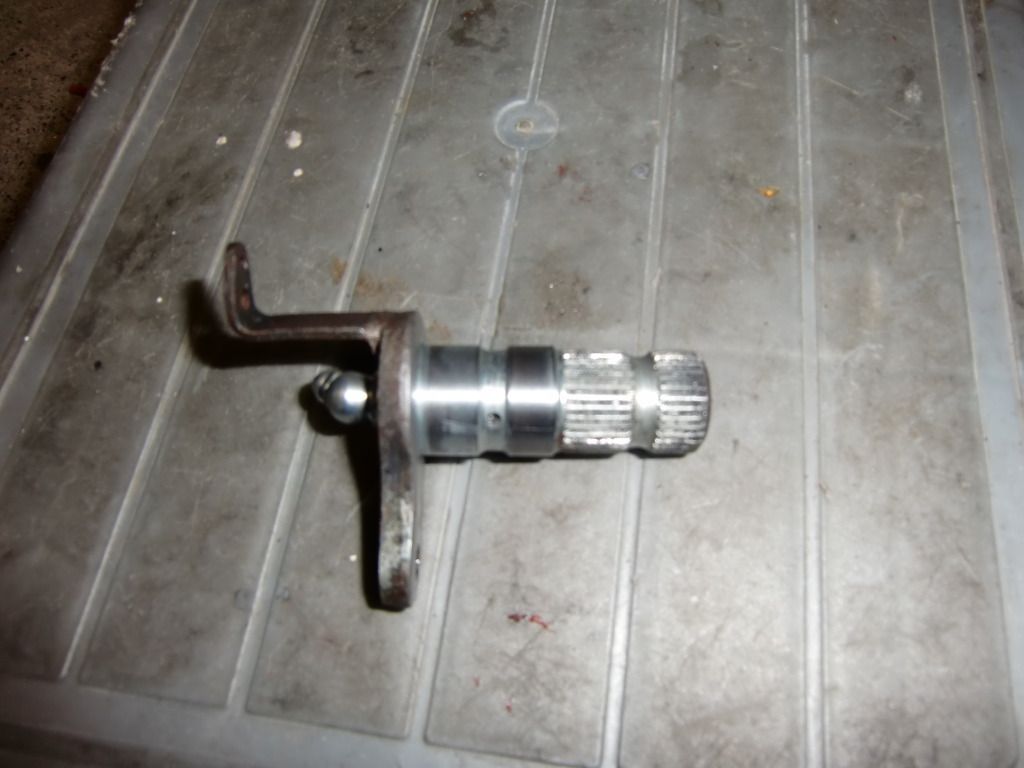
After being pressed in

d9044ba1.jpg


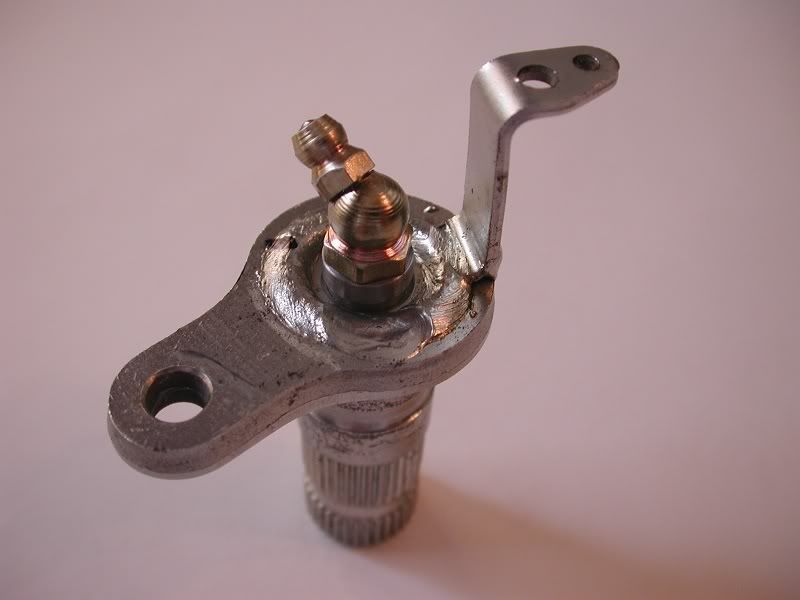
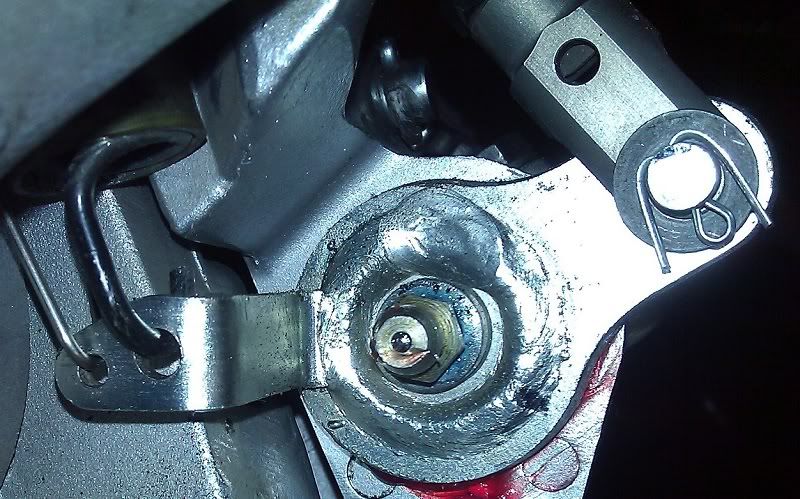
Completed assembly with grease hole drilled

d713195a.jpg


Nice job and clean install!

Now, off to find a buddy with a lathe... :)

--G

 
Last edited by a moderator:
I would consider buying a new one and send it to you, then give you my old to start an exchange program with others. Let me know if that interests you at all.

EDIT: If the below price is correct I would send you two new ones and you send me one back and keep one.

The only reason I am so hot on this is I just tore mine down at 16,000 miles and while not hard it is time consuming, and it definitely needed done!

 
Last edited by a moderator:
Nice work ToyQuest,

I don't recall seeing a hole (counterbore) on my Gen 1 (2003) when I recently had it off, but looking at the Yamaha parts break-down, Yamaha updated the part # from 5JW-27212-00-00 to 5JW-27212-01-00. Not sure why the update.

Online parts sites show around $25 for this part for those who may want to upgrade & install a grease fitting.

*Edit* On my '03, it does have the counterbore where the bushing would go.

 
Last edited by a moderator:
I just checked and the first gen '05 does have the counter bore from the back side. You can see it while it is still on the bike.

I'd be in for a press in bushing and zerk fitting kit. Drilling the holes should be easy enough.

 
Last edited by a moderator:
Snap of pic of it on the bike and post it up please!
Here you go. As indicated in the original post, I ended up using a straight zerk for the best access with a grease gun.

I'm currently checking around to see what a cnc shop would charge for a batch made out of 303/316 stainless (starting with 7/16 bar stock). Before making a batch I would want to get a good sampling of other bikes to ensure that the counterbore is a consistent .394" (10mm)

2c8c3a08.jpg


Now that is sweet...Alternately, tell me why it would not be easier to simply drill the shaft housing in line with the groove in the shaft and screw in a self tapping zirk?

 
I guess that is possible. I just didn't want to possibly reduce the strength of the housing by drilling it. The counterbore seemed like the best strength wise.

Full disclosure, the other option that I did consider was "plugging" the counterbore from the back side and drilling/tapping the outer end of the shaft. I just didn't want the zerk fitting poking out on the outside.

 
Thanks for posting this. I've just spent the afternoon doing this mod to all 3 of my FJRs. I used an ali insert rather than the steel one you used (just because its easier to work with) I also used an angled grease nipple to ease access.

(done on gen 1 bikes)

rearbrakesplinemod003.jpg


rearbrakesplinemod005.jpg


rearbrakesplinemod006.jpg


rearbrakesplinemod014.jpg


it works

rearbrakesplinemod017.jpg


Last edited by a moderator:
Damn... when the part's shaft is that rusty, I don't know if grease is gonna be able to make it operate smooth again. You might wanna take some emery cloth or wet 'n dry paper to that thang!

For the record... Mine's been sticky a few times, at the most inopportune times naturally, in the past. But it never looked quite that nasty!! :p

If I rubbed off all the rust there would be nothing left. Works just fine, not too bad for 100,000 miles on salty UK roads. :)

this ones better

002-1.jpg


Last edited by a moderator:
Thanks for posting this. I've just spent the afternoon doing this mod to all 3 of my FJRs. I used an ali insert rather than the steel one you used (just because its easier to work with)
I am just curious about aluminum/steel dissimilar metal corrosion: Is this an issue? Or is it not an issue? Just curious.

(because the life span of these bikes are so short relatively to say: buildings that the amount of corrosion caused by this issue is insignificant during the typical FJR lifespan?)

 
Last edited by a moderator:
Top