Building a Rally Bike

Yamaha FJR Motorcycle Forum

Help Support Yamaha FJR Motorcycle Forum:

This site may earn a commission from merchant affiliate links, including eBay, Amazon, and others.
I was a bit concerned about weakening the OEM stand with those two holes, something the Gaurald unit avoids. We will see, it seems strong enough.

If it fails I will simply cut some mild steel to the same shape, weld it on and paint it.

First competition is in two weeks. It will be a bit of a test for the new set-up, but I will still be trying!!

 
Twigg

One thing you may want to look into is a replacement for those Velcro/buckle stripy thingies that yamaha gave us to secure items in the main storage area of our clamshell bags...

IMG_0124_zps941557a5.jpg


I have some small RocStraps mounted in my bags. No more fighting the velcro that can't take any tugging without letting go.

IMG_0127_zps7ed063de.jpg


They work pretty well for securing the Go Bag when the lid is opened, however, I am looking for a clean way to mount the straps down near the bottom of the opening. This is still a work in process...

IMG_0126_zps2aea84fd.jpg


Brodie

rolleyes.gif


Last edited by a moderator:
Those straps look effective. Another member offered me some OEM straps, but I have already fitted mini-bungees across the corners, and for now they'll do.

I'll look for a longer term solution later, but the RocStraps look good.

 
Okay ... One last major thing before it's just a matter of "fine-tuning" ... the Hydration System

I was conflicted about this. Originally, on the Venture, I had the cooler mounted on the plate next to the Aux Tank. It was a "suck" system, and it worked. The problem was that sometimes I like to be able to add water to my jacket, then mess with the vents to keep me cool. When I moved to a taidragger tank, I fixed the cooler to the right passenger foot board, and used a (big) 12V pump.

This also worked with one caveat. With the "suck" system you can blow the water out of the tube and back into the cooler. This means you always get cold water to drink. With the pumped system, water has to remain in the pump and tube so the first few mouthfuls are about the same temperature as a decent cup of coffee, without the flavour.

What to do .... I changed my mind several times, but went with the pump. The cooler is again behind my right shoulder, next the the Summit 4-gallon:

DSCN0106-L.jpg


DSCN0107-L.jpg


DSCN0108-L.jpg


In that third photo you can see the bite valve and the push-to-contact switch. It's reliable and effective. The pump is really a bit big and heavy, but this is a rally bike so I'm not too worried about a couple of pounds here and there, although I may change to a submersible pump because with that I would get the best of both worlds ... pumped water plus the ability to blow the excess back into the cooler.

 
Could you use a check valve and a bypass hose around the pump to blow water back into the cooler?

The other way would be to have a return line from the bite valve. When you hit the button the warm water would be returned back to the cooler and be replaced with cool water.

This may sound a bit silly, however, with the pump system you could set up some windshield washer emitters strategically positioned to get you wet so you could take advantage of 'On Demand' evaporative cooling. If you plumb it right you could hit the button to purge the warm water out the emitters before taking a drink of cool water.

Just a thought.

Brodie

;-)

 
Last edited by a moderator:
They are good thoughts :)

In the UK this would be easy. RV'ers use external water supplies, and drop in a submersible pump that is controlled by the interior faucet.

They are cheap, small and reliable but hard to get here, so I will have one shipped. It's the perfect solution because the pump sits in the water. Converting a windshield washer pump is possible, but it's not as easy as it might seem ... Meanwhile, I have lived with the warm water for a few mouthfuls, it's doable.

 
Still to do ...

Add On/Off switch for LR5s

Add Skene Dimmer for same

Upgrade rear lights ... probably Hyper-Lites

Add Cruise Control

New Tank Bag ... Looking at Moto Centric MotoTrek 19

Auxiliary Cover - Linda T

New rear tire soon .... One that is usually fitted to cars, but doesn't actually say "Car" on it anywhere :D

Most of this will happen after the "How the West Was Won".

 
My .02.... +1 for the Hyper-lite flashing lights on the rear. I have them installed and love them, (I got the U32 brake/running with the license plate bracket) they get people's attention without being too obnoxious in my opinion. I also like that small pelican case idea behind the plate.... I think I need to add that to my bike as well. Very cool set up, and I think your cockpit looks like Darth Vaders bathroom.
punk.gif
Very nice. But on a separate ignorant question, why the two different GPS's?

 
I use them for different things.

The Nuvi 765T right in front of me is primary navigation. It is loaded with all the waypoints I can conceivably hit, and I navigate point-to-point. I get audio directions from that unit.

The other is a StreetPilot 2720. I also has all the waypoints and it has the complete expected route. Most of the time it sits on the Trip Computer page. I use it as my speedometer and it gives averages, including miles remaining.

With that one I can paly "what ifs". What if I drop this bonus, or add that one .. what is the effect on my eta at the barn. I can also use it to scout ahead for gas, etc.

I have about $200 invested in those two units. I could do it with two Garmin Zumos, but that would have cost about $1000 more :D

There really isn't that much in the cockpit. The two GPS aside, there is only the Satellite Radio, the Spot takes care of itself and the phone sits there quietly most of the time.

 
Making burned thighs a thing of the past, hopefully.

I have been suffering from the over-heating of the gas tank issue ... including the black plastic fairing pieces at the lower edge ... they can get too hot to touch.

So I made a heat shield that extends from the front of the tank to the rear hinge, goes down the sides and behind those plastic panels:

DSCN0109-L.jpg


I used this stuff. It was $10 from Home Depot, and is probably sufficient for five bikes or more:

DSCN0111-L.jpg


Heat rating seems decent and I'll report back if there is a problem.

 
Making burned thighs a thing of the past, hopefully.
I have been suffering from the over-heating of the gas tank issue ... including the black plastic fairing pieces at the lower edge ... they can get too hot to touch.

So I made a heat shield that extends from the front of the tank to the rear hinge, goes down the sides and behind those plastic panels:

DSCN0109-L.jpg


I used this stuff. It was $10 from Home Depot, and is probably sufficient for five bikes or more:

DSCN0111-L.jpg


Heat rating seems decent and I'll report back if there is a problem.

It will also be good for keeping the shrimp cocktail fresh on the bike.

 
Last major change before Colorado ...

Whenever possible I like to stay at the Iron Butt Motel. Budget is part of that calculation but there are other reasons. When "on the clock" and taking a rest-stop, the quickest way to get to sleep, with least to do in the morning, is to simply find a quiet place and climb into a bedroll. The pleasure from sleeping this way is hard to quantify but I'll try ...

In the Big Tex Rally 2012 I finished the first day, 1100 miles, in Sanderson, TX. It's a small town right on the southern Texas border with the Rio Grande. There is a small Truck Stop. Behind it I lay in my sleeping bag with the sound of the bike cooling down right next to me. The concrete emitted a steady warmth on the cool October evening, and light pollution was close to nil. I fell asleep looking at more stars than I ever believed existed. Don't get me wrong. Motels have their place too, but everyone should try this, at least once or twice.

While trying to find somewhere to strap the bedroll to the bike I realised that space is at a premium, so I used the last of the aluminum plate I bought a few years ago to make a small shelf behind the Auxiliary Tank. It is bolted to the steel subframe that spreads the load onto the bike. It will not carry much weight and hangs out only a few inches past the vertical section of the OEM subframe. I think it will be just fine, but welcome comments. All I need now is a couple of decent straps.

DSCN0112-L.jpg


Last edited by a moderator:
Had to ditch the water pump. I was cleaning the system with a mild bleach solution and the pump kept stalling, blowing fuses. That's not the kind of reliability I need so it's back to sucking and I'll get an inline submersible pump later.

 
Bike now has a Rally under its wheels. So what worked, and what didn't work as well as I had hoped:

The good news is that everything worked after a fashion. The side cases are too small and I miss, miss, miss having a top case. The Russell seat finally became accustomed to my skinny butt, and 2990 miles were covered with no rear issues. Same cannot be said for my back and shoulders, but lack of fitness is probably the main culprit.

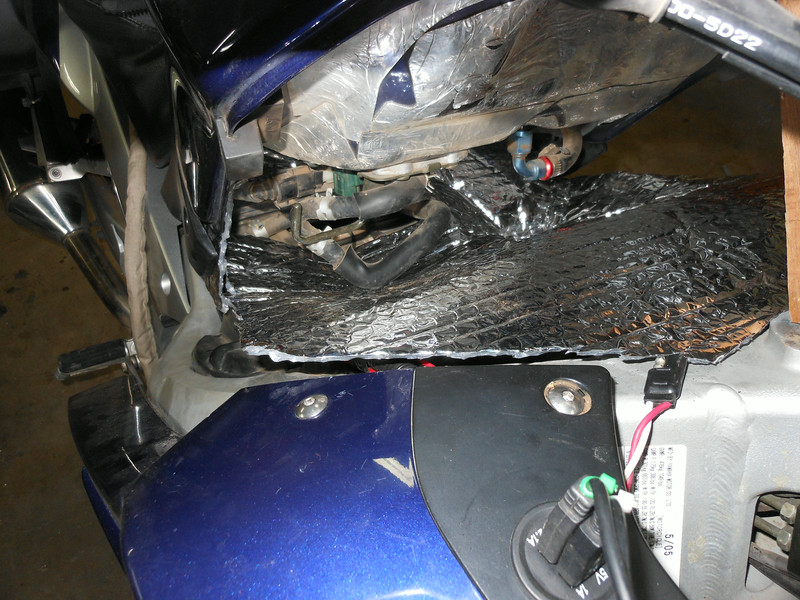
A couple of times the Aux. gas was reluctant to fully drain, but I suspect a pinched vent line was the culprit ... fixed.

The backrest I fitted was awesome, but that will change when I get a better tank ... one that will take a Pelican Case.

The Side Stand Pad I fitted contributed to the tip-over, and that will be addressed. The pad itself worked flawlessly.

The MRA X-Creen added to the windshield seemed to do the job .... however ... It also added to the load on the windshield causing much movement. As an experiment I decided to remove it for the 750 mile ride home. The result was that I could detect no difference in wind noise or buffeting, and the screen appreciated no having the extra loading up top, so it is staying of. Windshield, btw, is a V-Stream.

The $12 "Grip Puppies" are excellent. 2990 miles and not even the slightest tingling in any fingers.

The ThrottleMeister did its job. I finally got the hang of it, and while it is no substitute for CC, it worked well. CC is coming.

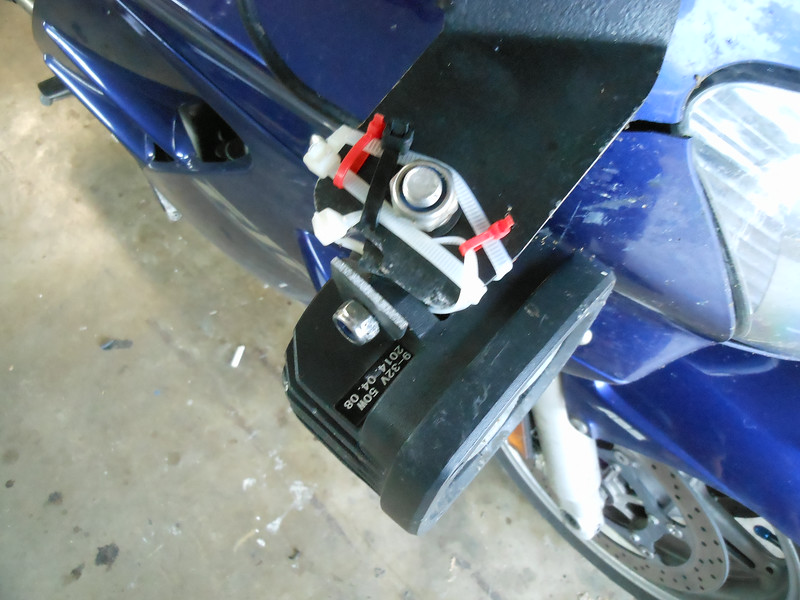
The LED lights (LR5 from ledrider.com) worked perfectly and are probably the only additional lighting I need. If I was to be "picky", maybe a set of narrow spot beams to fill in the hole when on those long, straight roads. Not essential but might be nice to have. It's worth pointing out that for all of my night-riding, including some 40 miles of dirt roads, I was operating with just one of those lights effective ... and it was still awesome.

Tips for "Roadside Repairs":

DSCN0007-L.jpg


Some things were not so good.

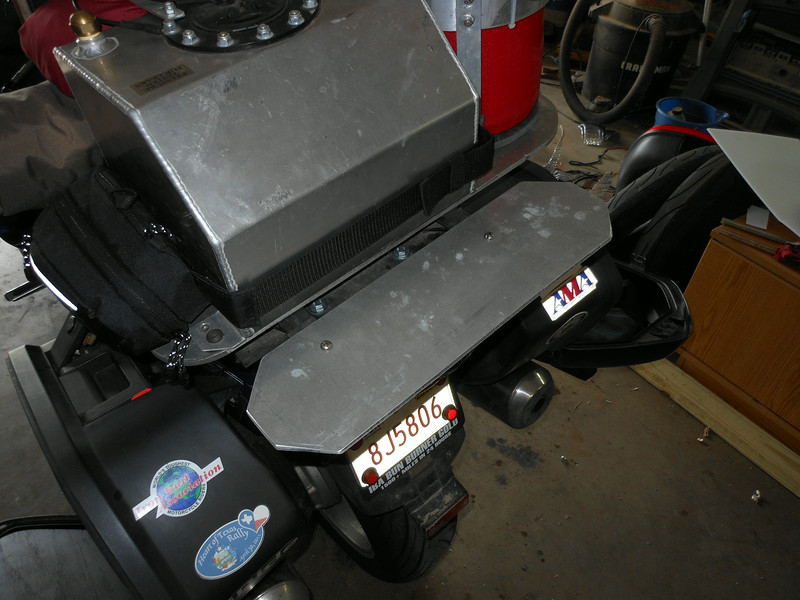
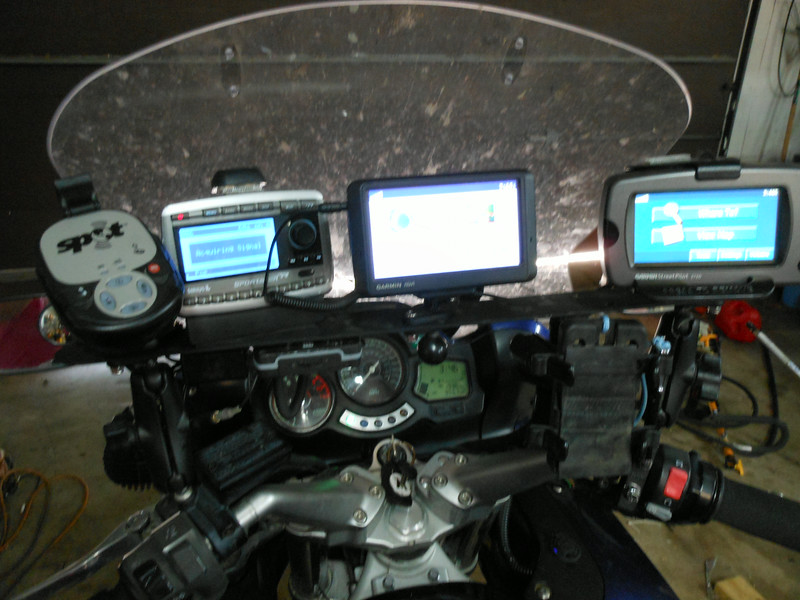
The "farkle shelf" that came with the bike looks great, doesn't work. It puts the GPS (s) and Sat. Radio too far away, and too low. They can be hard to see at the best of times, and in this position using them was a bit of a struggle at times, so it has gone.

I made a farkle-bar for my Venture Royale, and it was time to bring it back into service.

DSCN0010-L.jpg


This brings all of the electronics much closer and just below my eyeline while riding. I can still see all the instruments on the dash and it easily clears the windshield at all heights.

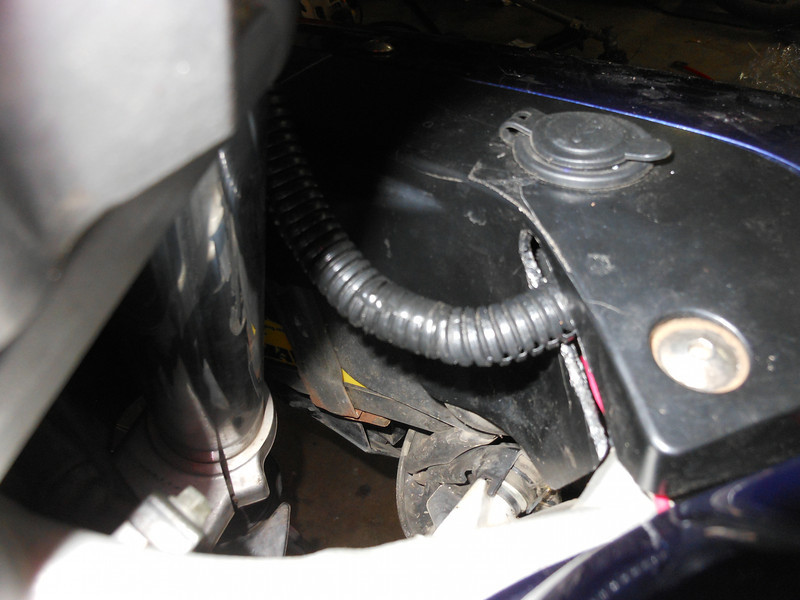
Previously I made and electrical box to attach to the bar, but this time all the wiring would comfortably reach from the Fuzeblock. I simply needed to cut a slot in the now repaired "D" Panel:

DSCN0015-L.jpg


This system might look a bit odd, but It is tried and tested and works well for me.

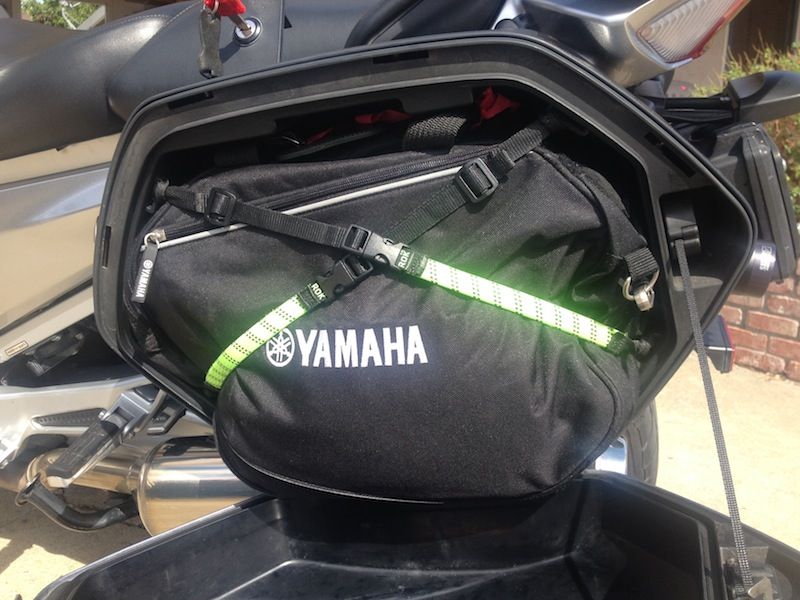
The magnetic tank bag I used was too small. I knew it would be and was not disappointed. Magnetic bags make gas stops a breeze, and underneath the bag is a brilliant place to keep a Rally Flag. I'll get a bigger bag.

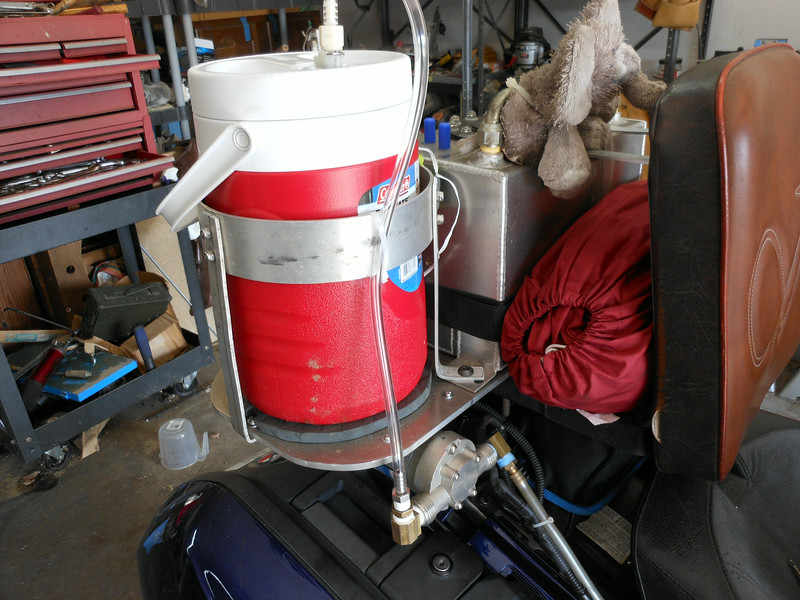
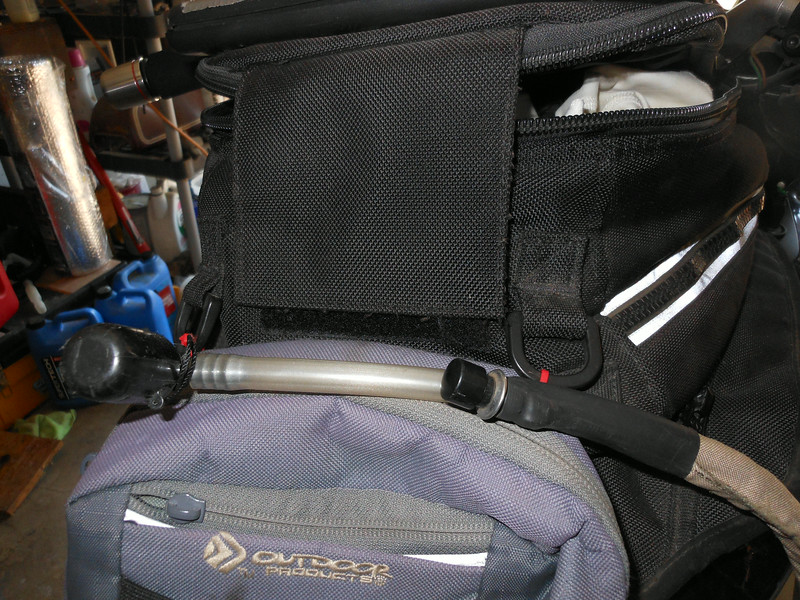
The hydration system worked decently well without the pump, but I still plan on fitting a small submersible pump to the system

That's all for now. When I make further changes I'll update the thread.

 
Top