Lessons Learned on changing the CCT

Yamaha FJR Motorcycle Forum

Help Support Yamaha FJR Motorcycle Forum:

This site may earn a commission from merchant affiliate links, including eBay, Amazon, and others.
I remembered paying more than that, so had to look it up again. Looks like different part number for Gen 1. For Gen2 it's 5JW-15456-11-00 for $6.75. One would think they'd be the same.

 
I remembered paying more than that, so had to look it up again. Looks like different part number for Gen 1. For Gen2 it's 5JW-15456-11-00 for $6.75. One would think they'd be the same.
I did some research and it appears that in 2008 when the CCT was updated they also did an update on the cam chain cover gasket or what Yamaha calls the Oil Pump Cover Gasket (item #30). My '06 AE lists the cover gasket number as 5JW-15456-10-00.

There is no change in the actual cover since the part number for the cover is identical over all model years (Part # 5JW-15416-00-00)

Based on this the three gaskets appear to be interchangable and I would probably order the newer gasket regardless of what generation of FJR you have.

I will go into the original post and update with part numbers.

 
Last edited by a moderator:
Dumb question but what indicates a need to change the cct? Is this just a gen 1 item at low mileage or is this nessassary on all model years? Is there an upgraded model that lasts longer?
Not a dumb question at all.

Besides what Ray said, I'll add this: before the CCT swap on my bike last fall, upon startup (mainly with a cold engine, but sometimes when it was warm, as well), on the right side of the engine, I could hear a slight "click-clack-click-clack." Think of an old-style mechanical typewriter typing very rhythmically, heard through a door, and that's about what it sounded like.

After the swap - nothing. Quiet as can be.

 
Has anyone considered using allen socket head bolts in lieu of the stock hex head bolts with the ground-in slot? I have to tackle this project later this week and I thought I would pick up the socket head bolts to try.

 
I'm not sure that allen head screws would be any better than the stock hex heads. The main problem is not having enough room to swing the wrench from the side, so I think you'd run into that same problem with the allens.

That said, it wasn't really that much of a PITA on my '05. Make sure to pick up one of the (more expensive) 8mm ratcheting box end, combination wrenches from Sears. The cheap one has too course ratchet teeth. You'll see what I mean when you look at them.

 
Has anyone considered using allen socket head bolts in lieu of the stock hex head bolts with the ground-in slot? I have to tackle this project later this week and I thought I would pick up the socket head bolts to try.
Please try and let us know but I think you'll find that there will not be enough room between the frame to get an Allen socket onto the bolt closest to the frame. A long T-handle 'ball end' Allen wrench just might give you the proper alignment for the bolts holding the CCT. Unfortunately I think you'll find that there will not be enough room to then turn the T-handle though.

I'm thinking a ball-ended Allen bit using a 1/4" socket with a 'wobble' extension might be your best bet.

71730.jpg


I found these bits on the web that have 'magic ring' for holding the screw. Here is the link:

Metric 'Magic Ring' Ball end Power Bits

 
Last edited by a moderator:
Hi Jim!

To remove the OEM bolts one tool that works is a wobble extension, different from a 'universal joint' type swivel. A wobble extension looks like this:

255025_lg.jpg


The taper at the transition between the socket attachment area and the shaft of the extension lets the socket wobble a bit and this is just enough to get the socket square on the bolt and let the extension be just a bit off center. Since I have a set of 'gear ratchet' box end wrenchs I would use one of those. The only caution is that the gear ratchets aren't strong enough for high torque use.

One type of gear wrench:

half-moon-end.jpg


There is no reason you can't replace the standard bolts with Allen head screws :wub: I would suggest that you use washers because the shoulder of the Allen head is smaller than the shoulder of a bolt affecting clamping area. Since you will only be doing this job once (hopefully), consider using blue locktite if you go the Allen screw way. Any ball end hex wrench will allow offset access to the bolt head.

255018_lg.jpg
2520399_lg.jpg


Has Iris painted her FJR white yet? Or replaced her FJR with a white bike?


Edit: Dang, ol' Fred is quick on the answers! And -- we pretty much agree! :blink:


Of course the job is much easier to do when the engine is in the RadioHowie position, like mine was too.


day_05g.jpg


Last edited by a moderator:
Based on my CCT change this week, using an allen head on the upper bolt will work, lower bolt next to the frame...not so much. I don't think you can get the angle necessary even with a wobble extension and ball end allen. The only other way is with a very short allen wrench on both sides, and even then you're not going to get the necessary swing.

Cutting a slot in the standard hex worked really slick!

--G
Another happy customer!! :)

 
Thanks! A couple of more suggestions to add/mod the origional post:

- Add the torque value for the cam chain cover

- Emphasize the value of having good tools vs crappy tools. See the comment about the pickle I got into over the weekend in this thread

 
Unless you have a really good inch-pounds torque wrench, I would be hesitant to torque those cover bolts.

More threads get pulled out (stripped) due to the use of torque wrenches than come loose due to not using them. ;)

Just tighten them to good n' tite and call it a day. They just have to make an oil seal, no mechanical support.

 
Last edited by a moderator:
Unless you have a really good inch-pounds torque wrench, I would be hesitant to torque those cover bolts.

More threads get pulled out (stripped) due to the use of torque wrenches than come loose due to not using them. ;)

Just tighten them to good n' tite and call it a day. They just have to make an oil seal, no mechanical support.
I'm a 'righty tighty' with my Allen key T-Handle kind of guy myself.

A good friend of mine (even though he rides KTM's) works over at the nuke plant calibrating torque wrenches. He tells me that the best you can hope for is about plus or minus 20% of the reading. For small fasteners if you are not willing to put out some fair dollars for a high quality inch-pound torque wrench and have the ability to keep it calibrated, you're wasting your time.

Having said that and having worked with wrenches all my adult life I have developed a calibrated wrist that 'clicks' and lets me know when things are 'tight enough'. If you're a newbie to all this and want to learn get an in-lb torque wrench.

But PLEASE if you buy a clicker type, back off the setting to zero before storing. My friend who calibrates these things for a living will thank you and so will the bolts on your bike.

 
Last edited by a moderator:
Unless you have a really good inch-pounds torque wrench, I would be hesitant to torque those cover bolts.

More threads get pulled out (stripped) due to the use of torque wrenches than come loose due to not using them. ;)

Just tighten them to good n' tite and call it a day. They just have to make an oil seal, no mechanical support.
Sound advice.

 
Hi Jim!

Has Iris painted her FJR white yet? Or replaced her FJR with a white bike?
 

Hey Alan, no white bikes in the stable yet. We did do a fair amount of maintenance this winter though. New tapered bearings in the steering stems, replaced all of the stock bearings in the relay arms and swing arms, replaced the thermostats, new coolant, greased the drive shaft splines, greased the side stands and center stands. Then when we almost had them all back together, we started them up to let the new coolant flush thru and settle out when Iris heard that "noise". Iris indicated that's your tensioner. She remembers when hers was replaced at Herba's (and it made the same noise). I'm hoping that by this weekend we should be in good shape (if the parts come in). :D Say hi to Helen.

 
Unless you have a really good inch-pounds torque wrench, I would be hesitant to torque those cover bolts.

More threads get pulled out (stripped) due to the use of torque wrenches than come loose due to not using them. ;)

Just tighten them to good n' tite and call it a day. They just have to make an oil seal, no mechanical support.
IIRC, the bolts on the cam cover are a shoulder bolt. Adding to Fred's thoughts, once these bottom there's nothing left to torque. Snugged up is all that's necessary. Same goes for several (at least on GENII's) on the fairings.

--G

 
I finally got a garage pass and had free time today to change out the CCT. I've had the new blue dot unit and these instructions printed out and sitting on the workbench for months. This post was invaluable. I did a couple things different and found a few work arounds.

I had four different 8 mm wrenches, including a box ratchet, but still had trouble with the bolt next to the frame. As I have a bunch of old SAE tools that were my uncles, I found that 5/16" ignition wrenches also fit the 8 mm bolt. Used at least four of those, too. Saved my butt and allowed me to remove that bolt.

Got the new CCT installed and was installing the adjustment access bolt, thinking i was home free. Didn't think it would be a problem until it rolled off my fingers and went into the frame recess. Of course I couldn't find my magnet on a stick. Ran down to the hardware store and got a new magnet on a stick. This one is a small diameter magnet on a telescoping rod. Retrieved the bolt, then realized I could hold the bolt with the magnet, insert it through the frame access hole and easily thread the bolt into the CCT. No slot cutting of the bolt required!

The biggest pain was cleaning the old gasket off the cam chain cover and the engine. Also, it was a bit tricky reinstalling the long pin that came off with the cover. Had to maneuver the plastic chain guide around until I could get the pin inserted.

Got it all back together and running and had enough time to change the oil and filter and clean up the bike a bit.

 
I finally got a garage pass and had free time today to change out the CCT...
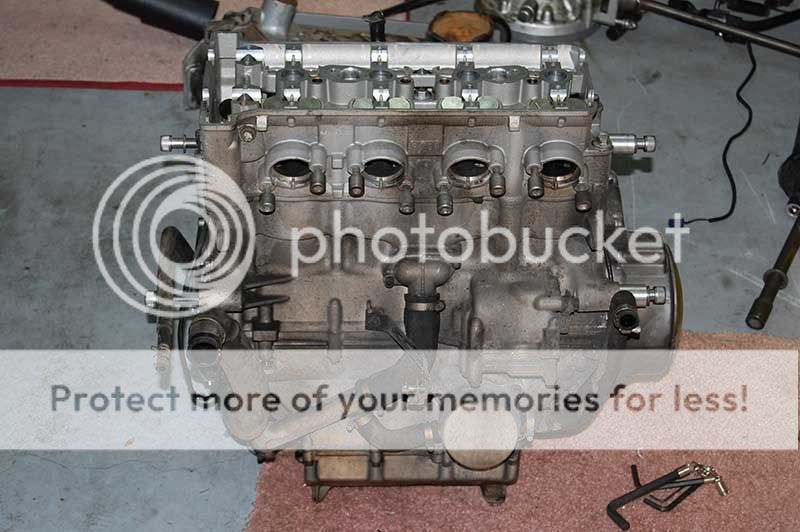
I read in a different thread that someone took off the clutch cover and had more room to swing the 8mm wrench when attempting to remove the bolt closest to the frame. If someone shows up in the Spring for Tech Day IV looking for a CCT change we will find out if this is true.

I used tweezers to position the bolts so there was less chance of losing a bolt down into the access hole in the frame. That being said, the magnet will work just as well for the one bolt in question saving having to cut the slot in that bolt. I do not believe however that using a magnet to start the two CCT mounting bolts would work as well.

 
Top