My initial thought would be to mold a piece very similar in shape to the rear seat but with a flat top, open front (would allow some ''cramable with front seat off' storage) and possibly attatched foward on either side where the side fairings are bolted to the frame. Rear? hard to do much more than using the same method the pillion is installed, but not sure if this would be 'accepted'? Could laminate in aluminum flat bar in top for added strength and to drill and tap tank mounts......
You are using an out of date browser. It may not display this or other websites correctly.
You should upgrade or use an alternative browser.
You should upgrade or use an alternative browser.
not another aux tank thread!
- Thread starter hyndsight
- Start date


Help Support Yamaha FJR Motorcycle Forum:
This site may earn a commission from merchant affiliate
links, including eBay, Amazon, and others.
Joe2Lmaker
Well-known member
I was thinking of the composite piece as a non-structural piece. It would be more of and enclosure, auxiliary tank fairing, or skirt. The second piece is the bracket, support or framework. I called that piece the rack. The third piece is the tank. I was thinking the skirt could attach to the rack using plastic rivets (Yamaha P/N 90269-06008-00) .The tank would attach to the rack with screws.So what are your thoughts on attatchment if I did come up with a composite piece? Seems like it would be hard to compete with the simplicity/strength of your TA tank mount.
Or, the entire piece could be removed from the rack when the seat is off.My initial thought would be to mold a piece very similar in shape to the rear seat but with a flat top, open front (would allow some ''cramable with front seat off' storage)
The bottom of the tank could have two L angle pieces welded on. The screws/bolts would go through these and into the rack. The added benefit would be that these would protect the fittings and lines when the tank is not in use.
I think this will work (and look) the best if the pieces are installed in this order; the rack to the bike, the tank to the rack and the skirt to the rack.
Now, I better get outside and get some yardwork done or my wife is gonna go on strike.
BwanaDik
Well-known member
OK, been messing around with this because it's too hot today to ride.
This is my take on the descriptions above. I made it in styrafoam so it was easy to work with.
Here's the pillion seat pan I plan to use as a template for the base.
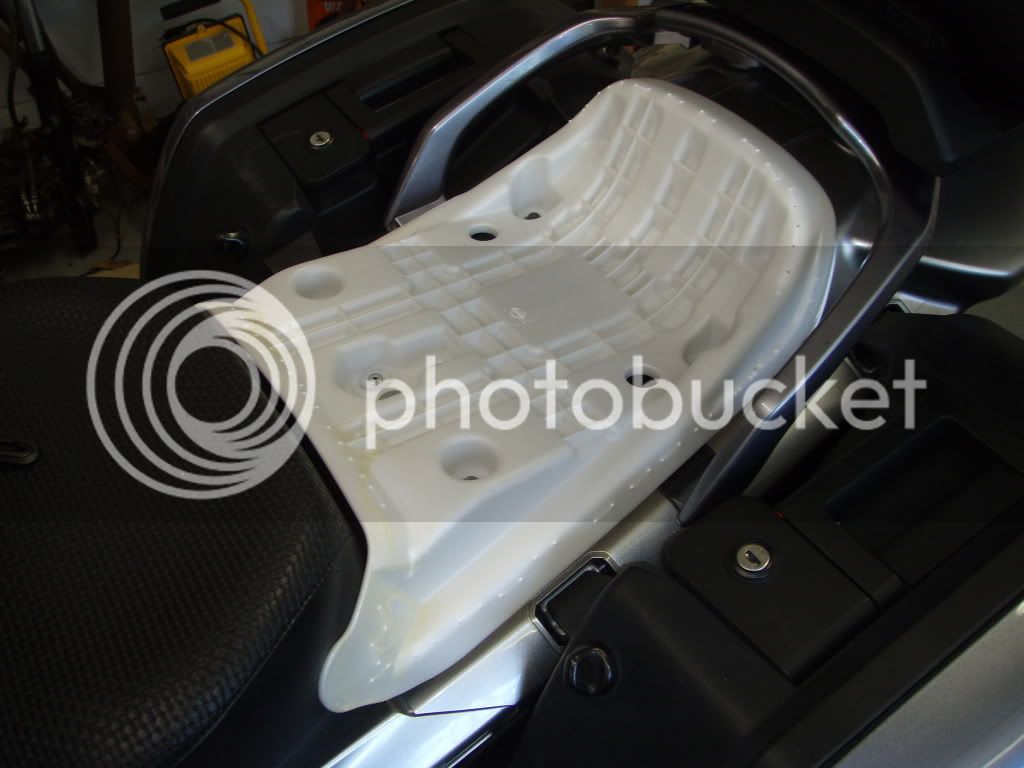
Here's the mock up on the seat pan on the bike.
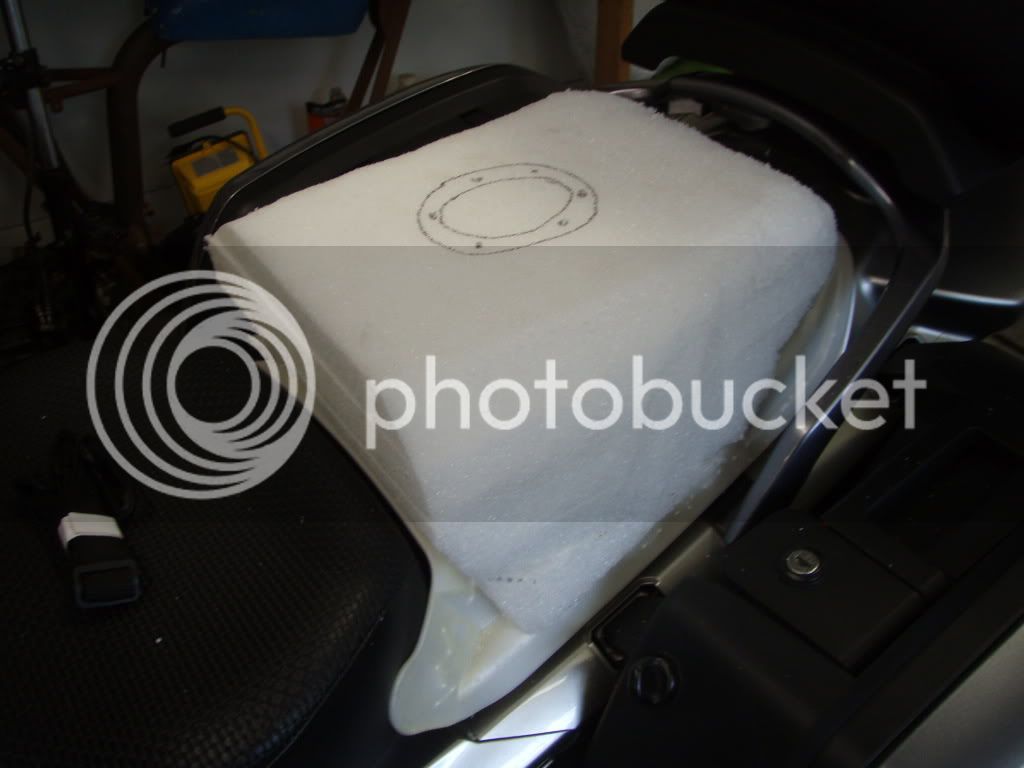
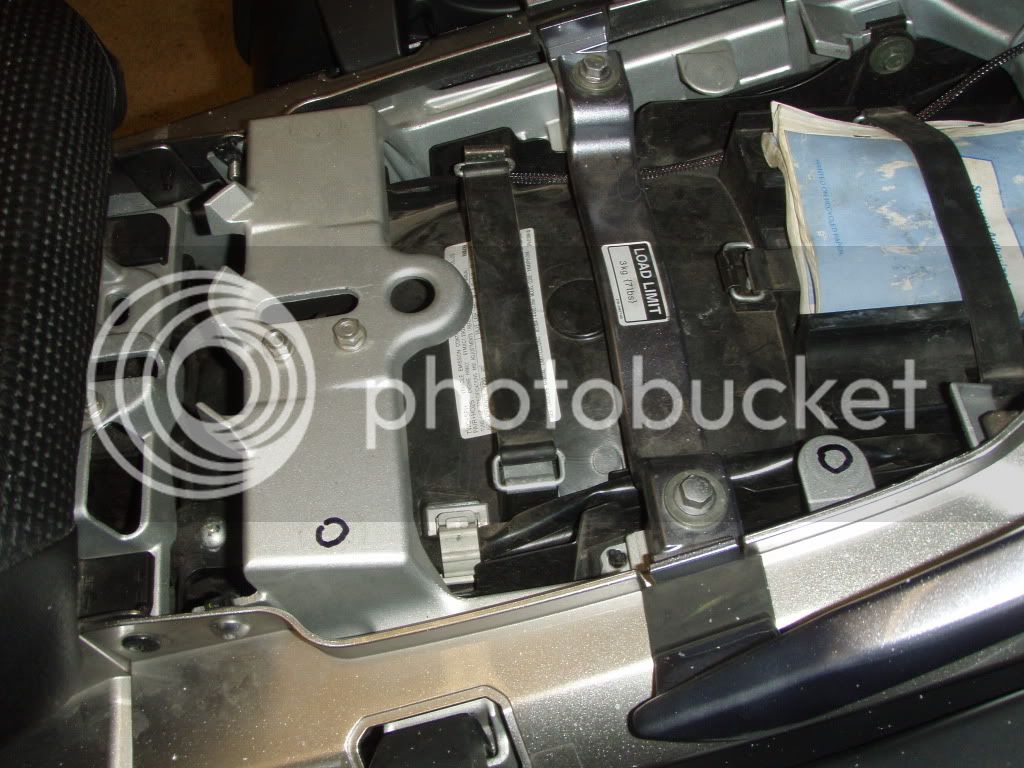
This is a shot of under the seat. I've put a circle on two of the four flat spots that I can drill and tap and use to bolt the whole thing down.
Once I get the foam all filled in, I'm going to try and make a reverse form out of fibedglass.
Does fiberglass resin disolve styrafoam? If so, I can probably use a plastic cover of some sort. Once I have a reverse mold, I can beat thin gauge metal into it for the shape of the upper section.
What gauge is the steel in a "typical" fuel tank?
The real trick will be to fabricate the seat pan in metal. I'll probably make it a whole lot simpler than the plactic pan but basically the same shape.
Then weld the two halves together. I'll probably have to make it in three sections with the third section the flat side up against the rider's seat.
Obviously, I still have to work thru the fuel pump issues but that's later down the road. And find a fuel filler cap but any hot rod shop should have that.
What do you think?
This is my take on the descriptions above. I made it in styrafoam so it was easy to work with.
Here's the pillion seat pan I plan to use as a template for the base.
Here's the mock up on the seat pan on the bike.
This is a shot of under the seat. I've put a circle on two of the four flat spots that I can drill and tap and use to bolt the whole thing down.
Once I get the foam all filled in, I'm going to try and make a reverse form out of fibedglass.
Does fiberglass resin disolve styrafoam? If so, I can probably use a plastic cover of some sort. Once I have a reverse mold, I can beat thin gauge metal into it for the shape of the upper section.
What gauge is the steel in a "typical" fuel tank?
The real trick will be to fabricate the seat pan in metal. I'll probably make it a whole lot simpler than the plactic pan but basically the same shape.
Then weld the two halves together. I'll probably have to make it in three sections with the third section the flat side up against the rider's seat.
Obviously, I still have to work thru the fuel pump issues but that's later down the road. And find a fuel filler cap but any hot rod shop should have that.
What do you think?
BwanaDik
Well-known member
OK, been messing around with this because it's too hot today to ride.
This is my take on the descriptions above. I made it in styrafoam so it was easy to work with.
Here's the pillion seat pan I plan to use as a template for the base.
Here's the mock up on the seat pan on the bike.
This is a shot of under the seat. I've put a circle on two of the four flat spots that I can drill and tap and use to bolt the whole thing down.
Once I get the foam all filled in, I'm going to try and make a reverse form out of fibedglass.
Does fiberglass resin disolve styrafoam? If so, I can probably use a plastic cover of some sort. Once I have a reverse mold, I can beat thin gauge metal into it for the shape of the upper section.
What gauge is the steel in a "typical" fuel tank?
The real trick will be to fabricate the seat pan in metal. I'll probably make it a whole lot simpler than the plactic pan but basically the same shape.
Then weld the two halves together. I'll probably have to make it in three sections with the third section the flat side up against the rider's seat.
Obviously, I still have to work thru the fuel pump issues but that's later down the road. And find a fuel filler cap but any hot rod shop should have that.
What do you think?
Edit: I just measured it and it roughs out to about 3 gallons, probably a little less. I might increase the heigth for more capacity. Remember, this design is not for max IBA capacity, just more on board fuel capacity that will clear IBA tech inspection
Last edited by a moderator:
Joe2Lmaker
Well-known member
Don't forget, you already have two threaded holes you could use, the front grab rail attachment points.This is a shot of under the seat. I've put a circle on two of the four flat spots that I can drill and tap and use to bolt the whole thing down.
This photo gives me about four different ideas.
Those ideas are divided into two categories, if you are biding one tank for yourself or if you plan to go into production.
If you are only building one tank for yourself, your seat pan is already form fitting and adequately attached. All you need to worry about is attaching a tank. If you mill some holes through the seat pan, you could mount a tank directly to the bike's rear subframe.
You could also use your seat pan to cast a negative.
You could mask your entire seat pan and spray it with some insulating foam from a hardware store. Then, file and sand that foam to suit. Make your negative cast off of that.
You could then use one of those negatives to mold a skirt, figure out how to cut the center out for storage and mount the tank directly to the rear subframe.
Making the same shape as the seat pan out of metal is going to get expensive, or you had better be very skilled with a panel beater sandbag and teardrop mallet.
The idea I like best is building up that seat pan and using it as the negative form to make a bunch of skirts.
BwanaDik
Well-known member
Great minds apparently think alike! After I posted, I got to doing, as my wife calls them, my "standarounds" where I plan out the next activity with a glass of wine 
Yes, It occured to me to to use the seat pan as is in some way shape or form. I think I can make the bottom of the tank to conform to the seat pan and continue with the upper half mold. It occured to me because if I use an all metal pan, it very well might damage the riders seat as it's up hard against it.
Thanks for the tip about the grab rail bolts!
Does fiberglass resin melt styrafoam?
What gauge steel is a tank made of?
Bwana: Not far from my original idea although I would shoot for the 4+ gallon size. Yes, resin will disolve styro. Carefully applied shrink wrap or a wax combo of partall paste and pva would probably work, (a denser form of foam like blue board is better for this). I am NOT a sheetmetel guy but wonder what kind of fatigue would be introduced in this kind of shape? Once your negative was built I still think that f/g would be a viable option. How are you accessing the bolts?
Joe2l: If I am visualizing the same thing as you, once tooled, the 'skirt' would be a relatively cheap and simple part to produce. Obviously the mechanics of the rack/tank would have to be completely ironed out first
Joe2l: If I am visualizing the same thing as you, once tooled, the 'skirt' would be a relatively cheap and simple part to produce. Obviously the mechanics of the rack/tank would have to be completely ironed out first
BwanaDik
Well-known member
Yes, adding a little heigth would get that extra capacity, I'll check it out.
How do you make a surfboard? I thought that was a styrafoam core with fiberglass wrapped around the outside???
Showed wifey the current design and she made a good suggestion. If I go with the OEM seat pan and simply mount a steel base of some sort on it, I could cover up the remaining exposed plastic with seat material. This would eliminate any rubbing problems with the interface with the riders seat and make it look like it matches the rest of the bike. The "skirt" area of the seat pan would be covered with OEM material with the tank on top. She also pointed out the flat front of the tank may be a hinderance to moving around on a long ride. I may curve the front surface too.
Off to Michaels tomorrow for f/g!
Joe2Lmaker
Well-known member
I don't know.What gauge steel is a tank made of?
Yes to both.Joe2l: If I am visualizing the same thing as you, once tooled, the 'skirt' would be a relatively cheap and simple part to produce. Obviously the mechanics of the rack/tank would have to be completely ironed out first
Some homebuilt airplane are fiberglass over foam. What sort of foam is used for that?How do you make a surfboard? I thought that was a styrafoam core with fiberglass wrapped around the outside???
Showed wifey the current design and she made a good suggestion. If I go with the OEM seat pan and simply mount a steel base of some sort on it, I could cover up the remaining exposed plastic with seat material. This would eliminate any rubbing problems with the interface with the riders seat and make it look like it matches the rest of the bike. The "skirt" area of the seat pan would be covered with OEM material with the tank on top. She also pointed out the flat front of the tank may be a hinderance to moving around on a long ride. I may curve the front surface too.
Off to Michaels tomorrow for f/g!
Smart wife, but I still think the seat pan should not be structural. The tank still needs to be mounted directly to the bike's subframe.
As for the flat front on the tank, that's why I went with a 5° angle on the front of mine. The Sampson is even more angled.
Last edited by a moderator:
FWIW, years ago, I owned a '74 Laverda SFC and a '74 Ducati 750SS - both came stock with fiberglass tanks and both were raced in club races with race gas without issues...It sems that Triumph used fiber glass tanks in the 60s ....
Last edited by a moderator:
Back to the 'bladder' idea: Dug out May issue of Cycle World and re-read the piece on Gary Egans Duc with the custom Fuel Safe bladders in saddle bags. Probably an expensive rout, but think about a trunk that would instead of being perched way up high on the tail, it could utilize the whole area up to the riders seat. This is one of the things I like about the Tangi, that it gives that flexibility to move the trunk in closer to cog, but this could look 'like it was made for it'. Could even remove the grab rail for more depth, and it could widen out behind the saddle bag latches to make more room with less height. Then of course, a separate fuel bladder fit to the front area.......
Gramps
Well-known member
I'd like to see that concept drawn up. :coolsmiley02:
Great ideas here, been enjoyable reading along.
Great ideas here, been enjoyable reading along.
BwanaDik
Well-known member
OK, again too hot to ride today so I've been messing around in the shop again. Came up with some ideas.
I'm happy to say that fiberglass resin does not disolve styrafoam. No problems here. I did a test strip to check it, no issues with the styrafoam so it looks like I can make what I want then reproduce it.
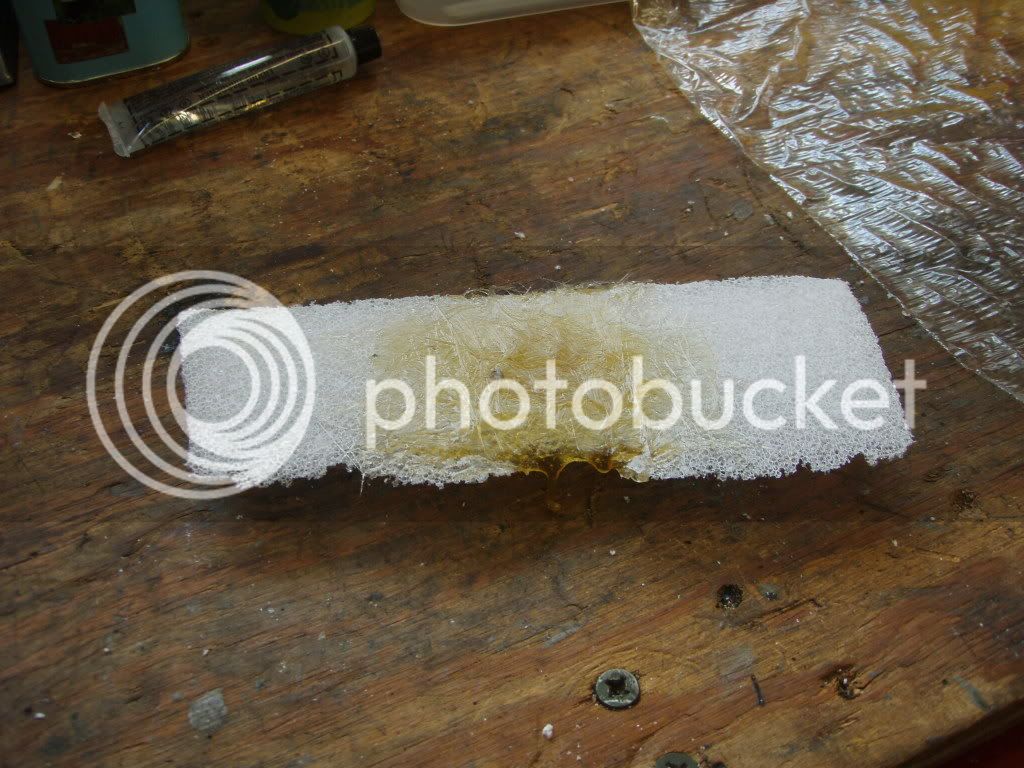
I also picked up some of that stuff that you seal your house with, it's supposed to be sandable after it's dried. I did a blob on Saran wrap to see how it sticks.
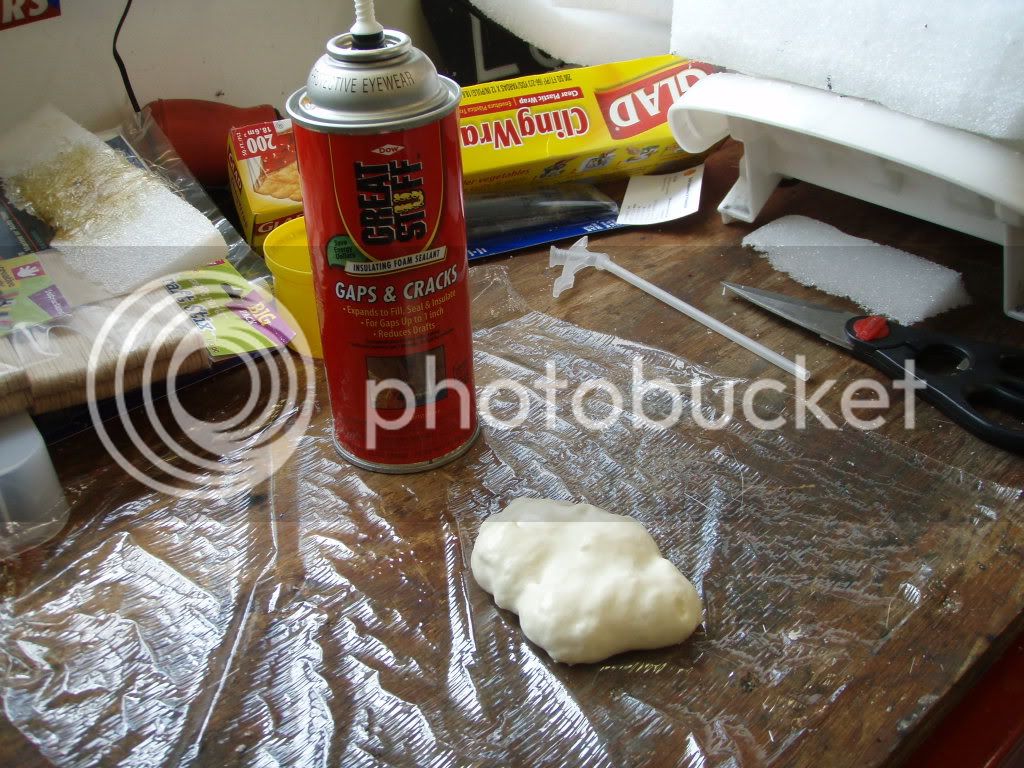
Looks good so far. But the more important thing came later.
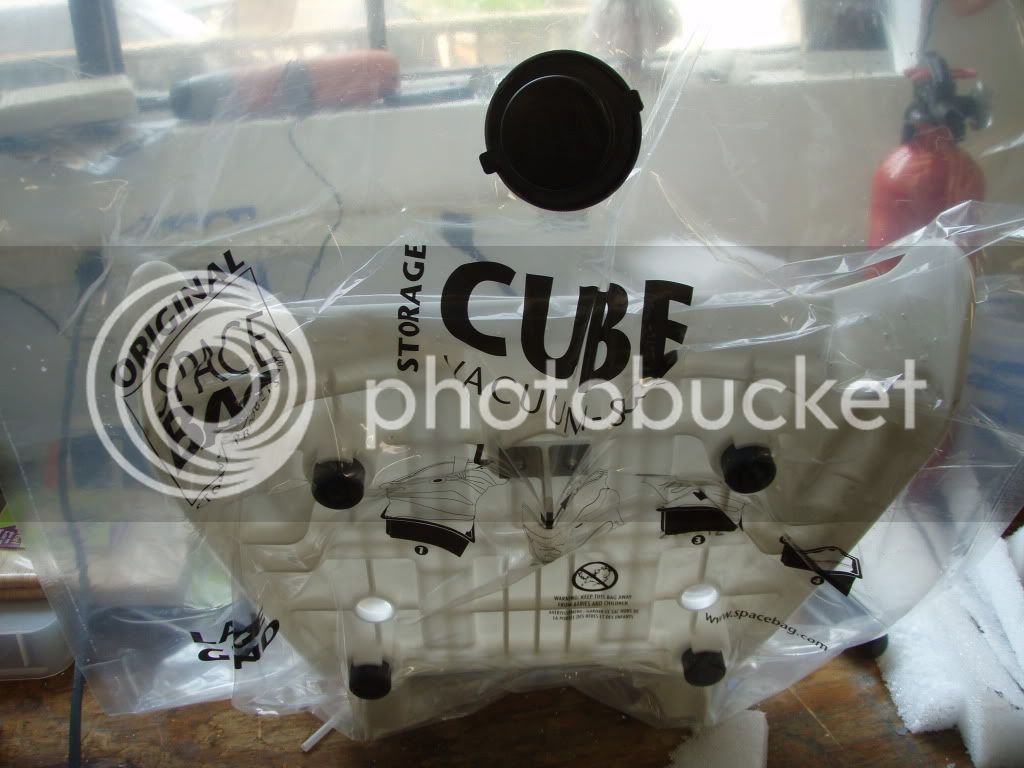
I showed wifey what I was doing and her first reaction was "the saran wrap is too thin, why don't you use one of those vacuum storage bags?" Duh! Well needless to say, she gets paid today
I tried it and, sure enough, the bag conformed EXACTLY to the seat pan. All I had to do was to regulate the vacuum and pull the wrinkles in the plastic out. Volia! Perfect conformity to the seat pan!
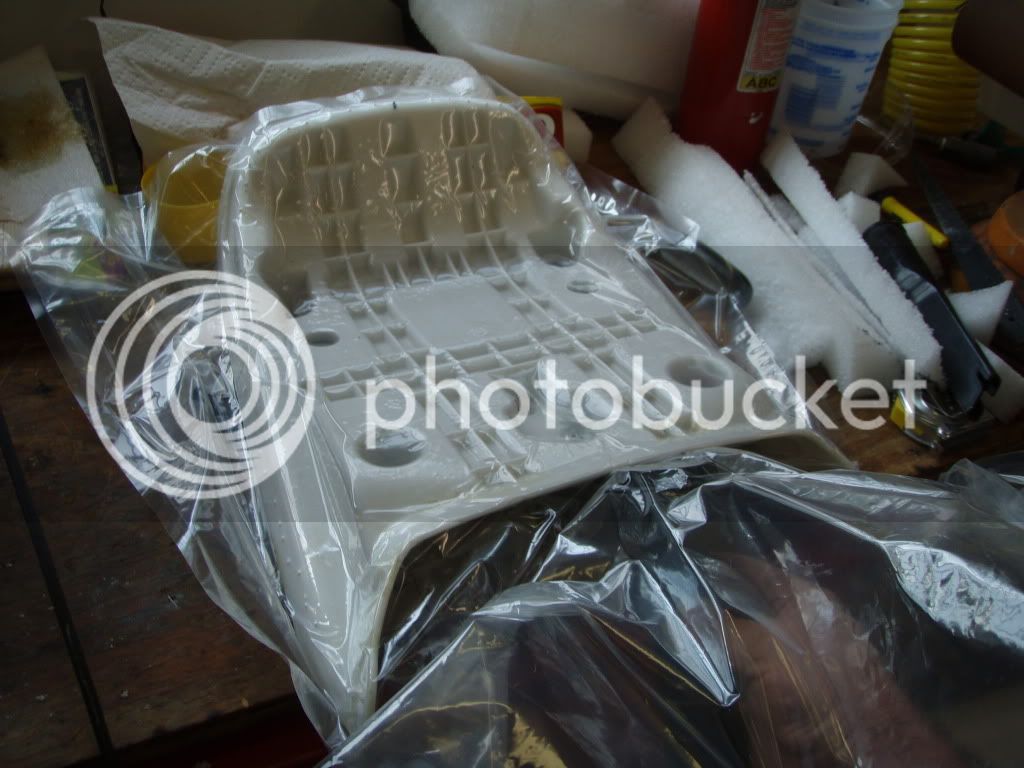
The idea here is to build a majority of the fuel tank out of styrafoam, then fill in the gaps with the "Great Stuff" sealant, and sand the final product to it's final shape. So now it seems I have the method to reproduce a shape of exactly what I want, whether it be a fiberglass tank or a fiberglass reverse mould. So the next step is to decide to go steel of fiberglass. I figue I can 'glass the whole thing then pour acetone into it to get rid of the styrafoam and Great Stuff. Don't really want to do it that way as it's a one shot deal, the mold it now gone. Plus you end up with a lot of goo to clean up. I'm still thinking thru a way to make a shape I can beat steel around.
So the next question is, "is a fiberglass tank legal under IBA rules"? Obviously there are a number of things like mounting, fuel connections, etc that need to be addressed but the fundamental question still remains.
Also, I'd like to be able to easily get under the tank for whatever I've got stored there. So I figure two bolts to mount it to the grab rail mounts (still working out the details here) in addition to the OEM seat pan set up and you're in. I'm planning on using the factory Yamaha fuel disconnect (like under the tank) for a fuel disconnect as I can't see Tech arguing with a factory fitting.
Any IBA Tech inspector types out there for a ruling on 'glass vs. steel? (we know who you are )
I'm happy to say that fiberglass resin does not disolve styrafoam. No problems here. I did a test strip to check it, no issues with the styrafoam so it looks like I can make what I want then reproduce it.
I also picked up some of that stuff that you seal your house with, it's supposed to be sandable after it's dried. I did a blob on Saran wrap to see how it sticks.
Looks good so far. But the more important thing came later.
I showed wifey what I was doing and her first reaction was "the saran wrap is too thin, why don't you use one of those vacuum storage bags?" Duh! Well needless to say, she gets paid today
I tried it and, sure enough, the bag conformed EXACTLY to the seat pan. All I had to do was to regulate the vacuum and pull the wrinkles in the plastic out. Volia! Perfect conformity to the seat pan!
The idea here is to build a majority of the fuel tank out of styrafoam, then fill in the gaps with the "Great Stuff" sealant, and sand the final product to it's final shape. So now it seems I have the method to reproduce a shape of exactly what I want, whether it be a fiberglass tank or a fiberglass reverse mould. So the next step is to decide to go steel of fiberglass. I figue I can 'glass the whole thing then pour acetone into it to get rid of the styrafoam and Great Stuff. Don't really want to do it that way as it's a one shot deal, the mold it now gone. Plus you end up with a lot of goo to clean up. I'm still thinking thru a way to make a shape I can beat steel around.
So the next question is, "is a fiberglass tank legal under IBA rules"? Obviously there are a number of things like mounting, fuel connections, etc that need to be addressed but the fundamental question still remains.
Also, I'd like to be able to easily get under the tank for whatever I've got stored there. So I figure two bolts to mount it to the grab rail mounts (still working out the details here) in addition to the OEM seat pan set up and you're in. I'm planning on using the factory Yamaha fuel disconnect (like under the tank) for a fuel disconnect as I can't see Tech arguing with a factory fitting.
Any IBA Tech inspector types out there for a ruling on 'glass vs. steel? (we know who you are
)Raining sideways up here in Me today so it looks like we were up to the same thing BwanaDiK!
I should have said polyester resin will eat "some" types of foam. I know it will with blueboard or cooler foam, (which I thought you are using but now I see it is more of a craft? foam. I started mine in Ellfoam today, (generic name for a Dow product I think). This I know is resistant.
I am now leaning toward just building myself a one off, (less concerned with IBA cert). The chances of me doing an IBA event anytime in the near future are very slim, but I know I am doing a coast to coast and back again this fall, so just that is all I need for justification.
Right now my plan is to make the foam/glass plug, pull a female mold, and lay up my tank in that. Bottom will be a secondary part. Probably utilize same mount as seat, but add two bolts foward, either in the seat locator pin holes, or side fairing mounts.
Joe 2l: What is the OD of that nice jaz filler you are using? I was thinking of moving the fill out to the outside/foward corner for filling without removing luggage from top.
Last edited by a moderator:
Joe2Lmaker
Well-known member
That is definitely not styrofoam. Styrofoam is closed cell (polystyrene). The foam pictured is open cell, perhaps PE?I'm happy to say that fiberglass resin does not dissolve styrafoam.
One word of caution when using the insulating foam like Great Stuff. Do not put it on too thick. If you do, the outside will form a crust preventing the inside from properly curing. If you need it thick, build it up in layers making sure each layer has completely cured. The glob pictured is about as thick as I like to go. Also, to prevent your applicator tip from clogging up, use acetone. If you don't clean the tip/valve, you will only be able to use it once. Hopefully you already knew that or that little glob will be all you're going to get outta that can.
Don't forget that any goo you miss will be going through your injectors.Plus you end up with a lot of goo to clean up.
I'm not using the JAZ filler neck. Some of the Tag-Along Tank owners wanted them, but not because I recommended them. I like the JAZ flush mount fill cap or the Pro-Werks fill caps. Pro-Werks has a bolt-on bung and cap assembly that would probably work well for your application. If you go that route, opt for the Pro-Werks 1-1/4"-12 thread on the cap. For a beer, I'll tell you why.Joe 2l: What is the OD of that nice jaz filler you are using? I was thinking of moving the fill out to the outside/foward corner for filling without removing luggage from top.
The OD on the 6 hole JAZ flange is approx. 6". That goes for both the flush mount and filler neck.
dustyrains
Well-known member
"The real trick will be to fabricate the seat pan in metal. I'll probably make it a whole lot simpler than the plactic pan but basically the same shape."
Interesting thread. Just a thought; could you somehow use the seat pan itself rather than just using it as a template for a metal facsimile? Build your tank in essentially the same shape as the stock seat, attaching it directly to the stock pan? That way the finished tank would attach the same way the seat does.
Interesting thread. Just a thought; could you somehow use the seat pan itself rather than just using it as a template for a metal facsimile? Build your tank in essentially the same shape as the stock seat, attaching it directly to the stock pan? That way the finished tank would attach the same way the seat does.
Last edited by a moderator:
Poolboytoo
Well-known member
Ok bwanadic, and hyndsight you have had four years to finish and perfect your projects, interested in sharing your results? This was a fantastic thread that fell off the face of the earth. Did this thread take off in another posting?
HotRodZilla
GOD BLESS AMERICA
Remember how Bwanadick said he likes to stand around a d drink wine? Let's just say the wine won the battle. AND he's probably had 50 other projects going since then. Haha...
stuarto49
Member
Here was my idea for aux fuel, built and installed on my BMW R1100S (back in 2007). I wanted some extra fuel but wanted to stay with the sleek lines of this bike. I was preparing for a cross country ride, Phila to LA, which I accomplished easily in 4 days. Then I departed to make a 50cc ride, planning to end in Wilmington, NC - didn't quite work out, that's another story.
I designed this cell to follow the lines of the pillion seat cover and had my son fabricate out of stainless steel. Used an aircraft-style filler and a small pump to transfer the fuel to the bike's main tank. Functioned very well and was still able to load on top of the tank - it was fairly heavy s/s, maybe 12 ga. So it could easily double as a luggage rack.
https://rs42.pbsrc.com/albums/e342/stuarto49/R1100S_FuelCell_1_zps558d2af1.jpg~c100?t=1417876054
https://rs42.pbsrc.com/albums/e342/stuarto49/R1100S_FuelCell_2_zps627b9fda.jpg~c100?t=1417876270
https://i42.photobucket.com/albums/e342/stuarto49/R1100S_FuelCell_3_zps23717d02.jpg?t=1417876276
Similar threads
- Replies
- 58
- Views
- 4K
- Replies
- 12
- Views
- 712
- Replies
- 73
- Views
- 4K