Project Bike Locker moves forward... Working Prototype on bike

Yamaha FJR Motorcycle Forum

Help Support Yamaha FJR Motorcycle Forum:

This site may earn a commission from merchant affiliate links, including eBay, Amazon, and others.
I really miss the long aluminum bars, Dwayne, as I was really looking forward to see how you might incorporate them on the next group ride.

050826-NatHOGRally-P8270125e.jpg
I've been hearing about these FJR "group rides" for awhile now. Thanks for the advance warning.

 
Here's a teaser...

2331536510048658291S600x600Q85.jpg


For those who don't know, that's a vacuum form mold. Those little holes go all the way thorugh to a chamber sandwiched inside the layers of wood. Below that, a threaded outlet can be found. Hook up a vacuum hose, hit the power switch and air is sucked down through those tiny holes.

Next, heat up your sheet of ABS plastic, and drape it over the mold. The air does the rest, sucking the sheet of plastic down over the mold. Let it cool for a few seconds and repeat.

These molds are not inexpensive and last roughly 10 - 15 cycles, meaning you get 10 - 15 units from the wooden mold. Great for proof of concepts, not good for production. If you move to production, you need to step up to aluminum or some material that's tough enough to stand the heating cycles without delaminating or distorting the way wood does. Even specialty blends like that used here simply begin to blister and splinter when the heat cycles hit them. There's always a balance between cost and durability, so for the first run of prototypes, this wood mold was fine for my needs.

A CAD drawing specs the actual shape, then that is fed into a CNC carving machine. After a bit of noise, out pops the basic mold. It's then mounted onto the "base" or "table", within which is that little chamber I mentioned above. A long skinny drill bit takes are of the holes, taking care not to drill too far through.

Goes without saying...but... more to follow...

 
Last edited by a moderator:
So here is a question, for those how have existing tank bags that use magnets, any chance of a version that is just a small plate to which a bag can be attached without placing it directly on the tank?
 
So here is a question, for those how have existing tank bags that use magnets, any chance of a version that is just a small plate to which a bag can be attached without placing it directly on the tank?
Not followin gyou. Do you intend to use the magnets with my version?

Might be worth me stating this, as it appears way back at the beginnign of this thread, but my version will attach to the tank without touching the paint. Not sure that matters to your question, though...

 
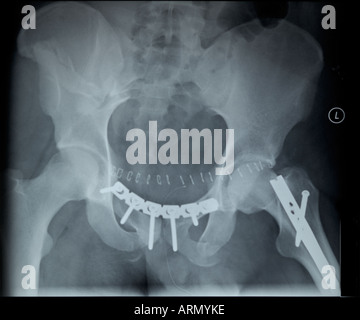
So will the rider end be tapered to reduce the risk of "open book" fractures of the pelvis?

ARMYKE.jpg


Last edited by a moderator:
So will the rider end be tapered to reduce the risk of "open book" fractures of the pelvis?

ARMYKE.jpg
...ummm...not something that was part of the original design plan. Storage was the goal...and protection...and water resistance. To be fair, in order to accomodate this type of request/requirement, the project would be scrapped. The fact is the end result would simply be too little storage space to warrant the effort.

 
Well, after SWMotech being idiots, Motorcycle Superstore saved the day.

Hoping the mounts I just ordered are what I'm expecting they are. The gent on the phone thought so, and I'm inclined to agree. This solves the last big hurdle. :)

Now to finish the weather sealing, mount the lock and paint. Can't wait!

 
The mounts arrived today!

Now I can move on to making sealing gaskets, finishing the interiors, mounting the hinges and locks, then its off to the body shop for prep and paint. :)

Hoping to have at least one ready, and mounted on my bike, at NAFO. :D

 
Time for an update...in fact, I'll just say up front that I now have a working prototype mounted on the bike. :)

OK, so I bought some silicon fuel line at the hobby store, and with a bit of silicon sealer, it functions as a seal between the top and bottom. I'm going to try another option on the next prototype, though, as this method has drawbacks:

1 - slow to set up

2 - not very clean looking

3 - not as secure as I'd otherwise like - meaning the silicon sealer can let go from the silicon tube

I managed to get a bunch of things done this week on this first prototype:

1 - mounted the weather seal

2 - mounted the front hinge

3 - mounted the lock

4 - mounted the locking post

5 - fabricated the locking tang

6 - mounted the...um...mount... ;)

7 - giggled like a school girl when I first saw it on the FJR. :D

Now, time to do some fine tuning:

1 - needs a couple new mounting bolts with nylock nuts

2 - needs an interior - this particular unit needs some silicon to seal the edges, too

3 - needs to have the lock mechanism adjusted and secured properly - its secure now, just not fully tightened down

That's about it. It'll stay as raw ABS plastic for the foreseeable future and I'll work on unit #2 to get it painted to match the bike.

Onto the pics...

2750245310048658291S600x600Q85.jpg


Yup, that's a combo lock on there...enter the combo, turn right to unlock.

2723681460048658291S600x600Q85.jpg


2559142580048658291S600x600Q85.jpg


2253292450048658291S600x600Q85.jpg


2351166890048658291S600x600Q85.jpg


2637942850048658291S600x600Q85.jpg


Mounting the bottom plate tuned out to be easy-ish...the plastic on plastic made it hard to hold in place to mark where the mount should go. Once that was worked out, though, it was simple - drill and bolt.

Now, with a simple twist clockwise, the unit snaps into the mount on the tank-ring. It clicks into place and there we are, all lined up on the tank. Twist in the opposite direction to pop the unit off for fueling, etc.

Next hurdle - how to lock this puppy to the tank ring. I have a couple ideas, so let the research begin!

 
Wow!!

This is the first I have seen of this thread. Color me impressed!!

I can really appreciate the potential of having a hard, lockable, weather tight, tank locker. Keep up the good work. I'll be very interested to see the final product.

edit - One question would be: What would you expect to do with the locker when refueling? It would be nice to have someplace to hang the thing without risking scratching the tank. Maybe if it were somehow hinged to flip up for fill-ups? I know that this is probably beyond the scope of your project.

 
Last edited by a moderator:
Wow!!

This is the first I have seen of this thread. Color me impressed!!

I can really appreciate the potential of having a hard, lockable, weather tight, tank locker. Keep up the good work. I'll be very interested to see the final product.

edit - One question would be: What would you expect to do with the locker when refueling? It would be nice to have someplace to hang the thing without risking scratching the tank. Maybe if it were somehow hinged to flip up for fill-ups? I know that this is probably beyond the scope of your project.
Well, thanks Fred! It's been an under-the-radar pet project for a couple years now. A little time here, a little there, etc.

Until I have the working prototype, there wasn't much to showcase, so this all kinda just came together this week. I'll try to answer your questions...

What would you expect to do with the locker when refueling?
Juggle my dear Fred...juggle! All kidding aside, I'd set it on my seat, like I do my current soft-sided version. It's twists off and on, so is super quick to remove and install right now. When/if I can figure out a locking set up, that may change the time involved somewhat...

It would be nice to have someplace to hang the thing without risking scratching the tank.
My original foam mock up actually had a location for a D-ring to be bolted to the unit, opening up the possibility of attaching a carabiner clip to say...hang the locker from a brake lever or available RAM mount ball, etc. I haven't progressed to that stage yet because:

1 - I'm still giggling that I got it this far

2 - I have to account for protecting paint on the locker (obviously not a "current" issue for the prototype)

3 - I still just throw it on my seat, and I need to think past this habit

Maybe if it were somehow hinged to flip up for fill-ups? I know that this is probably beyond the scope of your project.
Love the hinging idea...and yeah, beyond the scope currently. mostly, this has to do with sourcing the tank ring mounts. My first source can't produce them any more at a reasonable price point (his current price was over $100/ring mount, so he stopped producing them). My second source (my plastics company) quoted me $56/mount, so price forced them aside, too. I contacted SW Motech to ask about buying their ring mount bases so I could build my own upper mount to fit their base...and they said "Due to patent reasons, we cannot sell the bases individually. You want a base, you have to buy the tank-bag to match it." After I stopped laughing, I put them on the "useless" pile, too. After a bit more searching, I found the current mounts for $15 each. Cheap-ish, easy and readily available in a variety of tank ring configurations - sold!

Right now, the cost per unit is hovering right around $220 for the ten prototypes. Still pretty steep, but if htis were a production scenario, efficiencies could be found, things bought in bulk, etc. Plus, the cost of all the'experimental' stuff I keep buying and not using wouldn't exist, so that'd help drop the price, too. For now, this is just an experiment and a damn fine lesson in product development. :)

 
Duane, I have some material from my sound-deading project on the Honda Element. It's from Raamat, and it's a roll of mass-loaded vinyl called "Ensolite" with an adhesive backing; you cut it to fit. It has a soft texture, and might work in the interior of your locker to spruce it up. You just cut to fit, then remove the backing and press into place.

Plus you get the built in benefit that your locker will be acoustically perfect, cause I know that was keeping you up at night.

I'll save up my scraps if you are interested.

Ensolite_IUO_Pea_4bbe1cc33defb__27624_zoom.jpg
*sigh*...I suppose it was always bound to be this way... but I'll take yer scraps and be grateful for them...

Thanks Dave. :)

Just last night I asked myself if the acoustical properties inside the locker, when closed mind you, would permit concert quality sound or recital quality sound...question went unanswered... Now I can realize a minor dream with this project of an acoustically dead space so the beep from my camera won't echo!

 
Top