I have one installed -- with nothing mounted on it. Will try to post a picture this evening.
------------------------------------------------------------------------------------------------------------
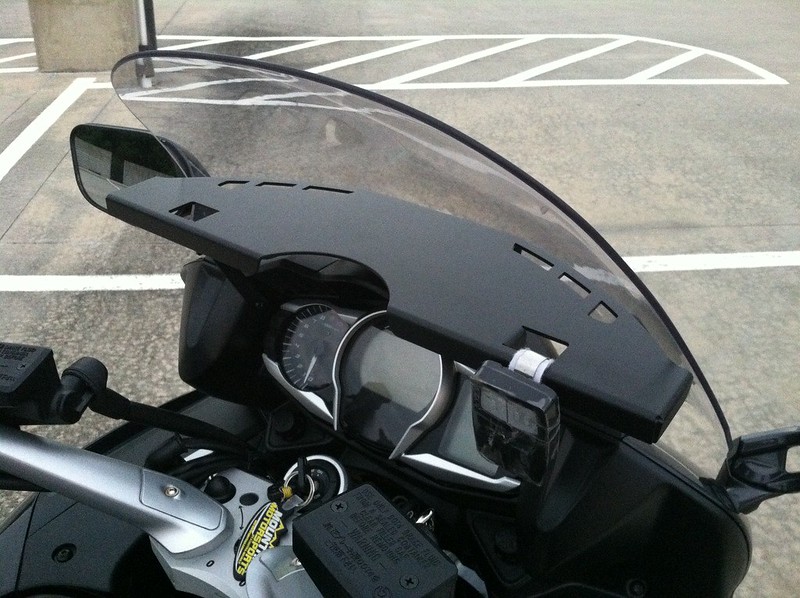
Generic view. Note rolled edges. In all photos, windshield is fully retracted/down. This does limit usable mounting height for devices over 4 inches tall, shorter as you go forward towards the windshield, but Ram balls can be mounted to the shelf and positioned to suspend your device pretty much wherever you want it.
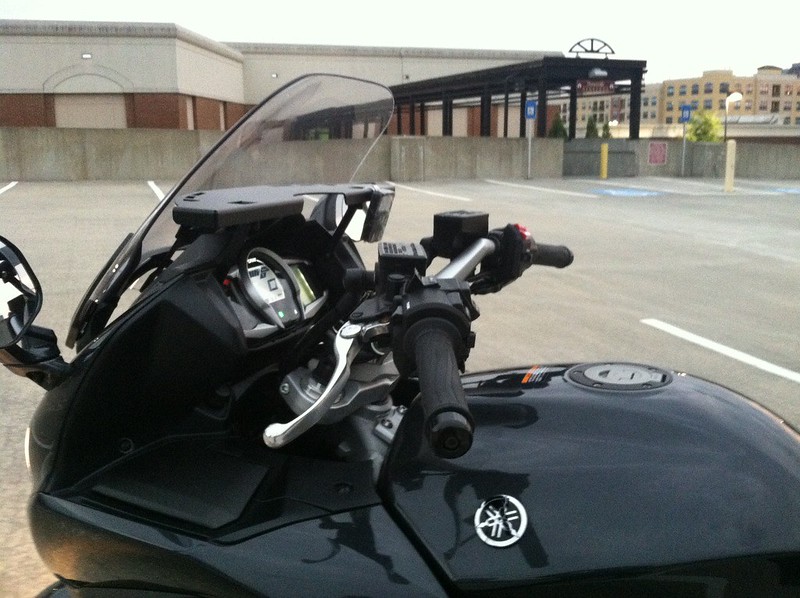
View from the clutch lever. Note the diagonal strut just in front of the garage door opener. Port and starboard struts attach via existing Phillips-head screws on the fairing.
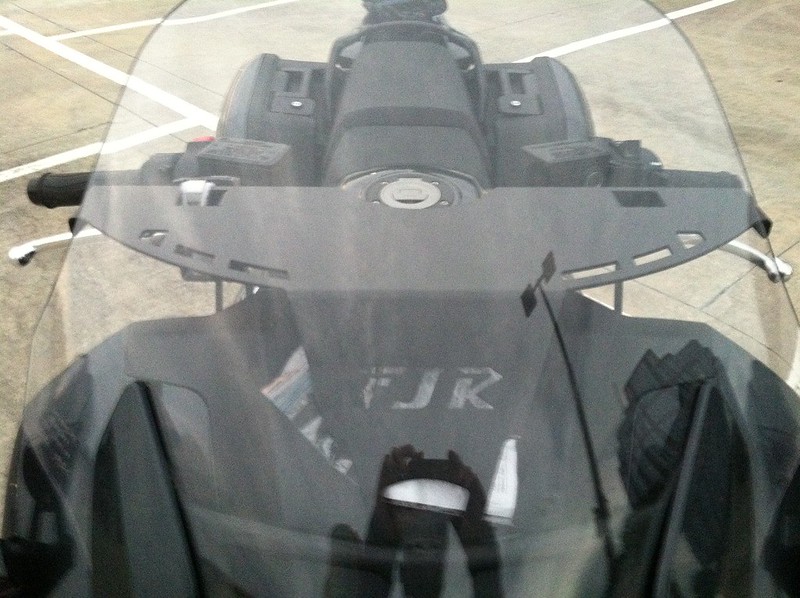
Front view. I've stuffed a piece of paper behind the FJR cutout in the front panel.
Guess I didn't get the one element that requires "work". The front panel tapers to a rounded point with a bolt-hole that sits near the plastic nose of the FJR, lower than the bottom edge of the windshield. Drill a matching hole in your plastic and tighten the supplied bolt, rubber washers, and plastic-lined locking nut. Note that you can reach behind this piece of fairing plastic and do not need to take off any piece of the fairing or windshield. This bolt plus the two struts are the only attachment points to the bike.
View from the throttle. Note ventilation slots at the front edge. Garage door opener dangles just fine, now that its hanger is lined with "loop" velcro to eliminate rattles. It flows with the wind -- which I like -- and is positioned perfectly for on-the-roll entrances to the garage. (Clear packing tape = cheapskate waterproofing.)
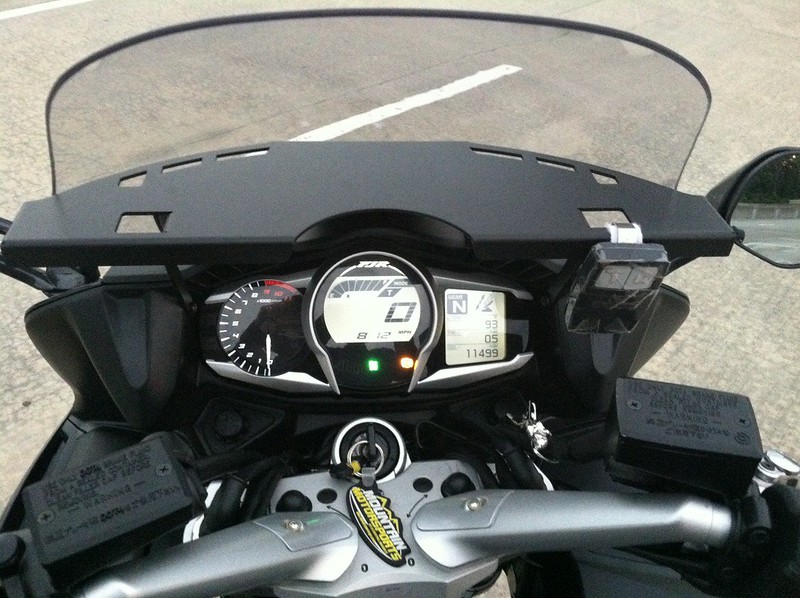
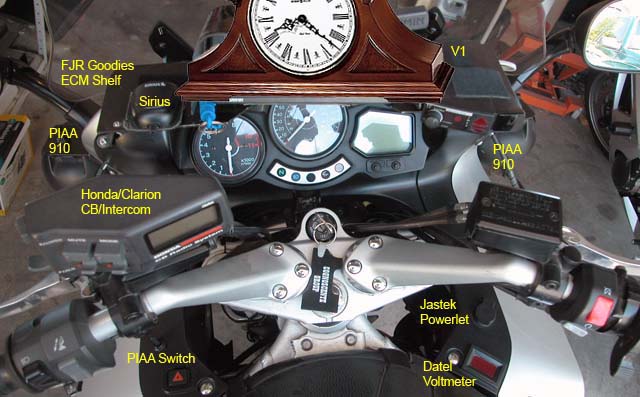
View from the pilot seat. The shelf does not block your view of the instrument cluster or the road. Windshield moves fully up and down. Handlebars roll from lock to lock, and are just a little lower than the shelf. Full left turns do not whack my garage door opener.
A powder-coated angle is included to mount my GPS, and the pre-drilled holes match the Garmin mounting bolt pattern. I will mount mine dead-square center, touching the edge of the semi-circular cutout. There's enough height there for the mounting apparatus and the GPS even with the windshield fully lowered -- almost always in the Atlanta summer.
Cable routing will take a little more thought, and I have not yet settled on a location for the iPhone's Otter Box. No permanent alterations before both decisions have been made.
In the meantime, the shelf looks badass just sitting there dangling my garage door opener. The fit, finish, and mounting arrangements are superb. The five mounting screws (one on the front panel, two in each strut) are only hand-tight, but there's no rattling or shifting. Took ten minutes to install, and five of those were running an extension cord and selecting a bit for the drill.