You are using an out of date browser. It may not display this or other websites correctly.
You should upgrade or use an alternative browser.
You should upgrade or use an alternative browser.
Help! - Broken Valve on lower end of Fork Cartridge (Gen II)
- Thread starter RZ350
- Start date


Help Support Yamaha FJR Motorcycle Forum:
This site may earn a commission from merchant affiliate
links, including eBay, Amazon, and others.
Quick question about copper washers... I sometimes re-use copper washers, but I bought new ones for the bottom cartridge bolts to do this fork servicing. These new ones were under the heads when then bolts were over-torqued, so I 'm thinking I shouldn't re-use them despite them looking fine.
The original set also looks fine to me. Would you re-use them?
The original set also looks fine to me. Would you re-use them?
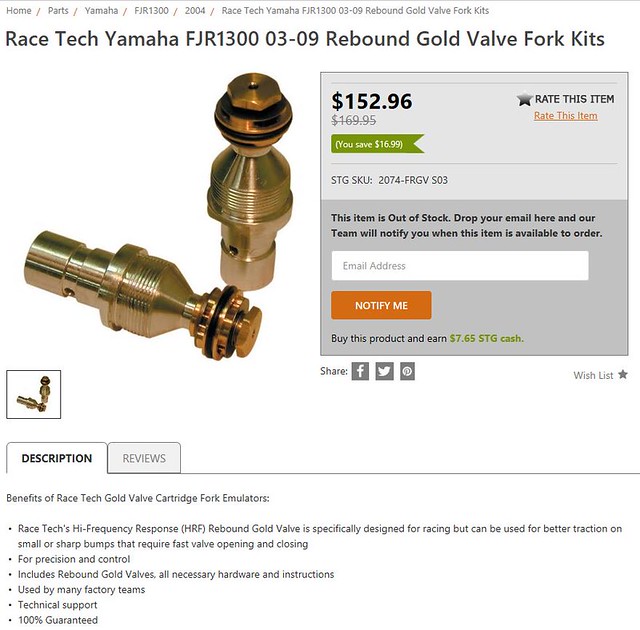
This project is just not going my way. Don't you hate it when you get all excited when a package arrives earlier than expected in the mail, but soon find out its the wrong part inside?
I ordered these parts from an online seller. The picture is correct, but the description says "Rebound", and the rebound valve goes inside the cartridge rather than at the bottom. My bad for not reading the print, but geez that's misleading. So I'm back to hunting down parts.
I ordered these parts from an online seller. The picture is correct, but the description says "Rebound", and the rebound valve goes inside the cartridge rather than at the bottom. My bad for not reading the print, but geez that's misleading. So I'm back to hunting down parts.
Last edited by a moderator:
I’d reuse the originals that didn’t get abused. I have always reused those copper washers and never had a leak.
I use these for a rough check https://www.amazon.com/gp/product/B009GLISY4/ref=oh_aui_search_detailpage?ie=UTF8&psc=1 . Definitely not laboratory accurate, but will detect large inaccuracies in the wrench.
What do you secure it to when using a tq wrench for comparing readings?
I would think that you could just stick it into a vice with soft jaws to test your wrench. Either that or stick a socket on it and test it on something you know to be really tight.
Last edited by a moderator:
I have the same thing from Harbor Freight. I use a wheel nut on one of my vehicles to secure it and test up to about 100 ft-lbs, after that I use an axle nut or some other high torque fastener that I can find on my car.What do you secure it to when using a tq wrench for comparing readings?
RossKean
Well-known member
Put the torque adapter on a regular ratchet and put a socket on it that will fit the 3/8" (or 1/2") head on the "clicker". Set clicker to 50 lb-ft (or whatever), apply pressure and see what the digital readout says when the torque wrench clicks.
Edit:
D'OH
Brainless today - Torque adapter on the torque wrench. Socket to an immovable bolt (or clamped in a vice) . EXACTLY as Fred suggested three posts ago!!
Edit:
D'OH
Brainless today - Torque adapter on the torque wrench. Socket to an immovable bolt (or clamped in a vice) . EXACTLY as Fred suggested three posts ago!!
Last edited by a moderator:
I welded a 3/8" drive socket and a 1/2" drive socket to a piece of square tube and clamp that in my vise. With that I can check both 3/8 and 1/2 wrenches.I use these for a rough check https://www.amazon.com/gp/product/B009GLISY4/ref=oh_aui_search_detailpage?ie=UTF8&psc=1 . Definitely not laboratory accurate, but will detect large inaccuracies in the wrench.
What do you secure it to when using a tq wrench for comparing readings?
I sent him my old 1st Gen compression valves, so RZ will be set to reassemble his forks in stock configuration next week and be back on the road. But I’m trying to talk him into doing the full valve upgrade now. I mean, once you have the forks this far apart, it’s just ~ $350 bucks to a great front suspension.
Had a little time to disassemble the valves from the cartridges. Heating the joint for about 20 seconds on my heat gun high setting (1000F) did the trick. I knew it was warm enough when liquid started weeping out of the joint. Before the heat, I couldn't budge it with high effort (but I'm a bit gun-shy on the project). Once heated, it broke apart pretty easily with moderate effort.
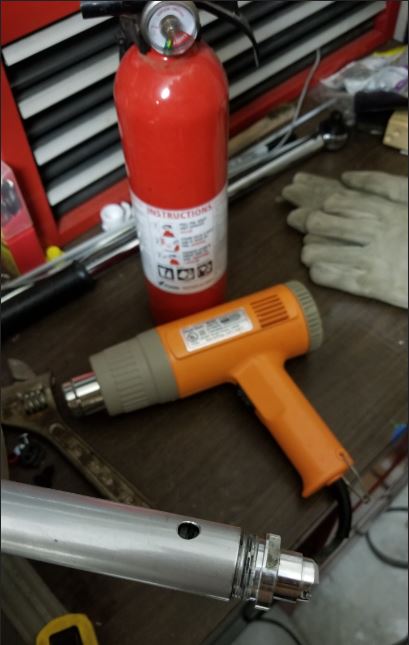
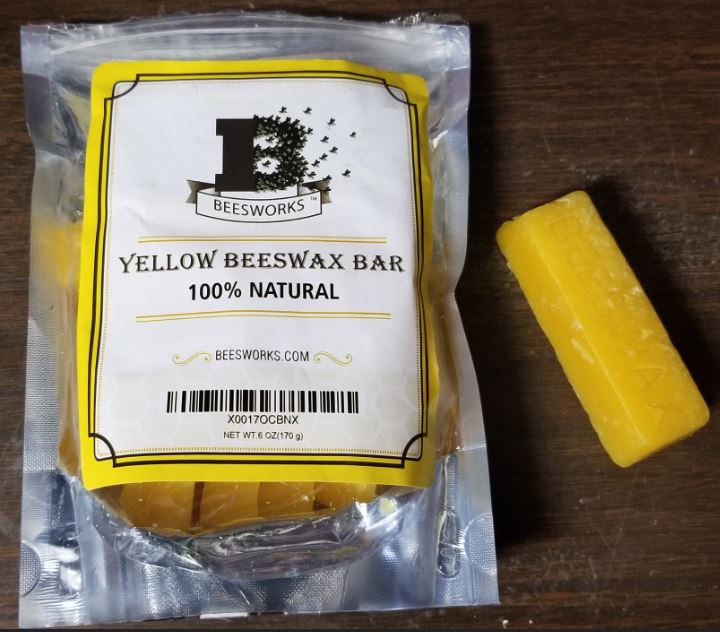
I had some natural beeswax on hand to dissolve the Loctite if it proved stubborn, but didn't need it.
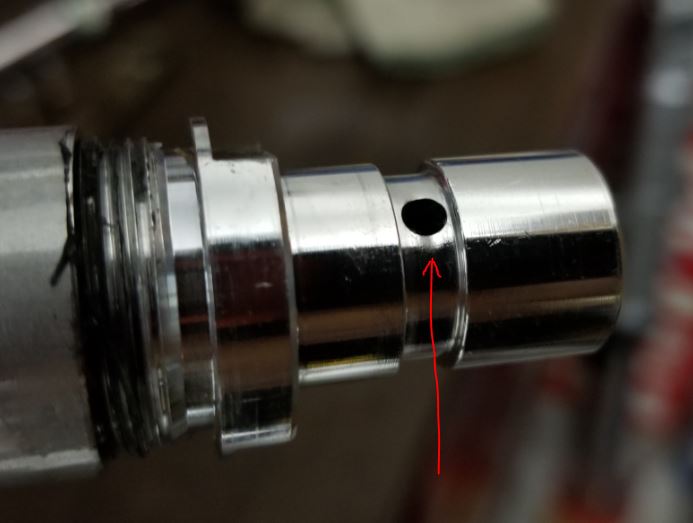
This is the valve that survived the over-torque condition. You can see where the diameter was starting to neck down and distort around the hole (That hole is a classic "stress-riser" in the engineering world... where failures can often originate from)
Here's how badly the copper washer can distort in an over-torque condition. The originals looked fine and will be reused.
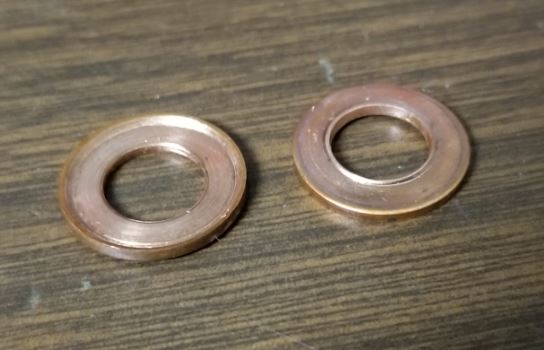
Everything is apart and ready to go back together with new parts. More to come....
I had some natural beeswax on hand to dissolve the Loctite if it proved stubborn, but didn't need it.
This is the valve that survived the over-torque condition. You can see where the diameter was starting to neck down and distort around the hole (That hole is a classic "stress-riser" in the engineering world... where failures can often originate from)
Here's how badly the copper washer can distort in an over-torque condition. The originals looked fine and will be reused.
Everything is apart and ready to go back together with new parts. More to come....
Last edited by a moderator:
Followup....
Fred's valves showed up in record time (2 days!!!). I gave a little thought to a fork upgrade and decided to wait until the next front tire change. Sliding out the fork tubes and pulling the cartridges out is just a few more added steps. I found out the general fork service work (seals and bushings replacement) really isn't hard... if your torque wrench is calibrated properly!! I bought the special sized aluminum tubing for $17 delivered to drive the middle bushing in and that worked like a charm.
Since the valves arrived so early, I tossed them in that night yet and was able to take it for short test ride last Sunday. Although the Gen 1 valves appeared just a bit different than the Gen 2 (there was a small hole drilled in the side of the Gen 1 that I didn't see on the Gen 2 version), but the forks seem to perform about the same, regardless. My schedule and the weather has not cooperated lately and the bike has sat now for a week since the repair, so I have yet to take it in a good long ride to get a full impression.
Thanks again to Fred for his speedy delivery of parts and his suspension setup procedure. And thanks to all for the support in this thread.
Glad my old parts came in handy. Im not even sure why I saved them. I would not have bothered to sell them and certainly would not have put them back in after upgrading my forks with GP parts. Serendipity I guess.
I still have a pair of stock rebound valves if they can be of use to someone
I still have a pair of stock rebound valves if they can be of use to someone
Geezer
Parsimonious Curmudgeon
Regarding copper washers, you can reuse them pretty much indefinitely. When I get one that is squashed I simply pound it flat. They do get work hardened, but simply heat them with a propane torch until red hot and let them cool. They do not need to be quenched like other metals.Quick question about copper washers... I sometimes re-use copper washers, but I bought new ones for the bottom cartridge bolts to do this fork servicing. These new ones were under the heads when then bolts were over-torqued, so I 'm thinking I shouldn't re-use them despite them looking fine.
The original set also looks fine to me. Would you re-use them?
Last edited by a moderator:
Heating and letting cool tempers them. Heating and quenching hardens them.They do get work hardened, but simply heat them with a propane torch until red hot and let them cool. They do not need to be quenched like other metals.
Funny story on the copper sealing washers on the bottom end of the forks... I got the fork and wheel back together and everything was nice and clean. The next morning, I reached under the end of the left side tube and I was discouraged to feel a drop of oil ready to drip off the bottom. At that point, I was questioning my decision to reuse the copper washers in such a critical spot. I was scheming what was the minimum disassembly I could do to get at that Allen screw to give it a tad more torque (I now know the limit is 50% more, right? lol). Patience was with me that day and I decided to wipe it off and give it a day to see if more drips come. Well, it has been a week now and its still completely bone dry, so no disassembly is required luckily. All I can figure was there was a drip of oil that wept out of the axle joint overnight. I did notice there being a bit of oil on the black ABS disk when putting it together so maybe that was the source.
Similar threads
- Replies
- 22
- Views
- 1K
- Replies
- 4
- Views
- 602
- Replies
- 8
- Views
- 637