


Mount Rainier
Well-known member
Here’s one that certainly may have turned up on the forum in the past, however, I couldn’t find it after a good deal of searching.
I have come up with an inexpensive simple fix to what is a reoccurring problem regarding the side bag attachment. As you have no doubt discovered the carrying/locking handle has been known to stick in the up position and requires some aggressive coaxing at times to get it to return to the down position which causes the locking lug to rise into the sub-frame to lock the bag into position.
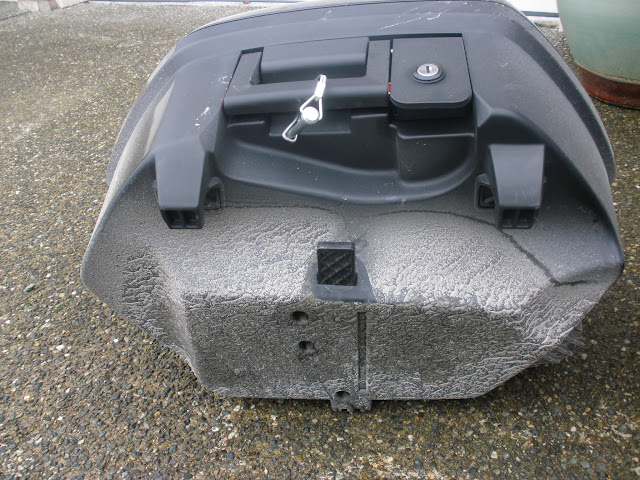
One of the causes of the handle sticking is debris in the gear mechanism. Dirt, sand and other debris collects on the locking lug as a result of foul weather and road conditions. I was surprised by the amount of dirt and grim that had collected within the grid pattern on this lug and most certainly worked its way down into the gears resulting in a less than smooth operation..
I frequently remove my bags for cleaning and bike maintenance reasons but with the bag off, the handle is almost always in the raised position and I simply failed to notice the buildup of foreign material on the lug due to it being recessed into the bag when it is off the bike.
Here’s my simple low-tech method of reducing the lugs exposure to the elements.
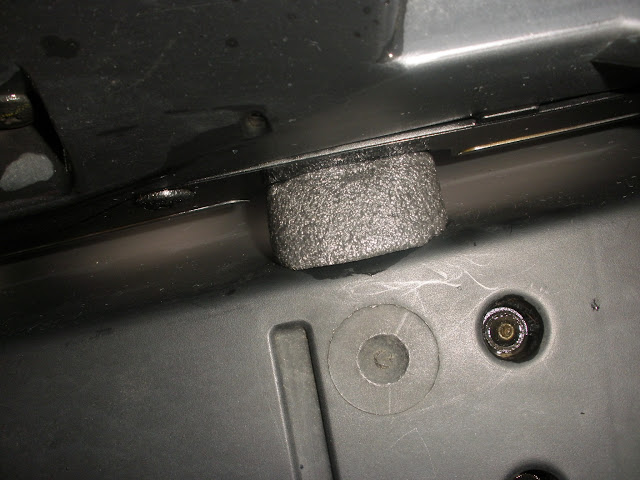
I purchased a 6 foot piece of closed cell foam pipe insulation with a <b>1 inch inside diameter</b>, for $1.27. That was the only length available at HD.

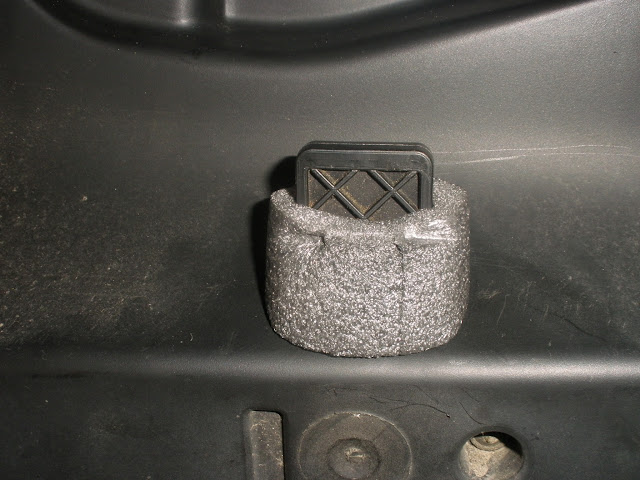
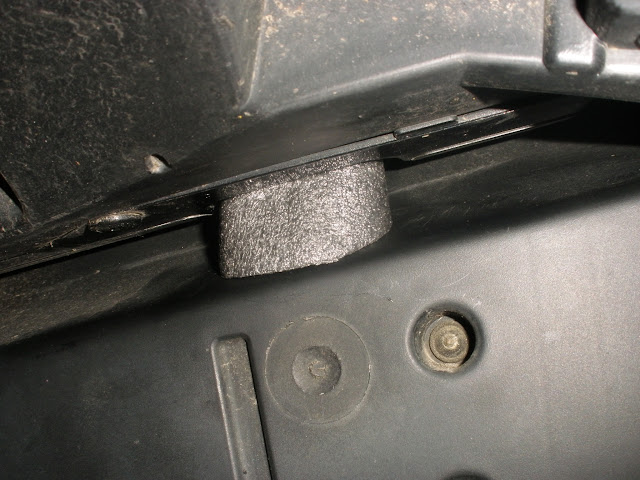
I cut it to fit between the bag and the bottom of the sub-frame with one end beveled to match angle of the bag and the other end straight across. The whole thing is less than 2 inches in length. The nice thing is that when cut a little long, it compresses upon insertion and creates a good seal against road debris and liquid finding their way onto the locking lug and into the mechanics of the lever system.

It took about 3 minutes to get the feel for lining it up on the lug which is done easily from the opposite side while installing the first bag and from the rear of the bike reaching through between bag and rear wheel on the second bag. Practice with one bag off and it ends up being relatively easy to line up and complete the install. Cut some spares just incase you are on the road and forget they are there when removing the bags at the place of lodging etc and they get lost.
Some pics of the effectiveness of this simple application:
Before a 200 mile Pre Super Bowl ride yesterday.
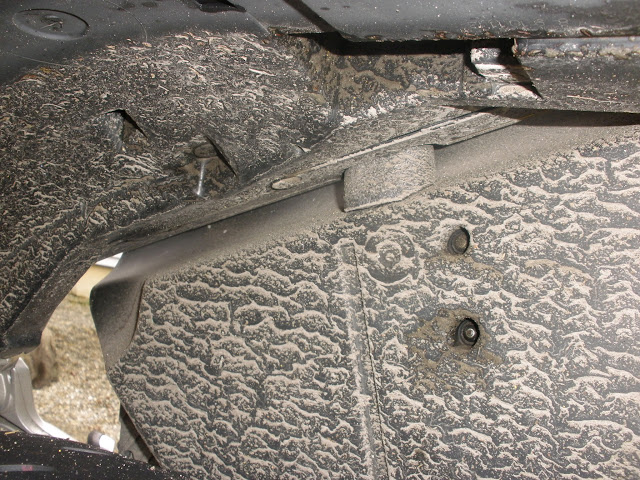
Upon my return. This 200 miles was all on paved roads.
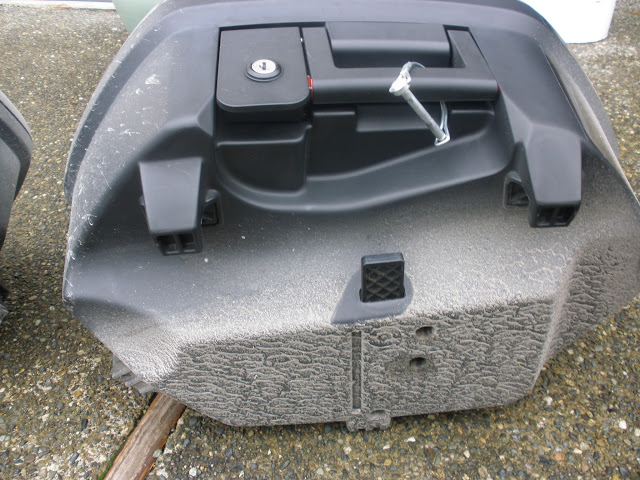
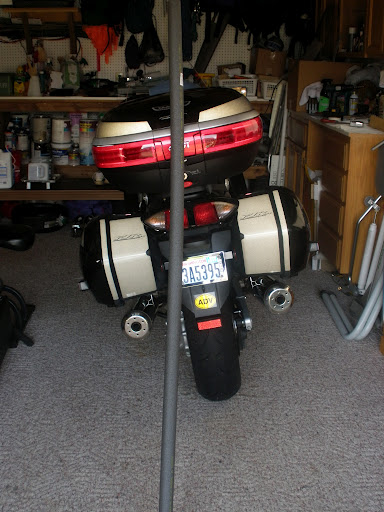
All cleaned up and re-installed.
All you do to clean these inserts is after you’re done with the bike wash, rinse them off in the soap bucket, squeeze them out and reinstall. I ended up with 5 ft 7 inched of material left over. Total cost of material used, less than $.05. :yahoo:
Keep Going!
I have come up with an inexpensive simple fix to what is a reoccurring problem regarding the side bag attachment. As you have no doubt discovered the carrying/locking handle has been known to stick in the up position and requires some aggressive coaxing at times to get it to return to the down position which causes the locking lug to rise into the sub-frame to lock the bag into position.
One of the causes of the handle sticking is debris in the gear mechanism. Dirt, sand and other debris collects on the locking lug as a result of foul weather and road conditions. I was surprised by the amount of dirt and grim that had collected within the grid pattern on this lug and most certainly worked its way down into the gears resulting in a less than smooth operation..
I frequently remove my bags for cleaning and bike maintenance reasons but with the bag off, the handle is almost always in the raised position and I simply failed to notice the buildup of foreign material on the lug due to it being recessed into the bag when it is off the bike.
Here’s my simple low-tech method of reducing the lugs exposure to the elements.
I purchased a 6 foot piece of closed cell foam pipe insulation with a <b>1 inch inside diameter</b>, for $1.27. That was the only length available at HD.
I cut it to fit between the bag and the bottom of the sub-frame with one end beveled to match angle of the bag and the other end straight across. The whole thing is less than 2 inches in length. The nice thing is that when cut a little long, it compresses upon insertion and creates a good seal against road debris and liquid finding their way onto the locking lug and into the mechanics of the lever system.
It took about 3 minutes to get the feel for lining it up on the lug which is done easily from the opposite side while installing the first bag and from the rear of the bike reaching through between bag and rear wheel on the second bag. Practice with one bag off and it ends up being relatively easy to line up and complete the install. Cut some spares just incase you are on the road and forget they are there when removing the bags at the place of lodging etc and they get lost.
Some pics of the effectiveness of this simple application:
Before a 200 mile Pre Super Bowl ride yesterday.
Upon my return. This 200 miles was all on paved roads.
All cleaned up and re-installed.
All you do to clean these inserts is after you’re done with the bike wash, rinse them off in the soap bucket, squeeze them out and reinstall. I ended up with 5 ft 7 inched of material left over. Total cost of material used, less than $.05. :yahoo:
Keep Going!
Last edited by a moderator:
 Given both our recent experiences, I'll take the blowing sand over the dense fog along I-5 any day George. :clapping: