And the journey begins

Yamaha FJR Motorcycle Forum

Help Support Yamaha FJR Motorcycle Forum:

This site may earn a commission from merchant affiliate links, including eBay, Amazon, and others.
. . . upon the well organized bench.
But . . . . see . . . . . . I mean . . . . . . There isn't one!

My trick is to unfold an ancient card table and steal all the Tupperware from the kitchen.

(Real Tupperware, not slang for bodywork.)
yeah, right

when I was there, he put his FJR tool kit spark plug wrench right in Jan's plastic container for safe keeping, NOT !!!

oops.gif


Once you have the cylinder head removed you are only a few $$$ away from having it repaired and being the owner of a good as new engine. Might be time to contact S76.

??? Not sure of the meaning of this. I obviously missed something somewhere somehow.

Hard to believe, considering outside of work and sleep, I LIVE here. :)

 
Skinny, anorexic bitch. Hardly a keeper.
Howie3.jpg


Hard to believe this hero's journey started with this little hole....

This thread gives me Déjà vu nightmares.


Howie

You have a package coming via UPS ground sometime early next week.

PrototypeMCCTfromAPE.jpg


I couldn't guarantee the second unit, but how does the prototype sound?

:)

Brodie

 
Howie
You have a package coming via UPS ground sometime early next week.

PrototypeMCCTfromAPE.jpg


I couldn't guarantee the second unit, but how does the prototype sound?

:)

Brodie
DUDE!!! You MUST keep that for yourself. I appreciate the offer and all that, but #1 MUST go to he who pioneered "The Cause".

(you ARE the Neil Peart of FJRdom!)

BTW, that's a FINE lookin' piece of moto-bling. I'm droolin'. :yahoo:

 
Last edited by a moderator:
F'ing A Steve, way to get things done! Nice to see you breaking a sweat in the garage and things moving forward.

FWIW, the FJR motor on a wood pallet with some plywood boxed about it is about 270#. At least that's what I paid for when I had my replacement motor shipped.

And dood, remember to fish that Stator wire up where it belongs on the new motor before bolting the frame up all the way. It's way easier that way. DAMHIK.

 
It will be interesting to see if Grumpy's throttle bodies look as nasty as the ones you pulled off of that engine. If they are in better shape then we can assume that your original ones were affected by the local environment. Sort of the same thing that happened to your fuel tank.

 
It will be interesting to see if Grumpy's throttle bodies look as nasty as the ones you pulled off of that engine. If they are in better shape then we can assume that your original ones were affected by the local environment. Sort of the same thing that happened to your fuel tank.
I think dirty throttle bodies is the norm on higer mileage bikes. Here's mine at about 65k, still runs great.
IMG00061-20090512-1100.jpg


SkooterG's

StarterReplacement14.jpg


Just meandered through all 7 pages of this, and all I can say is "good for you!". I changed out the engine on my FZ1 and it was pretty straight forward. Putting the new one in, I was amazed at how all the wires just kinda fell into place. I guess from being bent and heated/cooled so many times they just stayed bent to where they needed to go. I want to say "keep up the good work" to you, your son and son in law. You'll be riding it soon!

 
RH, I'm not sure you have removed enough parts.... it looks like the rear pegs are still on the bike B)

All kidding aside those of us who don't know a spanner from a wrench bow to you

 
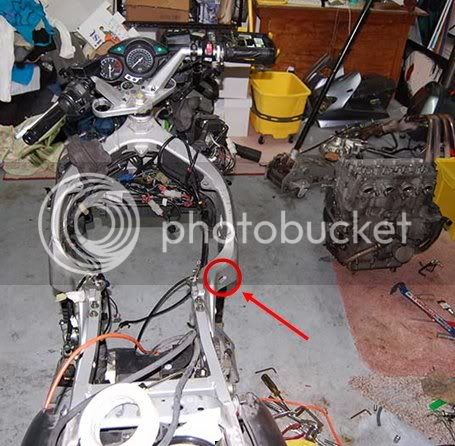
Minor problem has surfaced, unrelated to the ongoing motor transplant.....

I've got basically nothing to do, except organize all my tools, until Grumpy arrives next week with his motor and we repeat the dreaded engine removal on HIS bike, so I thought I'd yank the cylinder head off to see what kind of damage had been done to the valves.

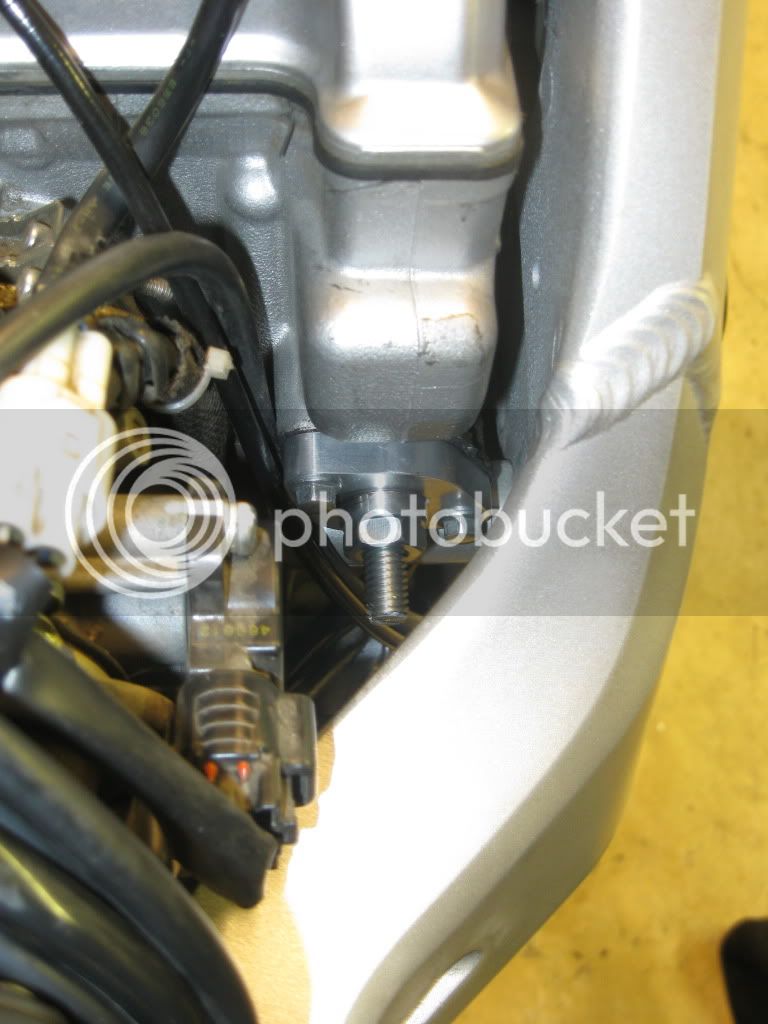
Let me tell you right now, as Ionbeam will testify, those cylinder head bolts are IN THERE FOR KEEPS!

It's amazing that it took a 22 inch piece of pipe over the end of a breaker bar to break those bolts loose. If you're unfamiliar with the torque sequence on head bolt installation, it's an interesting read.

For those who don't have a factory service manual, here's the sequence in a nutshell.....

First you oil up the bolts, slide them in their bolt holes and torque them all down tp 18 lb/ft of torque. Then, you loosen all the bolts up and RE-tighten to 18 lb/ft. With me so far?

Now, after all 10 bolts are tightened to 18 lb/ft a second time, you set aside your torque wrench and tighten each bolt one more time, 1/2 of a complete turn of the bolt, 180 degrees. This puts a serious stretch on the bolts, apparently, so if you accidentally overtighten, i.e., go over 180 degrees after the 2nd torqueing sequence, you dispose of the bolt and do it all over again with a new one. NEVER re-use the head bolts.

So how does this apply to tonight's adventure?

Let me assure you, after those bastards have heat cycled over 46,000 miles, they do NOT leave the block willingly.

And on top of everything, those damn bolts only have a 12mm head on 'em, so you have to remove them with one of the smaller sockets in your collection.

I managed to break 9 of the 10 bolts loose, by bracing a foot against the block, adding a 22 inch piece of pipe over my breaker bar handle for leverage, and damn near busting out 4 year old surgical repairs to hear them CRACK like a shot from a Remington 22 rimfire. But on bolt #10, my f***ing socket split and rounded the piss outta the head of the last bolt!!!

SHIT!!!

Trust me, as hard as it was breaking the other 9 bolts, an EZOut is NOT gonna break that bolt loose. And the bolts are all "sunk" into the head, so you can't get a dremel cutting wheel in there to slice the head of the bolt off.

Ionbeam mentioned the same problem with his head removal, and said something cryptic like "the bolt head was machined off" so the head could be removed. At least at that point, the remaining bolt should be easy to remove with a set of vice grips.

Fortunately, this little setback has NO effect on the motor replacement. It's just a warning that if you ever have to remove your cylinder head, you probably want to remove those head bolts with an impact socket, specially hardened for tough duty. My Stanley 12mm split like it was made of cardboard trying to get that last bolt out. :(

'Howie

 
I've broken better quality sockets (craftsman) before too. It's what happens when we put extensions on our breaker bars. A better solution might be to use an impact gun? :unsure:

 
Good info on the head bolts. One way is use a drift or short piece of stout metal, smaller than the head of the bolt so you don't mar the flats, and hammer on it for a while. Start with a medium blow with a hammer and increase the force of the blow until the bolt screws out with a reasonable amount of torque.

Also let soak first with some good penetrant like 50-50 acetone/trans fluid.

Edit: OCfjr's Proto bolt extractors look pretty good. I don't know how much room there is around the bold head. I have hammered a cold chisel to start a cut in the side of a bolt head and used a short stout punch to pound into the cut in the counter clock wise direction to remove bolts many times.

 
Last edited by a moderator:
Stanley/Proto sell Bolt Extractor sets, as does Sears/Craftsman. The Stanley/Proto kit is a bit more oriented to bolts in a well and looks a bit beefier to me, but either should do the job. The kits run about $25, IIRC for a seven piece set. They are just sockets designed to grip rounded off bolts in different sizes.

 
That's my son maneuvering the motor on the jack. Six-foot-six, 235 pounds. 32 years old. Trust me...he can kick any of yer worthless asses! (including mine) :assassin:
Then again I hear you cry at the sight of Palmetto bugs..

I got a Garage cat 'could whip yer sissy ass ya puss :fuck:

Good to see ya got help putz..Otherwise that ghey assed scoot would further clutter yer garage :p

:jester:

 
Top