Donal
Well-known member
If you're struggling to get hold of a test connector, just send a pic (of the mating socket on the bike) to Eastern Beaver. They will identify it and supply all the parts you need. 
Don
Don


Thanks for pointing out my errors, I know better and try to keep my breaks, brakes, your, you're, peddle, pedal, to, too, two, etc straight. As one of the worlds worst speelers I reserve the right to butcher even simple words, at any time, without warning or remorse. Though I will correct any errors should I be able to see them or have them pointed out to me.One nitpick: "instillation" should probably be "installation"? And another nitpick: "peddle" should maybe be "pedal"? Yeah, I'm OCD...
And for my bike, in the second procedure: "0.5 seconds later the front brake lever will pulse twice; then the rear brake peddle will pulse twice" then the front brake lever will pulse twice again. I take it this isn't unique to my bike? The second procedure pulses a lot more than the first one. I guess it's the one you want to use when changing the fluid, as I imagine it moves a lot more old fluid out of the ABS block...
And a third thing, I tried ordering the test coupler from Ron Ayers in December (along with a bunch of other stuff) and they said it's no longer available, according to Yamaha.
At < $10 for an assembled part I didn't think that there would be much advantage to buying parts from Eastern Beaver. But, in light of CC saying that the Yamaha OEM Test Coupler is no longer available, Eastern Beaver becomes the new supplier of choice.If you're struggling to get hold of a test connector, just send a pic (of the mating socket on the bike) to Eastern Beaver. They will identify it and supply all the parts you need. ...
FYI... I got lazy and rather than do my own, ordered here too. Order was cancelled a couple of days later.... I presume because it is no longer available.I just ordered the coupler from here Clicky
$9.72 part +1.75 shipping
Could not resist having this for my next brake flush.
Thanks Ion
I am fully willing to feed you next time yer in the neighborhood. waddulike?Could be. Willing to work for food.So is this "Test" going to be featured in a future video of an upcoming nor'easter FJR Tech Day??
If anyone has recieved the parts from Eastern Beaver could you please post the part numbers.If you're struggling to get hold of a test connector, just send a pic (of the mating socket on the bike) to Eastern Beaver. They will identify it and supply all the parts you need.
Don
Yes, my order got cancelled too. It seems like this coupler is not available anymore.FYI... I got lazy and rather than do my own, ordered here too. Order was cancelled a couple of days later.... I presume because it is no longer available.I just ordered the coupler from here Clicky
$9.72 part +1.75 shipping
Could not resist having this for my next brake flush.
Thanks Ion
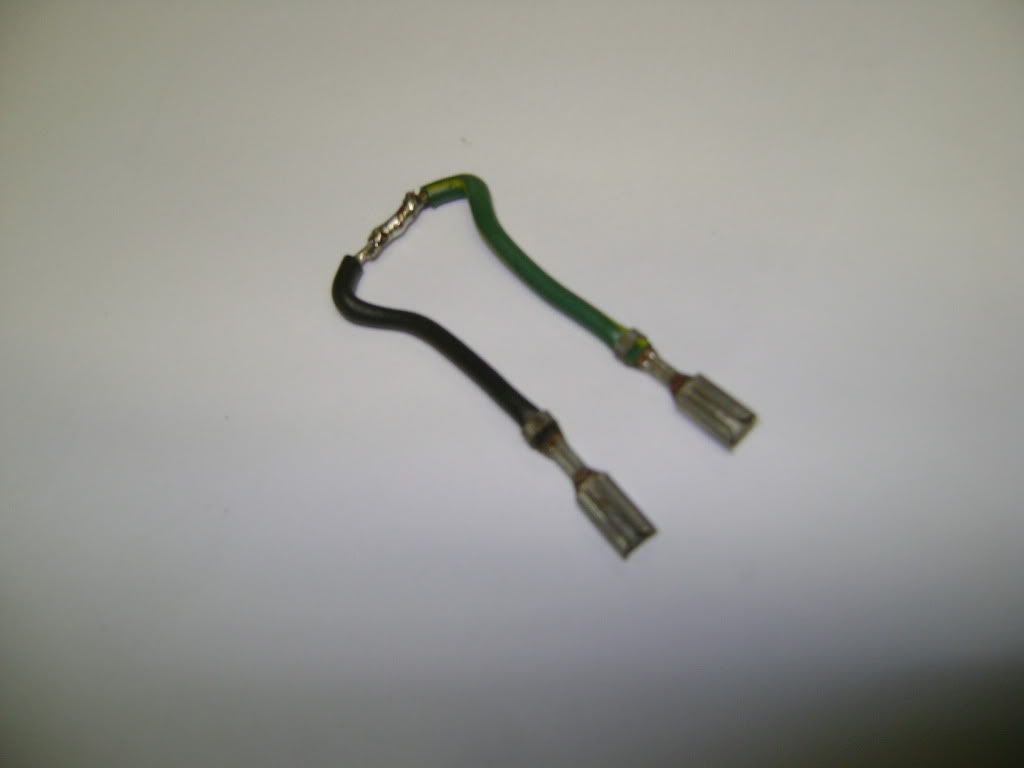
Hillbilly jumper.I guess it would not be hard to build a jumper cable for temporary use during brake bleeding. Are those spade style connectors in the coupler residing in the FJR?
IME, he seems to favor lobstah and Irish eggs benedict (but not together, at the same time), and will consume good chowdah with gusto.I am fully willing to feed you next time yer in the neighborhood. waddulike?Could be. Willing to work for food.So is this "Test" going to be featured in a future video of an upcoming nor'easter FJR Tech Day??
The rear brake pedal should be pressed until it stops moving and is firm, there is no need to crunch it. Both the brake lever and rear brake pedal should be held firmly, without release.When performing test 1, how much pressure should your helper need to put on the wheel to get it to move? Also should you be pressing hard on the rear brake? Its pulsing and doing everything as indicated, but it does not seem like the wheel wants to move. I got it to move when really pushing on it, but was wondering if the pedal is supposed to go up and thats what releases it? I figured it would all be internal? clarification appreciated
I have an '07. It's quite well hidden. First of all, it's upside down with the cable pointing up. Second, it's clipped to a small metal piece so you have to release the little catch on the connector. It's at the forward-left corner of the battery. Mine has a weatherproof plug that was very very difficult to remove.OK. Can someone describe exactly where this test coupler plugs into.
The description says that there is a socket above the battery.
I have a 06 Gen 2. There does not appear to be any spare sockets above or around the battery area.
Enter your email address to join: