v65
ouch
I haven't seen this posted before, so hopefully someone will find it useful. Just finished installing the audiovox cc, but wanted to keep the option of installing brighter LED tailights and a backoff module. This is a notorious issue with the cc, but by pirating the ideas from valkyrie website (its OK, he pirated his idea) I pieced a solution together.
You need two relays. The first relay is to ground the cc as explained nicely on the valkyrie website. This will allow you to replace the stock tailamps with LEDs. The second relay is to power other brakelight accessories such as a backoff.
Note: my backoff is wired to the lights in my trunk, not the stock tailights. To wire the backoff to the stock tailights you would have to wire the backoff to the second relay then wire the lights to the backoff.
The trick is that the second relay has to be isolated from the first with a diode, otherwise you will have that no good positive voltage on the purple wire with no brakes depressed! This means that the tap into the brake light wire will have to split to go to the two relays.
The wiring diagram looks like this:
I installed the two relays under the tool tray on my '06:
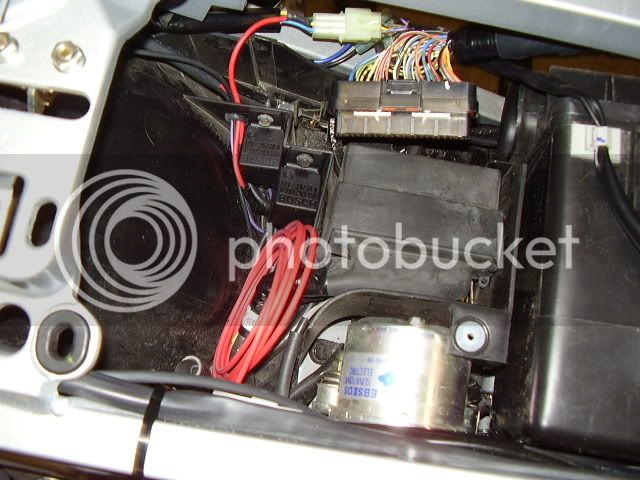
The large coil of red wire is the positive lead from post 87 on the second relay for the backoff module and other brake light accessories.
Final Note: If all was right with the world then post 87 on the first relay (to ground the cruise control) would have power to it when the brakes are engaged. Don't even think about it, I screwed around with all different kinds of permutations of wiring and diodes trying to get juice from that post to power the backoff module. Whenever you hook ANYTHING to that post you end up with voltage on the purple wire while no brakes are engaged, which is no good. Hence the second relay. Perhaps a sparky would be kind enough to explain, took a lot of hours to come up with this combo")
You need two relays. The first relay is to ground the cc as explained nicely on the valkyrie website. This will allow you to replace the stock tailamps with LEDs. The second relay is to power other brakelight accessories such as a backoff.
Note: my backoff is wired to the lights in my trunk, not the stock tailights. To wire the backoff to the stock tailights you would have to wire the backoff to the second relay then wire the lights to the backoff.
The trick is that the second relay has to be isolated from the first with a diode, otherwise you will have that no good positive voltage on the purple wire with no brakes depressed! This means that the tap into the brake light wire will have to split to go to the two relays.
The wiring diagram looks like this:
I installed the two relays under the tool tray on my '06:
The large coil of red wire is the positive lead from post 87 on the second relay for the backoff module and other brake light accessories.
Final Note: If all was right with the world then post 87 on the first relay (to ground the cruise control) would have power to it when the brakes are engaged. Don't even think about it, I screwed around with all different kinds of permutations of wiring and diodes trying to get juice from that post to power the backoff module. Whenever you hook ANYTHING to that post you end up with voltage on the purple wire while no brakes are engaged, which is no good. Hence the second relay. Perhaps a sparky would be kind enough to explain, took a lot of hours to come up with this combo
Last edited by a moderator: