Audiovox touchpad mount options?

Yamaha FJR Motorcycle Forum

Help Support Yamaha FJR Motorcycle Forum:

This site may earn a commission from merchant affiliate links, including eBay, Amazon, and others.
Rostra kit seems pricy compared to the Audiovox, but if there ain't no Audiovoxes out there any more that may be moot.


And the price you see for them rivals what Murph's lists for the new Rostra from what I've seen; not that you still can't "find a deal" if you look in the right place.

Maybe it's OK. I don't know. I'd like to hear from someone who tries it, though. Or from someone who'd bring their bike here with a Rostra and let me try it on theirs. :ph34r:

I agree with that! Would really like to hear of a FJR running one and what it took to install plus how it operates. New Year, time to move on and all that!

 
Rostra kit seems pricy compared to the Audiovox, but if there ain't no Audiovoxes out there any more that may be moot.
My main reply, though, is that the Audiovox can read the electronic speed wire on most of its applications, but it can't read the FJR's. The bike has too many pulses, it's out of range of what the Audiovox brain can keep up with. I'm wondering if the same applies to the Rostra, or if you just feed it the tach signal instead.
$205, easier to install, and going through the specs in the installation manual, the pulse frequency should definitely not be a problem for this electronic CC. https://www.rostra.com/cruise-control.htm

I'm tempted.

 
Excellent thread on the Rostra electro unit at Concours Owners Group including good stuff from Fred H.
Looks like the bee's knees for ease of installation and setup.
I read through the COG write up and partway through it there is this post;

"It's somewhat large- approx. 3" X 4" X 5" and there is a rigid extension at the end of the cable mount this is (guessing here) about 3 1/2" long. This bike is tight on space and squeaking things 'under it's clothes' is tough. I really made an effort with mine and could not find any place to mount it that I would call 'slick'. But there are always other methods and the Rostra can certainly go somewhere else. Even if you had to modify the cable to lengthen or shorten it, you still have a lot of options in mounting I think.

There was a guy who published some info. about installing one of these units in an FJR and also could not find a place for it. He found he could split the unit in half on the 3" dimension and mount it in two pieces, connected together only electrically. I took mine apart to do the same thing but found that it has a homing switch that crosses the entire width. It could be modified but before I reworked that unit to that point, I would use an Atmel MPU and a micro actuator and make a slick unit."

Size looks like an issue for FJR's, but other things about the subject looked pretty good. Hmmm, someone sure needs to figure this out!

 
Another thing: Having an "Engaged" light is definitely not worth 25 bucks, at least to me. I always laughed at Dad's Lincoln lighting up "Speed Control" on his intrument panel, assuming he was too stupid to know he'd just set it. I know it's engaged, I don't need a 25-dollar circuit to tell me so!

If I had to get on, it's the cheapie switch for me. Or maybe a homemade set like so many have used with the Audiovox.

 
From 2004; this post was linked to again in 2007 when Rostra was being discussed a second time.

Posted on Tuesday, July 20, 2004 - 07:54 pm:
I have successfully installed an all-electronic cruise control on my 2004 FJR1300 ABS. I was intending to make a nice write up, but the roll of (silver-halide) film I shot during the install was no good...I haven't used my ring light in a while and I screwed up. So let me just make a few comments, and if there are details I have left out of interest, ping me.

I used the Rostra Precision Controls "GlobalCruise" unit, part 250-1223. See www.rostra.com. I got a very good price at Brandon Distributing (www.brandondist.com), but it is still probably more costly than the Audiovox all-electronic unit. Jumping to the end: it works quite well, with a slight surging at set, but then, after about 10 seconds of a few slow accel/decell cycles (to fine calibrate I would guess), it settles right down and is very smooth. And I live in a hilly area. I would guess it is not quite as silky smooth as the vacuum unit, judging from the raves written on this site. But it is just fine for me.

The unit is not small (although it is claimed to be the smallest all-electronic unit for sale by their tech people): about 3 x 4 x 5 inches, with a rigid cable coming from the side (picture and installation manual on the Rostra web site). I did manage to test fit the unit under the seat, by just placing it into the tool tray. It fits there tightly, with some modest force, but the cable would be able to wrap under the tank and around to reach the throttle area. So, this seems do-able. But this is not where I put it...I did not swim into uncharted waters to simply wimp out and loose my precious tool tray.

By the way, besides being all electronic (a must, as I am an electrical engineer) and very well built (my judgement), the cruise cable also has a clever scheme to take up lost motion, i.e., twist the throttle and the cruise cable disappears into its sheath. No metal "beads" required to create slack. Now, back to the story:

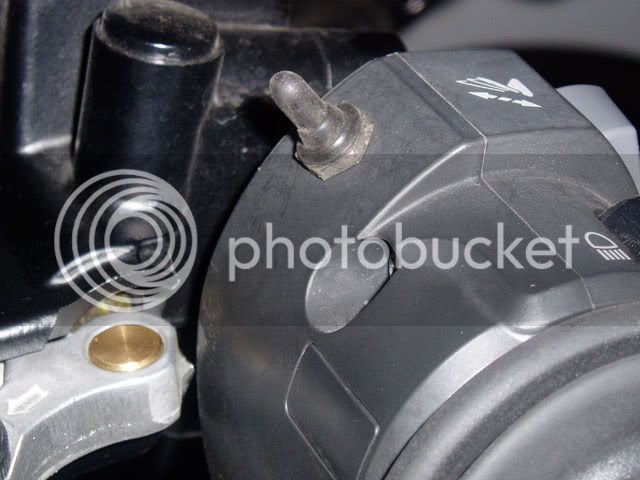
I installed my unit between in the headlights, under the front fairing. The really nice aspect is: a straight shot gets you to the throttle area, so the cable routing is trivial. The bad news: this area is not big enough to mount the unit as supplied, and of course, the front fairing must be removed to do the install. My solution: I cut the Rostra unit into halves! The upper part is where the electronics live; the bottom is where the servo motor and cable pull mechanism resides. Thus, I created two smaller units. The servo guy is between the headlamps, mounted to a bracket that keep it rigidly in place independent of the fairing. The electronics piece sits behind and above one headlight, kept in place by wire ties. Note I have left many important details out here, but ultimately, with the help of Rostra support (they were very patient), I found all necessary connections between the two parts I created and it all functions just fine. A side feature: I can adjust the unit's "switches" through the access hole in the front fairing beneath the windshield. Also, the unit is far from sources of ignition noise and should be out of the weather, too (I have yet to ride with this set in the rain, as I am unhappy with their el-cheapo switchgear...this will change).

Besides the challenging physical install (which I claim you can avoid by sacrificing about 70% of your tool tray), I was very worried about the unit surging on the FJR. To address this concern as aggressively as possible, I deviated from the "usual" manner of attaching the cable to the throttle mechanism. To summarize, I wanted to use as much of the cable motion as possible, which is far more motion available than is created by a full twist of the throttle. So, I attached a radial arm to the throttle pulley's side (super strength, high temperature epoxy), and then attached the cable to the arm's end. After careful calibration, the system has worked well for me. But note: I never tried a "stock" install of the cable to the throttle pulley, and so, can't judge the intrinsic surging this unit might have on the FJR.

Two last details: the VSS signal on the FJR *is* too fast for this unit's switch setting (about 80000 pulses per mile). No problem: I constructed a simple electrical circuit to perform a divide-by-four function, slowing the VSS signal by 4x to 20000 ppm and also creating a very nice square wave for the Rostra to consume in the process. And secondly, the FJR has an electrical switch mounted with the clutch: why not use it? I did so, and used the Rostra's "neutral safety switch" feature with the clutch circuit (and a simple level shifter circuit) to create one more way to disable the unit...by pulling the clutch. Works fine, and is safer in my opinion than waiting for rpms to build to accomplish the same thing. By using this circuit, the cruise will not set with the sidestand down, either. (This makes bench testing harder, but I thrive on problems like this.) I did not connect the "usual" rpm sensor circuit.

I have not put too many miles on the system, but hope to change that in the Fall. This note is intended to represent a proof of concept, with some alternative install ideas thrown in, relevent (I hope) to the preceding messages.

...damocles
Rostra install manual.

 
Last edited by a moderator:
...his newer unit will configure for 36,000 pulses per mile, and he was able to connect the VSS signal directly, no divide-by-four or anything like that.
Note that the Gen II does not have a VSS sensor, it uses the pulse steam from the ABS sensor.

 
Here's another photo of the do-it-yourself approach, a la BrunDog, except that I don't see the need for an On/Off switch, so mine is on all the time and this switch takes care of Set/Resume (Accel/Coast).

avcc1.jpg


Where do you find the switch boots? (Yeah, I've searched, but I'm sure I'm gonna feel really dumb when I get the answer. <_< )

 
Where do you find the switch boots? (Yeah, I've searched, but I'm sure I'm gonna feel really dumb when I get the answer. <_< )
Call Digikey. I find calling them a lot quicker than looking through their parts catalog. Somewhere around here I posted the (updated) parts numbers for the switches, but I'm feeling too lazy to look for them. :)

 
it's somewhat large- approx. 3" X 4" X 5"Size looks like an issue for FJR's.

Hmmm, someone sure needs to figure this out!
Our forum member Patriot has already figured it out. :yahoo: No need to hide farkles under plastic - just mount them on the sliders! :rolleyes: If you hurry you can beat him to it and be the first with a Rostra mounted on the left slider! :dribble: :D :p :)

 
Fred, at least you didn't use a wheel lug bolt to attach yours like AirBoxBoy did:


I prolly would have used whatever 10mm bolt I had laying around like airboxboy. But when I got the bracket from Murph's it came with the nifty allen head deal.
I also used the bolt that came with the bracket from Murph's. Must have changed suppliers at some point to save $0.00007 per kit. Maybe I'll look for something nicer next time I'm at the hardware store, now that you've made me all self-conscious about my bolt.
I got Murph https://www.murphskits.com/catalog/product_...?products_id=72 to hook me up with a socket head bolt for my Skyway LH mount. Great guy to talk with and he wanted me to post up that he has 7 GEN I Non-Abs fork braces left. Originally sold for $128, will sell now for $50 (add $25 for fork tube protectors). I'm just passing this along in case someone is looking for a deal on a fork brace.

 
Last edited by a moderator:
Where do you find the switch boots? (Yeah, I've searched, but I'm sure I'm gonna feel really dumb when I get the answer. <_< )
Call Digikey. I find calling them a lot quicker than looking through their parts catalog. Somewhere around here I posted the (updated) parts numbers for the switches, but I'm feeling too lazy to look for them. :)
Thanks. I Googled the list for Digikey and came up with more info, too. I'll give Digikey a call.
These are the DigiKey part numbers...

360-1143-ND

360-1140-ND

335-1003-ND Blk Cover

335-1002-ND Red Cover

Getting ready to put the Audiovox on my Spyder..

 
Last edited by a moderator:
Where do you find the switch boots? (Yeah, I've searched, but I'm sure I'm gonna feel really dumb when I get the answer. <_< )
Call Digikey. I find calling them a lot quicker than looking through their parts catalog. Somewhere around here I posted the (updated) parts numbers for the switches, but I'm feeling too lazy to look for them. :)
Thanks. I Googled the list for Digikey and came up with more info, too. I'll give Digikey a call.
These are the DigiKey part numbers...

360-1143-ND

360-1140-ND

335-1003-ND Blk Cover

335-1002-ND Red Cover

Getting ready to put the Audiovox on my Spyder..
Any plans to put moto tires on it? Kind of a "Reverse Darkside"?

Where do you find the switch boots? (Yeah, I've searched, but I'm sure I'm gonna feel really dumb when I get the answer. <_< )
Call Digikey. I find calling them a lot quicker than looking through their parts catalog. Somewhere around here I posted the (updated) parts numbers for the switches, but I'm feeling too lazy to look for them. :)
Thanks. I Googled the list for Digikey and came up with more info, too. I'll give Digikey a call.
These are the DigiKey part numbers...

360-1143-ND

360-1140-ND

335-1003-ND Blk Cover

335-1002-ND Red Cover

Getting ready to put the Audiovox on my Spyder..
Bookmarked! :thumbsup:

 
Fred, at least you didn't use a wheel lug bolt to attach yours like AirBoxBoy did:


I prolly would have used whatever 10mm bolt I had laying around like airboxboy. But when I got the bracket from Murph's it came with the nifty allen head deal.
I also used the bolt that came with the bracket from Murph's. Must have changed suppliers at some point to save $0.00007 per kit. Maybe I'll look for something nicer next time I'm at the hardware store, now that you've made me all self-conscious about my bolt.
Ever since I got my AVCC mounted up, I've had a horrid looking zinc plated hex head bolt holding the Skyway control pad on due to not being able to find the correct socket head. I'd posted above on this thread that I got one from Murph's, but it ended up being too short after shimming the mount up to the proper height. Every hardware store within 50 miles, McMaster Carr and others only offered a M10 X 1.5 pitch thread which won't work in the LH Gen I Mirror mount. It is a 1.25 pitch which I FINALLY found at https://carpentercreek.us/product.sc?produc...p;categoryId=88 The 40mm length worked fine with a 5/16" spacer to set the Skyway mount at the correct height. It's much better looking and at $4.25 for two bolts ($7.22 delivered in 2 days from GA) this is a cheap dress up for the cockpit. UP you have no excuse now!

Cruisecontpad008.jpg


M10X1.25 pitch 40MML black oxide socket head bolt

Cruisecontpad007.jpg


Last edited by a moderator:
Top