Front Cowling

Yamaha FJR Motorcycle Forum

Help Support Yamaha FJR Motorcycle Forum:

This site may earn a commission from merchant affiliate links, including eBay, Amazon, and others.

Blue Laser

Well-known member
Joined
Jun 30, 2006
Messages
80
Reaction score
0
Hey, guys, I can use a little help here.

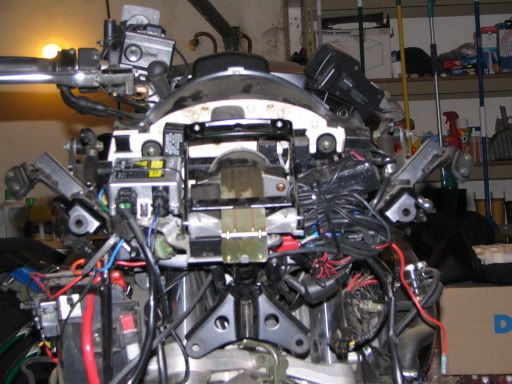
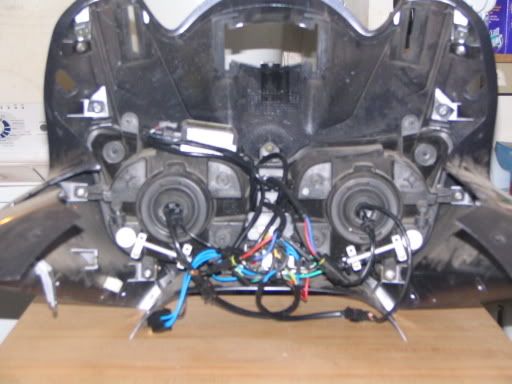
I'm trying to replace the turn signal indicator light bulbs in the

dash, but I'm having a heck of a time getting the front cowling

off.

I have taken off all the 4mm hex bolts related to the upper fairing pieces,

all the screws and fasteners from under the nose, all four dash panels, the

mirrors, the windshield, the panel under the windshield, but it still won't come off.

Can anyone tell me what I'm missing here?

Thanks a bunch-

Jim

 
Last edited by a moderator:
Jim,

Try this, picture of the exploded dash.

gage_explode.jpg


"Meter" page of parts manual

Looks like it is held together from the rear of the panel (front of bike) with 3 screws.

The last part of the fairing is a bugger to get off.

One screw right between the headlights was a pain to reach

If you go to the parts catalog (link below) part 35 on the "Cowling 1 page" is the screw I am talking about

cowling1.jpg


I got the picture from the yamaha parts catalog

 
Last edited by a moderator:
The last part of the fairing is a bugger to get off.One screw right between the headlights was a pain to reach

If you go to the parts catalog (link below) part 35 on the "Cowling 1 page" is the screw I am talking about
Pawtracks,

Maybe the one screw in the middle is all I'm missing...I hope this thing goes back together easier

than it comes apart, but at least I'm saving $130.00 (what the dealer wanted to charge me).

+1 on the exploded diagrams. Am I supposed to take ALL the windshield stuff off before the

cowling comes off? (I didn't think I'd have to take the mirrors off, but I did anyway.)

No digital camera available currently, or I'd take a pic...maybe someday. :(

Thanks for the quick reply...

Jim

 
Last edited by a moderator:
Having never done this myself, this is just my gut feeling.

I've had it down to "almost there" but never had the instrument cluster out

To get to the holy grail you are seeking "Instrument cluster" you have to remove almost everything.

-4 dash panels A-D Fairly easy

-Both mirrors need to come off to remove side panels

-Above side panels need to come off to gain access to the center/front cowling (between headlights)

-Windscreen, motor arms and center panel with associated hardware also has to come off to gain access to the rear of the instrument cluster.

Once you have almost everything off it should appear that the last painted portion of the cowling is almost ready to fall off (part that runs between the headlights) The only anchor point to the bike now is the 1 or 2 screws directly between the headlights. If you pry the side up and shine a flashlight from the rear you should see the screw(s) It took a screwdriver with an swivel/angled tip to get that last one out.

I took everything off shortly after getting the bike to:

-See how it was done

-Wire up my horns

-See how much room was in the dash area for future mods/upgrades

You can see my bike is apart as I type.

If you need some pictures let me know, I'll be home in the garage at 5pm PST

 
To get to the holy grail you are seeking "Instrument cluster" you have to remove almost everything.-4 dash panels A-D Fairly easy

-Both mirrors need to come off to remove side panels

-Above side panels need to come off to gain access to the center/front cowling (between headlights)

-Windscreen, motor arms and center panel with associated hardware also has to come off to gain access to the rear of the instrument cluster.

Once you have almost everything off it should appear that the last painted portion of the cowling is almost ready to fall off (part that runs between the headlights) The only anchor point to the bike now is the 1 or 2 screws directly between the headlights. If you pry the side up and shine a flashlight from the rear you should see the screw(s) It took a screwdriver with an swivel/angled tip to get that last one out.
Pawtracks,

I think I see what I have left. Thanks SO much for the description of what I need to do.

REALLY hot in my garage (no a/c), so I may wait until tomorrow a.m.

I probably wouldn't be riding in this heat anyway (triple digits...about 123 degrees in the garage...

yeah, yeah, I'm a wuss-so sue me!)

Thanks again for the help...

Jim

 
Last edited by a moderator:
FYI, I have found it to be easier to leave the fairing attatched to the headlights and disconnect the headlights from the frame, pull them as one piece.

 
FYI, I have found it to be easier to leave the fairing attatched to the headlights and disconnect the headlights from the frame, pull them as one piece.
Rogue,

Can you show me (via Parts List) what screws stay in for the headlights?

Also, how do you get to part # 31 On Cowling 1 on the parts list?

If you or Pawtracks (or anyone for that matter) have any other ideas,

please advise.

Jim

 
Here is the bike:

IMG_1566.jpg


And here is the headlight assembly and fairing ready to go back on after installing HID headlights:

IMG_1568.jpg


My way on that parts page screws 31 and 35 stay on.

 
Last edited by a moderator:
DELETED!!

Need to enter new topic, but related.

See topic title "Related to Cowling".

Jim

 
Last edited by a moderator:
Thanks to one and all for the replies on my issues with

the turn signal dash indicator light bulbs.

I sincerely hope I never have to crawl around

in there again, BUT...

It's all done, both left and right bulbs were replaced,

everything's back together!

(Rogue: Special thanks for taking the trouble to post pics!

They were much appreciated)

I'm gonna go ride! :yahoo: :yahoo: :yahoo:

Jim

 
Last edited by a moderator:
Thanks to one and all for the replies on my issues withthe turn signal dash indicator light bulbs.

I sincerely hope I never have to crawl around

in there again, BUT...

It's all done, both left and right bulbs were replaced,

everything's back together!

(Rogue: Special thanks for taking the trouble to post pics!

They were much appreciated)

I'm gonna go ride! :yahoo: :yahoo: :yahoo:

Jim
:thumbsupsmileyanim: :thumbsupsmileyanim: :thumbsupsmileyanim: :thumbsupsmileyanim: :thumbsupsmileyanim:

 
Top