Carb Sync tool

Yamaha FJR Motorcycle Forum

Help Support Yamaha FJR Motorcycle Forum:

This site may earn a commission from merchant affiliate links, including eBay, Amazon, and others.
Got a problem. Watched the video, and had a question. On my '14, the #1 TB is marked with the white paint. While doing the adjustment I failed to notice that my carb stix (old mercury type) had gotten bubbles in some of the columns and given me a false reading so dummy me adjusts the #1 screw to get the columns even. I've now got a lean type stumble at light throttle (around 2500 rpm), or when chopping the throttle and rolling back on, just like my '07 used to have and it's driving me nuts. I've since bought a new mercury unit and readjusted the TBs but can't get rid of the stumble.

If memory serves, the factory setting is for the #1 screw to be all the way shut, no? Trying to figure out how I can get back to stock setting on the #1 TB. Would really appreciate any help on this.

 
Wouldn't there be a vacuum setting that you could go back to on this?
Not that I'm aware of. The procedure is to adjust the other three cylinders to the reference cylinder, in my case #1, but no numbers are involved and there are none on the carb sync tools. I've got both types, the old fashioned mercury type and the Morgan, neither provide an actual number.

 
Last edited by a moderator:
Neither tool is going to provide you with a number.. As they are just diagnostic aids. Where did you see number 1 was the start point?

I'm sure somebody smart will happen in eventually to provide assistance...
However, my thinking on this is set #3 to maximum vacuum setting as it's indicated several other places to be the "unifying" port.

Also, being how all engines are not created equal I'm sure you're going to find primary settings all over the board. The big thing is to balance each cylinder within "specified" parameters.

JMHO.

 
Last edited by a moderator:
It is completely arbitrary which one you use. They probably picked the one cylinder that had the lowest vacuum when the screws are all closed, that way the combined bypass air will be as low as possible.

No the factory "preset" is not to have any screws closed all the way. But it doesn't really matter which one you use as the target.

If you get them balanced and the idle is too high, close them all down an equal amount and balance them again. My understanding is the idle speed will self regulate (within a reasonable range of bypass air) on the third gens. But I have not played with mine yet.

 
It is completely arbitrary which one you use. They probably picked the one cylinder that had the lowest vacuum when the screws are all closed, that way the combined bypass air will be as low as possible.
No the factory "preset" is not to have any screws closed all the way. But it doesn't really matter which one you use as the target.

If you get them balanced and the idle is too high, close them all down an equal amount and balance them again. My understanding is the idle speed will self regulate (within a reasonable range of bypass air) on the third gens. But I have not played with mine yet.
Thanks Fred. That's what I thought too but since doing the sync I've got a fairly pronounced stumble like my Gen II used to have. Really irritates me! I've done loads of TB syncs so baffled why this time it produced the stumble. Up to this point the bike ran flawlessly. I also removed the PAIR hardware, installed the block-off plates and thought maybe this had something to do, so went back in again and put it all back stock but still no joy. In the video that Radiohowie posted above, the guy makes the statement NOT to mess with the #1 air screw so then I thought maybe I had mess something up.

 
The guy in the video is not any sort of an "expert". He sounds to me like he is just parroting what he's read elsewhere.

Is your idle speed the same as it was prior to your adjustment? The reason that I ask is that I have noticed before that the FJR idle does tend to get a bit lumpy the more it is raised above 1000 rpm. But at or below 1000 rpm you run more risk of stall outs. I've always just lived with the lumpy idle as it doesn't seem to affect the drive-ability at all, but lately had been setting it closer to 1000 than previously.

 
Idle hasn't changed, stays at a steady 1050-1100. Doing another sync at the moment and noticed as I raise the rpm slowly to around 1500 there is a slight burble indicating maybe little leaning out. Isn't the idle on the Gen IIIs computer controlled?

Was reading through the factory manual and in Chapter 7, pages 12-13 it talks about going into the diagnostic menu and doing a reset on the TP and accelerator sensors. Is this a default reset to factory? Or does it simply allow me to go in an adjust the sensors? I've always had a slight pause when I blip the throttle, wondering one of these guys might be off.

 
Yes, idle speed is computer controlled via the ECU, just like all cars have been for the past few decades. It is a pretty simple scheme of using a bypass air control valve and looking at the rpm.

Having a lean condition at lower rpms is nothing new for FJRs or any other bike for that matter. In order to meet emissions requirements of various governing bodies, the fueling is intentionally lean at those rpms where the nannies check them. Idle speeds (and just above) is one place.

I'll check into those pages you reference, but I wouldn't worry about a little burble or stumble in the unloaded engine rpm, and especially not what happens when you blip the throttle. This ain't a hardley. No need for blipping.

As for the perceived pause, remember that the twisty thing is NOT connected to the throttles (on 3rd Gens). It is connected to a sending unit, which sends commands through an ECU that translates those commands and sends them to a servo stepper motor that actually yanks the throttle open. A small delay is expected. And the delay will (should) be more pronounced in "Touring" mode than "Sport" mode. The ECU may also think that it knows better than you and limit the blip to something less than what you are expecting. Just saying, there is a lot more to think about now than just the fuel and air mixture.

 
Last edited by a moderator:
MY '06 gets lumpier as the idle is raised...I noticed that it starts much quicker [@1/4 turnover] at 1200 rpm idle and seems to have less throttle lash...gonna do an unauthorized TBS and wondering where I should set the idle screw adjustment after I seat the four air adjustment screws?

 
Yes, idle speed is computer controlled via the ECU, just like all cars have been for the past few decades. It is a pretty simple scheme of using a bypass air control valve and looking at the rpm.
Having a lean condition at lower rpms is nothing new for FJRs or any other bike for that matter. In order to meet emissions requirements of various governing bodies, the fueling is intentionally lean at those rpms where the nannies check them. Idle speeds (and just above) is one place.

I'll check into those pages you reference, but I wouldn't worry about a little burble or stumble in the unloaded engine rpm, and especially not what happens when you blip the throttle. This ain't a hardley. No need for blipping.

As for the perceived pause, remember that the twisty thing is NOT connected to the throttles (on 3rd Gens). It is connected to a sending unit, which sends commands through an ECU that translates those commands and sends them to a servo stepper motor that actually yanks the throttle open. A small delay is expected. And the delay will (should) be more pronounced in "Touring" mode than "Sport" mode. The ECU may also think that it knows better than you and limit the blip to something less than what you are expecting. Just saying, there is a lot more to think about now than just the fuel and air mixture.
All good points. I miss the direct connection of drive by cable rather than wire but oh well. Just followed the shop directions and it looks like I can't just do a reset but rather have to undo the set screws and re-position the sensors while watching the dash for the correct numbers. Luckily when I checked my numbers they are within factory spec so I'm not fooling with them although I sort of wonder if it might be worth fiddling within the factory range. Anywhoo, just took a ten minute ride after re-doing the sync, set the #1 airscrew just a hair open, and cleaned the connectors and looks like I might have it running right again. So calling it a day for the moment. Thanks for the help, much appreciated.

A tip for removing the rubber caps off the vacuum nipples, use needle-nose pliers and simply grip the sides of the small clamps and gently lift, pulls the rubber cap up clean and easy.

 
"Neither tool is going to provide you with a number."

This is not correct for the mercury tool. Mine is marked at 2 cm intervals.

You can calibrate the tool by simply measuring the vertical distance from the mercury level in the reservoir to the lowest interval mark and then add that distance accordingly. The lowest interval is labeled "2" but the distance from that mark to the liquid level is more than 2 cm. Add the difference to the interval markings and you're calibrated.

The mercury tool is fine but I prefer a U-tube manometer filled with 75 weight oil. Flow restriction orifices in the tubes aren't necessary when using this oil.

1 cm of mercury = approximately 15 cm of oil

You can get extreme precision using the oil.

And, if you want, you can always modify the unit for four tube operation.

 
"Neither tool is going to provide you with a number."
This is not correct for the mercury tool. Mine is marked at 2 cm intervals.

You can calibrate the tool by simply measuring the vertical distance from the mercury level in the reservoir to the lowest interval mark and then add that distance accordingly. The lowest interval is labeled "2" but the distance from that mark to the liquid level is more than 2 cm. Add the difference to the interval markings and you're calibrated.

The mercury tool is fine but I prefer a U-tube manometer filled with 75 weight oil. Flow restriction orifices in the tubes aren't necessary when using this oil.

1 cm of mercury = approximately 15 cm of oil

You can get extreme precision using the oil.

And, if you want, you can always modify the unit for four tube operation.
Thanks, you are correct. Any pics of yours?

 
Chuckles.. But it is not going to provide you with a baseline starting point.

I may be wrong here but I read that is what he was looking for.

If that is the case? how does it know what factory set parameters are..Magic?

never have I witnessed a device that could tell me what he's asking.

 
"Neither tool is going to provide you with a number."
This is not correct for the mercury tool. Mine is marked at 2 cm intervals.

You can calibrate the tool by simply measuring the vertical distance from the mercury level in the reservoir to the lowest interval mark and then add that distance accordingly. The lowest interval is labeled "2" but the distance from that mark to the liquid level is more than 2 cm. Add the difference to the interval markings and you're calibrated.

The mercury tool is fine but I prefer a U-tube manometer filled with 75 weight oil. Flow restriction orifices in the tubes aren't necessary when using this oil.

1 cm of mercury = approximately 15 cm of oil

You can get extreme precision using the oil.

And, if you want, you can always modify the unit for four tube operation.
So mercury is imprecise? Oh damn!! The world id doomed! Countless calculations in nuke plants rely on this.

 
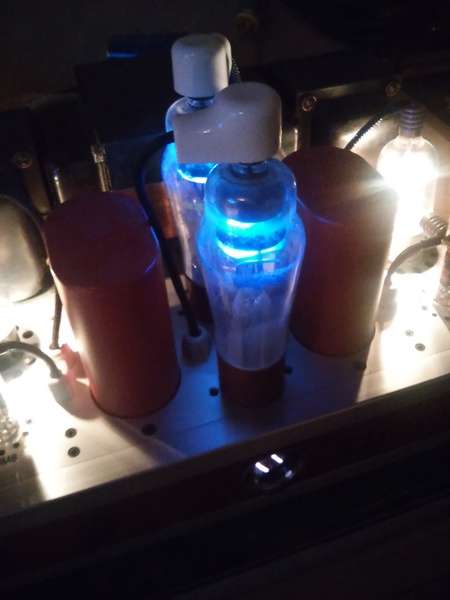
There is something magical with a good tube amp glowing as it pumps out your favorite music.

I enjoy mercury, but for other uses:
1sJ5x3.jpg


I picked up a Carbtune Pro for $75 locally, I'll finally be using it for the first time today! (The BMW didn't have vacuum ports)
 
have used the liquid type manometers and the Morgan Carb tune. my2worth says fuck the Morgan and stick with the liquid type.

Morgan makes a very good presentation BUT the hangy/sticky part of the metal rods is BS. I just want to hook the bitch up, balance &

be done, do not want to take apart the Morgan and clean it because I THINK it is hanging.

 
Top