DIY valve clearance check/adjust

Yamaha FJR Motorcycle Forum

Help Support Yamaha FJR Motorcycle Forum:

This site may earn a commission from merchant affiliate links, including eBay, Amazon, and others.
Yeah, I would say that 150 might be too course and may will leave scratches in the surface that are too deep. Plus the larger grit stuff tends to break loose and The 220 might be OK but try to find something around 400 or higher number to polish it off.

Regular 3M wet / dry paper is available in the required grits for paint finishing at most auto supply houses and doesn't cost very much.

 
So that is a plan, and one that will save a good deal of downtime and expense if several shims need to be replaced. As they will all require thinner shims than the ones in there, it's almost a no-brainer.

Would a vernier caliper have the required accuracy ... I sold my micrometers a long time ago ... They were all Moore and Wright, I wish I still had them.

 
I used a digital caliper (set to mm). Even the cheap ones are remarkably good. Measured some known thicknesses (shims and feeler gauges) to get my technique down pat. I have no concern about the accuracy of these measurements. The after-assembly measurements were pretty much as predicted.

 
Don't over think this. The 150 paper you have on hand will work fine to hog off most of the stock, though Fred is right in suggesting something more like 220 or 240 for roughing off most of the stock. Finer paper is less "grabby" and thus makes it slightly easier to keep 'em straight. But the 150 will indeed work fine if you are careful. Leave about a 1/2 thousandth extra meat on there to finish it up with a finer paper, like 400 or 500. One way to know that you've successfully removed all the deep scratches is to take your final few passes with the rough paper all in one direction. Then as you use a circular pattern to remove those deep scratches with a finer paper, you'll know when the last deep scratches are gone because they were all straight and going in one direction. Once they're gone, you're done. Mike the rascal in several places around the outer edge. If it's within about a thousandth, you've done a great job.

Vernier caliper: are you referring to those really old rascals that have no dial on them? Get out your magnifying glass. Is it accurate enough? Measure a piece of shim stock or a feeler gauge to practice. If you can accurately measure that, you'll do fine. If you're dealing with a really old one, you might have significant wear on the tips. Check the difference between using the tips and using the middle of the caliper jaws where they don't wear much. You may get very different numbers. I've seen them out by .002 inch.

Good luck

 
Last edited by a moderator:
So that is a plan, and one that will save a good deal of downtime and expense if several shims need to be replaced. As they will all require thinner shims than the ones in there, it's almost a no-brainer.
Would a vernier caliper have the required accuracy ... I sold my micrometers a long time ago ... They were all Moore and Wright, I wish I still had them.
I use these https://www.mcmaster.com/#electronic-calipers/=sng9xz electronic ones. As stated later, even the cheap ones are accurate and repeating.

 
Thanks. I have a set of "economy" digital calipers. I've been decently impressed with the accuracy and repeatability of measurements.

I wouldn't use them in a toolroom, but in the garage I think they'll be fine.

 
Thanks. I have a set of "economy" digital calipers. I've been decently impressed with the accuracy and repeatability of measurements.
I wouldn't use them in a toolroom, but in the garage I think they'll be fine.
I went middle of the line and got Mitutoyo digital calipers years ago and used them in the machine shop to custom make obsolete parts for machinery. I highly recommend them.

 
Hi Folks!

Well, I started the process this morning between doing other things. The gas tank if off, the PAIR tubes removed and the coolant drained. I will install the block-off plates once the coolant pipe is off.

Bob Price was kind enough to loan me his shim kit, feeler gauges, spare head cover gasket and TBS gauge.

I do have a question about the throttle cables. Do they need to be removed or only moved out of the way. Some of you mentioned to disconnect them at the throttle. Looking at them it is not clear to me what is involved, and I could not find anything in the service manual. Please give me some more info on that.

I am also not planning to remove the side cover. The bike is in 5th gear and I will rotate the rear wheel. I assume I need to turn it in the direction it normally turns.

Thanks!

 
Last edited by a moderator:
It is a LOT easier to disconnect the cables from the twist grip.

and loosen off the lock nuts on the TB side and just move them aside.

Comes in real handy when you try to remove & reinstall the cam cover and the gasket !

 
It's easier to get at stuff if the throttle cables are not in the way.

I found it simpler to undo the cable housing at the handlebar; remove the cables from the housing, and thread 'em out of the way. Note how the cables are routed -- you most certainly do not want to install them incorrectly during reassembly. Once you get at it, you'll see it's obvious which cable goes where.

I loosened the locknut at the throttle body end, so I could swing the cables to one side.

Take note, and I advise you also take photos with your cellphone or camera, throughout the procedure

I did remove the engine side cover, as I found it simpler to rotate the engine using a wrench. Others prefer the rear wheel method. Either seems to work fine.

BTW, take your time removing that coolant tube. It may seem frozen in place, but it's only pressure fitted tightly. Do not lever up on one end or the other -- wiggle it slightly as you apply upward force as evenly as possible. The tube is hollow, and can be deformed/bent if you force it. Take your time, it will come out.

 
Last edited by a moderator:
<snip> I do have a question about the throttle cables. Do they need to be removed or only moved out of the way. Some of you mentioned to disconnect them at the throttle. Looking at them it is not clear to me what is involved, and I could not find anything in the service manual. Please give me some more info on that.
Pull back the rubber boot and then remove two screws from the throttle clamshell. Unhook the cables from the twist grip and then feed some slack downward over the valve cover. It'll help to slightly loosen the cable jam nuts so you can pivot the cables.

Good luck!

--G

 
Thanks Guys! I think I got it.

I remove the two bolts to release the clamshell. Once that is open I will see how to disconnect the cables.

 
It's easier to get at stuff if the throttle cables are not in the way.
Just to be an
asshat.gif
(which is so unlike me! Really!) I'll point out how easy it is if you pull the engine first.....
angel.gif


OK, that's not really why I pulled the engine, but as long as it was out, the valve check was a walk in the park!!!!!!!
punk.gif


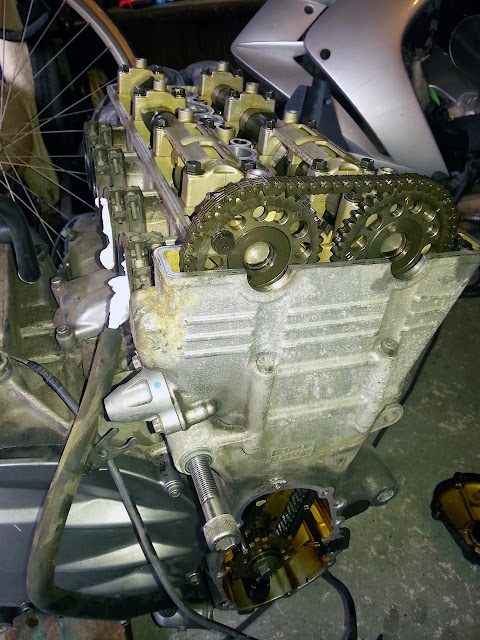
20140830_180851.jpg


Last edited by a moderator:
Thanks Guys! I think I got it.
I remove the two bolts to release the clamshell. Once that is open I will see how to disconnect the cables.
Just make sure you take pictures at each stage as recommended by Silver Spirit in post 21..........

 
Thanks Guys! I think I got it.
I remove the two bolts to release the clamshell. Once that is open I will see how to disconnect the cables.
If it's of any help, some of my piccies of throttle cable being removed from tube here.

 
Last edited by a moderator:
I am definitely taking photos. Hopefully enough :)

I did practice assembling the clam shell a few times while it was fresh in my mind.

Do I need to remove the spark plugs? The service manual says yes, but it is not mentioned in the article at www. fjr1300.info, unless I missed it.

So it looks like I just turn the rear wheel until:

Manual: "TDC on the compression stroke can be found when the camshaft lobes are turned away from each other."

fjr1300.info: "Rotate the engine so the cam lobes are 180 degrees from the lifter surface"

Easy enough.

It looks like the intake valves are the ones toward the rear of the bike.

Thanks!

 
...Do I need to remove the spark plugs? The service manual says yes, but it is not mentioned in the article at www. fjr1300.info, unless I missed it.

...
It'll make turning the engine over a little easier with them out.

 
Top