Photo's of how to get under the Tank

Yamaha FJR Motorcycle Forum

Help Support Yamaha FJR Motorcycle Forum:

This site may earn a commission from merchant affiliate links, including eBay, Amazon, and others.
Thanks Rick.

Am getting ready to tackle this myself and this is greatly appreciated.

 
Thanks Rick.
Am getting ready to tackle this myself and this is greatly appreciated.
The more of these kind of write ups the better. If everyone would make such posts (with pictures) of even the most simple procedures, I'm sure it would truley help the mechanically challenged. Ok....ME. It's amazing how much easier this is to understand than the same procedure outlined in the service manual. Thank you, thank you, thank you.

 
This would have been a great post.....

.

.

.

.

.

.

.

.

.

If I had a GEN II...... :(

Nice work, this should definately get pinned!

 
I just ran across this thread. I'm mechanically challenged (OK I would ride a short bus if mechanics was required in school, ok?). This should (IMHO) go in the Bin-O-Facts as a link. I actually feel like I could do more with the bike now, the pics with instructions and highlights give me confidence. Outstanding. Thank you!

:clapping: :clapping: :clapping: :clapping: :clapping:

 
Rickster - This is a most [SIZE=18pt]excellent[/SIZE] post! The pictures and the very clear instructions are invaluable. Thank you.

 
Thank you so much for going to all the trouble of making this post...

I'm getting ready to tackle work "under the tank" and it can be a bit nerve racking.

Pics help so much!

Stu

 
Completed this job tonight thanks to the detailed and thorough instructions. Thanks! Hat's off to making a what would have been a cluster-muck job into something easy.

 
I was wondering if this procedure will work for a 2005. Is it similar? Right arm hand cramps are killing me. I've done the search, but most of the articles have the photos removed.

Thanks, Dan

 
Rick

Just followed your post to do the throttle return spring modification. Excellent posting, but (isn't there always a "but"?) a couple of points I found that might help, only because you've gone to such detail that an innocent (like me) can find unexpected unknowns.

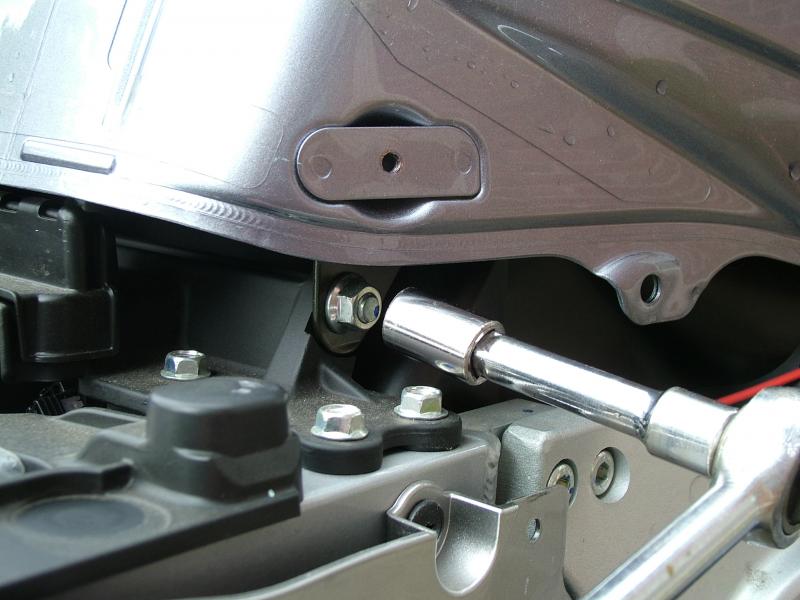
In raising the tank, slacken the pivot bolt at the back:

1_DSCF5731.JPG


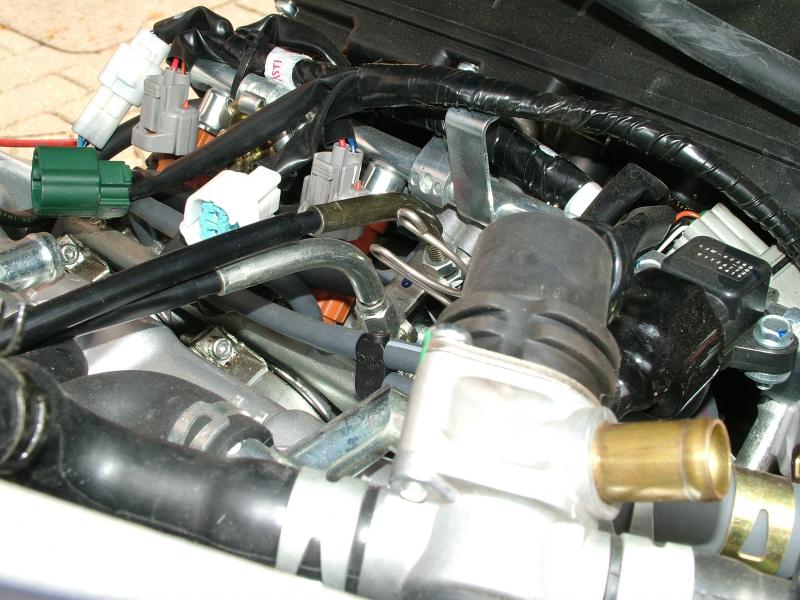
You gloss over the removal of the "lump" (with three vacuum[?] tubes and an electrical connection). Note the white plastic tie holding its wires to the tank wiring, needs cutting and replacing when re-installing.:

1_DSCF5745.JPG


Here the "lump" is just taken out of its wire holder:

1_DSCF5751.JPG


The only other comments are I had to get a third hand (sons do have their uses sometimes) to hold the throttle open the quarter turn necessary to get to the spring, and as I couldn't find anything to grip the spring to pull it off the hook, I used two flat-bladed screwdrivers, one to push the spring tang forwards until it was just clear of the hook, the other to push it sideways off the hook, in the end very easy.

The result? Much improved throttle control, so thanks for the great write-up that gave me the confidence to make this adjustment.

I'm off on a tour of Scotland in three weeks, should ease that wrist ache!

FWIW, I took a few photos of my progress (I do this so I know how to put things back!), they can be viewed here.

 
Last edited by a moderator:
Rick,

Thanks for the post and pics. I did the install on the PC-III with some hesitation and a few pics from this site. I had hand surgery on my right hand last week and the stiff throttle is really bugging my stitches.

AZ

 
Rickster,

Thanks for the excellent photos of the TRS mod. I'm up to the point of grabbing the the wire with forceps. I let it go once, but I believe it attached itself without unwinding. The throttle still feels the same. Are you forcing the wire to the inside around the catch to unravel 1 revolution? Curios to know how many wires are suppose to still be showing on the spool after the mod?

Thanks

cnqwst

 
another huge thanks for such a good step-by-step with pics. i just finished doing the spring mod, and altho the actual spring part was the "scariest" for me, it was also the easiest step. in reinstalling the tank, i couldn't get the tank to move up forward enough to match up with the two holes until i loosened the pivot bolt in the rear.

i was going to do your 2x4 wood block prop, but instead used two cam buckles and straps, held it up nicely.

thanks again.

 
Rickster,

Just finished the TSR mod, finally got the wire to unwind 1 time. I would not have even attempted it today, but your pics made it look so easy.

Thanks for the post.

Cnqwst

 
mcatrophy,

I thanked Rick for his pics but forgot to thank you for the extra pics and comments on the tank bolt. After reading your post it was clear why I was fighting the front tank mounts. Not a problem after that.

So, thanks to you for the great post as well. The technical expertise on this forum beats the hell out of the manual I bought from Yamaha for sure.

AZ

 
Thank You Thank You Thank You!!

Did the throttle spring unwind mod this morning. Took about an hour. Would've taken less time if I hadn't had to go fishing for my 5mm hex bit twice while putting the bolts back on the front of the tank. Rrrrrgh.

Didn't need to disconnect the "lump" -- was able to get to the spring by levering the "lump" up just a bit with the hemostat (everyone's got one of those in the tool box, right??) as I was reaching in for the spring from the left side of the tank.

This makes a huge difference in throttle feel. I highly recommend it.

Can't imagine tackling it without this write-up.

 
After riding over the weekend with a numb right hand, I decided to go ahead and do the TSR this afternoon. It was a pretty easy job with the pic's and step by step instructions provided.

THANKS !!

 
I also accomplished this mod quickly with the help of your pics. I would also add that you can go ahead and adjust the slack out of your throttle cable while you are in there. A 10mm wrench fits the friction nut on the aft cable with the olive green bend in it. You can see the slack in the cable when you move the throttle. Just loosen the top nut and rotate to the left and it will "unhook" from the bracket. Then adjust the bottom nut down a bit and test fit it back on the bracket. Pull up on the cable and test the throttle to confirm you have the desired amount of free-play. You will see when you remove most or all the slack. I left just a very small amount of slack. You can hear the click of the butterfly valves closing to confirm they are fully seated with the throttle twisted all the way closed. Tighten up the top nut on the cable and re-check. After you lower the tank, move your bars left and right testing the throttle at each stop. Again you should be able to hear the butterfly valves closing to confirm full seating.

Regards

Herkypilot

 
Last edited by a moderator:
Top