


FJR-Richie
Well-known member
So I have taken so much from this forum over the last year :cownoy: that its time to give something back. I originally saw this idea on the VFR forum when I was searching for voltmeters. I was so impressed I had to give it a try so this weekend I modified my right side mirror to house the very slick Datel Voltmeter. Here are some details and piccies:
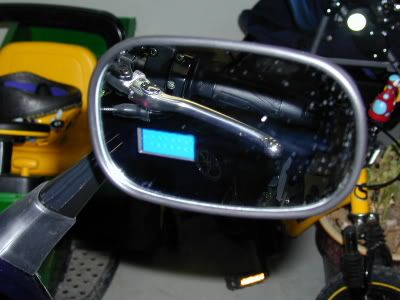
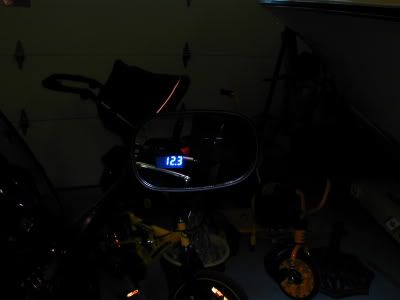
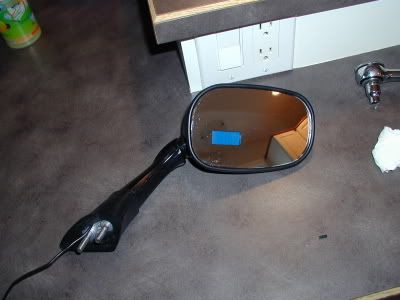
The Finished Product:
Here's how I did it:
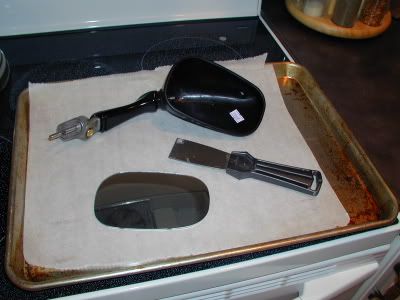
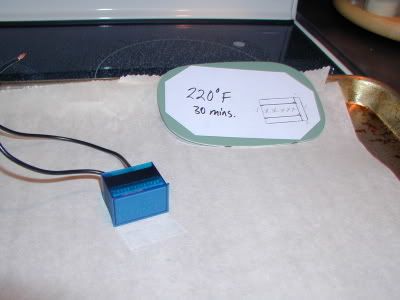
Step 1: Remove mirror and put in oven at 220 F for 30 minutes. This is to soften the housing to allow you to pop out the mirror. Remove from oven and using a paint scraper, carefully pop out mirror. The housing is quite soft and you should not have to force the mirror to pop it out.
Step 2: Select where you want to mount the voltmeter and trace a template on the paper attached on the back of the mirror.
Step 3: The most tedious/time consuming part of this job is removing the backing from the mirror. The stock mirror has four layers starting with glass, silver finish, backing paint, and paper. Once I had outlined where I wanted to mount the voltmeter, I taped some razor blades along the edge of the outline (to form a secure straight edge for the Dremel) using Aluminum tape. I used aluminum tape because 1) it sticks very well and 2) the dremel won't grind it away like other tapes would.
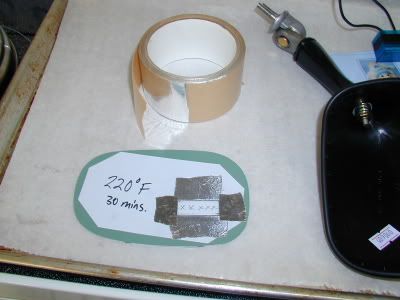
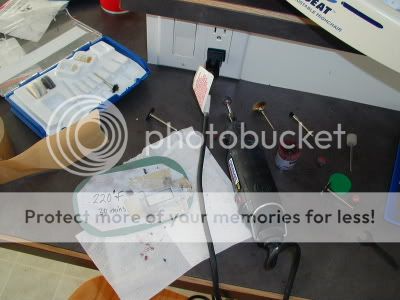
Step 4: Okay, now dremel away. I used the dremel polishing kit (available from Home Depot for about $10). I started first with the steel wire brush included in the kit to scrub off the paper down to the green backing paint. Use light pressure on the lowest speed. Then I used the felt polishing pads with the included polishing compund to scrub off the rest of the backing paint and silver finish. Be patient and take your time and you will have excellent results. Now you won't be able to get all the way into the corners and edges, but a razor blade by hand takes care of the fine finishing.
Despite this being tedious I found this was the way to get the best results. I had an old mirror I practiced on first with a number of other methods, including using muriatic acid. The acid worked best but was the most difficult to control and I really didn't want to take the chance of ruining my good mirror.
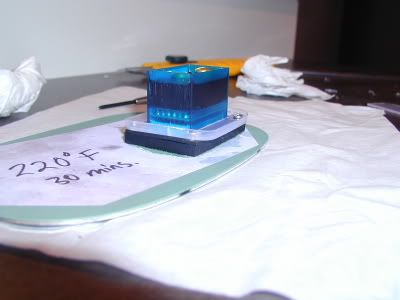
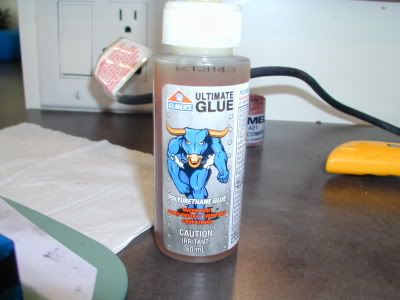
Step 5: Once you have the mirror prepped, its time to mount the voltmeter. I used polyurethane glue by Elmer. I tried two mounts - one direct on the glass and the other with the bezel mounted to the glass first. Both worked well but I preferred the look of the bezel mount and went with that. I fashioned a plastic retaining clip to hold the voltmeter and is screwed into the bezel with the supplied screws. Here is the bezel mount:
Step 6: Everything is mounted so its time to wire and reassemble the mirror. I grounded the voltmeter to the stem nut inside the mirror housing and ran the +ve wire down the mirror arm under a strip of elctrical tape and behind the boot. Put the unassembled mirror back in the oven for 10 minutes at 190F and you can press the mirror right back in.
Enjoy! B)
B)
Rich
The Finished Product:
Here's how I did it:
Step 1: Remove mirror and put in oven at 220 F for 30 minutes. This is to soften the housing to allow you to pop out the mirror. Remove from oven and using a paint scraper, carefully pop out mirror. The housing is quite soft and you should not have to force the mirror to pop it out.
Step 2: Select where you want to mount the voltmeter and trace a template on the paper attached on the back of the mirror.
Step 3: The most tedious/time consuming part of this job is removing the backing from the mirror. The stock mirror has four layers starting with glass, silver finish, backing paint, and paper. Once I had outlined where I wanted to mount the voltmeter, I taped some razor blades along the edge of the outline (to form a secure straight edge for the Dremel) using Aluminum tape. I used aluminum tape because 1) it sticks very well and 2) the dremel won't grind it away like other tapes would.
Step 4: Okay, now dremel away. I used the dremel polishing kit (available from Home Depot for about $10). I started first with the steel wire brush included in the kit to scrub off the paper down to the green backing paint. Use light pressure on the lowest speed. Then I used the felt polishing pads with the included polishing compund to scrub off the rest of the backing paint and silver finish. Be patient and take your time and you will have excellent results. Now you won't be able to get all the way into the corners and edges, but a razor blade by hand takes care of the fine finishing.
Despite this being tedious I found this was the way to get the best results. I had an old mirror I practiced on first with a number of other methods, including using muriatic acid. The acid worked best but was the most difficult to control and I really didn't want to take the chance of ruining my good mirror.
Step 5: Once you have the mirror prepped, its time to mount the voltmeter. I used polyurethane glue by Elmer. I tried two mounts - one direct on the glass and the other with the bezel mounted to the glass first. Both worked well but I preferred the look of the bezel mount and went with that. I fashioned a plastic retaining clip to hold the voltmeter and is screwed into the bezel with the supplied screws. Here is the bezel mount:
Step 6: Everything is mounted so its time to wire and reassemble the mirror. I grounded the voltmeter to the stem nut inside the mirror housing and ran the +ve wire down the mirror arm under a strip of elctrical tape and behind the boot. Put the unassembled mirror back in the oven for 10 minutes at 190F and you can press the mirror right back in.
Enjoy!
B) Rich
Last edited by a moderator: