OK, well... that didn't take too long.
[SIZE=14pt]The $3 remedy to flying GIVI trunks[/SIZE] (mine is a V46):
What you'll need to buy from local hardware store (I used Home Depot)):
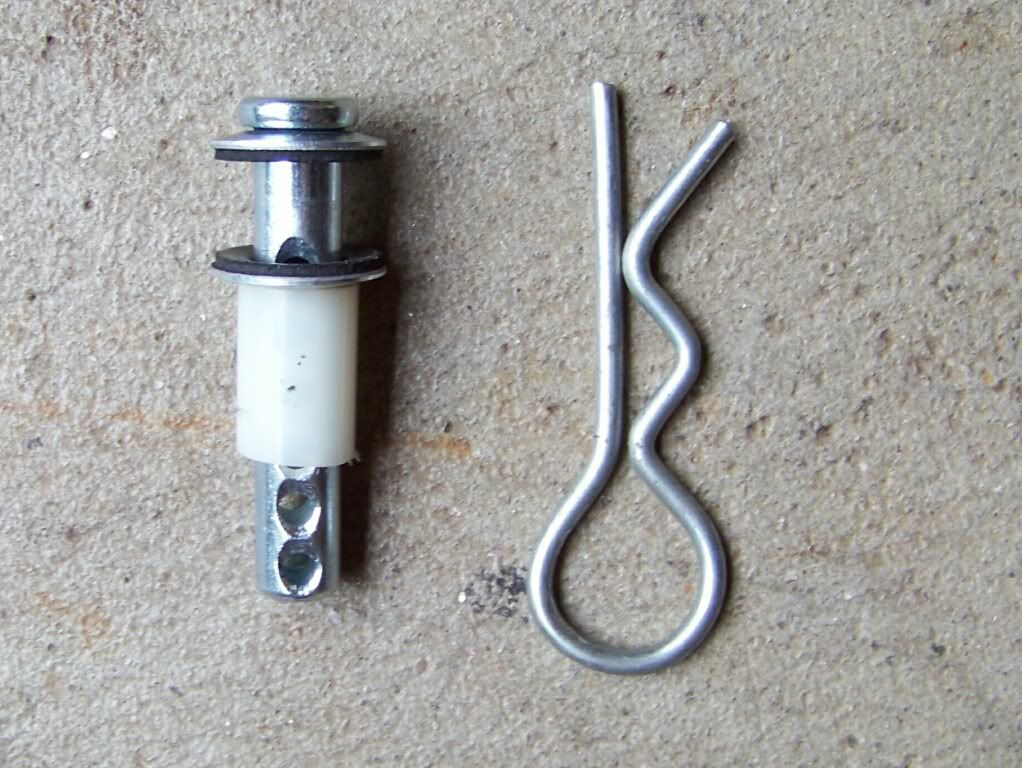
1 ) - 3/8" x 2" long Clevis pin
2 ) - 3/8" Sealing Washers (bonded) need 2
3 ) - Hitch pin clip
4 ) 3/8" plastic spacer (cut to 3/4" length)
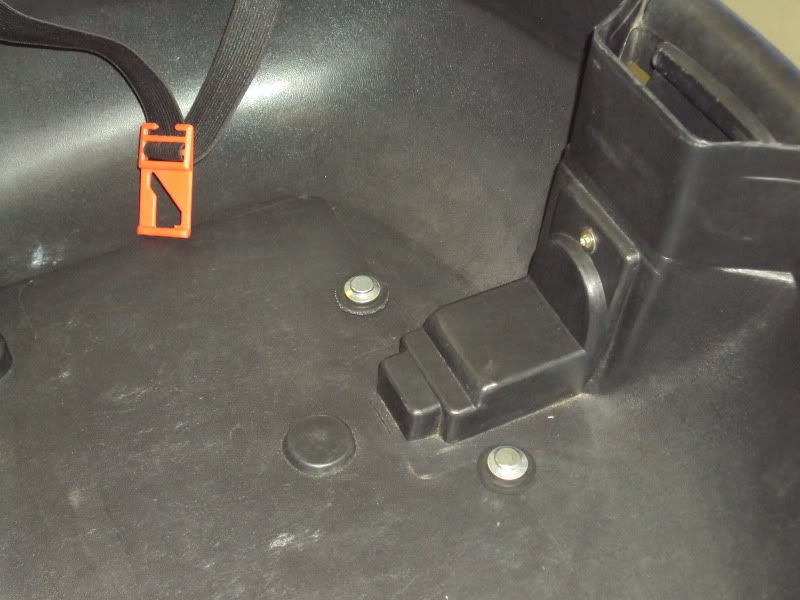
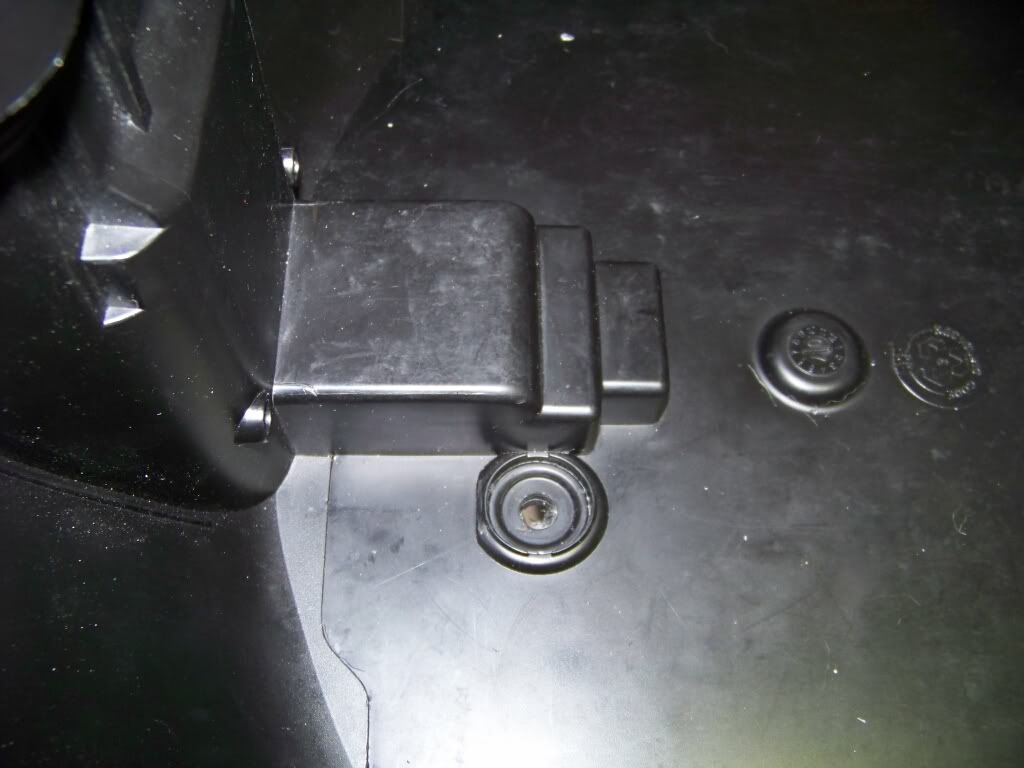
With the bag mounted normally on the rack, drill a 3/8" hole down through the center of the area in the trunk bottom that would be used for the Givi brake light connector, or if you have the brake light connector, the same place on the opposite side of the latch could be used. Drill straight down, all the way through the plastic (or metal) givi mounting plate.
Put one sealing washer on the clevis pin and then insert through the hole in the bag and rack plate. The sealing washers are nice. They are rubber bonded to a conical shaped washer. They are a friction fit to the clevis pin and will make it easier to put the pin on and off if removing the trunk.
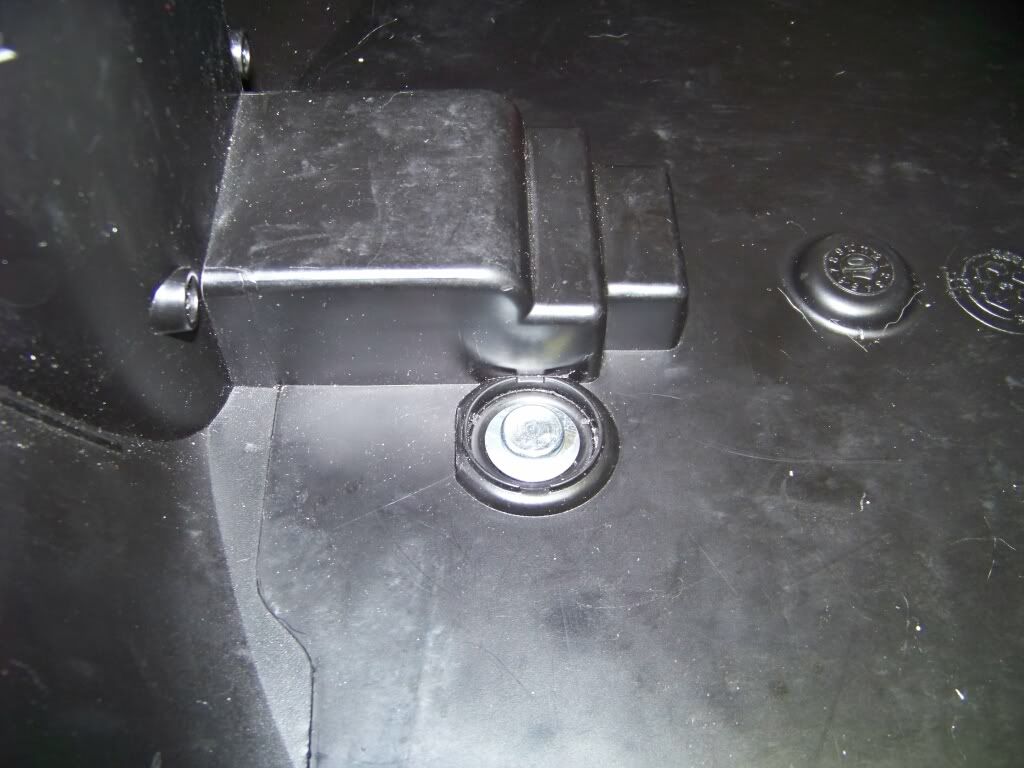
Push another sealing washer on the clevis pin from underneath, this is to spread out any load (should the latch actually come loose) across more plastic area.
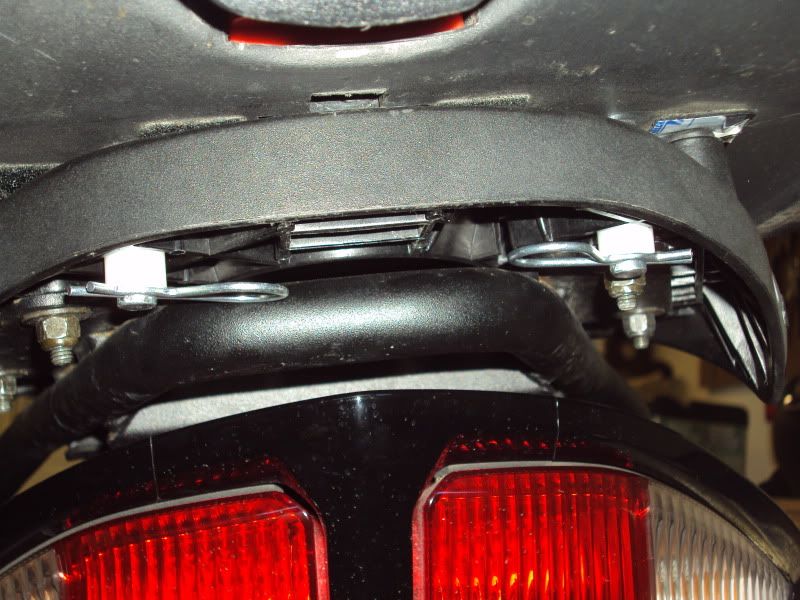
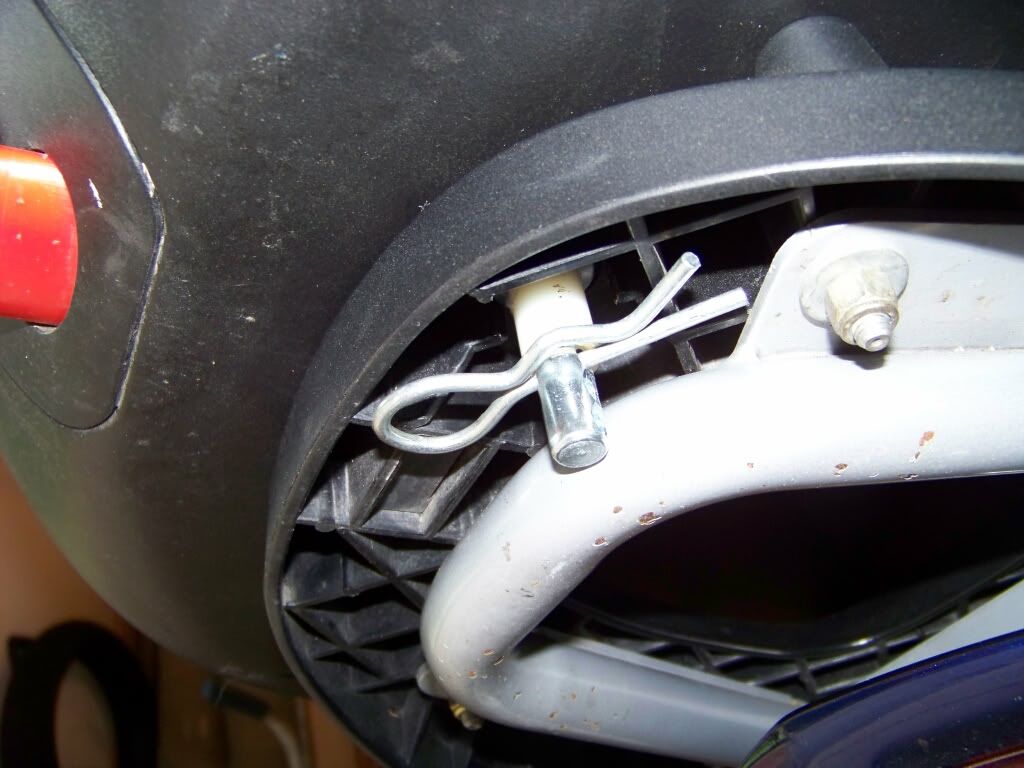
The plastic spacer is needed so that the hitch pin will be flush with the bottom of the rack when installed.
Slide spacer onto clevis pin and clip the hitch pin to hold it all together.
[SIZE=14pt]The $3 remedy to flying GIVI trunks[/SIZE] (mine is a V46):
What you'll need to buy from local hardware store (I used Home Depot)):
1 ) - 3/8" x 2" long Clevis pin
2 ) - 3/8" Sealing Washers (bonded) need 2
3 ) - Hitch pin clip
4 ) 3/8" plastic spacer (cut to 3/4" length)
With the bag mounted normally on the rack, drill a 3/8" hole down through the center of the area in the trunk bottom that would be used for the Givi brake light connector, or if you have the brake light connector, the same place on the opposite side of the latch could be used. Drill straight down, all the way through the plastic (or metal) givi mounting plate.
Put one sealing washer on the clevis pin and then insert through the hole in the bag and rack plate. The sealing washers are nice. They are rubber bonded to a conical shaped washer. They are a friction fit to the clevis pin and will make it easier to put the pin on and off if removing the trunk.
Push another sealing washer on the clevis pin from underneath, this is to spread out any load (should the latch actually come loose) across more plastic area.
The plastic spacer is needed so that the hitch pin will be flush with the bottom of the rack when installed.
Slide spacer onto clevis pin and clip the hitch pin to hold it all together.
")