How to R/R Bar-End Holder/Damper?

Yamaha FJR Motorcycle Forum

Help Support Yamaha FJR Motorcycle Forum:

This site may earn a commission from merchant affiliate links, including eBay, Amazon, and others.

JamesK

Got to ride
Joined
Mar 6, 2006
Messages
1,621
Reaction score
114
Location
Sydney, Australia
Apologies if this has been covered before, but a Google search of the forum did not find any useful info.

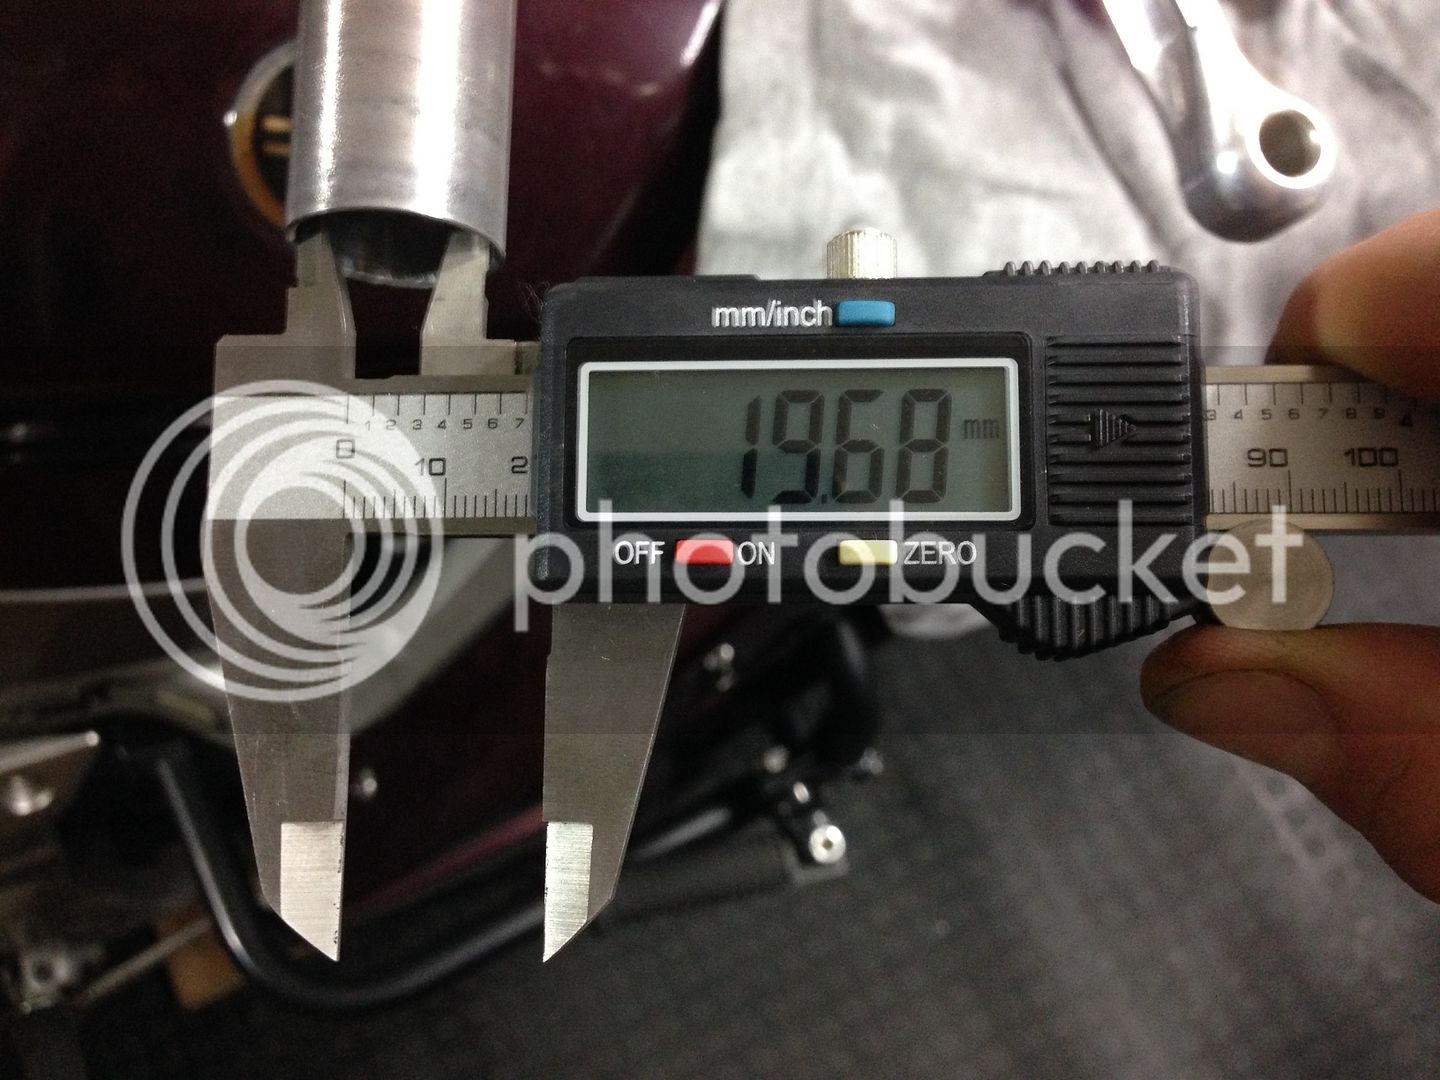
My throttle has been getting progressively more "sticky" despite regular service to clean and re-lube the bar and throttle tube. As can be seen from the pic (and its actually worse in "person"), at 215,000 miles I'm managed to wear significant grooves into the aluminum in the RHS clip-on. I've tried to buy a used clip-on on eBay, but most are damaged in some way or another, and the one that looked ok in the seller's listing pics and description (right handle bar) actually turned out to be the LHS clip-on when I received it. After the way I got screwed over by the other salvage yard who sent me an AE engine when I purchased an A engine I wasn't too shocked. Most of these salvage yards seem to be absolute crooks. At least this part only cost me about $60 by the time I shipped it to Japan and I now have a spare LHS clip-on
uhoh.gif


Anyway, I had no choice but to buy a new RHS clip-on.

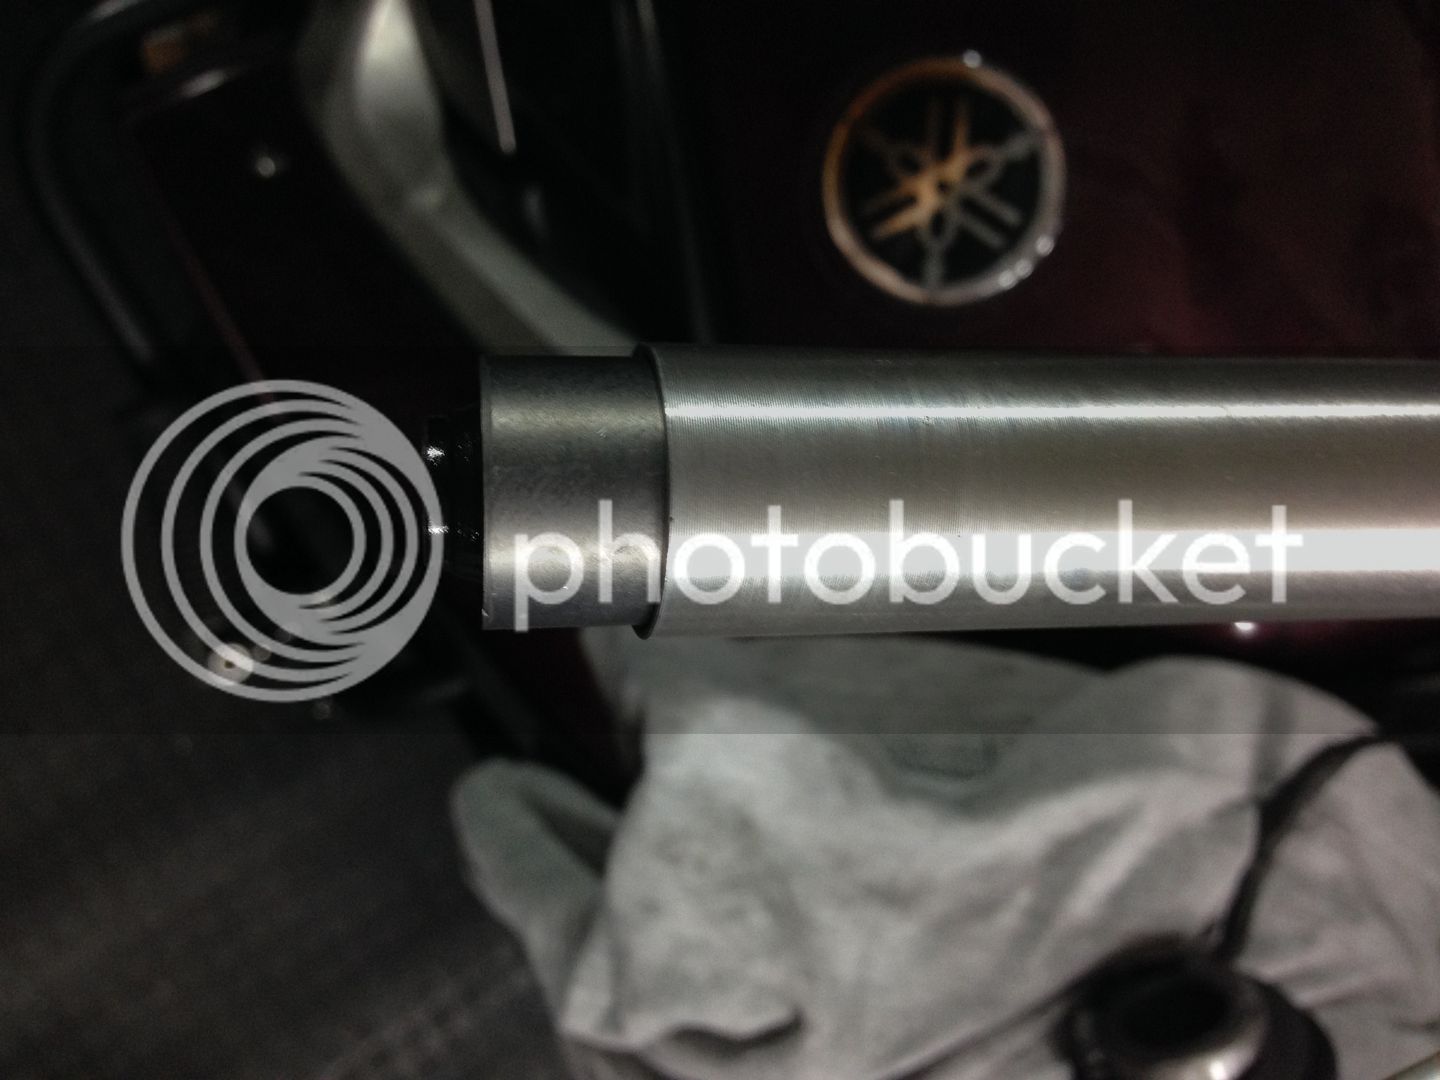
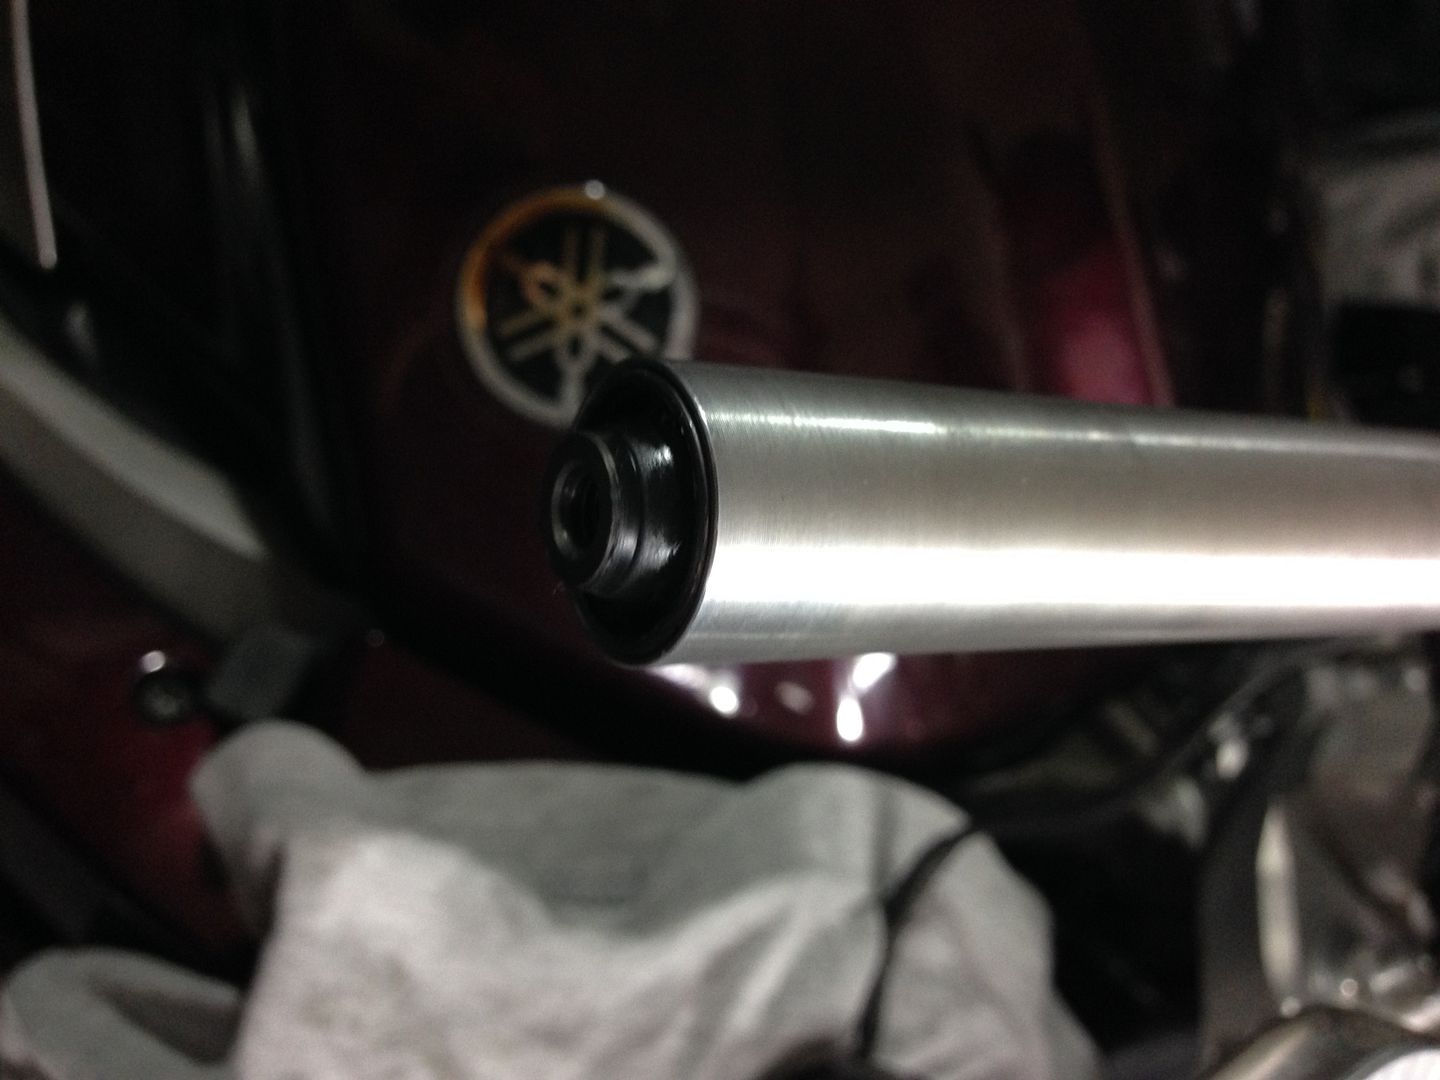
The thing I wanted to ask relates to the way of removing/installing the bar-end holder/damper into the new clip-on as this is not per-installed on the new bar. It looks like part #4 is glued into the bar and I've ordered a new unit as I couldn't find any way to remove this holder/damper from the old bar without damaging it.

Has anyone here successfully R/R one of these holder/damper parts and how did you do it and re-install it, e.g. glue it back with epoxy or RTV silicon?
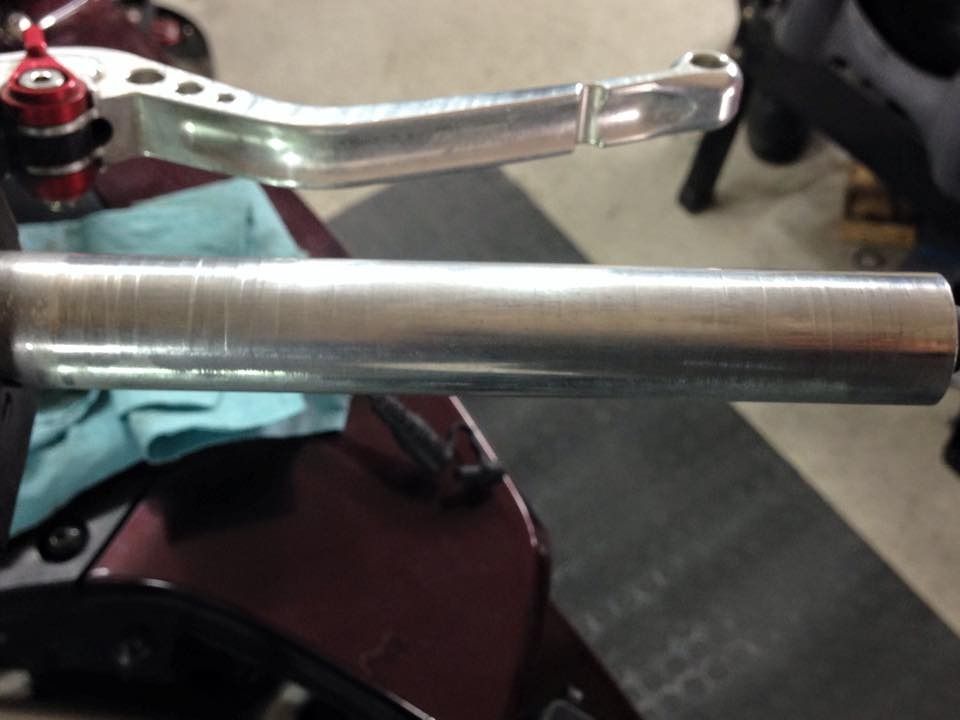
10356018_10153192577131228_2978283201407791094_n.jpg


STEERING_HANDLE_CABLE.png


Last edited by a moderator:
JamesK,

Sorry, I can't answer your question, but I have some questions of my own. If you will indulge me for a while, then:

If you are located in Japan, why not buy the parts locally? I would suggest that you have a local citzen there check prices, and maybe purchase the parts for you. DAMHIK. They have bike salvage yards there, also.

Seems to me, some fine emery cloth would polish out the grip tube smoothly. Emery cloth comes in all grades of coarseness. The deep scratches will remain, of course, but those gouges will not cause any problem in the operation of the twistgrip. The emery cloth would be used like a shoe-shine cloth, curving over the tube. You can use a fine-toothed flat file on any stubborn metal grains in the tube.

The inside of the throttle tube should also get some emery cloth action, this time with the cloth wrapped around and hot-glued to a broomstick or dowel rod that just fits inside the tube. Move the dowel in and out of the twistgrip, as well as rotaing the twistgrip. A fine-toothed round (or half-round) file can be used on any stubborn grains inside the tube. This work will get easier, as the inside of the tube gets smoother.

Wash and dry the parts with a cloth, after the sanding process, to remove any fine grit.

A hard carnauba paste wax should do the job as a lubricant, inside the throttle tube. Wax won't attract and hold dirt and grit, like liquid lubes would.

For the bar ends, maybe you can "trial-fit" the parts together without the grips at first, and see what happens to secure the ends to the bars.

Good luck on the hunt.

 
Thanks for the suggestions Infrared, I have searched the eBay equivalent in Japan, and found nothing. The problem is that up until 2013 FJRs were not officially sold in Japan, i.e. only available as a gray import and Yamaha would only offer a 1 yr warranty vs. 3 yrs for any domestically sold models. As such there are very few FJRs here, and even fewer parts available as salvage.

As I mentioned, the pic does not show very much of the actual damage, the grooves are deep, and towards the end of the throttle tube placement area the aluminum is worn such that the handle bar tune is far from round...

Obliviously I'm replacing the throttle tube as well and also the throttle cam guides as they too have deep grooves on the inside. Actually I'm going to be using a G2 throttle tube, which comes with built in delrin bushings so required minimal to no external lubrication.

 
Yahama's US sales only provide a 1 year warranty on FJRs unless you opt to buy additional Y.E.S. years.
I too purchased a YES plan as the bike and I were in the US. My point to Infrared was that this was a big deal for the local market as they couldn't even buy something like a YES plan for the grey market FJRs, even though these were only imported by a sole distributor company (Presto) which was Yamaha approved. These bikes never even really came to their originally destined countries, just got loaded on a boat and taken outside Japan's territorial waters and unloaded again
fool.gif


Also, from what I heard, Yamaha would often even give these grey model FJR owners headaches trying to buy parts, even consumables...

 
Last edited by a moderator:
Bump.

Seeing as there have not been any responses about tips/ideas on how to actually remove/install the Holder/Damper part, does this mean nobody has done it before
rolleyes.gif


Thank you Donal, that thread is related to what I was asking, I've read through it but it didn't really provide answers, just mostly presented more questions
no.gif


I figured since I was able to figure this out and successfully install the damper bushing I'd throw up some pics for other to reference in the future... I decided to use a new damper bushing as it's only about $12, since I didn't want to risk damaging the rubber by exposing the old one to heat while trying to remove it.

This seemed like it should be done using a similar approach to fitting a bearing seal so I heated up the end of the handle bar with a gas torch and cooled the damper bushing in a bag of ice, then lined up the bushing so it was square with the bar opening and used a suitable size socket (which lined up around the metal outer edge of the bushing such as to not put any force on the rubber or the inner threaded hole) to gently and uniformly drive it into the bar end. It went in smoothly and is in there nicely.

IMG_4685.jpg


6282bbf0-2f6a-4e55-a7a2-067a8d02c671.jpg


IMG_4686.jpg


IMG_4687.jpg


IMG_4688.jpg


Last edited by a moderator:
Top