Installing Audiovox Cruise Control

Yamaha FJR Motorcycle Forum

Help Support Yamaha FJR Motorcycle Forum:

This site may earn a commission from merchant affiliate links, including eBay, Amazon, and others.
Air flow has both magnitude and volume. Sticking the hose to your finger shows at least minimum magnitude but not volume (flow). Check the vacuum directly at the synch port and then again after plugging in the check valve.

It might be time go blow big bucks ($10) and get one of these from Harbor Freight:

multimeter.jpg


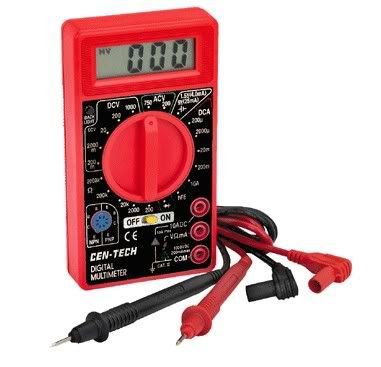
The meter is accurate enough for most automotive use and is cheap enough to be considered disposable after it hits the floor a few times. The meter is small enough to carry it with you.

 
Last edited by a moderator:
Thanks for the pictures...And rubbing it in!

Thanks ionbeam I have been using one.

I think the problem could be 1 of 2 things.

1.coil wire.

2. Over rev sensor

Sitting on my bike, the grey/red coil connection is on the left hand side.

The coil sits at a slight angle so its a tiny bit up and to the left. Steve, was yours this way? In the farkel, the grey red wire seems to be on the right side. I am very hesitant on just swappin the coil wires. I am not sure if that can be done, or if I will burn something up? Could it be that the factory just has them reversed?

The farkel states: "Leave the red label that says "Noise Suppressor - Do Not Remove" sticking out of the harness protector just in case the diode should need to be replaced someday. It will be easier to find."

What diode? I dont recall seeing diode, must be under the red sticker. Could it be bad? not sure how to check a diode.

Everything on my bike is routed out the left side. Vaccum, cable, and protective harness. The vacuum then goes right to ports, the cable and the harmess follow inside next to the frame. the control pad wires get routed under front of the frame, and the blue wire continues to coil. Having said that could it be that my blue wire is too close to spark plug wires causing the over rev protector to go off?

 
The coil is located behind (closer to the rider) the (2) main fuse boxes, directly behind the battery on the RH side of the bike. If I remember right, the gray wire with red stripe is the one closer to the center of the bike.

I routed the throttle cable on the right side and vacuum and electrical on LH side, not that this would make any difference.

Can you post pics of your install?

 
Hummm? that is the way mine is too. I will need to find a camera. my digi camera is broken.

I think tomorrow I will do some more tinkering. Im at a loss now.

 
Thanks for the pictures...And rubbing it in!
Thanks ionbeam I have been using one.

I think the problem could be 1 of 2 things.

1.coil wire.

2. Over rev sensor

Sitting on my bike, the grey/red coil connection is on the left hand side.

The coil sits at a slight angle so its a tiny bit up and to the left. Steve, was yours this way? In the farkel, the grey red wire seems to be on the right side. I am very hesitant on just swappin the coil wires. I am not sure if that can be done, or if I will burn something up? Could it be that the factory just has them reversed?

The farkel states: "Leave the red label that says "Noise Suppressor - Do Not Remove" sticking out of the harness protector just in case the diode should need to be replaced someday. It will be easier to find."

What diode? I dont recall seeing diode, must be under the red sticker. Could it be bad? not sure how to check a diode.

Everything on my bike is routed out the left side. Vaccum, cable, and protective harness. The vacuum then goes right to ports, the cable and the harmess follow inside next to the frame. the control pad wires get routed under front of the frame, and the blue wire continues to coil. Having said that could it be that my blue wire is too close to spark plug wires causing the over rev protector to go off?
My coil wires were opposite of the farkle instructions. When I was having problems I reversed them, tested, then flipped them back. That was not the source of my particular problem.

To test a diode, set your multimeter to Ohms, and measure the resistance both ways. One way the meter should indicate an open circuit. The other way you should get a reading (often a reading around 600). That indicates the diode is good. If you measure an open circuit both ways, the diode is open. If you measure low resistance both ways, the diode is shorted. (from: https://www.elexp.com/t_test.htm)

Jeff

 
I think the problem may be the diode.

When I put my meter on the diode setting it read 000, when I reversed the leads it read 000 again.Does this make sense?

Now then, if it is the diode, does anybody know what kind it is? I didnt want to pull the tank tonight to get at it, it would be nice to know what it is before hand so I can make a run to radio shack in the morning.

 
I think the problem may be the diode.When I put my meter on the diode setting it read 000, when I reversed the leads it read 000 again.Does this make sense?

Now then, if it is the diode, does anybody know what kind it is? I didnt want to pull the tank tonight to get at it, it would be nice to know what it is before hand so I can make a run to radio shack in the morning.

I don't see anything in the manual... you may have to call Audiovox's support line and ask.

Jeff

 
The noise suppression device is not a diode. It's probably a capacitor which lets low frequency signals (coil pulses) through to the servo and blocks higher frequency switching noise. A capacitor is an open circuit to a DC ohmmeter. I have a spare Audiovox I haven't installed. I checked the suppression device with an ohmmeter. It reads as an open circuit in both directions.

Your problem is likely a wiring error and/or bad electrical connection or a vacuum problem.

It's easy to determine which wire to connect to on an ignition coil. One side of each coil is connected to a constant 12 volt source. This is the red/black wire on the pre '06 FJRs. When you switch the key to 'on' power will appear on this coil wire. When you push the red 'Engine Stop Switch' to 'off' on the right handswitch this will cut the power to the coils (red/black wire).

You want to connect to the other wire on the coils. This is the wire that is switched by the ECU. On the pre '06 FJRs this wire is orange on one coil and gray on the other coil.

This installation is not that difficult except for the throttle linkage. It's a bit tedious but not difficult.

 
The noise suppression device is not a diode. It's probably a capacitor which lets low frequency signals (coil pulses) through to the servo and blocks higher frequency switching noise. A capacitor is an open circuit to a DC ohmmeter. I have a spare Audiovox I haven't installed. I checked the suppression device with an ohmmeter. It reads as an open circuit in both directions.
Your problem is likely a wiring error and/or bad electrical connection or a vacuum problem.

It's easy to determine which wire to connect to on an ignition coil. One side of each coil is connected to a constant 12 volt source. This is the red/black wire on the pre '06 FJRs. When you switch the key to 'on' power will appear on this coil wire. When you push the red 'Engine Stop Switch' to 'off' on the right handswitch this will cut the power to the coils (red/black wire).

You want to connect to the other wire on the coils. This is the wire that is switched by the ECU. On the pre '06 FJRs this wire is orange on one coil and gray on the other coil.

This installation is not that difficult except for the throttle linkage. It's a bit tedious but not difficult.
Justin,

The stress will have been worth it once you're cruisin', word.

For what it's worth, the tech line folks say that if the LED is blinking when the unit is powered on with the engine running, then you do have a valid coil signal.

One thing I've been noticing in these descriptions of symptoms is that you describe a "lurch" when engaging the cruise, followed by immediate disengagement. Here's a question:

With all power off and engine stopped, how much slack do you have in the throttle control from the cruise unit?

There should be just enough slack to completely unload the throttle when not in use. Even if there is a picture of the install, this is difficult to ascertain without actually feeling it.

Just a wild guess on my part, but if there is too much slack, could it be using all available take-up, and then disengaging?

Shane

 
It's easy to determine which wire to connect to on an ignition coil. One side of each coil is connected to a constant 12 volt source. This is the red/black wire on the pre '06 FJRs. When you switch the key to 'on' power will appear on this coil wire. When you push the red 'Engine Stop Switch' to 'off' on the right handswitch this will cut the power to the coils (red/black wire).
You want to connect to the other wire on the coils. This is the wire that is switched by the ECU. On the pre '06 FJRs this wire is orange on one coil and gray on the other coil.

This installation is not that difficult except for the throttle linkage. It's a bit tedious but not difficult.
When I disconnect the coil and turn key on, the grey and red wire has no power. but the other side does. when I connect both coil wires up, and turn the key on,I get 12volts to the blue wire.

My blue wire is connected into grey wire w/ red stripe, just like Imallin's. And from what I can tell from his post , the wires are on the same coils and in the same position. Now there is another coil tucked below that. Its difficult to see as you would need to remove the fairing. But I dont this is the coil to use judging from the farkel, and this post.

Shane- I do not have any extra play in the cable, just enough to let the throttle snap back.

 
This is probably retarded, but just grabbing straws now. Did you make sure your servo throttle cable was fully extended - pulled out as much as possible - when you installed it?

 
Oh my god, after all this work, troubleshoot, undoing things redoing this. I think I just found the problem. I cut the friggin diode/capaciter thing off. And of course I was doing all the work and my friends shop, who is very tidy, so the blue wire has now been thrown away. Iguess I need to call audiovox and find out just what that thing was.

Thanks for all of your help guys. and yes...I feel stupid.

 
After a painful wait, and being transferred to everyone at Audiovox. I found out that the noise supressor is just a 20k resistor.

 
Gentlemen-

Let me just say that having a cruise control on a bike is very nice! (need I say more?)

I'mallin, Radman,Ionbeam,FJRJeff, and others,thank you very very for your wonderful help and support on this issue. In the end, I spent way more time and money on this than I had to, and unfortuneatly it was all do to an oversight by a Friend or myself not paying attention and cutting off the noise suppressor on the blue cable. A very simple mistake that made me chase my tail for over a week.

For anyone wanting to install one on an 06. My advice is the following from what I have learned:

1. Use the fasterners for the tang that Radman mentioned in this post.

2. Do not remove the throttle return spring from the tang as mentioned in the farkel. ( I say this because I had throttle return issues.)

3. I would use 6-7 chainlink beads. This will raise the bead chain coupling above the tang on the black throttle cable mount. Since the bead chain coupling is wider that the rest I ran into clearence issues with that.

4.place the parallel throttle cable clamp on the black throttle cable almost to the curve and lean over to left side of bike. Adjusting the throttle cable can be a bear, check, check and recheck for a good snap back to the throttle. Note: fasten the heat shield and cross brace then test throttle again. Just having that heat shield can throw things out of whack if there is a clearance issue.

5. run RED wire from Servo, ORANGE Wire from Control Pad, and GREY wire from Control back to the Blue wire on the tail section where Imallin installed the red wire.

6. Did I mention DON'T CUT OFF THE NOISE SUPPRESSOR ON THE BLUE WIRE?

Thanks Guys!

 
Holy mother..........! This brings a tear to my eye! Congratulation and kudos for hanging in there until the bitter end.

 
Good Job!! :yahoo:

While all of this was going on I got my AVCC installed. But I couldn't bring myself to post my success, didn't want to be the one to push you over the edge. You were sounding a little desperate at times. :gah:

I had one of these on my last bike and you WILL find that all the pain was worth it.

 
Top