Winter Project - Reviving a Wounded FJR

Yamaha FJR Motorcycle Forum

Help Support Yamaha FJR Motorcycle Forum:

This site may earn a commission from merchant affiliate links, including eBay, Amazon, and others.
Just a minor observation. That 'stuck' bolt is on the alternator side, clutch is on the other side...................

 
Just a minor observation. That 'stuck' bolt is on the alternator side, clutch is on the other side...................
Thanks Donal. You are correct.

I could claim minor Dyslexia.....
fool.gif


But I'm just an idiot sometimes!
jester.gif


Harbor Freight and AutoZone sell "cheap" compressors that will get to 120psi...It may make your life easier for around $45. Or you can spend the money and get a good one.

I have a 130psi compressor from Sears that was $169. I bet your tired of hemorrhaging money at this point, so that's why I suggested the cheap alternatives that will get you through.

 
Last edited by a moderator:
Just a minor observation. That 'stuck' bolt is on the alternator side, clutch is on the other side...................
Thanks Donal. You are correct.

I could claim minor Dyslexia.....
fool.gif


But I'm just an idiot sometimes!
jester.gif
No worries, I am a fully certified member of that particular club....... Absolutely loving this epic, so much better than TV!..................

 
Air compressors are a lot like bike gear. Get something you will be happy with for many years and only cry once.

I spent a good bit of time shopping for a compressor and watching craigslist and ebay.

I finally settled on a Bel Aire 5026VP that I got as a new return for around $400. (craigslist)

Prior to that I had found them in the 600 - 800 range. (msrp is 1200 or so)

https://www.belairecompressors.com/p_piston-1stage-electric.html

The CFM for these is better than anything else in that size range. Its also a separate (belt driven) cast iron (rebuildable) pump.

I am a professional auto tech, I have no doubt that I could work all day, every day with this unit.

 
"Applied air tools! But alas my tank won't kick out the torque needed........... (sigh)
rolleyes.gif
"

IIRC those bolts have a pinch bolt, much like a rear axle, that need be loosened first.

That bolt you are on, screws into an 'insert'.

That insert is clamped down by a pinch bolt, at least on side, maybe both.

Check out the Yamaha fische or the link I posted earlier.

I'm kinda tired right now and not thinking at 100%, but before you apply max force, please check.

It might save you some grief.

edit - what I'm saying is the whole enchilada can come out... frozen bolt, insert, and all.

 
Last edited by a moderator:
Close, DC, but no seegar....the pinch bolts are on the starboard side...and they tighten down on the sleeves, not the bolts themselves.

Theoretically, the pinched-sleeve frame hanger bolts on the right side should come out without touching the pinch bolts at all. They are there to be loosened to let the sleeves move up tight against the frame when the bolts are tightened.

 
Last edited by a moderator:
Good Morning Fellow FJR Owners and Lords of Engine Nomenclature... Doug and I got busy with the engine this past Saturday. Um ok, not in THAT way.
no.gif
BUT some of you may consider the following to be Engine pR0n - er something like that.
uhoh.gif
The conditions were just right. I am very blessed with the real estate (basement) to do this project. But I'm doubly blessed to have a friend like Doug! I'll explain as I go.

So Let's GO!

When I left you last, Doug was applying my feeble air tire inflater on the the stuck bolt. The pinch bolt was taken care of and the PB Blaster was applied over multiple days. A week went by. It's Saturday and my thoughts are on motorcycles (like always), specifically my naked and ailing FJR in the basement. But! I'm doing my household duties and am at the grocery store. Taking care of the weeks shopping. I get a text from the Wife "Hey how far r u out? Doug is here." My response is "about 10 minutes... just ready to check out." Well, the lunch meat lady was taking her time and it was more like 15 before I got home.

Doug and my wife were chatting it up mostly on work stuff (we work at the same place). Wife says "I'll put away the groceries, you and Doug do downstairs."

OK!
ok.gif


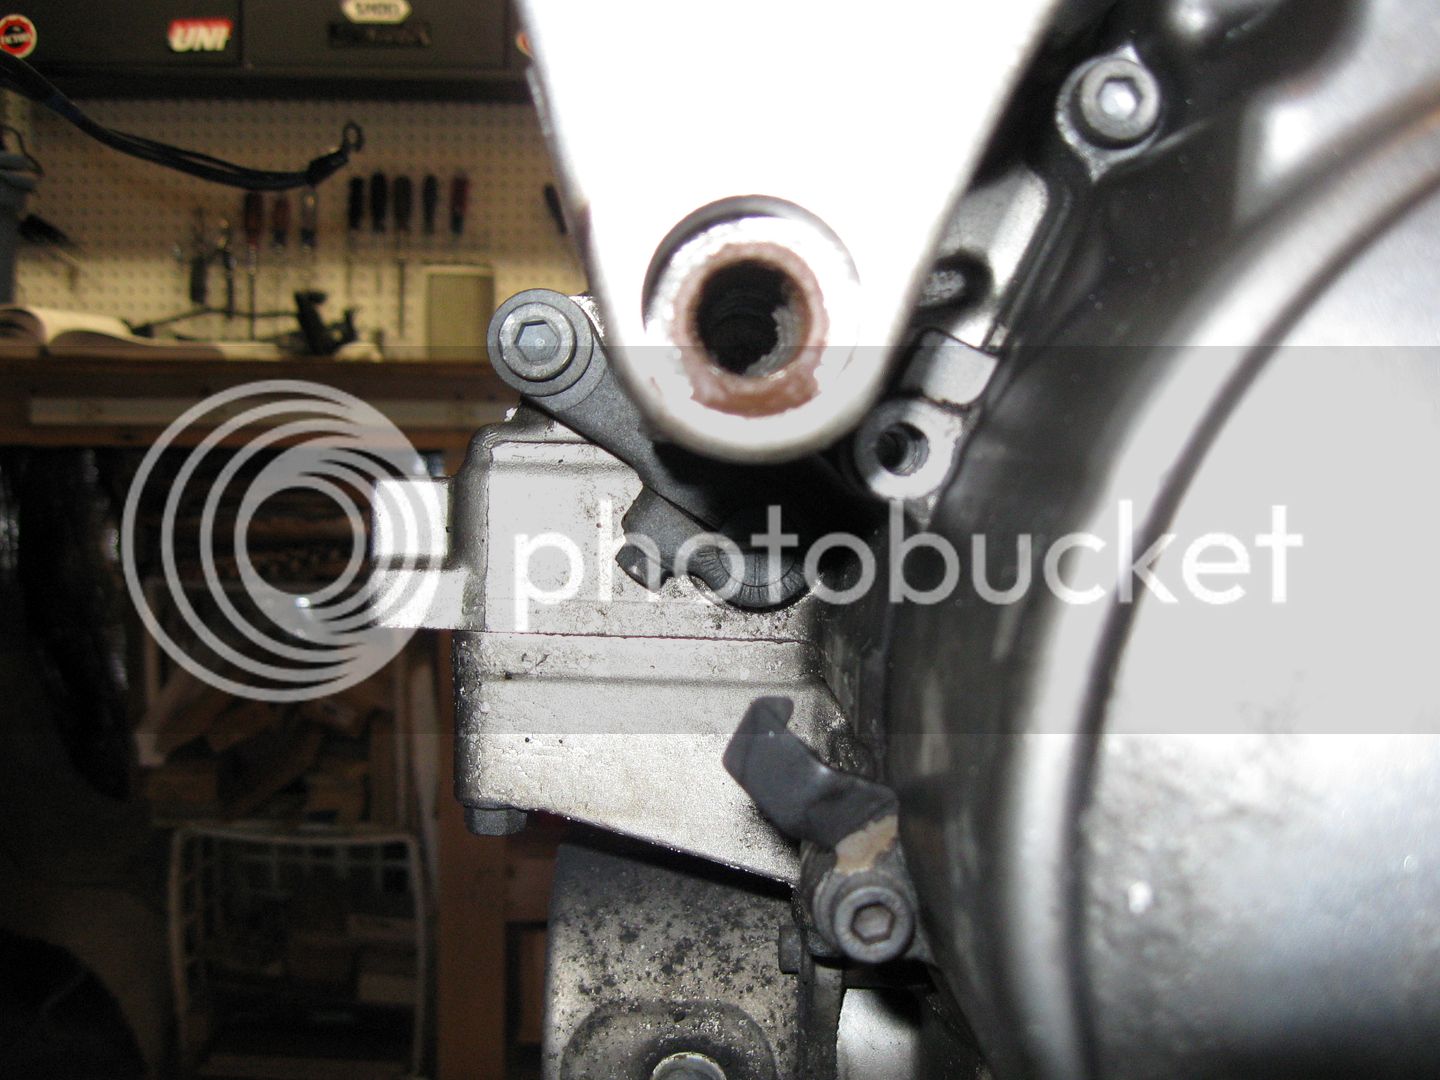
We head downstairs and I see.....

FJR131.jpg


Doug's grinning and now so am I! He heated it up some more and just kept applying pressure and it started to give. Back slightly and forward more.... He's thinking "It's either coming out or it's going to break!" Thankfully it was coming out!

That's all the help Doug could render that day. He had a wedding to attend to.

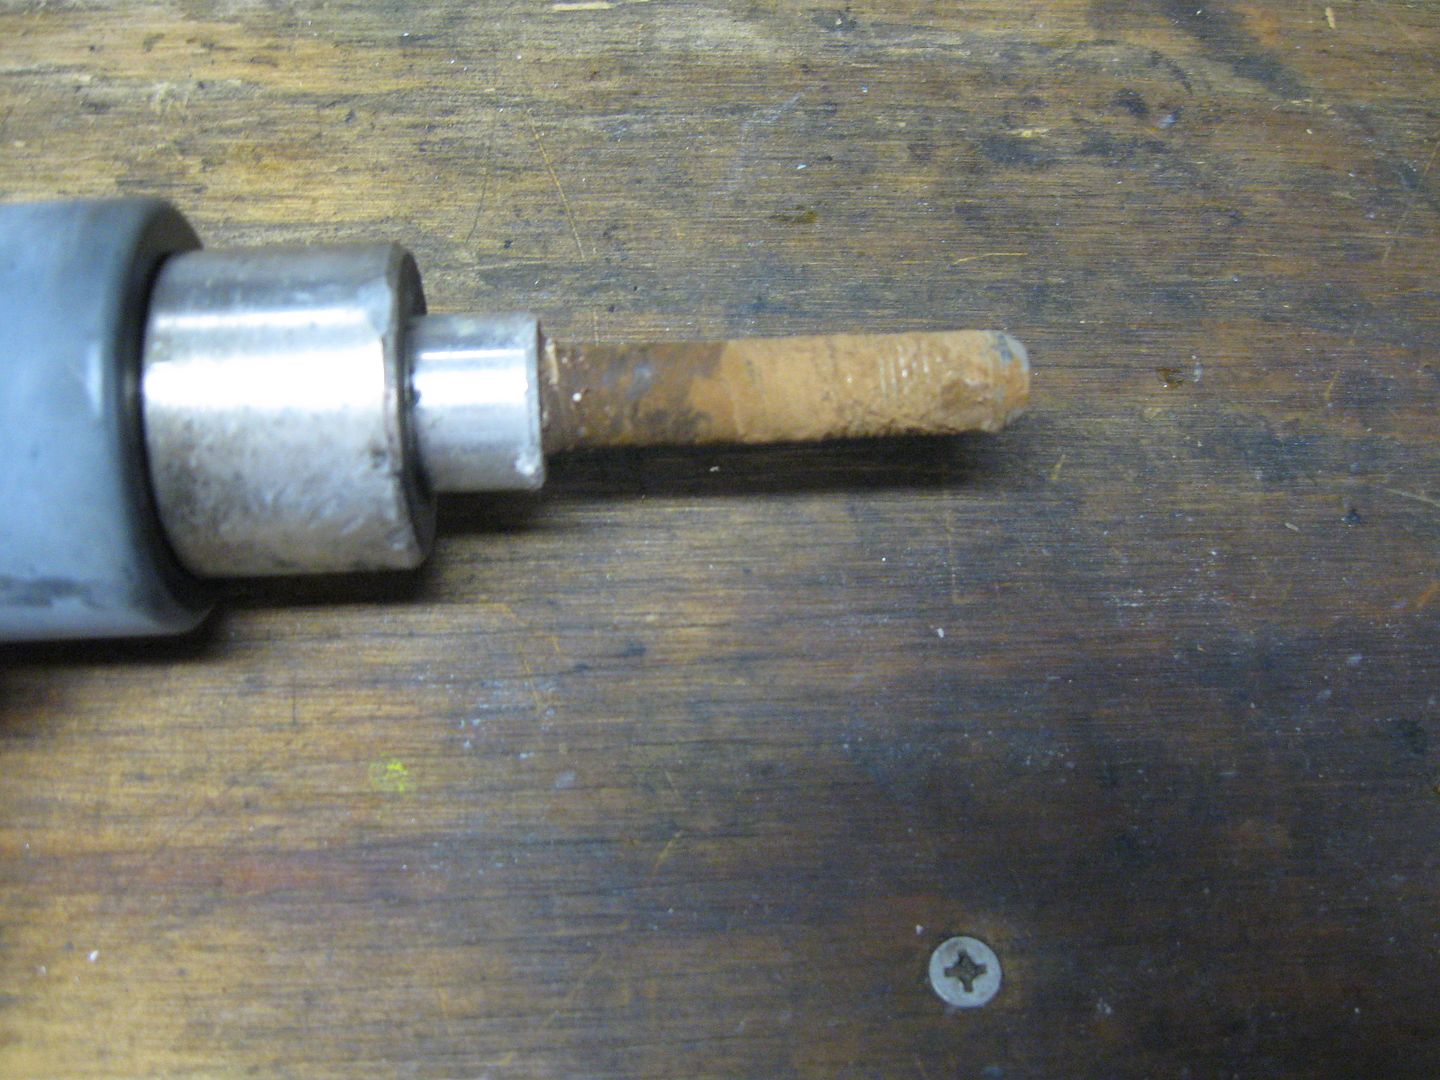
Here's the offending member in it's all of it's Grungy Splendor!

FJR134.jpg


A little wire wheel loving on that guy with some appropriate grease and it'll be good as new! I still have yet to separate the spacer, bolt and slider.

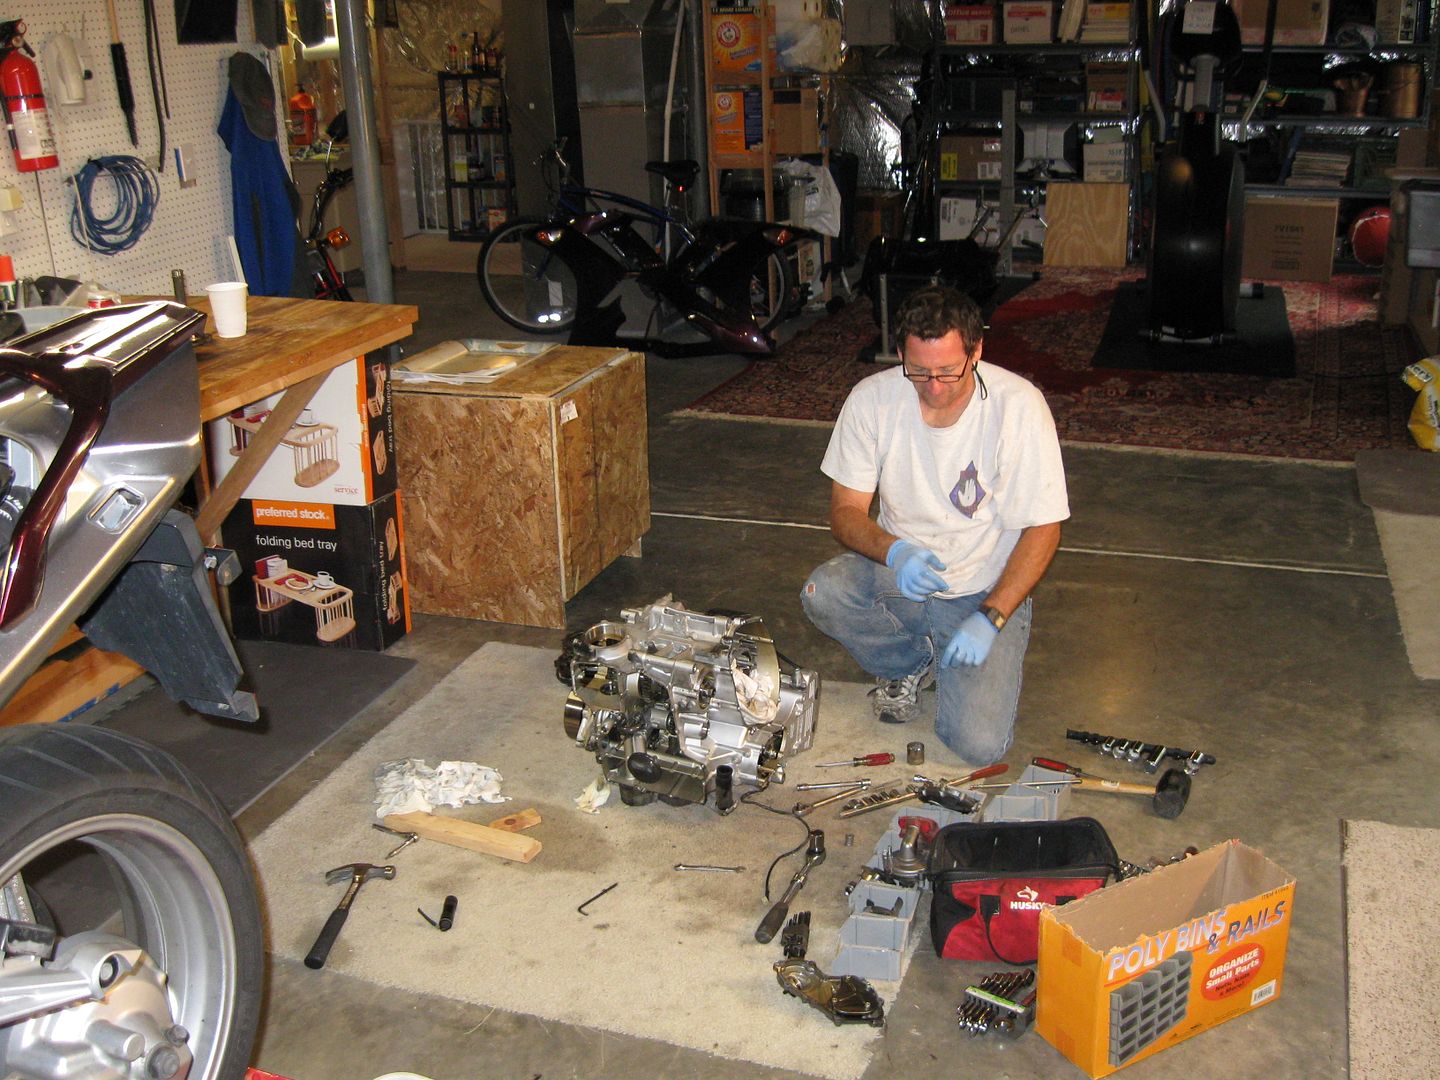
Fast forward another weekend to this past Saturday.....

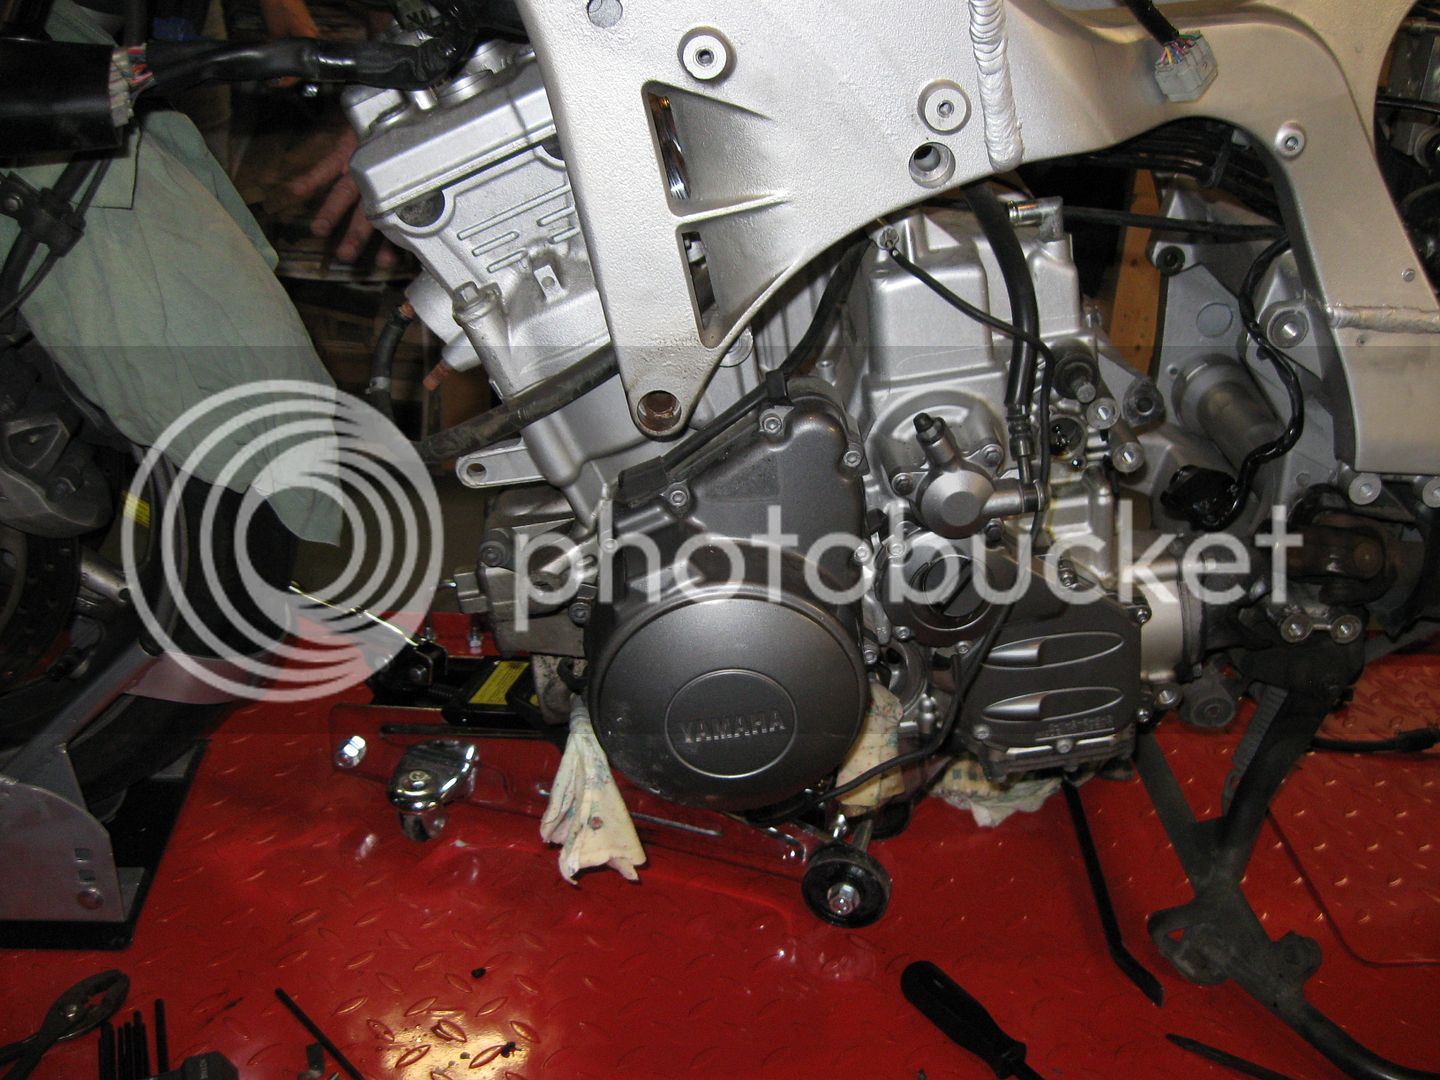
Whoa now. We have movement!

FJR137-1.jpg


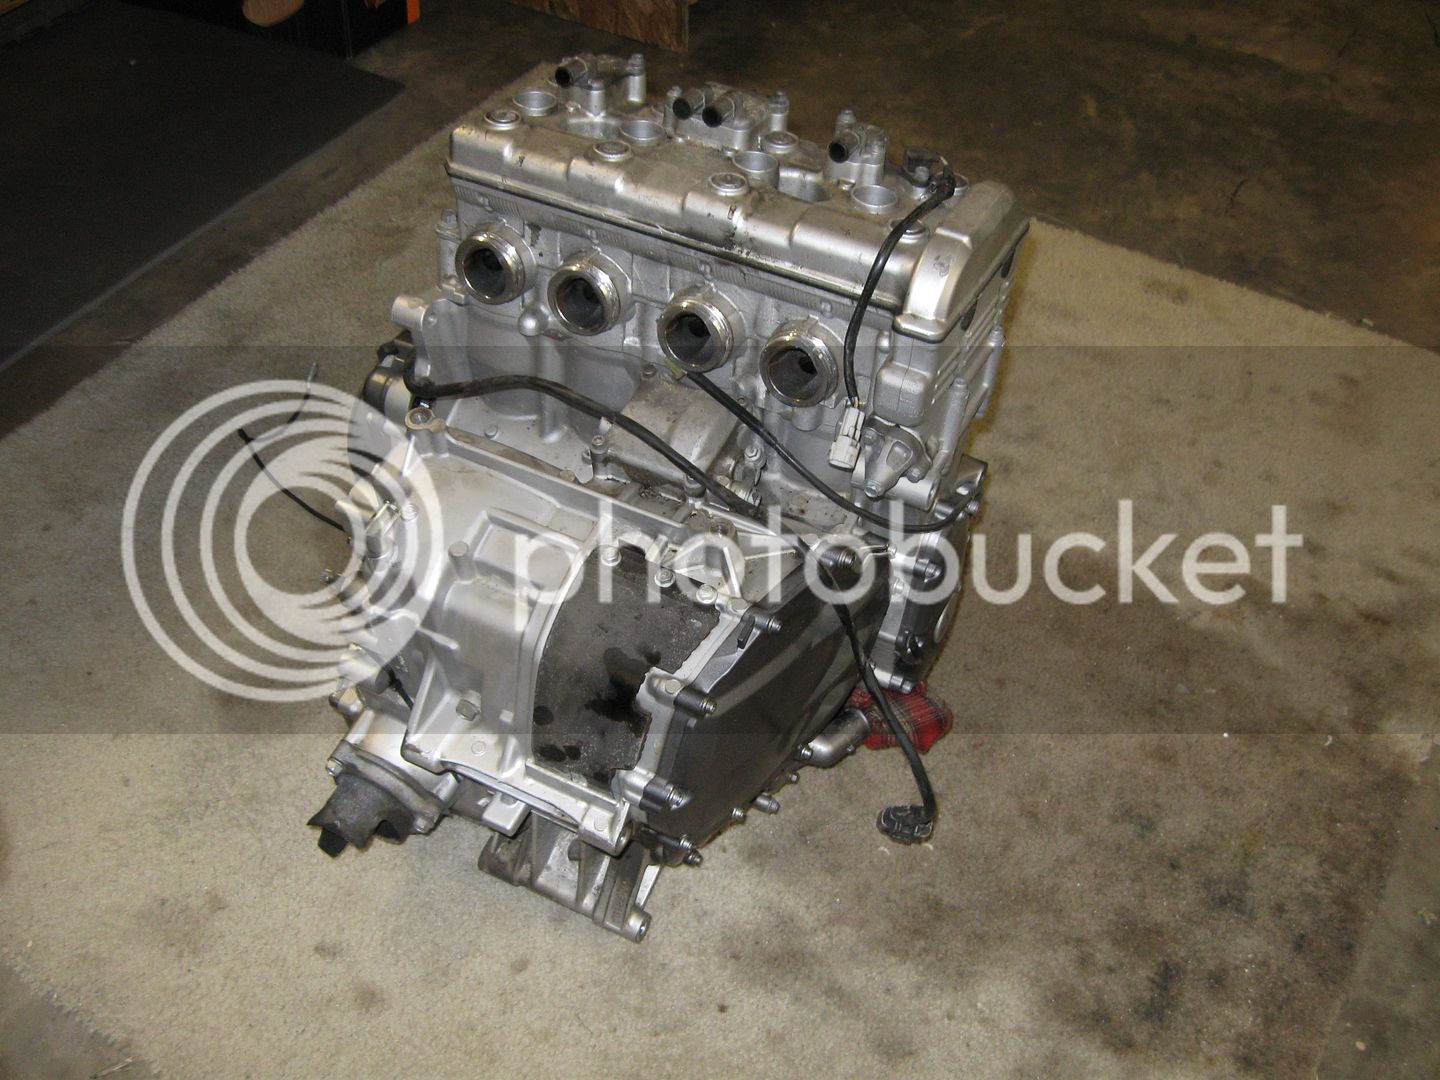
Here's where Shutterbug Streethawk has put down the camera and help! We had to get my wife involved as well. She's a Tropper and was more than willing to move the jack out the way while Doug and I lifted the engine and carried it over to it's resting place. (note: I offered the bench but Doug said "Floor is good. That way if something falls, it won't have far to go."

So without further fanfare (because there wasn't any):

FJR138.jpg


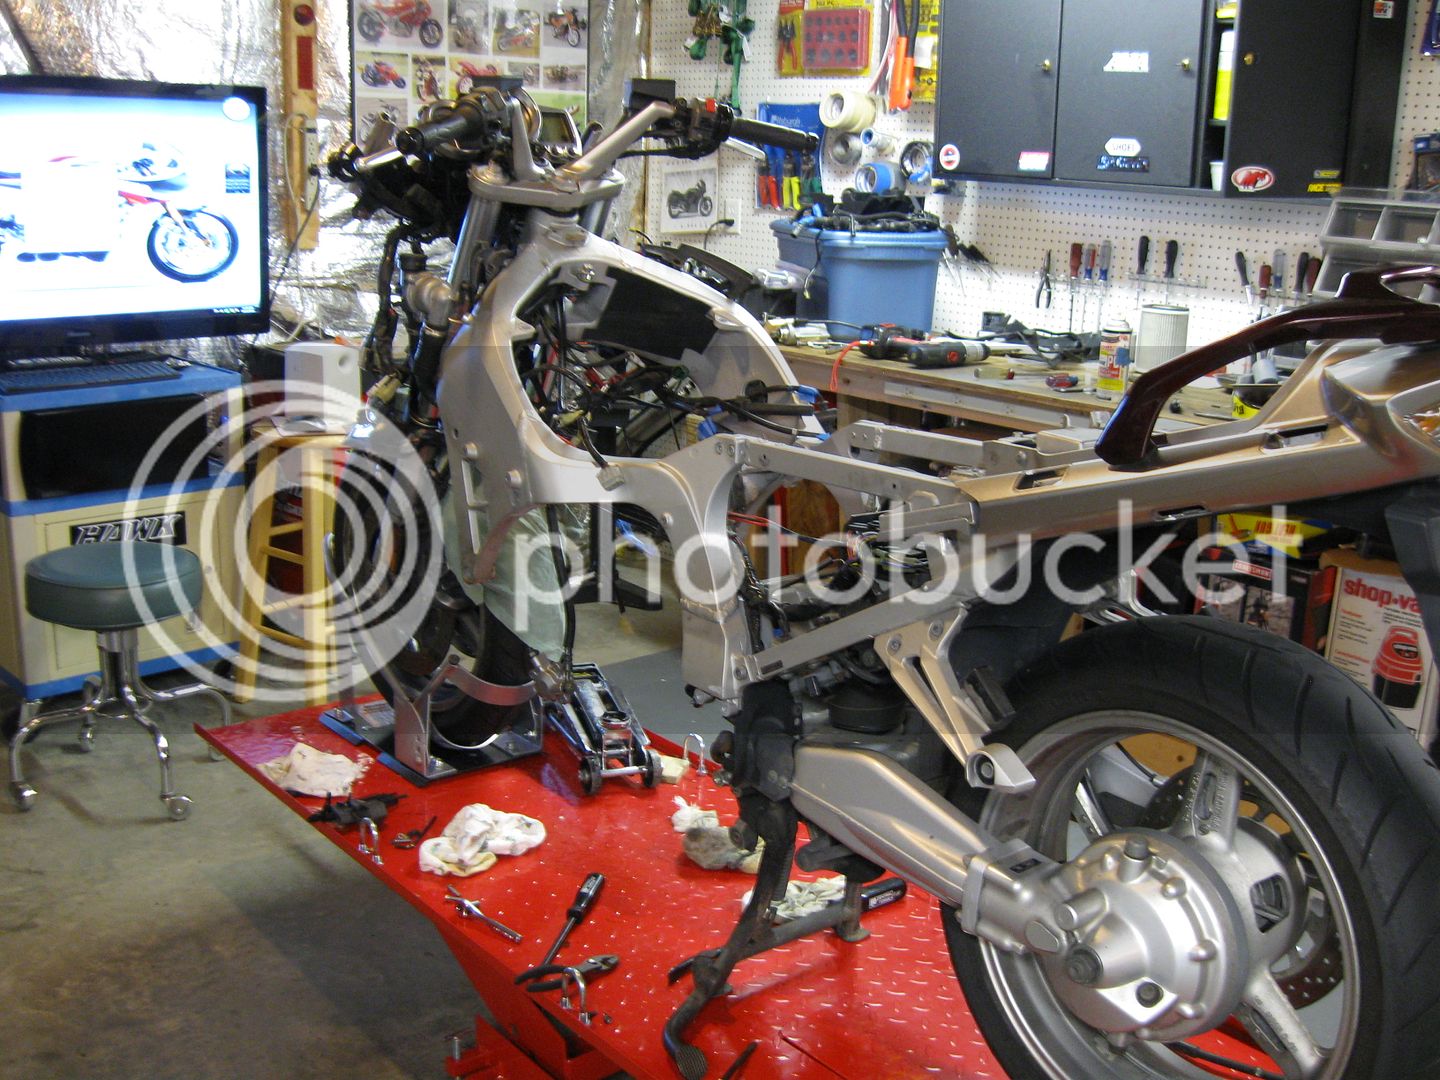
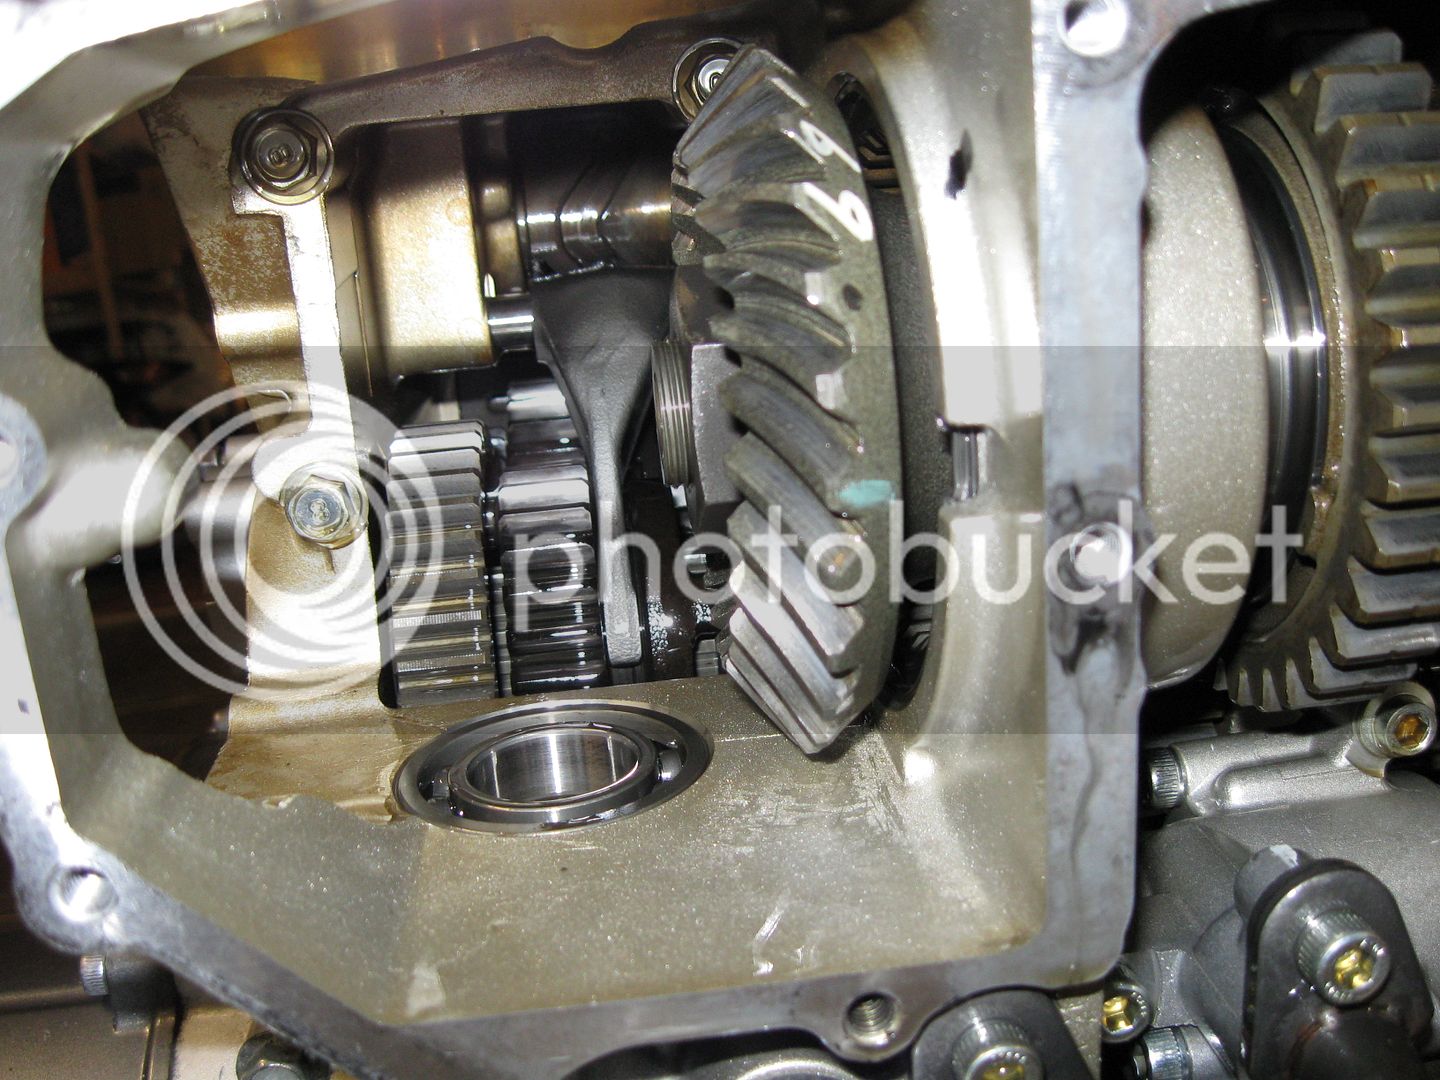
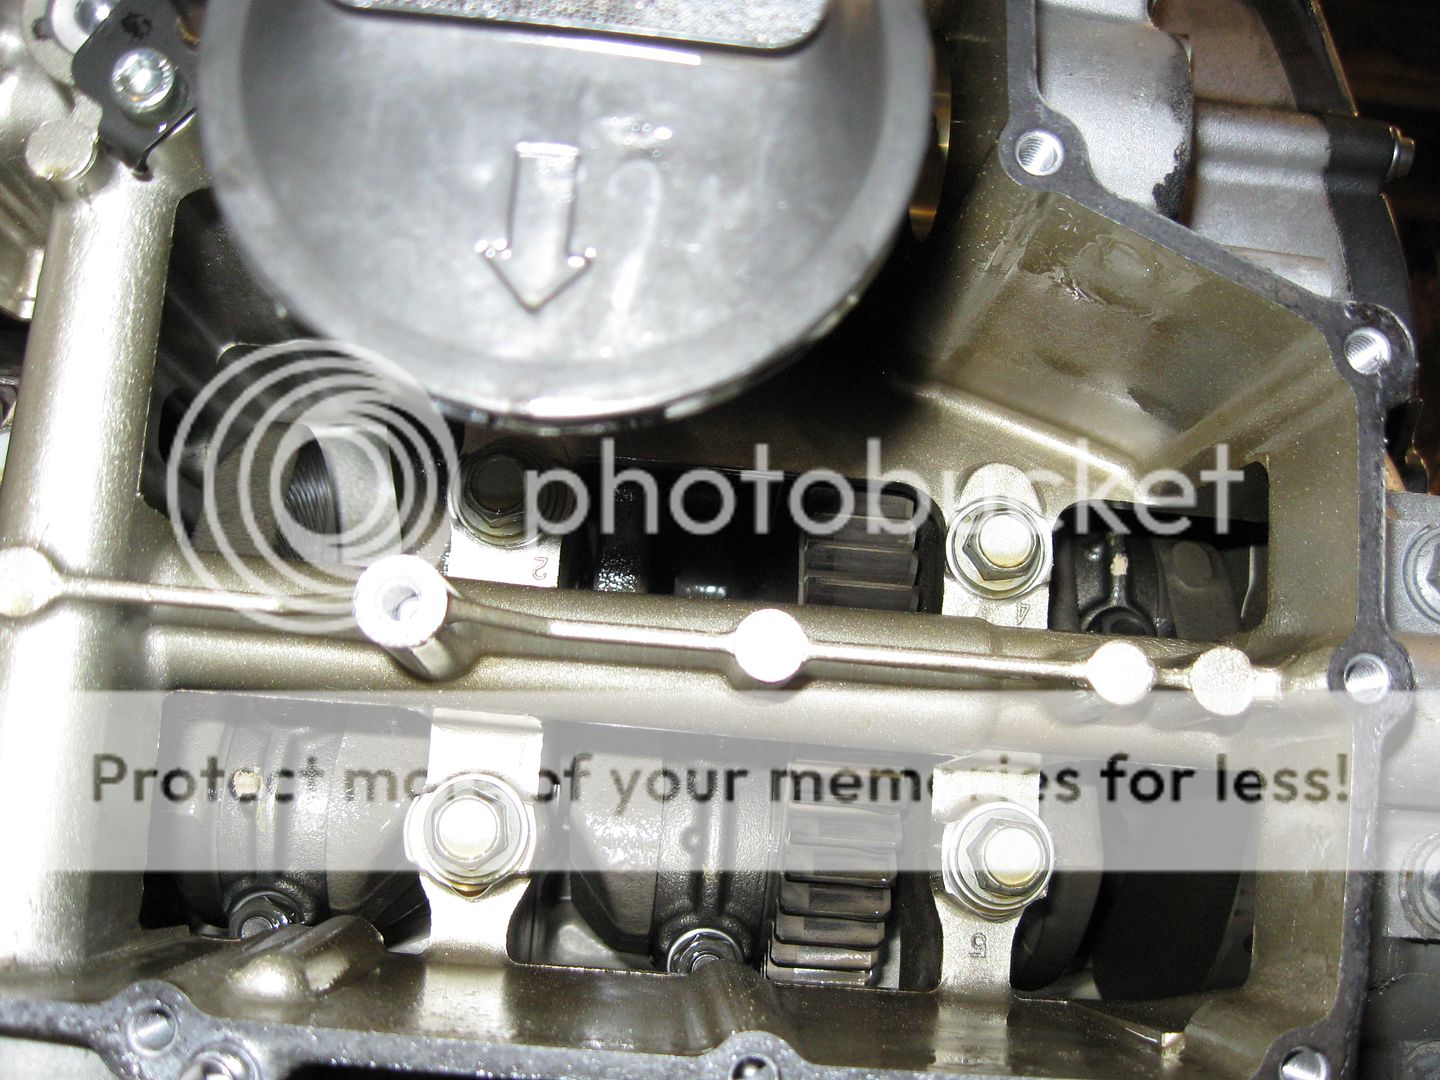
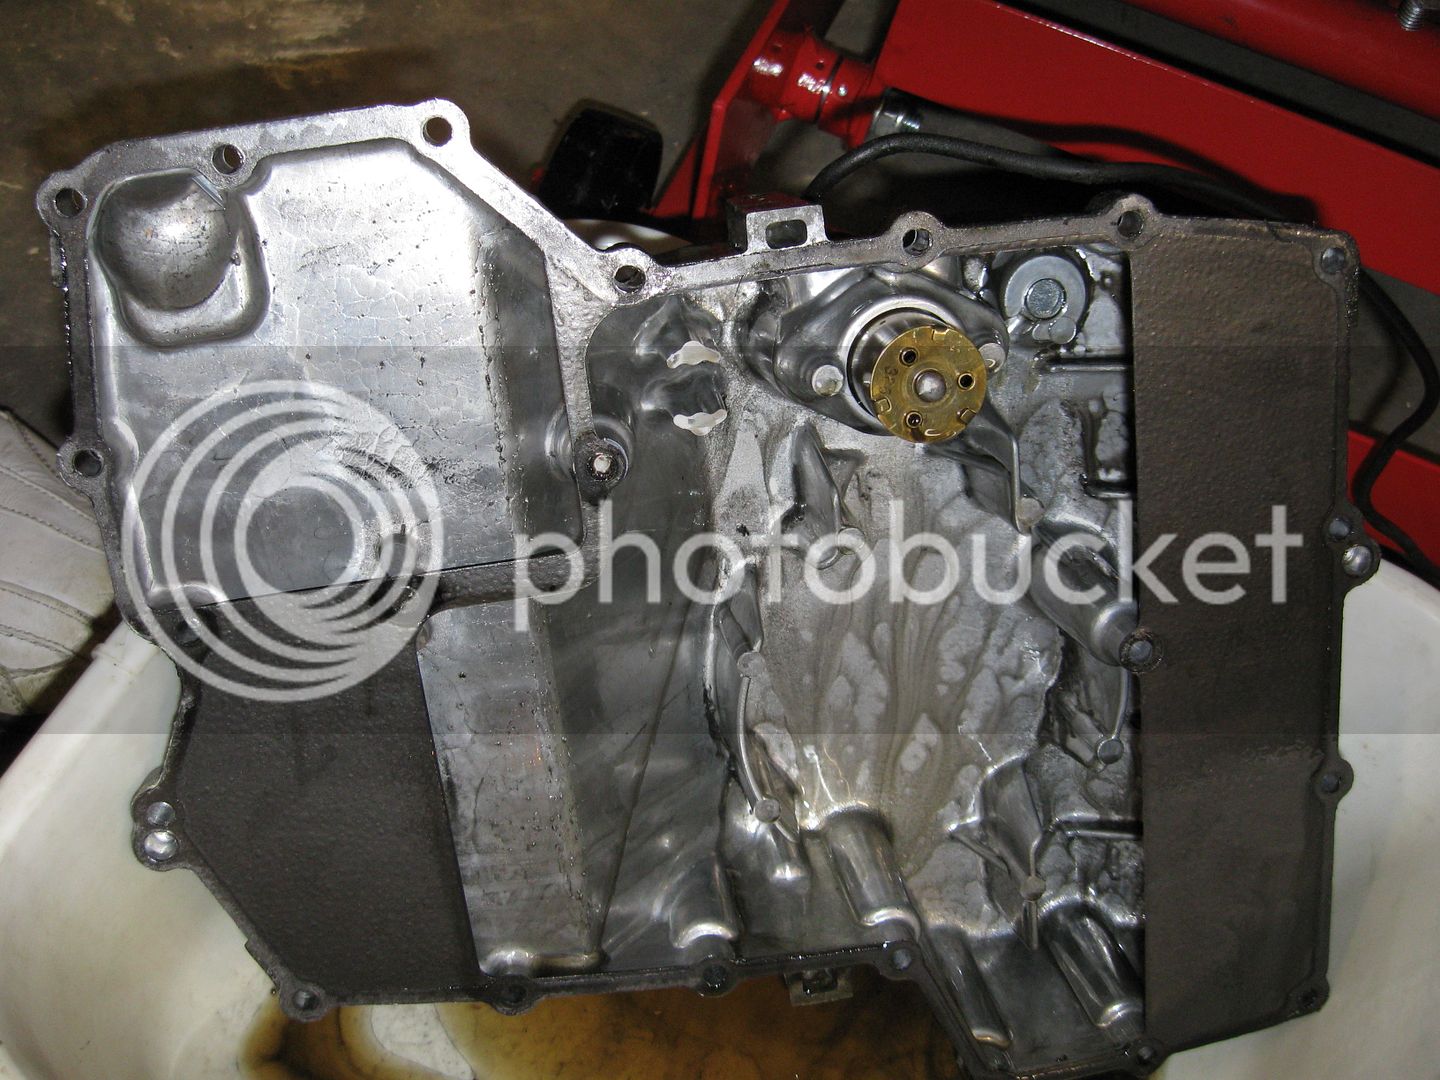
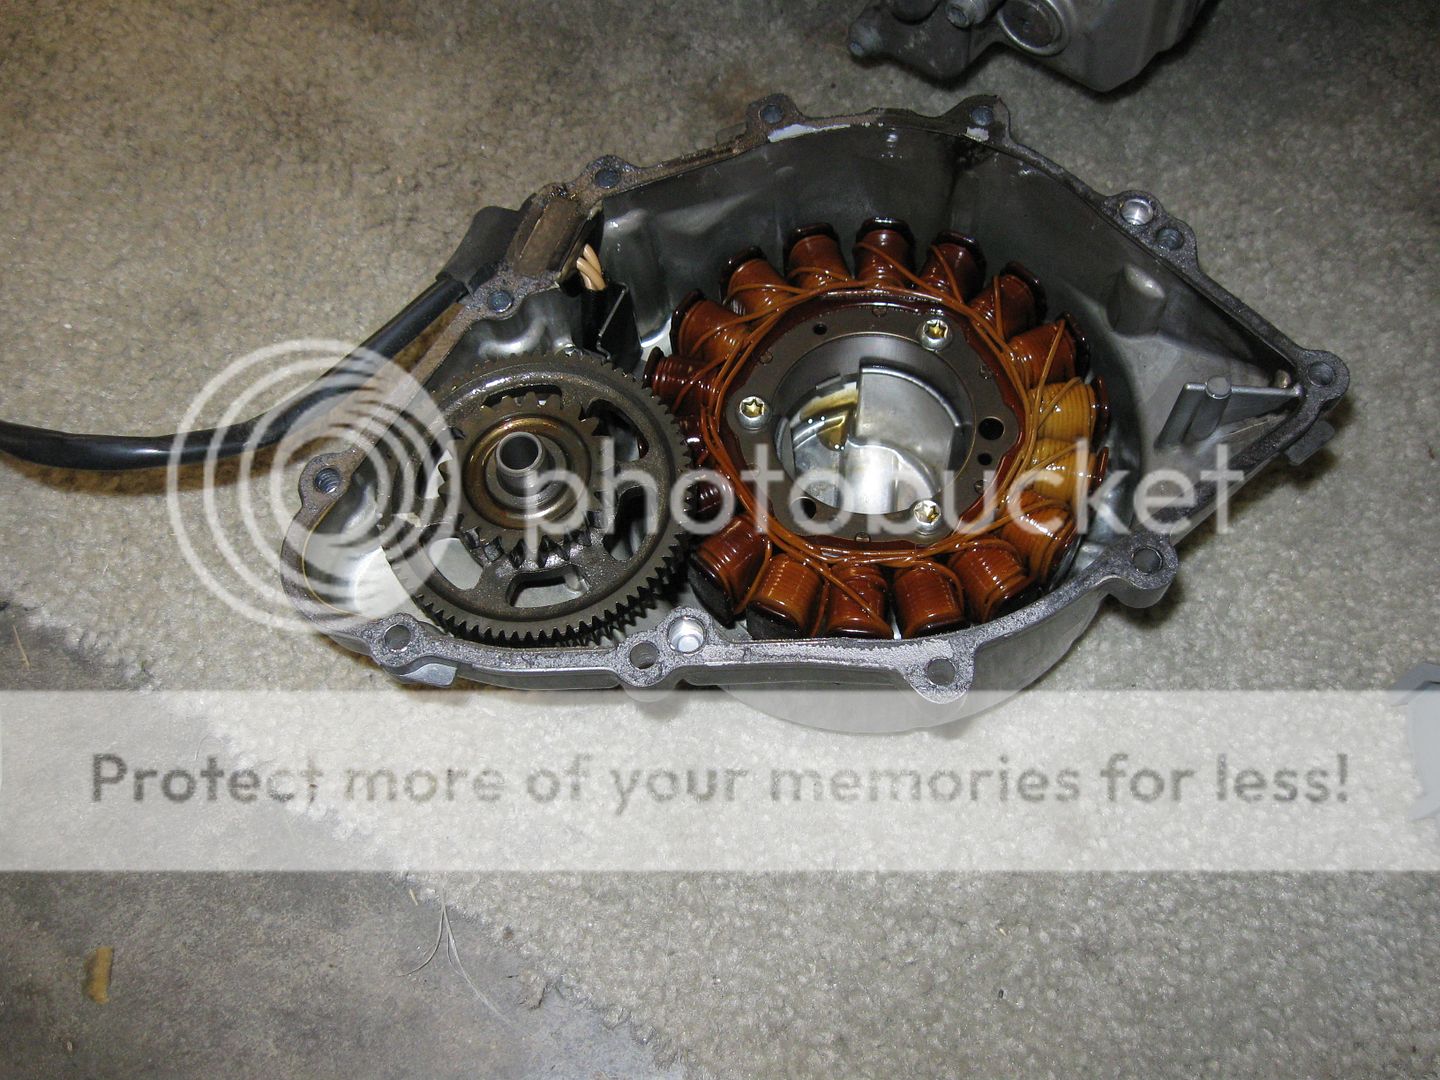
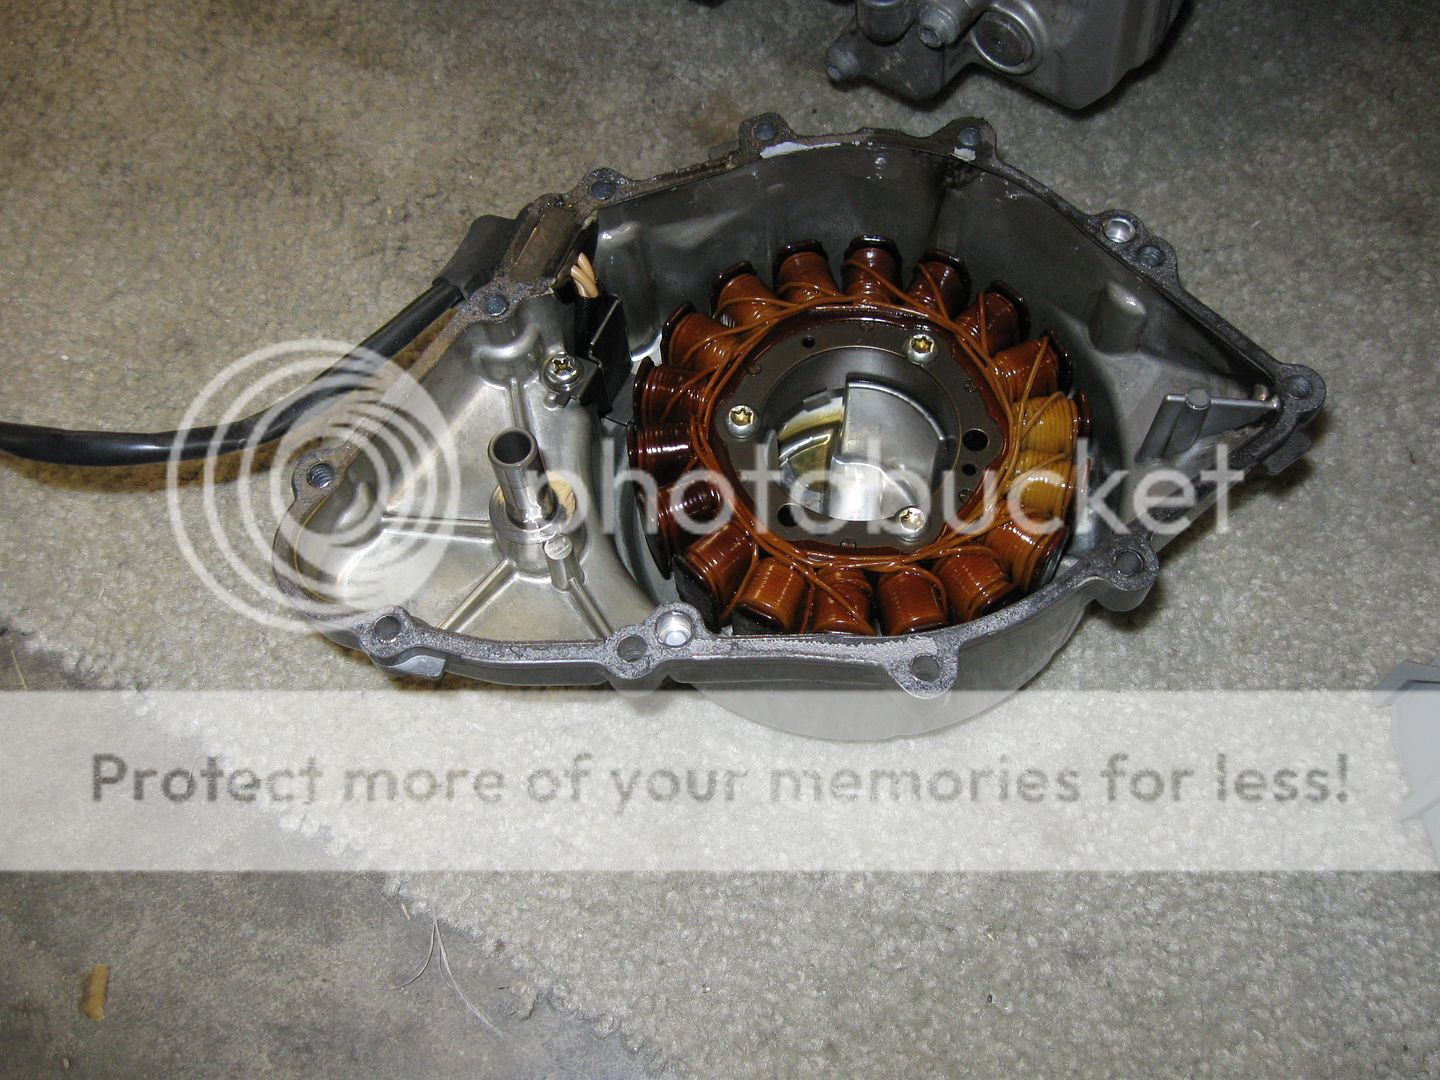
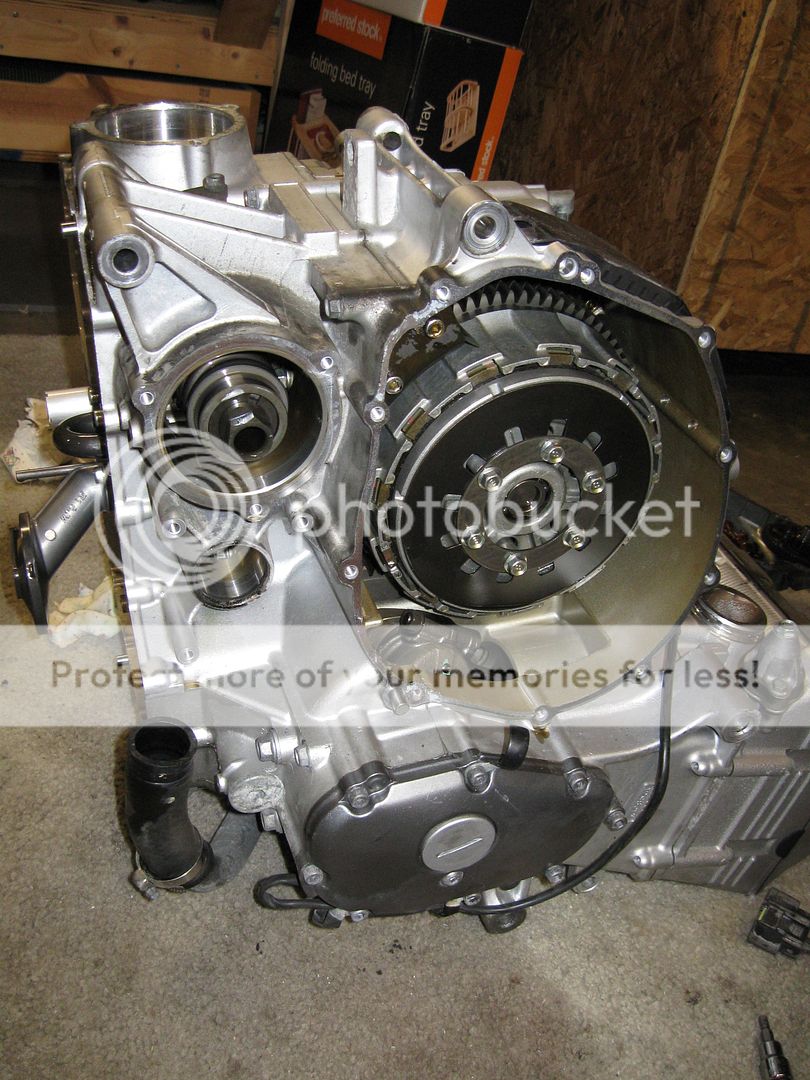
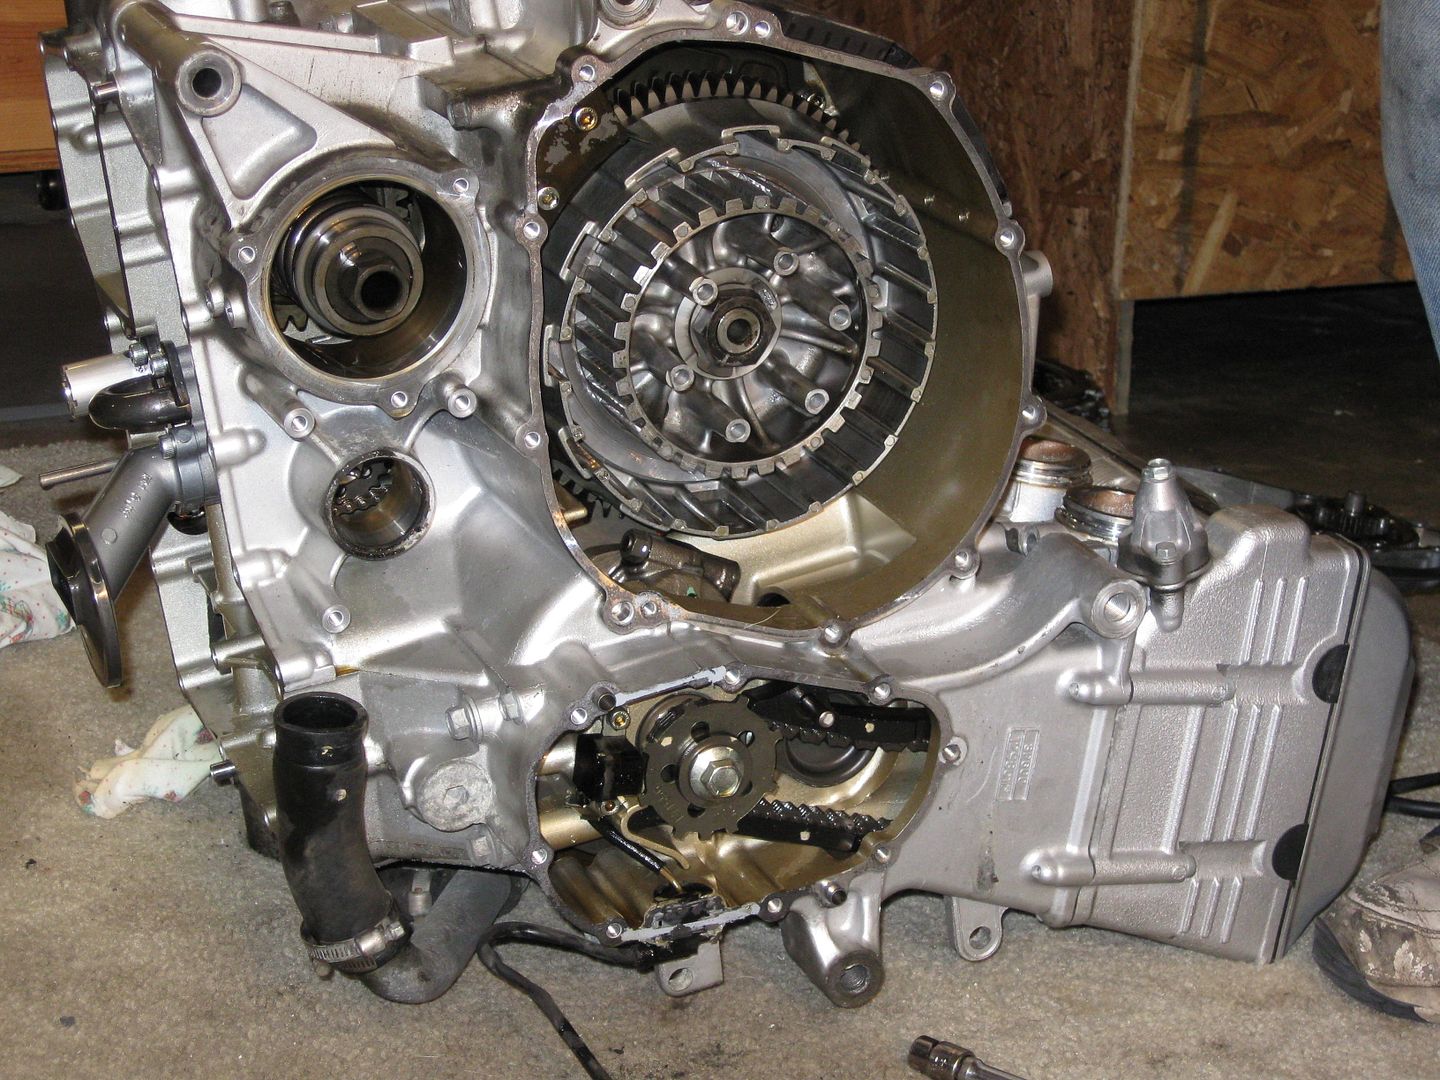
There she is! 1300 CCs and the heart of the FJR Goodness!!

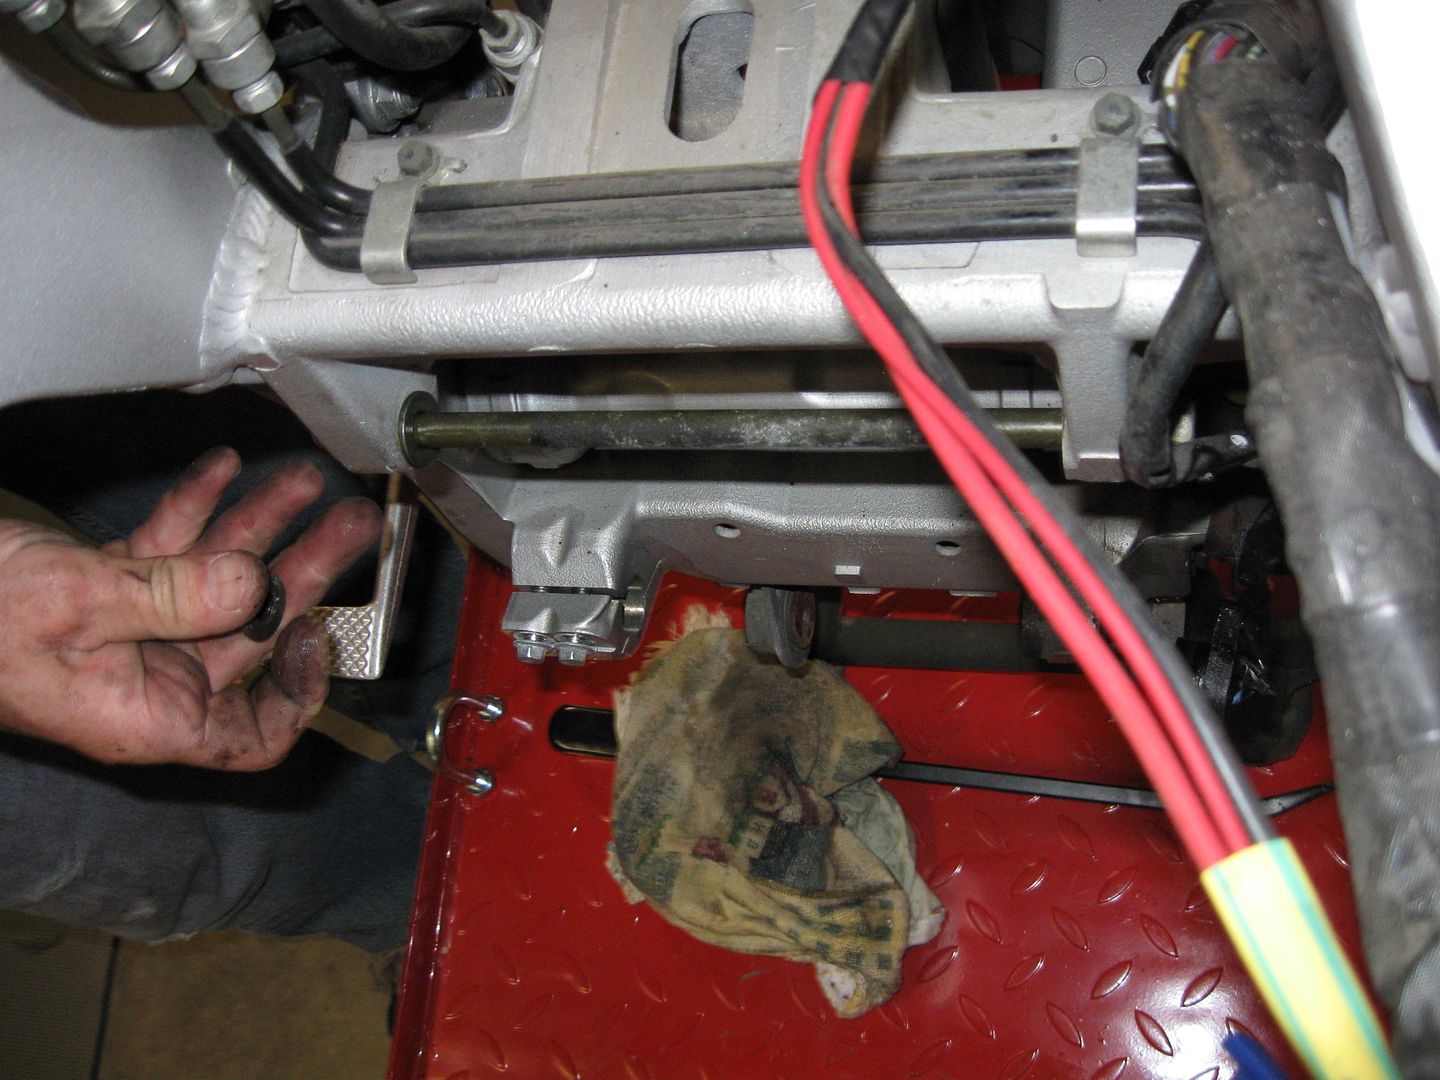
Now some shots of the frame and mounting areas etc... Most of this is displayed for Academics. Besides that annoying bolt, there's no damage, issues or any other problems outside the engine.

Lower mount area.

FJR140.jpg


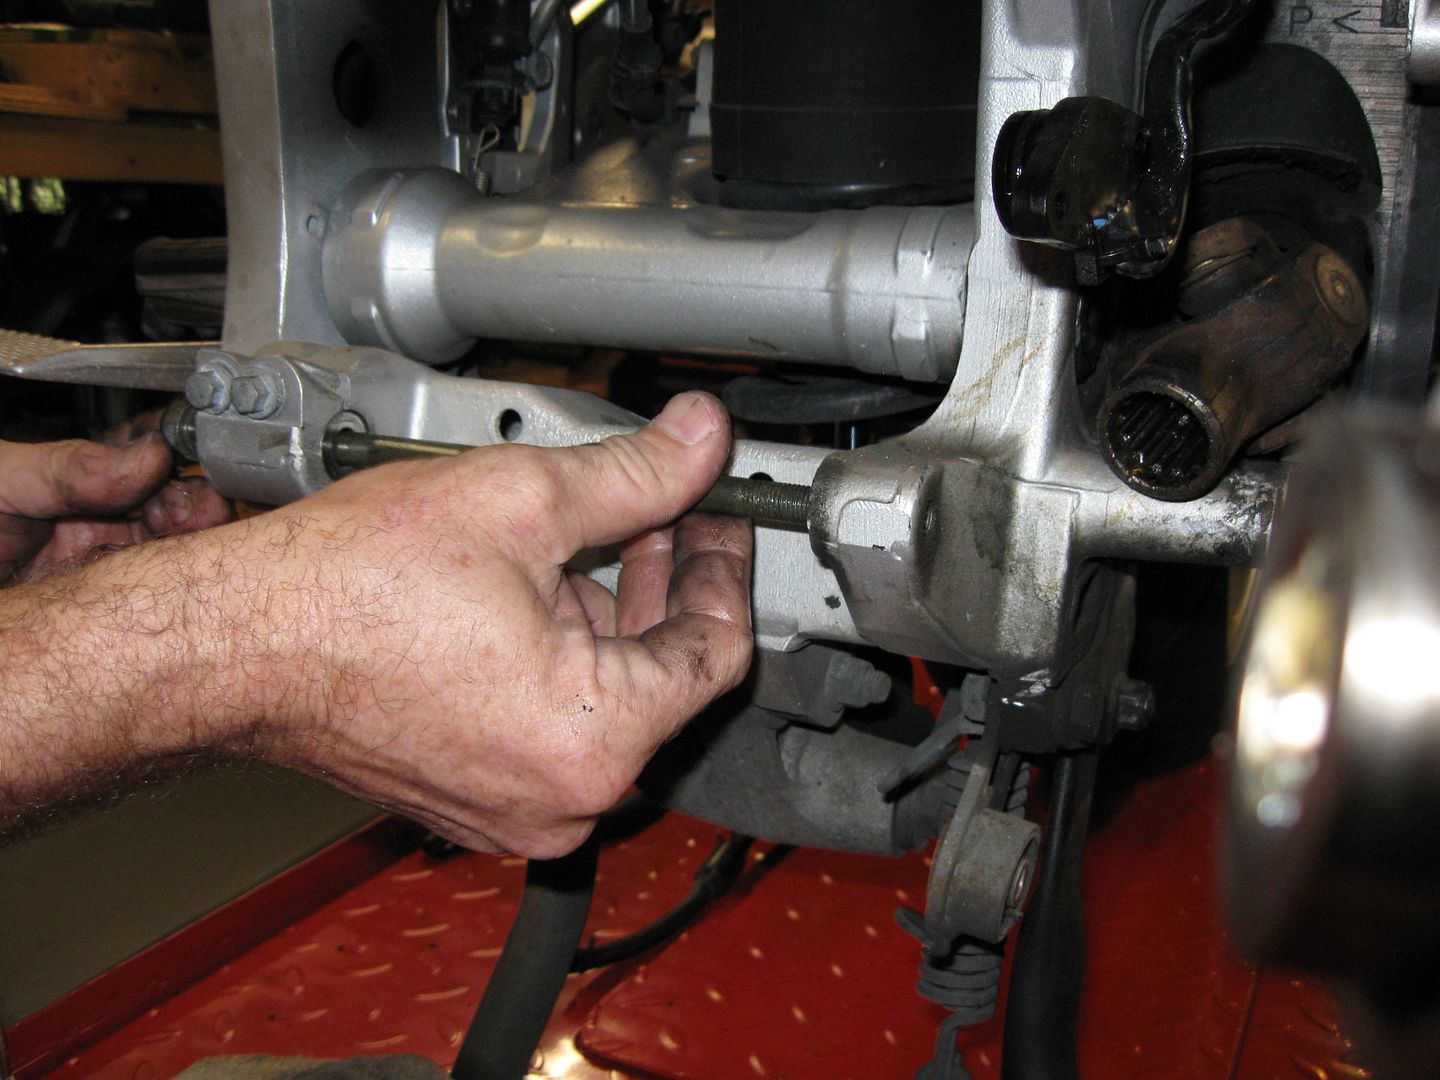
This bolt is threaded on one side.

FJR142.jpg


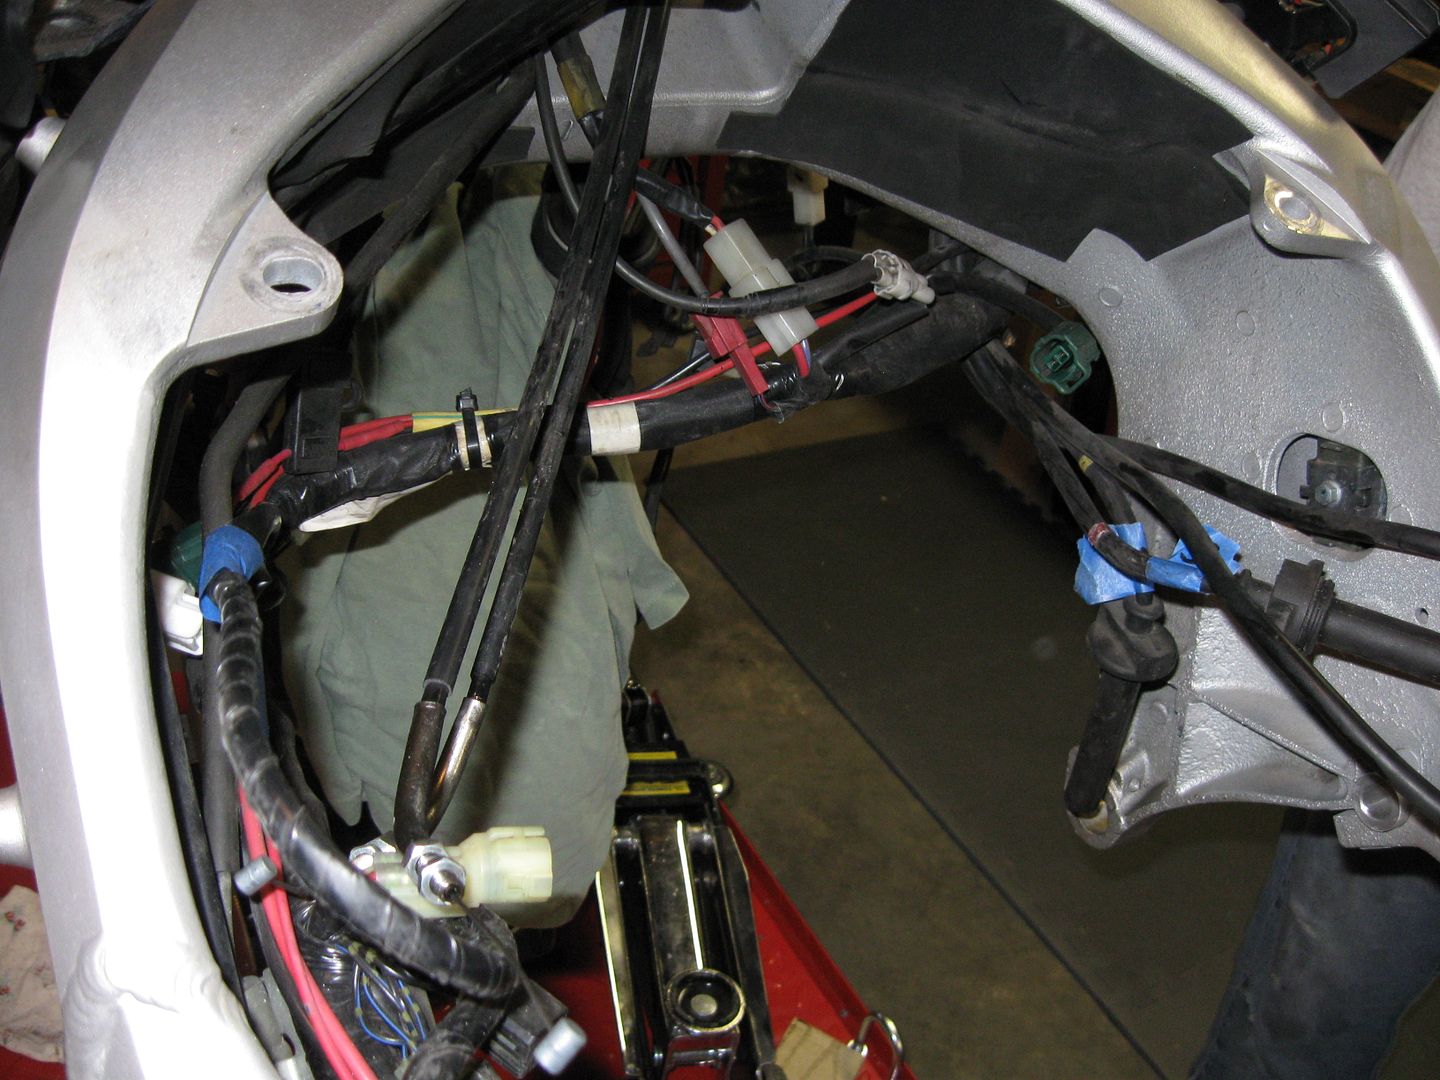
Upper frame. It's interesting how they pad the spars to keep the engine and other stuff from scraping.

FJR141.jpg


My Wife had a cool comment about the frame. "It's amazing how far they've come on the design of motorcycle frames. (Then the more Stereotypical follow up) They're quite pretty!" Wive's have their moments!
angel.gif
Mine is smarter than me AND rides, so I consider myself Lucky!
happysmiley.gif


FJR147.jpg


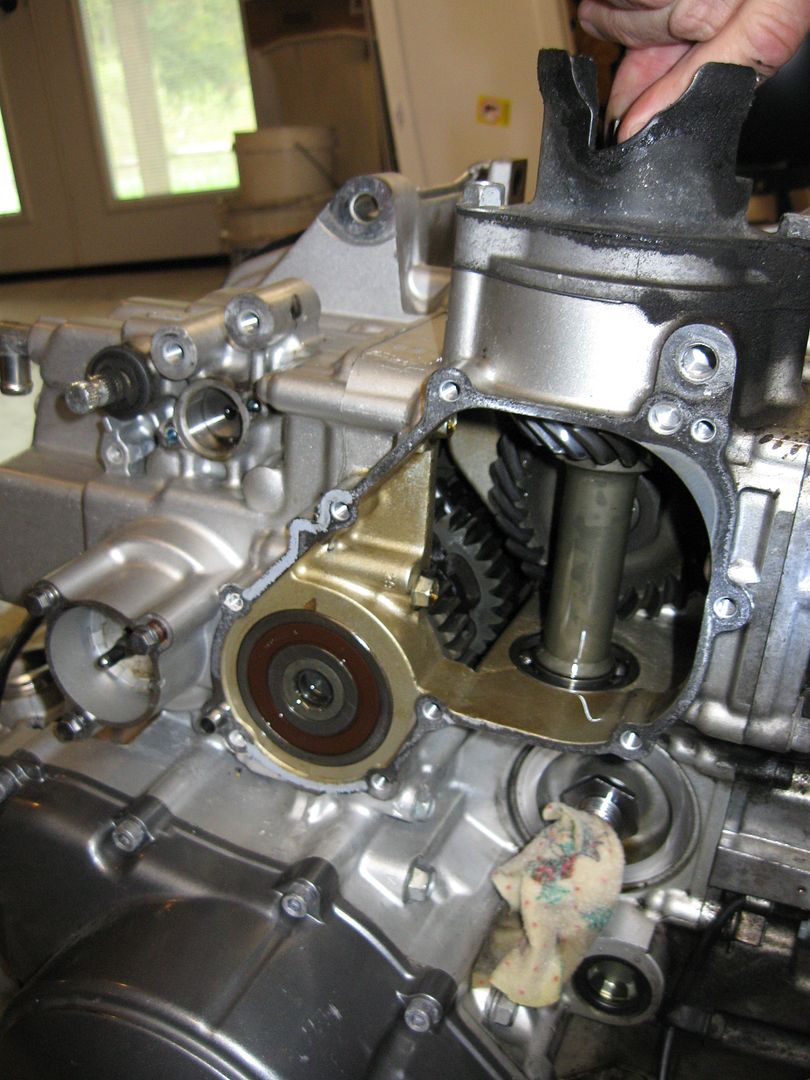
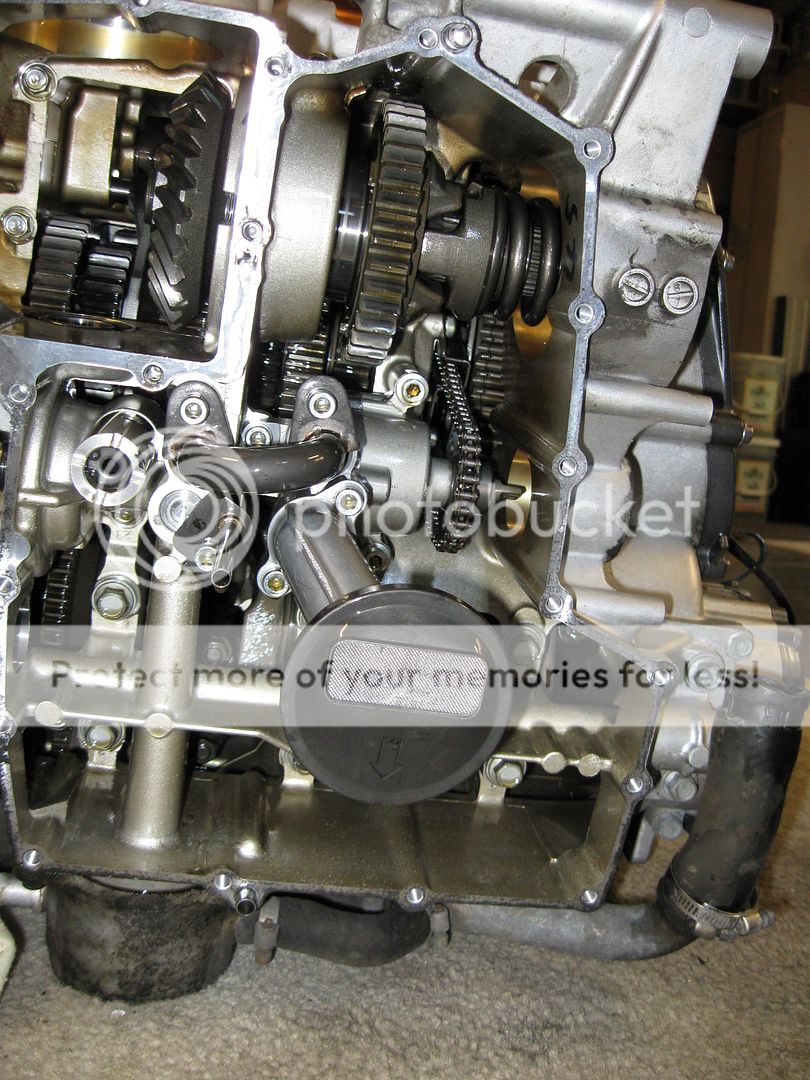
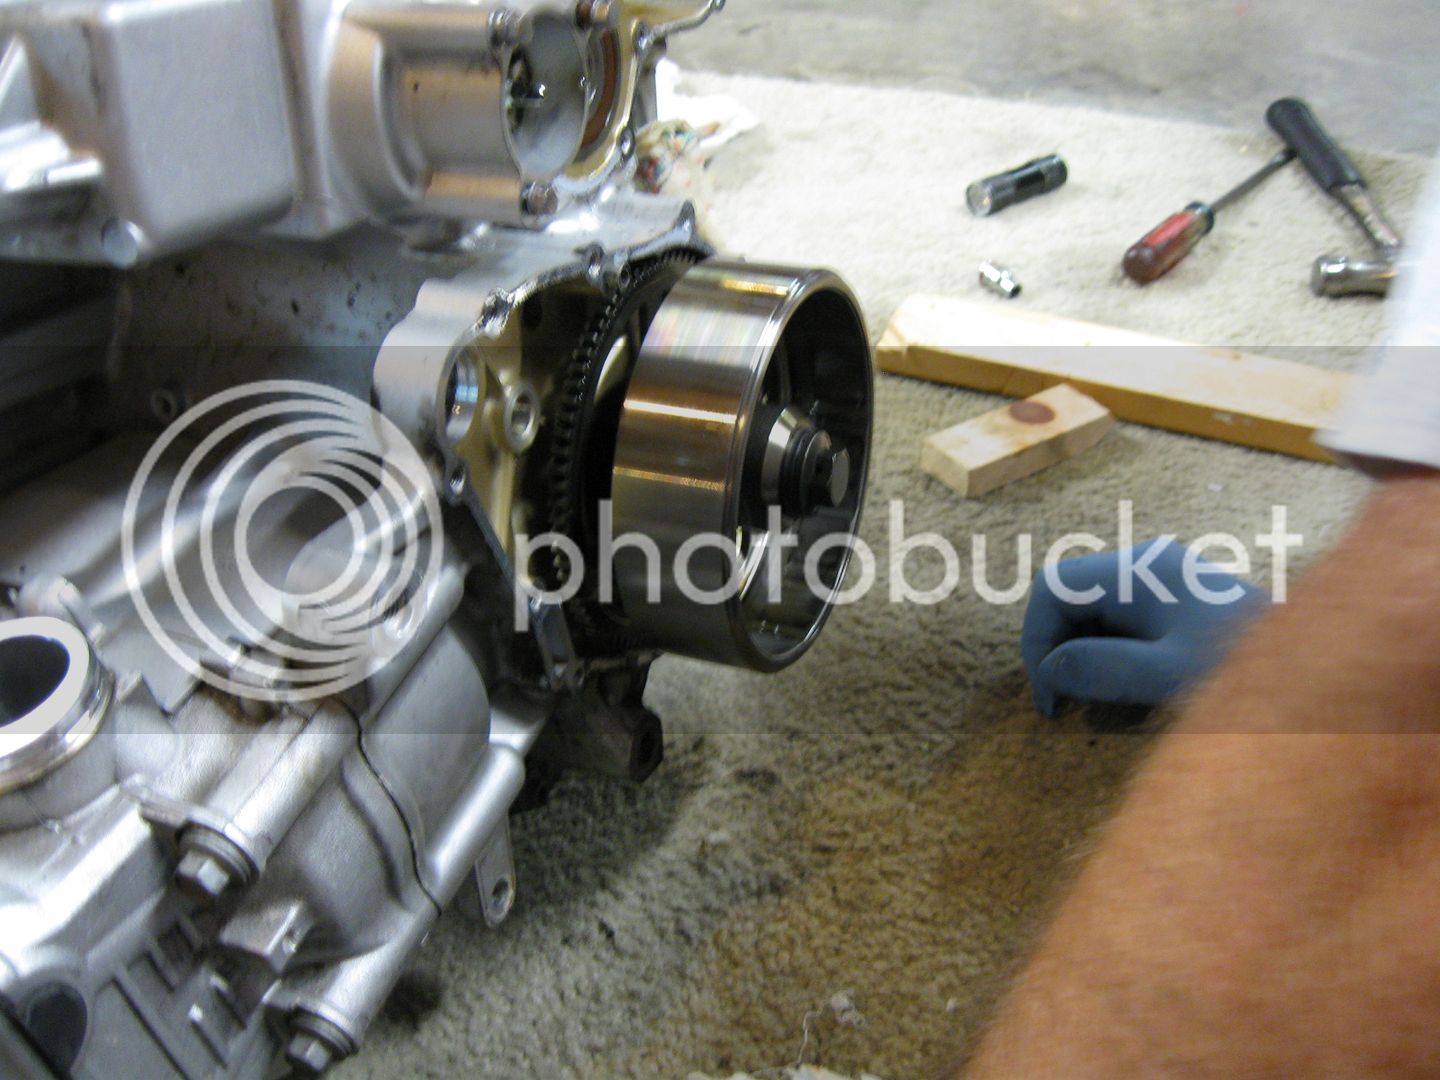
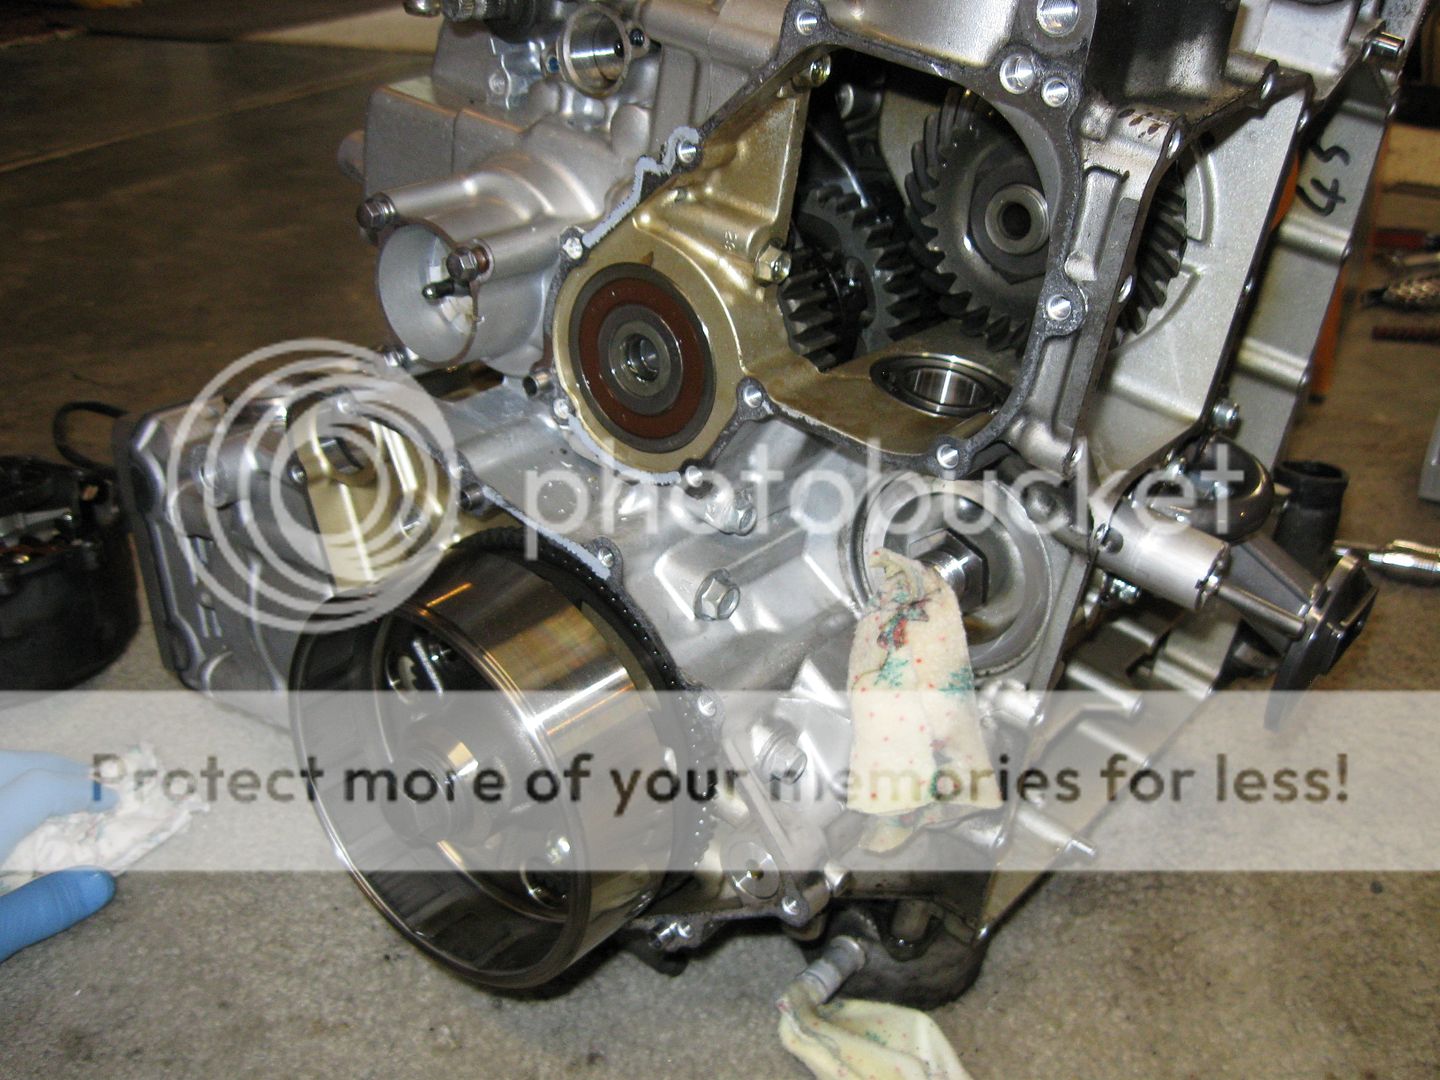
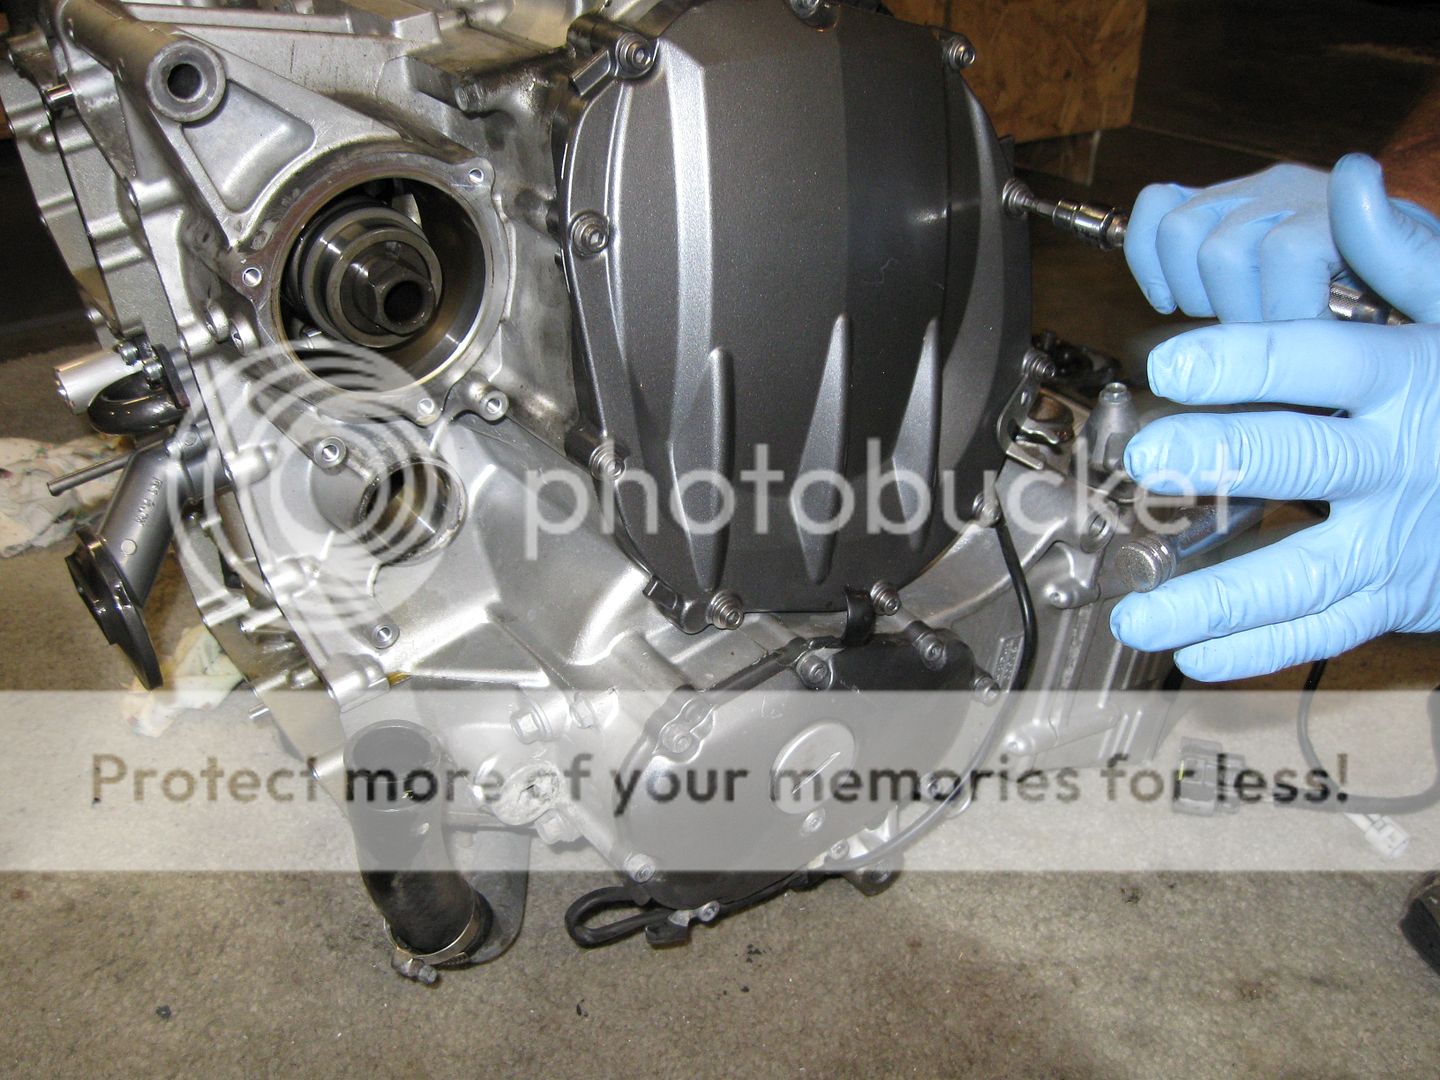
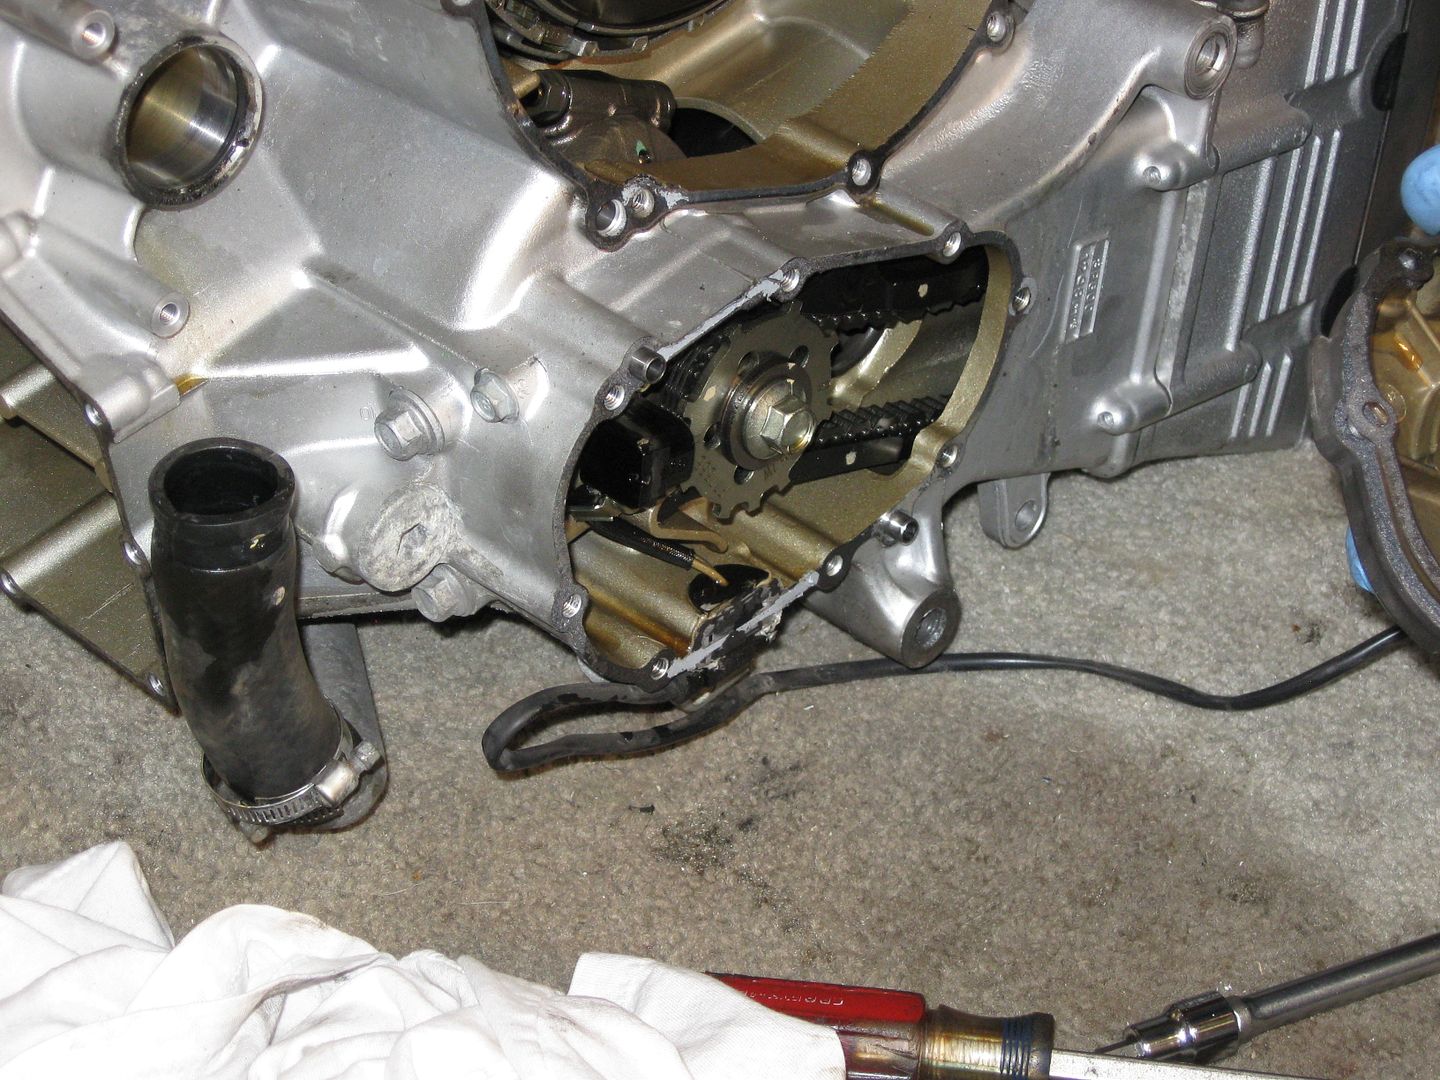
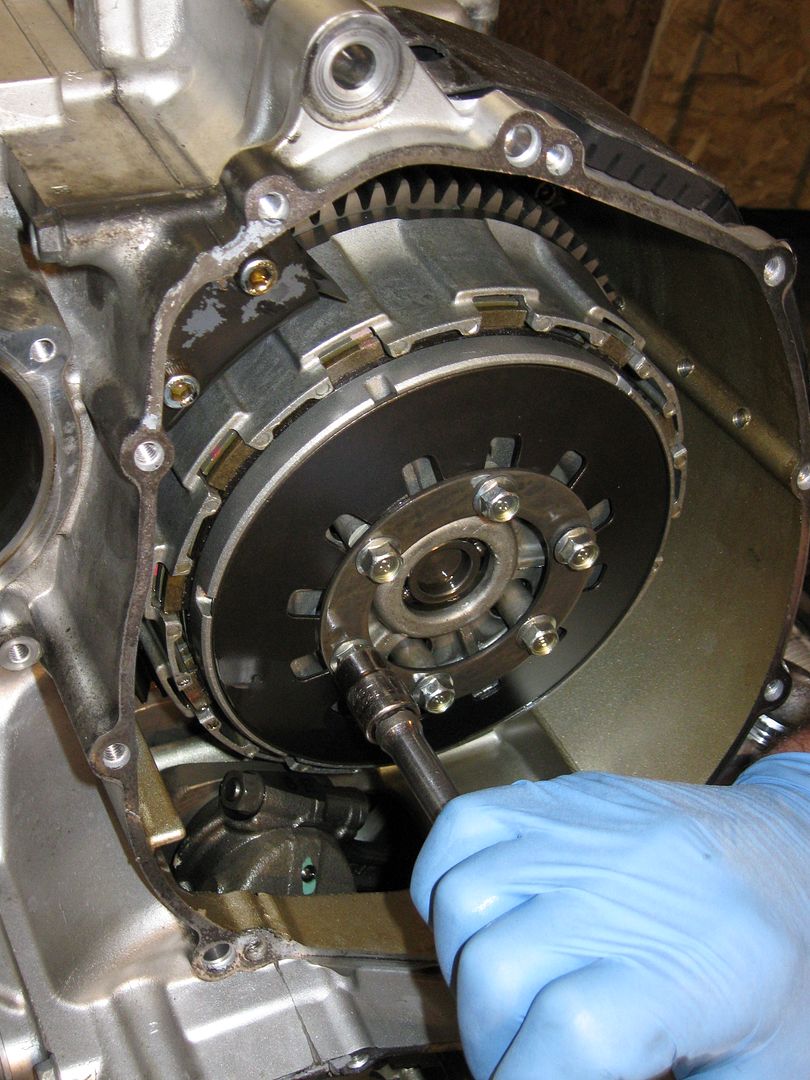
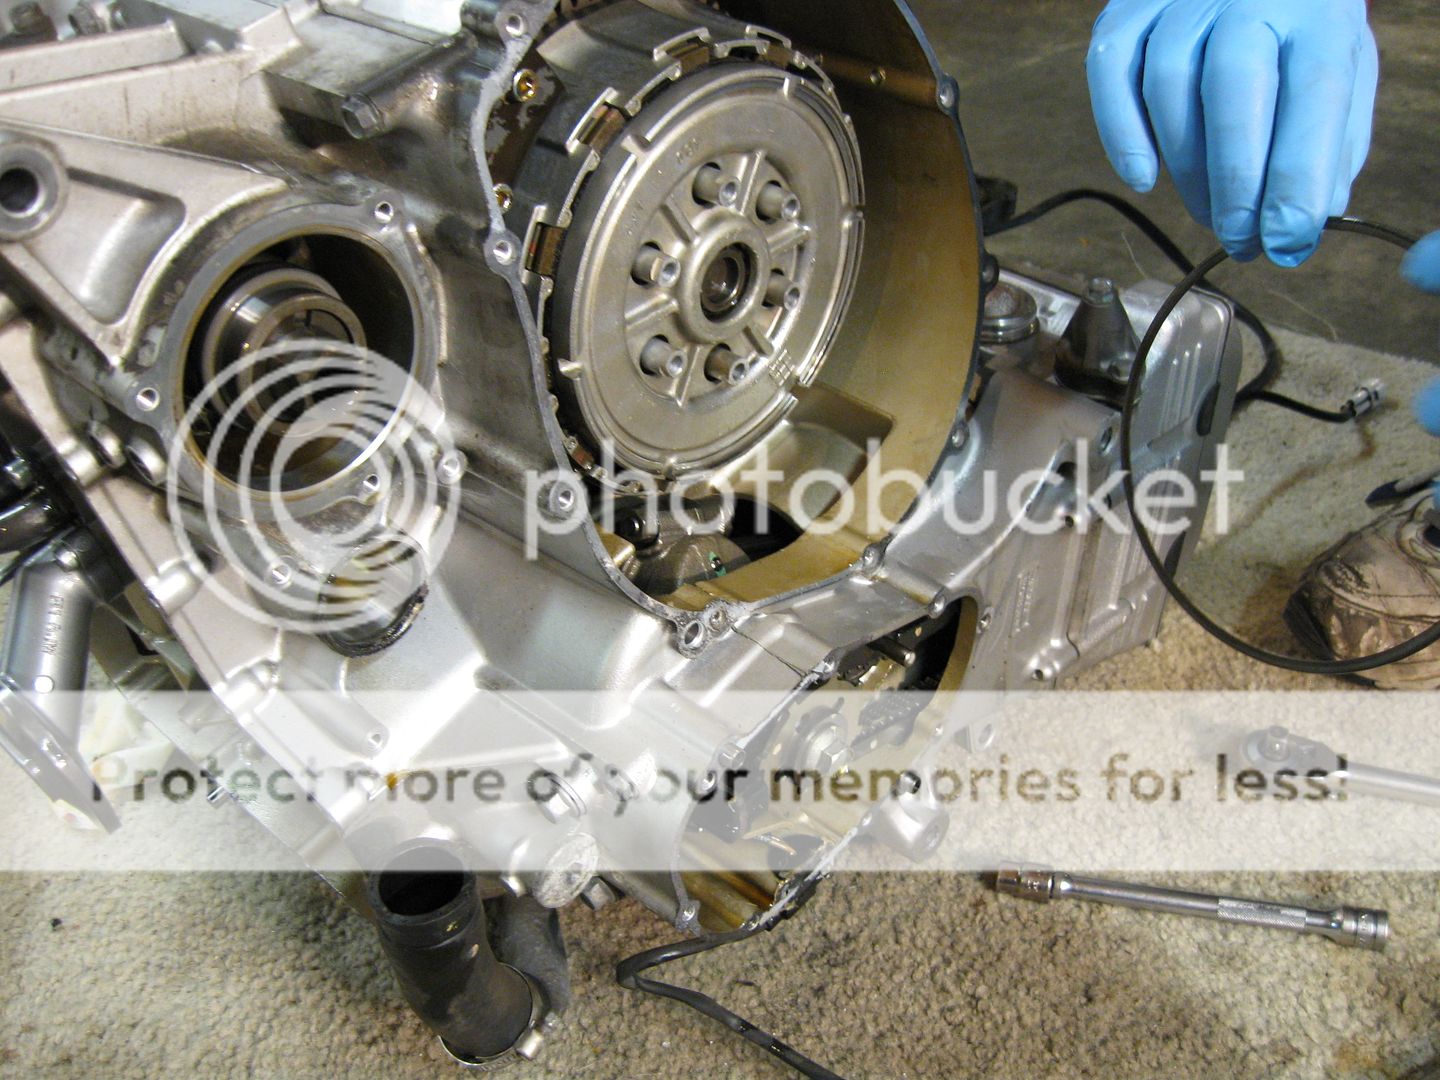
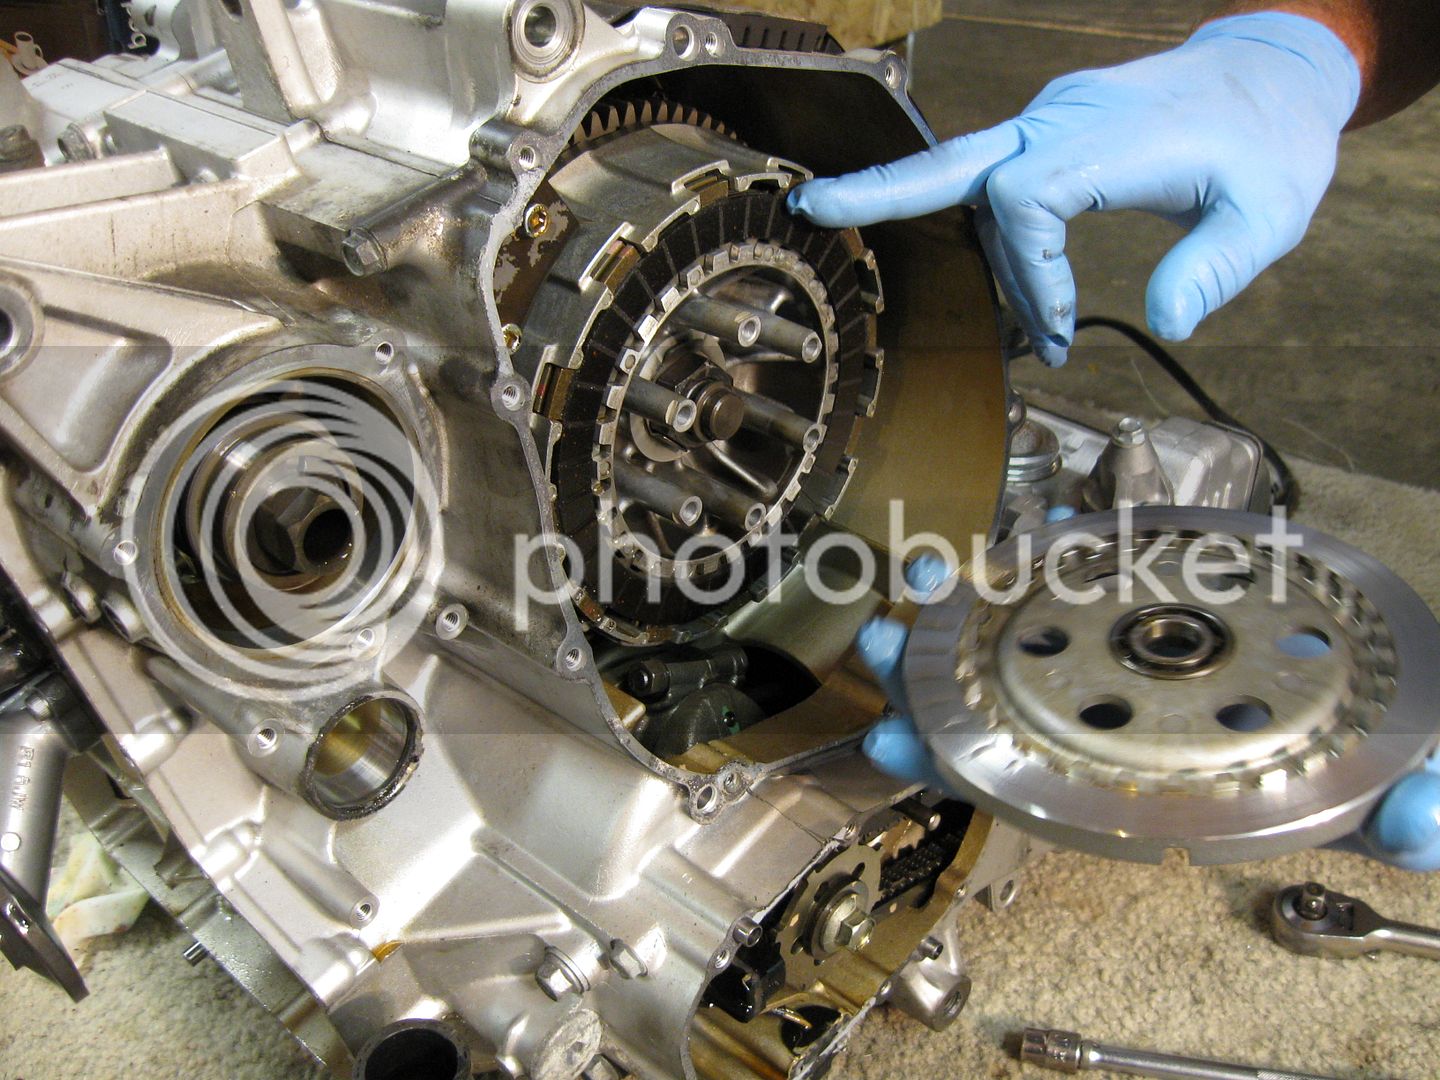
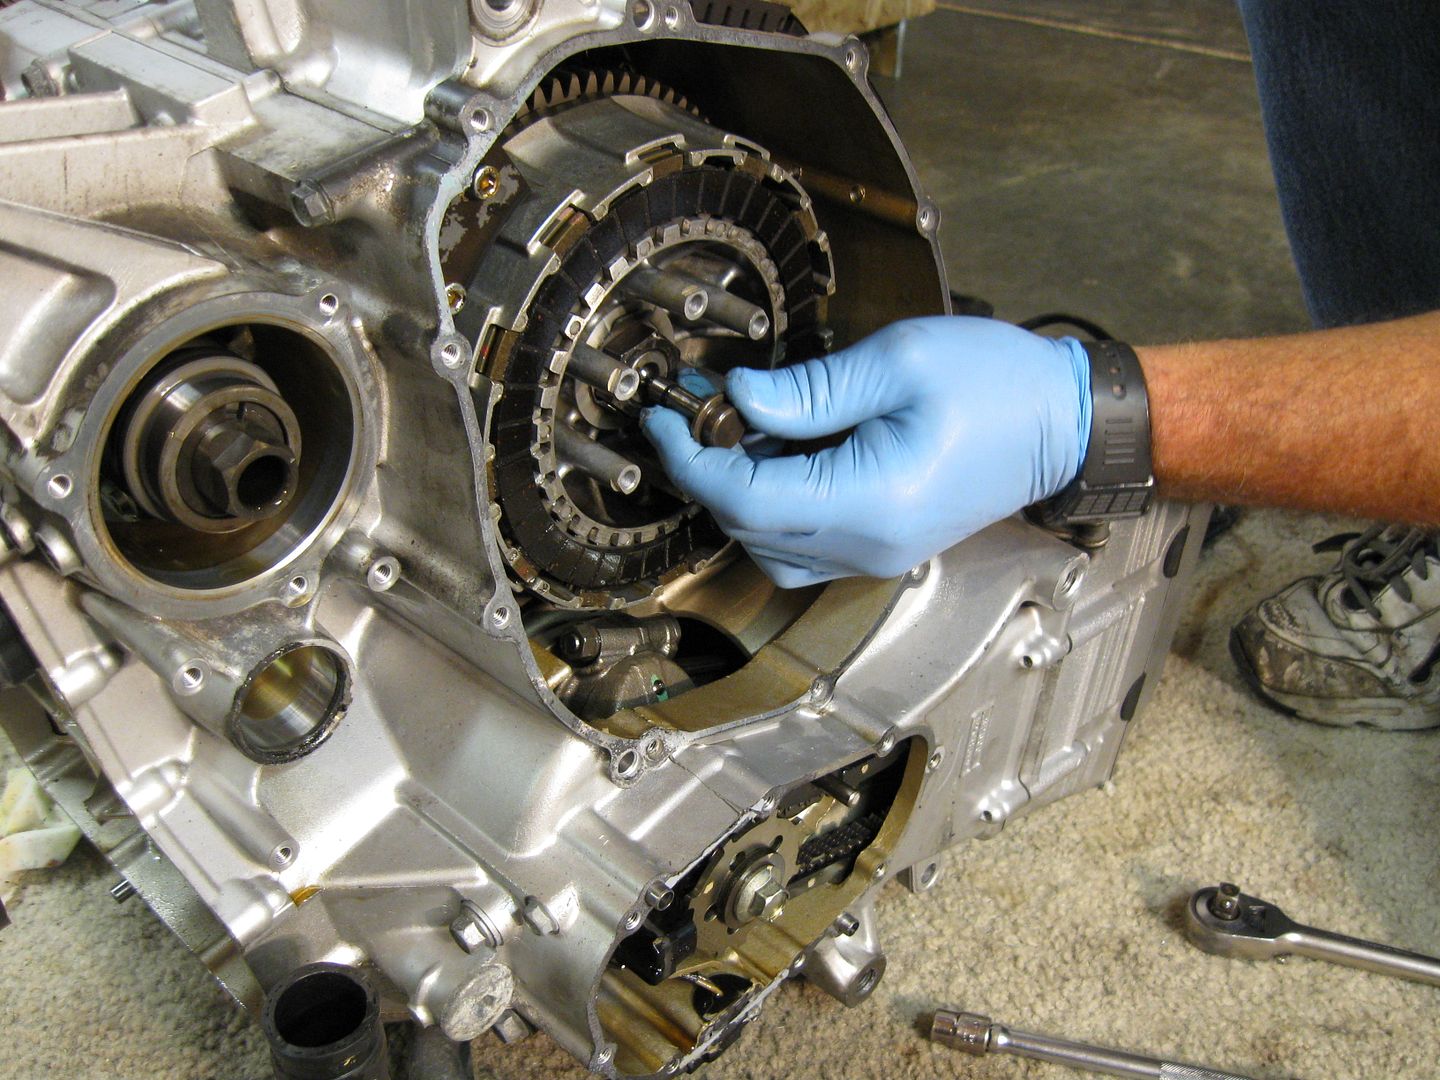
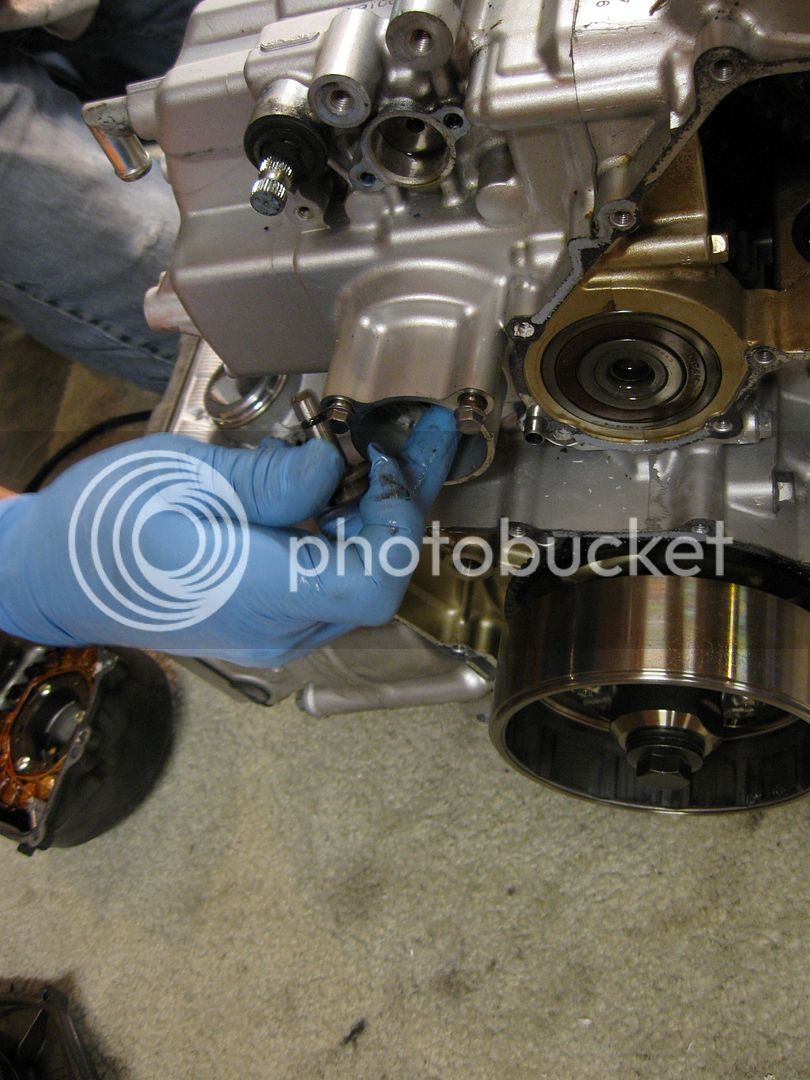
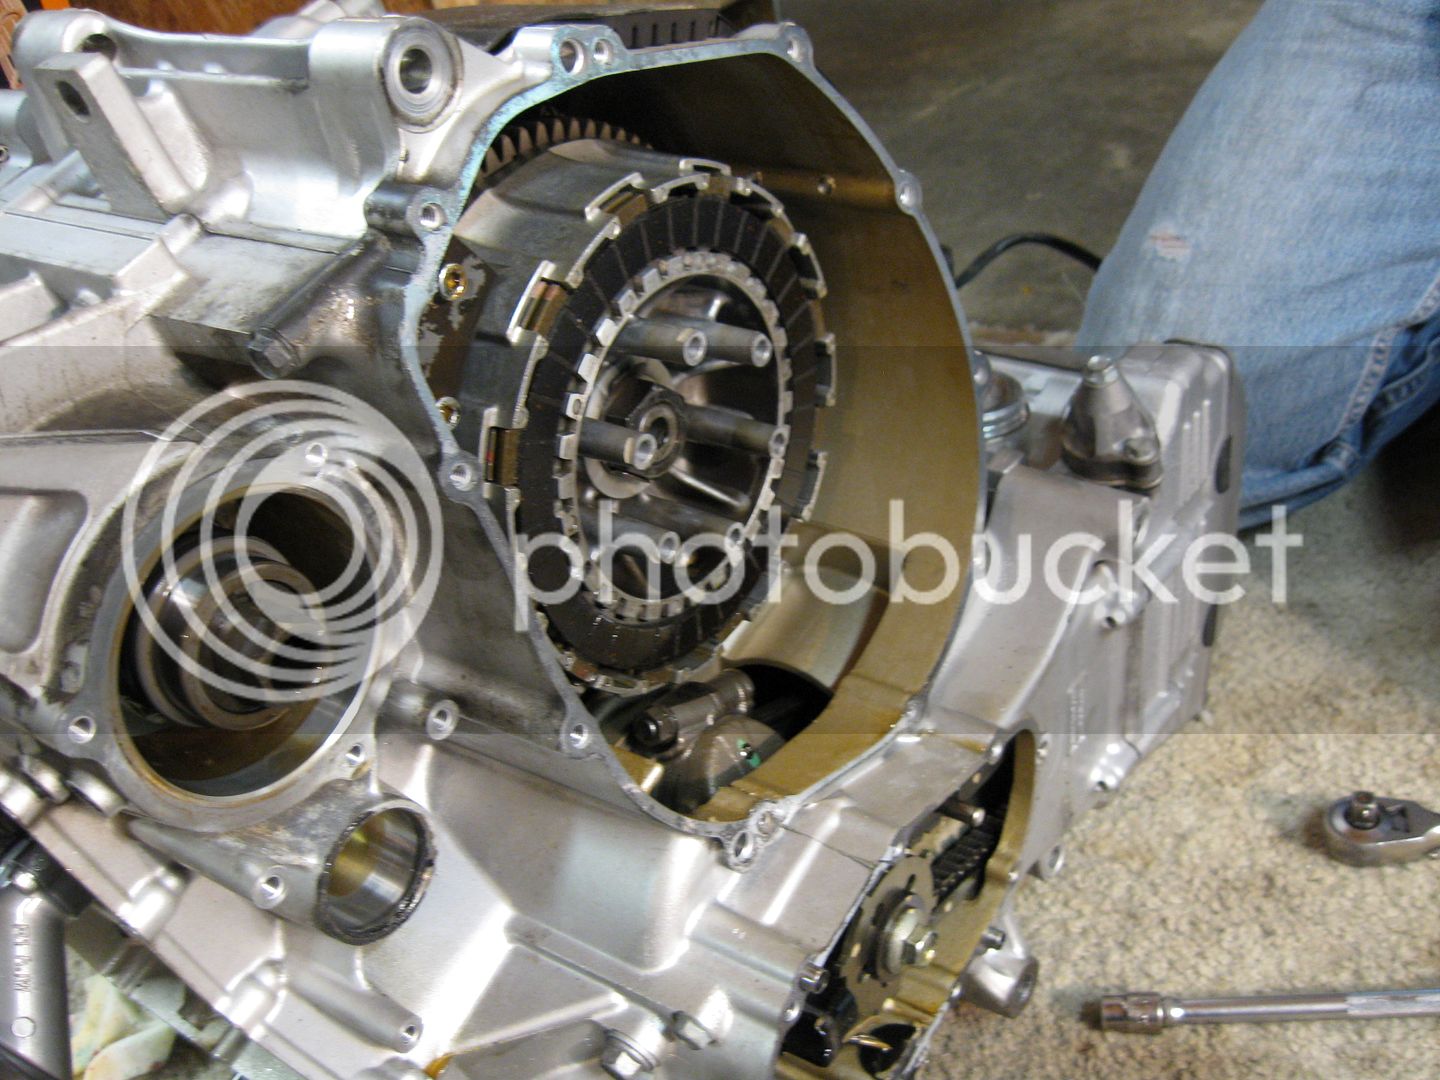
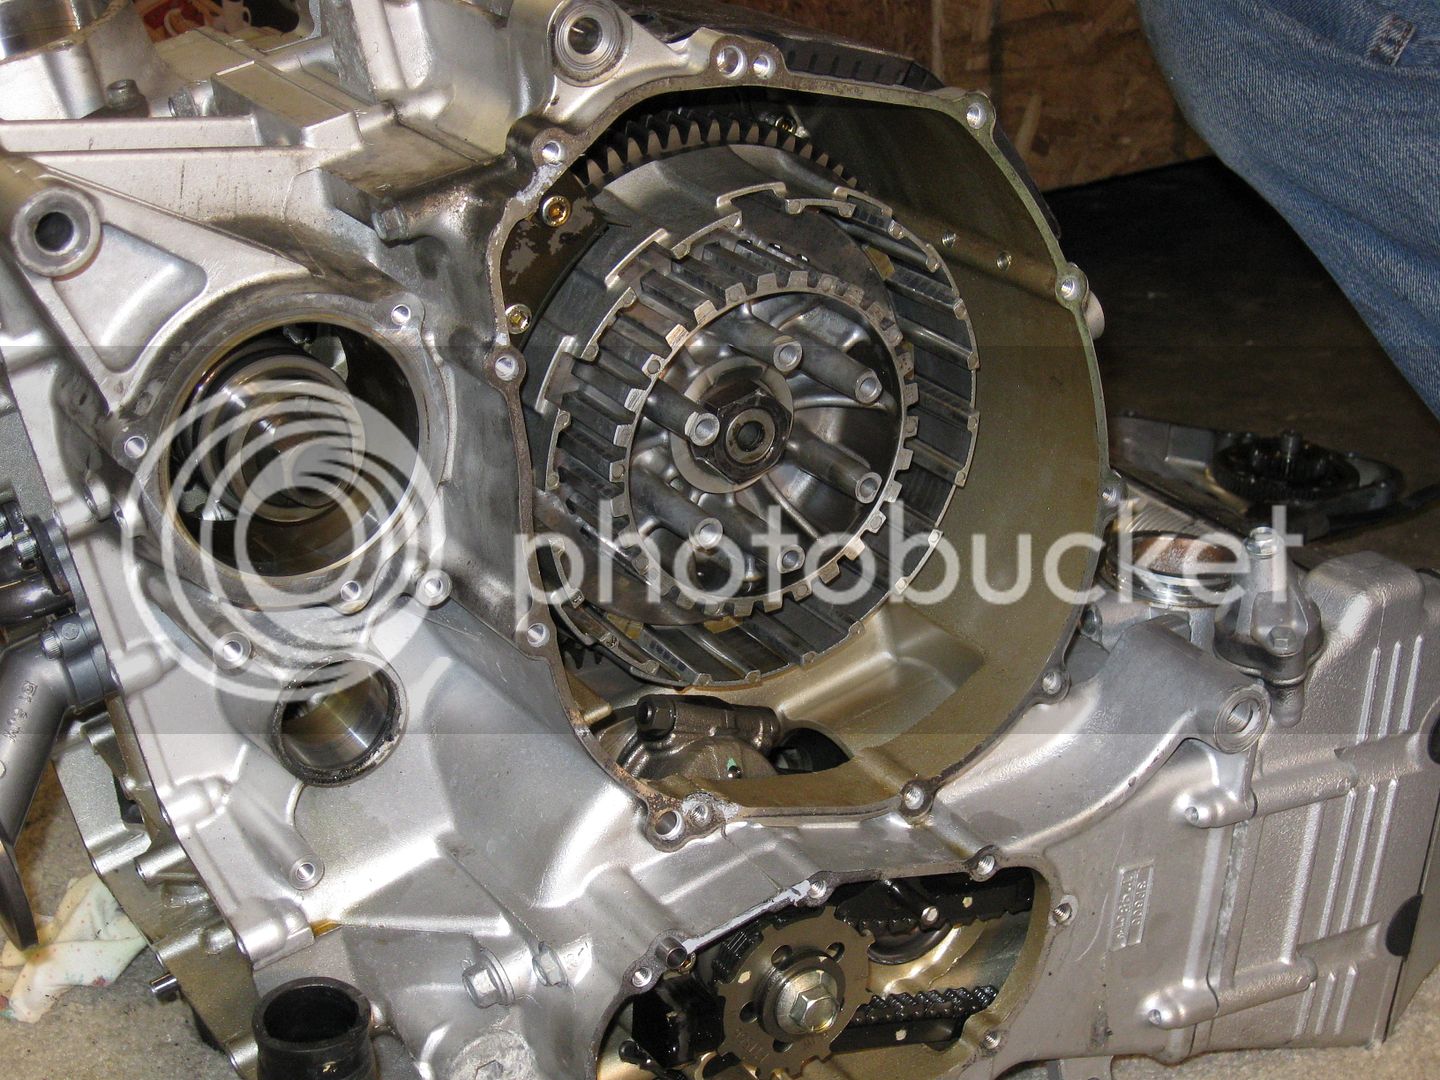
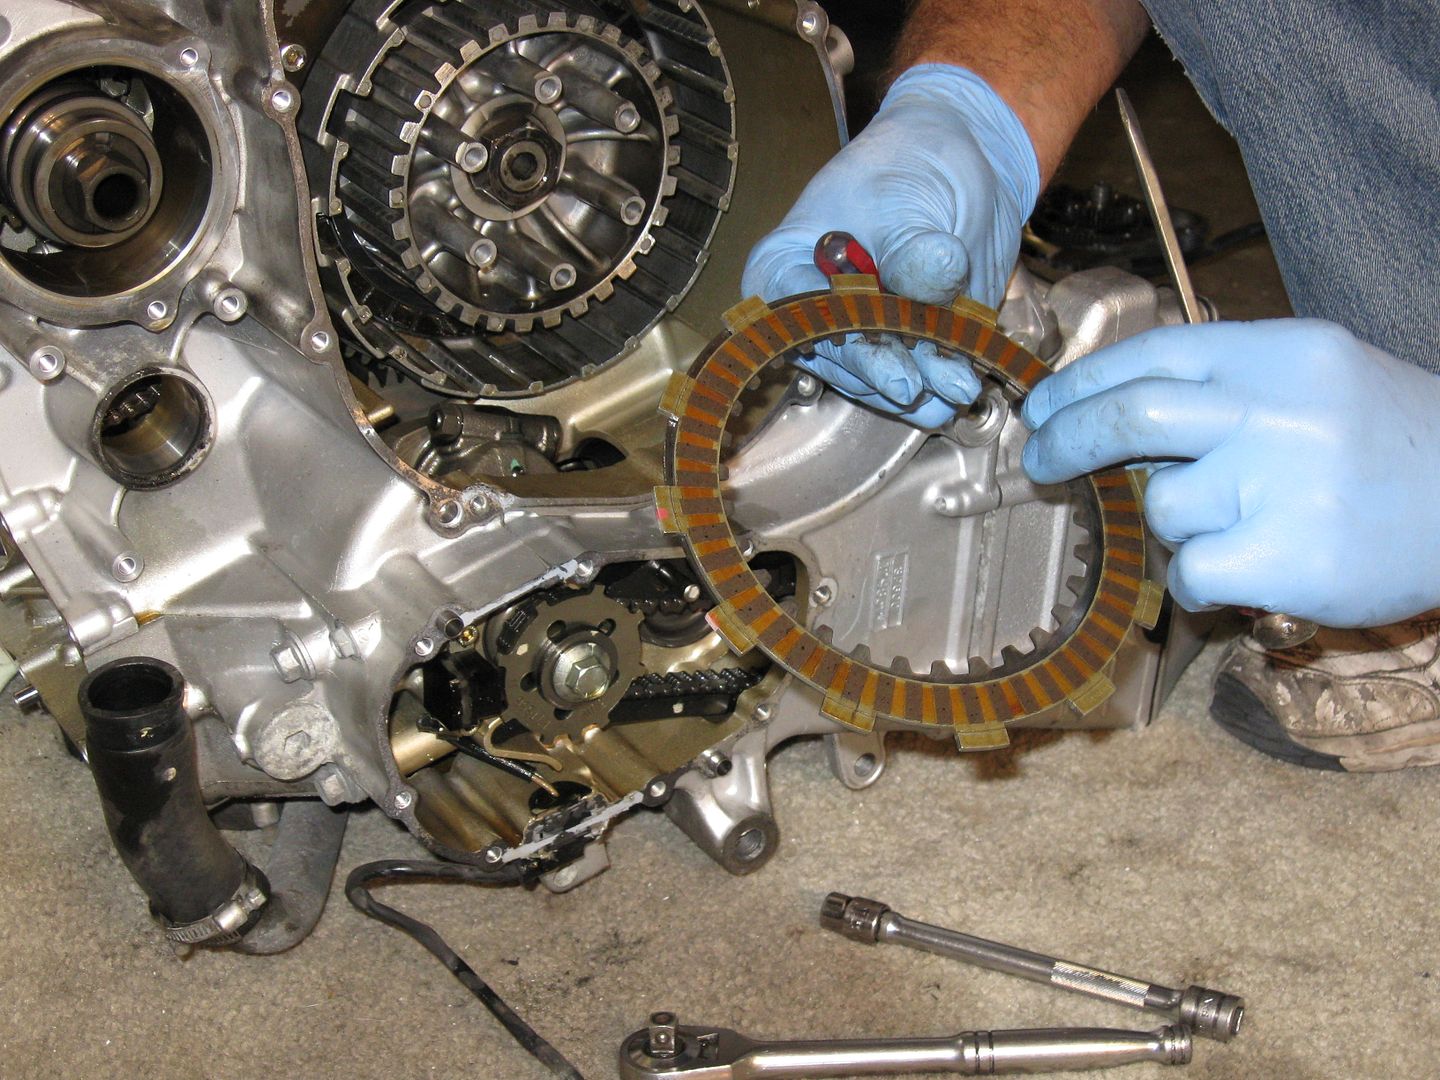
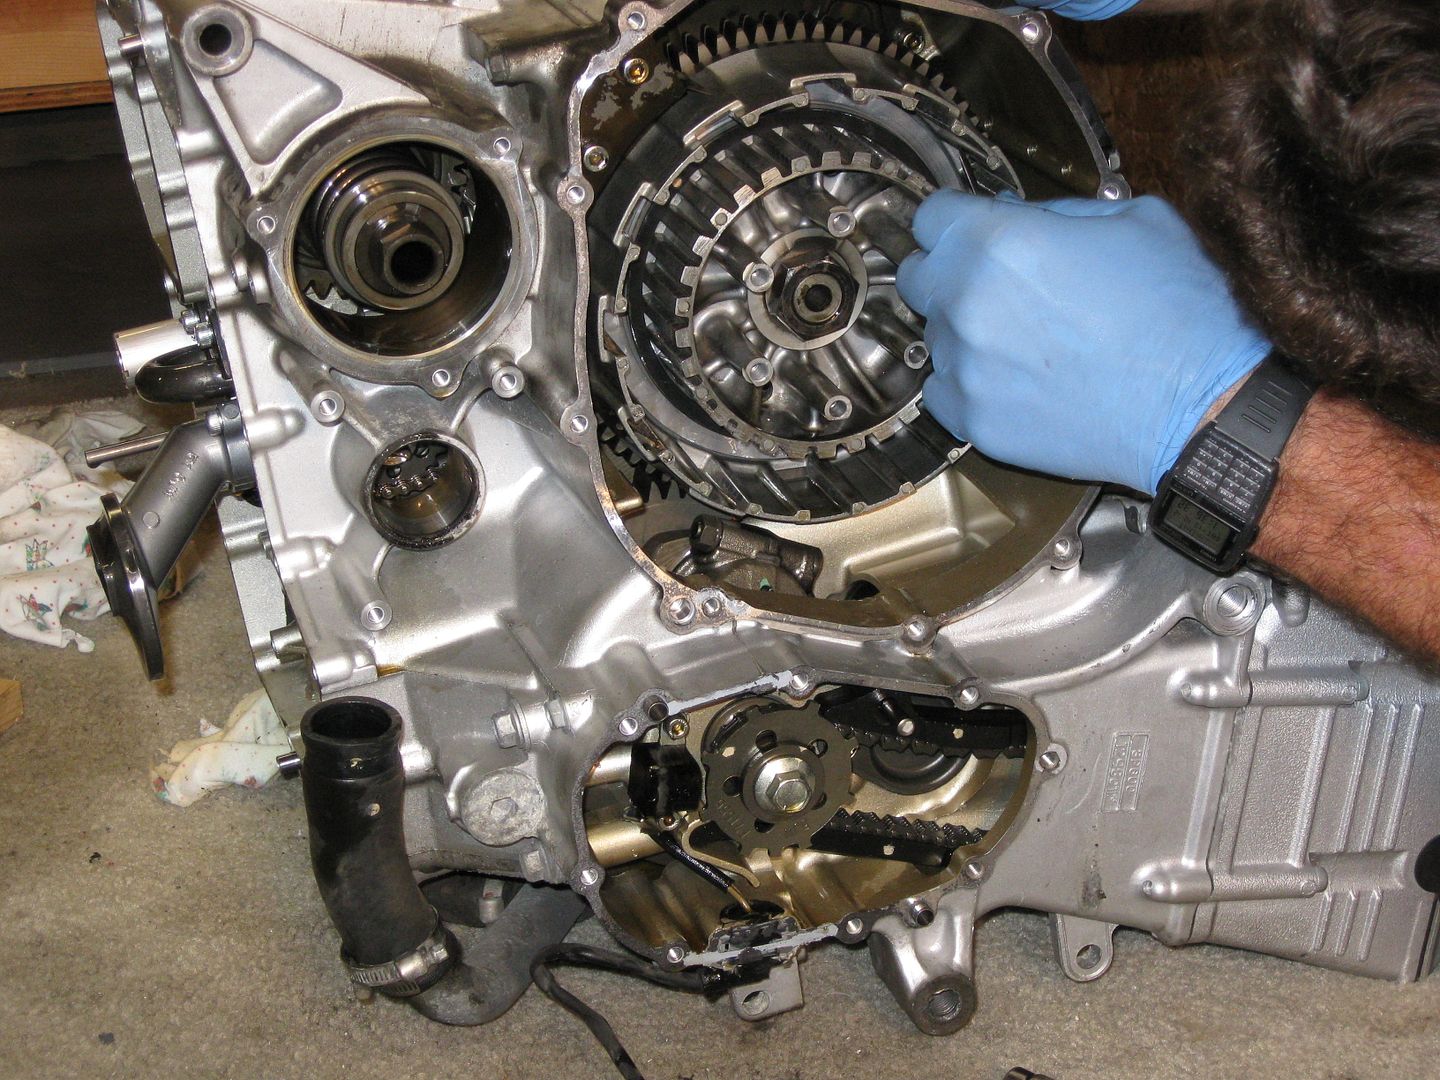
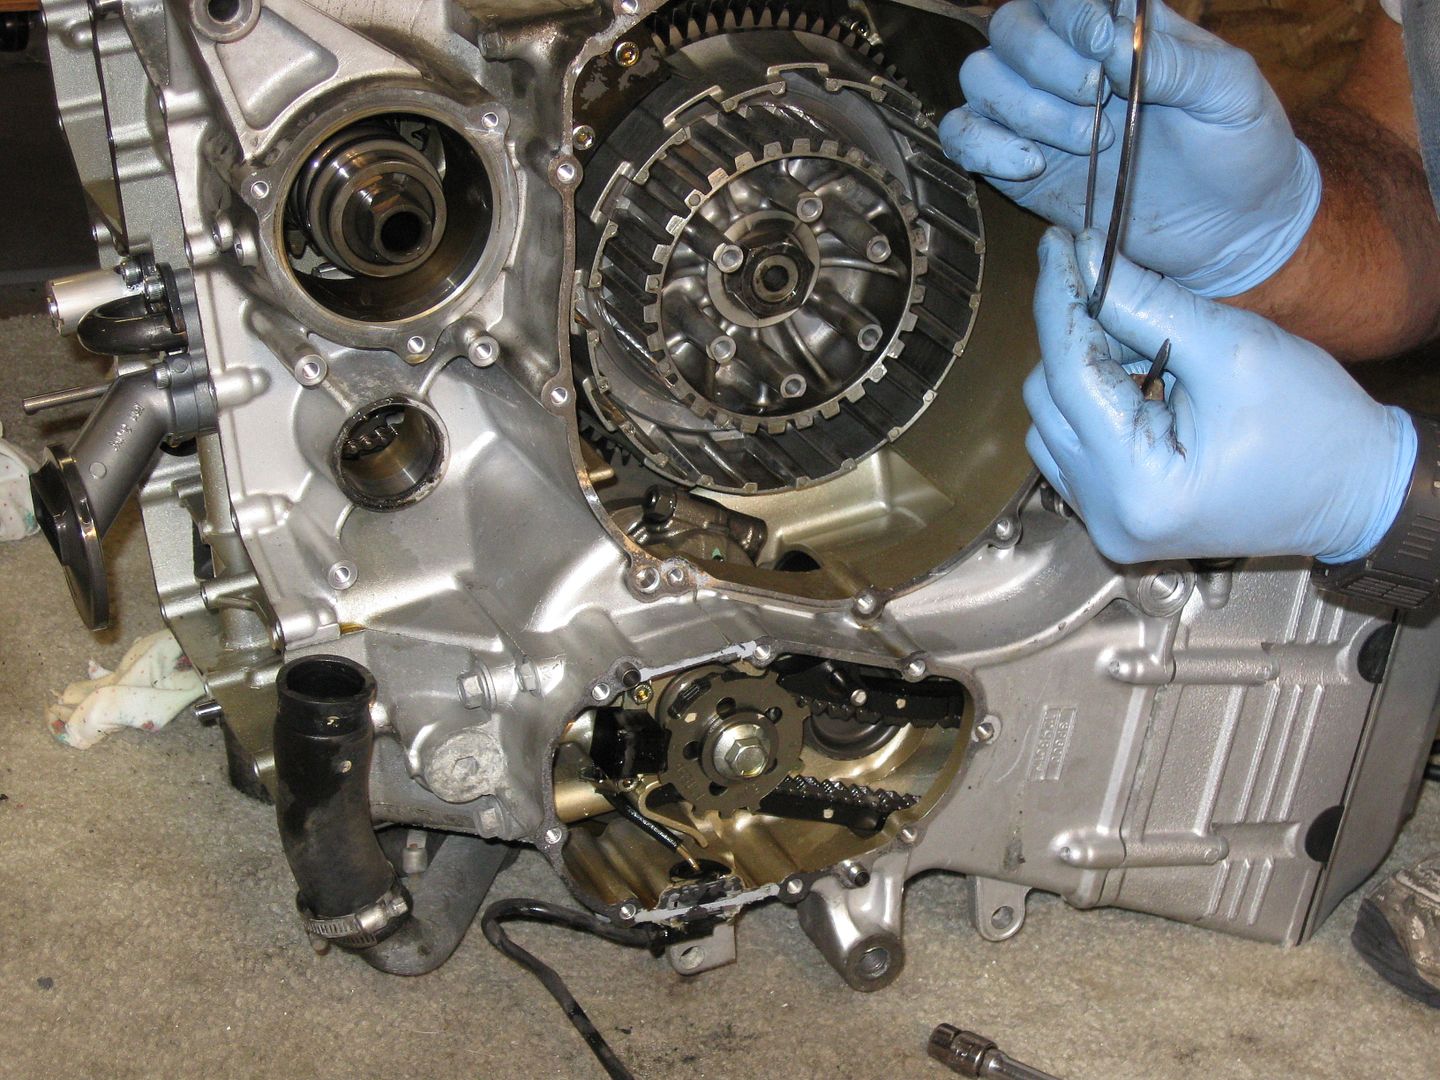
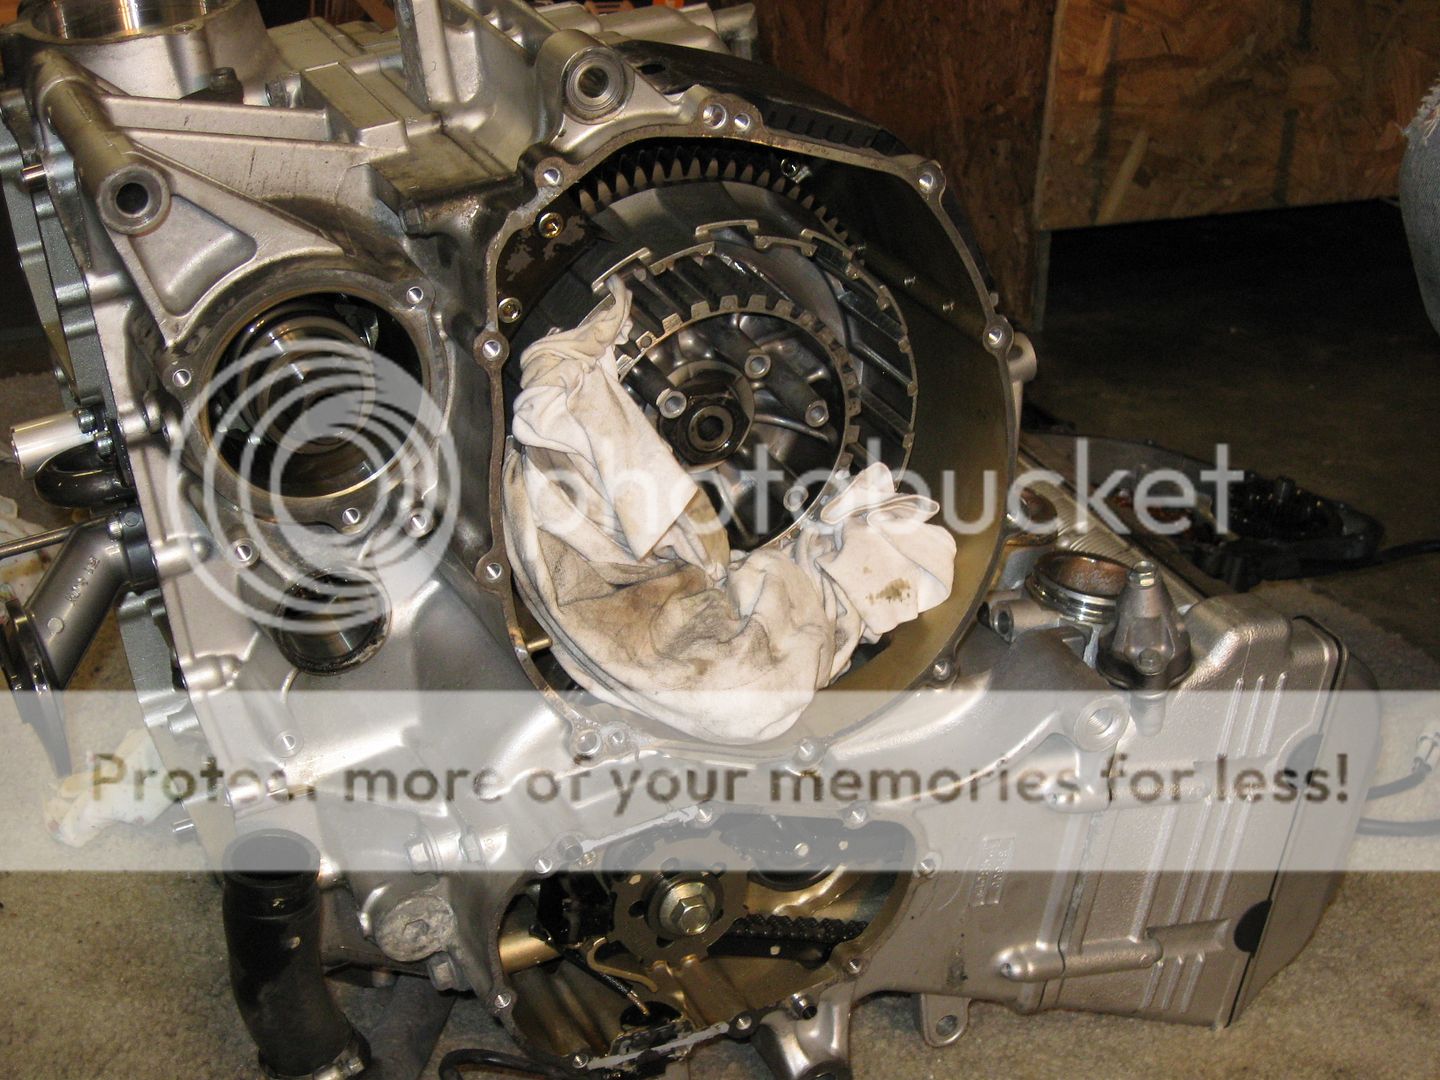
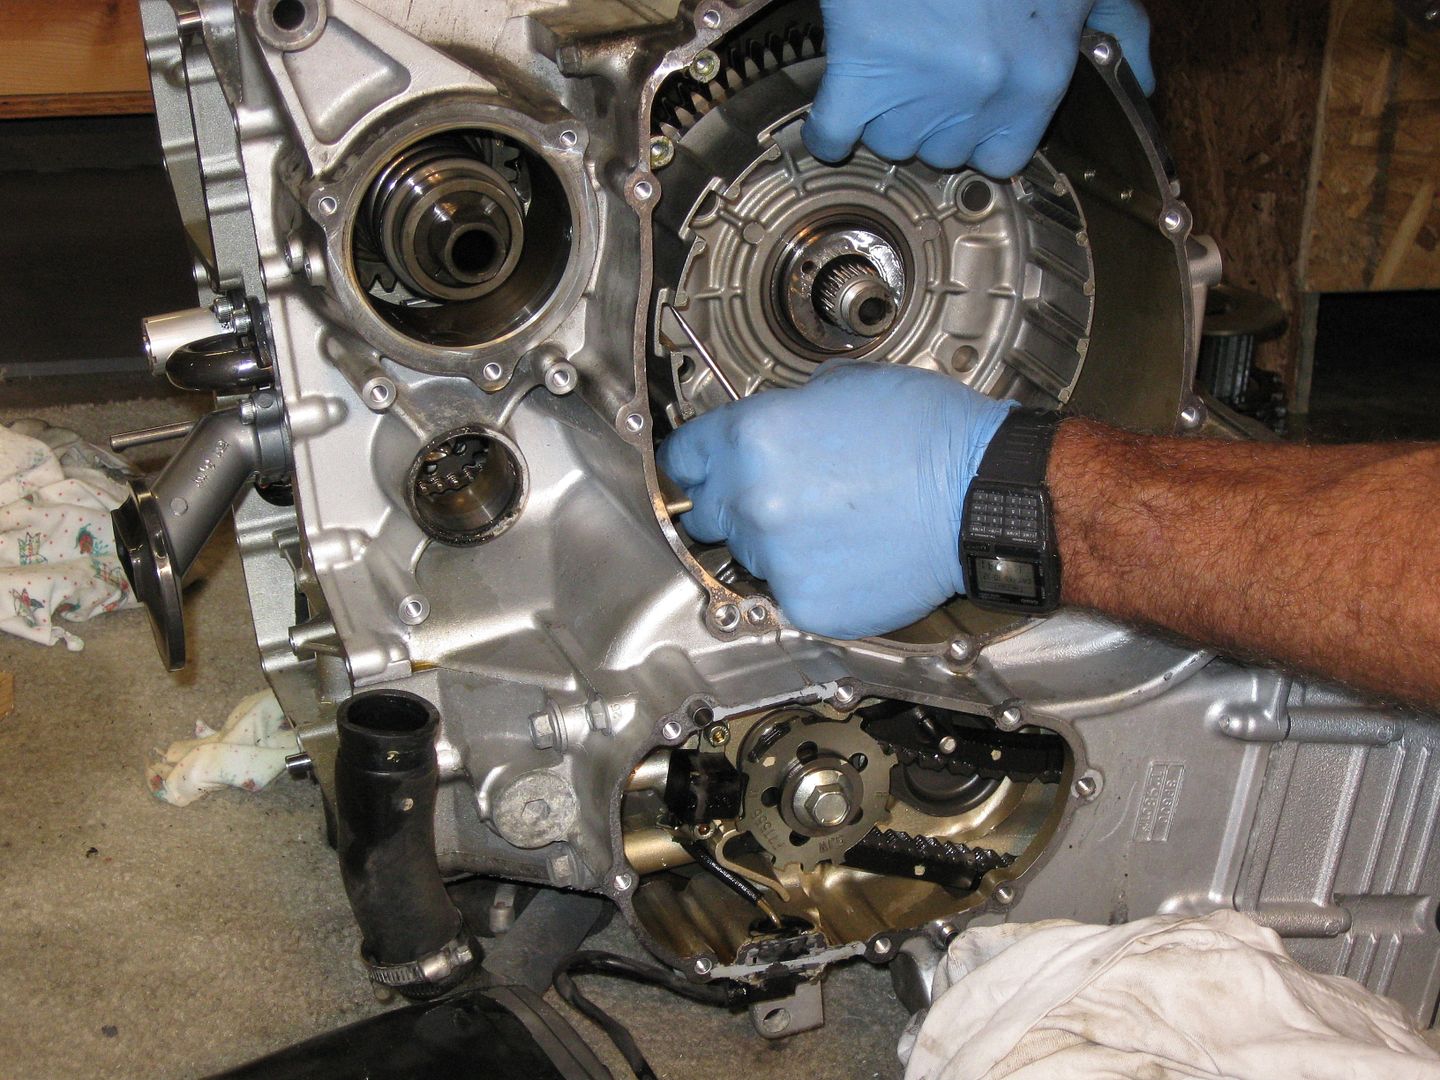
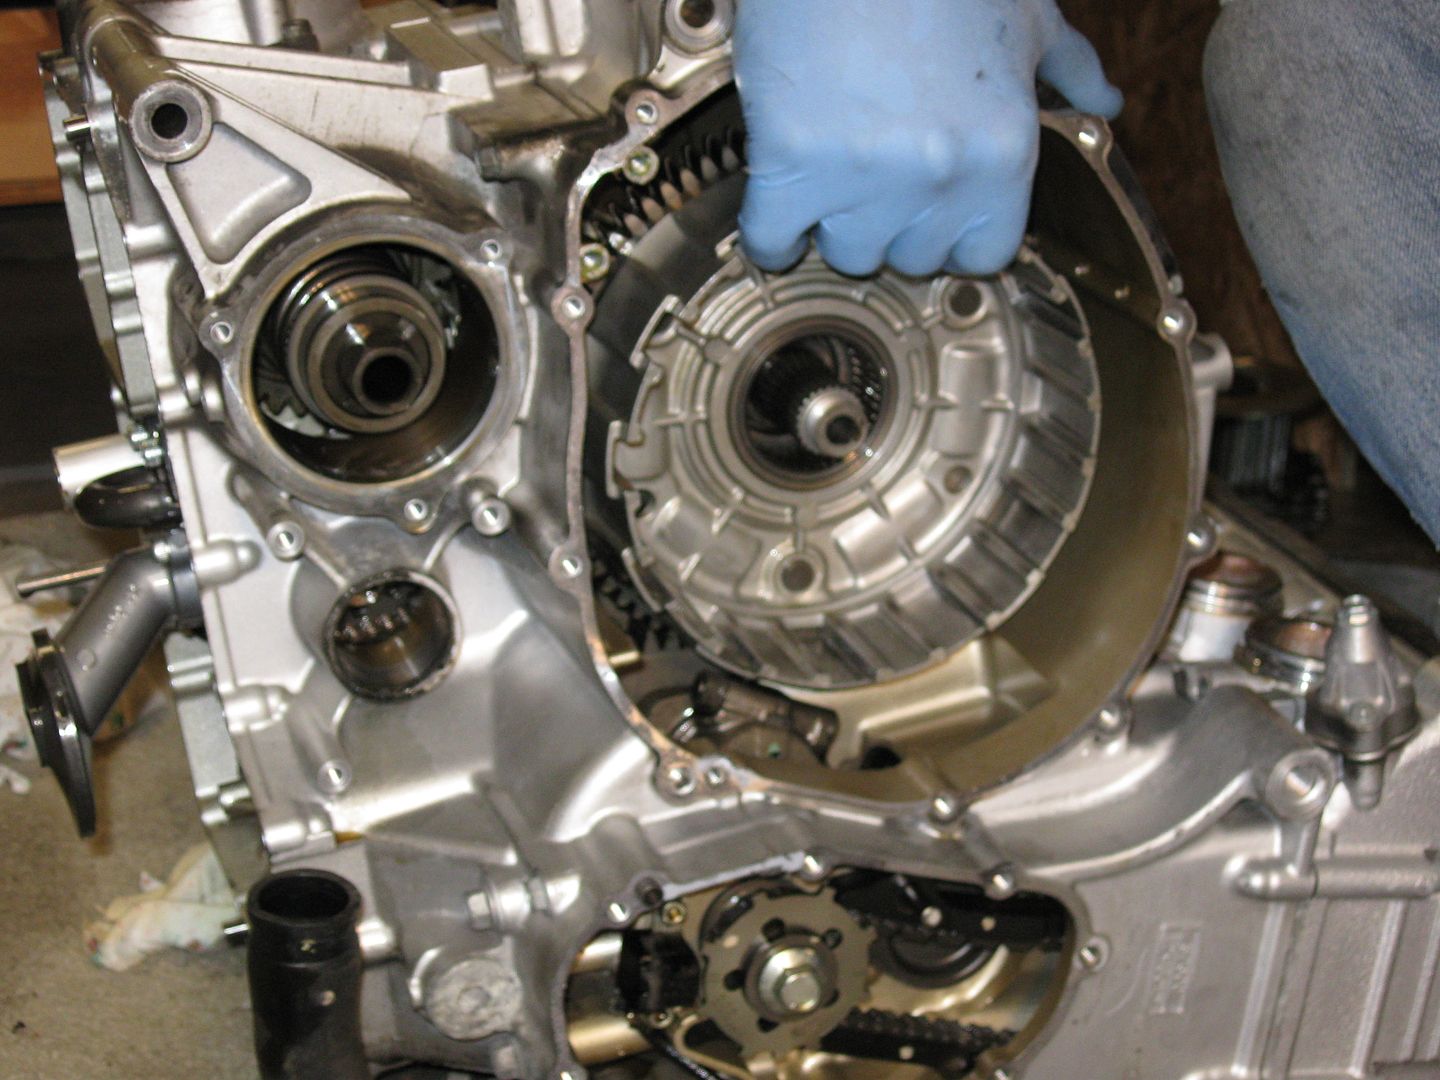
Now things get interesting and ..........
bike.gif


Years ago, I foolishly cracked the case on my GSXR 1100! While trying to remove the clutch basket in order to replace the clutch plates and spacers a simple job. I trailered the bike to a shop that specialized in aluminium welding thinking they might be able to do their work with the motor still in the bike? Wrong! Took the bike home and proceeded to remove the engine by myself and without a manual? I was scared witless but really had no other choices (economics). The case was fixed and I was able to put the bike back together but, it would have been nice to have a forum like this one to rely on! And a friend or two like you obviously have!

 
While your into it this far, go through all of the shock and center stand pivot points.
Noted Niehart... Excellent suggestion! It's easy to get fixated on the ultimate goal of shifting normalcy.
construction.gif
I will take some time and disassemble the rear for sure.

What I'm Jones'n to do is replace the shock! I'm going to keep an eye out for any group buys and do some shopping also. I'd like something better than stock but not race worthy. More of a "touring" shock I guess. ((shrug)) The ZZR1200 shock I put on my Concours was reason for keeping the thing as long as I have (8 years). The stock Connie shock felt like a Harley Hardtail.... well, I've never been on a hardtail but....
rolleyes.gif


(Notification/Reminder: If you haven't tried already, larger versions of the pics can be had by clicking on them. I'm using Photobucket)

Back to the disassembly of the engine.... as I said, things get interesting. As soon as the engine was out and on the floor, Doug dove at it like the FJR had to be on the track for Qualifying Sunday morning! Either that or the keys to (insert your ultimate ride here) were inside and someone said "If you can get them it's yours!".
hyper.gif


So being the good "observer/helper" that I am, I kept the camera in hand and kept out of Doug's way!

Side covers started coming off

FJR154.jpg


Bottom of the oil pan.... I joked with Doug saying "Maybe I should powdercoat that yellow!" - His response was "You would!" - - - - um, no I wouldn't!
bad.gif


FJR157.jpg


FJR159.jpg


I'm surprised he stopped long enough.... I DID feed him! Unfortunately I didn't have beer for him.
fool.gif
Any stock I keep is for him as I don't drink beer. Again, True Friend that he is, he stayed!

FJR160.jpg


With the oil pan off, all sorts of gears and stuff started showing up! I kept noting to myself, 60K on the engine and it looks brand new inside! Well, mostly.... that comes later.

FJR162.jpg


That chain is what drives the oil and water pumps. The oil pickup is that piece with the screen.

FJR163.jpg


Here's a good shot of the transmission gears with one of the shift forks. I took a short video of those moving when Doug was manually working the shifter. I'll get that posted to Youtube as soon as I can.

FJR165.jpg


Another glimpse into the bowels. There's a crank in there and some pistons I believe! Should be 4 of'em.... yeah. 4.

FJR168.jpg


Last shot for today is of the Oil pan. That gold piece is the oil level sensor so I'm told.

FJR170.jpg


I will try to get more pics posted soon!

 
Before you get too much further, try referencing these pictures from when I tore mine down: https://s75.photobucket.com/user/leavy1/library/Bike/FJR%20Transmission%20Disassembly

If you read the service manual, it'll tell you to completely disassemble the engine to get to the transmission, cylinder head off and all. I can tell you from experience that to split the case you don't have to remove the

- Oil cooler*

- Middle gear* (the one that meshes with the output gear you've already removed)

- Water pump

- Bearing cover immediately aft of the water pump.

- Clutch Slave cylinder (sorry 'bout not telling you sooner)

* Check out the pictures, there are two or three bolts that appear to require removal of these components, but their threads can be disengaged from the top case half without needing to remove them. Only difficulty is you'd need strange extensions and even stranger maths if you wanted to apply the correct torque to these bolts, as you wouldn't have a direct shot from above the bolt head. I just gave mine a 'good & tight' when it came to reassembly, there are after all 31 bolts holding both case halves together.

This should save you some time and also some money on gaskets & such.

Along with the generator cover, I'm pretty sure you're going to have to pull the clutch out entirely (to disengage the oil/water pump drive chain) and in order to get the motor back in the frame, I think you'll need to pull the rear wheel, gear, and drive shaft. Or alternately you can prove me wrong
winksmiley02.gif
.

What I'm suspecting you're going to find is the logical conclusion of what would happen if your bike's previous owner didn't fix the 'popping out of 2nd gear' issue that some have had; a broken 5JW shift fork. The pictures of my bad shift fork can be seen in the above link, and if that were to continue, I imagine it would break the fork eventually, and then you've got an uncaptured gear that can slide on the splined shaft when you lean the bike in either direction.

Did you find any shrapnel in the oil pan when you pulled it? The oil pump pickup screen looks clean, so I doubt much of anything made it into the filter.

Keep fuckin' that chicken!

 
Keep fuckin' that chicken!
I'm not sure how to take advise like that.... especially from someone named "..GoatBoy"
fie.gif
goatee.gif


Thanks for the info. Great stuff for comparison!

Your shift fork is interesting. No stuff in the pan or screen thankfully.

I should be able to post more pics today at lunch. Stay tuned.

 
Well lunch time update didn't happen. So let's make it a dinner update:

Stator cover with starter gears...

FJR173.jpg


Starter gears removed...

FJR174.jpg


Here's the other half of the charging system.....

FJR176.jpg


Gears gears gears - They're everywhere!

FJR178.jpg


Let's take a look on the other side shall we?

FJR179.jpg


Busting into the Clutch Basket (and it's innards):

FJR180.jpg


Yes, as stated earlier, the clutch has to come out for the oil/water pump chain. The PO stated the clutch may have been slipping, so it was coming out anyway for a measurement.

And we MUST keep time! The timing chain is exposed here. That give me an idea! Hey! Why don't I replace the CCT with the "blue dot" version?! heh, Yep. It's on my list along with the gaskets that need replacing.

FJR184.jpg


Aaaannnd dinners ready! More to come!!

 
Last edited by a moderator:
Note that you have the coveted STOCK stator and not one of those POS aftermarket stators. The stator looks fine, quite typical browning.

If you have to remove the rotor, now will be the time where you can put something in the gear train to hold it while you use your 180 psi 120 psi air gun to try to remove the nut, which is the easy part. To remove the rotor off of the tapered shaft don't even fool around, go straight to a tool rental place and pick up a large 3 bolt gear puller (with grade 8 bolts if possible). Prepare to sweat and swear. Apply lots of pressure and use little taps, it will come off with a Big Bang. The magnetic rotor will not like heat or hammering. Here is to hoping that what you are doing won't require you to pull the rotor.

 
Last edited by a moderator:
Tummy is full!

No need to pull the rotor ionbeam.... thanks for the info though! You know, a lot of this stuff you guys are adding/helping me with (if not already) could be added to a "How To" or FAQ.

Now where was I? Oh yeah! Staying out of Doug's way and taking pictures!

Working on getting the clutch out

FJR186-1.jpg


The bolts are removed, but don't go yanking it all out yet. Just top.....

FJR188.jpg


Then this ring comes off -

FJR189.jpg


Next the cover to expose the clutch plates (and steels)

FJR190.jpg


Next the shift shaft comes out....

FJR192.jpg


FJR193.jpg


So there's this big nut in the center..... He needs to come out! But not yet...............

FJR195.jpg


.......Let's get the plates out.

FJR197.jpg


FJR198.jpg


FJR199.jpg


The clutch plates measured out just about 50% used. Definitely not bad enough to slip. At the end, there's another ring -

FJR200.jpg


So let's get this nut out!

Just torque it out! Right!?!?
moil.gif


FJR201.jpg


Ummmmmmmm-m-m-m-m-m-m-m-m No! You stuff it with a rag or shirt or something (What? NO I'm NOT putting the shirt in the washer Honey!!
hypocritesmiley.png
)

FJR202.jpg


So I had to put the camera down... well, kinda and get the air tank and gun for Doug - So here I'm dragging the tank over after plugging it in. Doug waits (sort of) patiently.
no.gif


FJR203.jpg


Then Bpbpbpbpbpbpbzzzzziiiing! Off comes the nut! Almost quicker than I could snap a pic with my little Point-n-Shoot camera.

FJR204.jpg


Give the basket a wiggle and get that center spacer part out.

FJR205.jpg


FJR206.jpg


Out comes the basket! Hey there's little springy things behind there!
dirol.gif


FJR207.jpg


Whew!

I need to stop there for today. I'll have more hopefully later this week.

 
Last edited by a moderator:

Latest posts

Top