Installing Audiovox Cruise Control

Yamaha FJR Motorcycle Forum

Help Support Yamaha FJR Motorcycle Forum:

This site may earn a commission from merchant affiliate links, including eBay, Amazon, and others.

I'mAllIn

Well-known member
Joined
Feb 6, 2006
Messages
182
Reaction score
0
Location
Piperton, TN
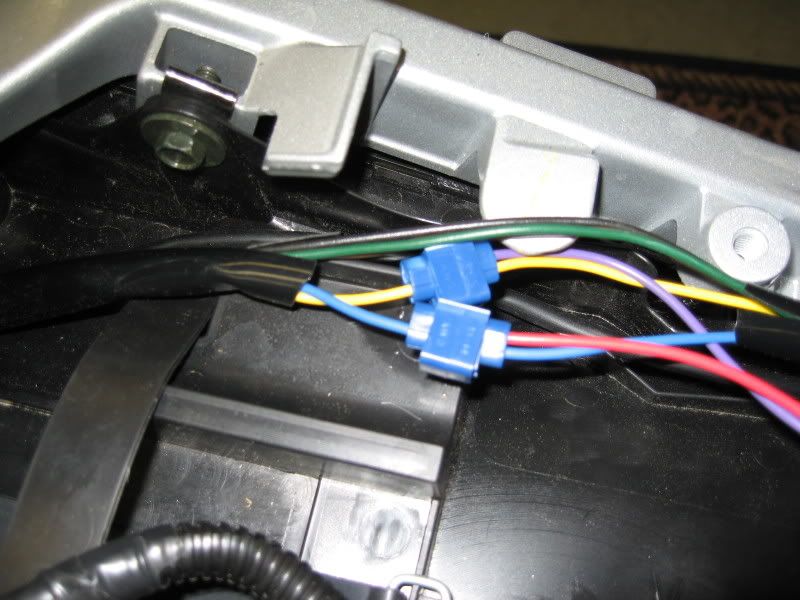
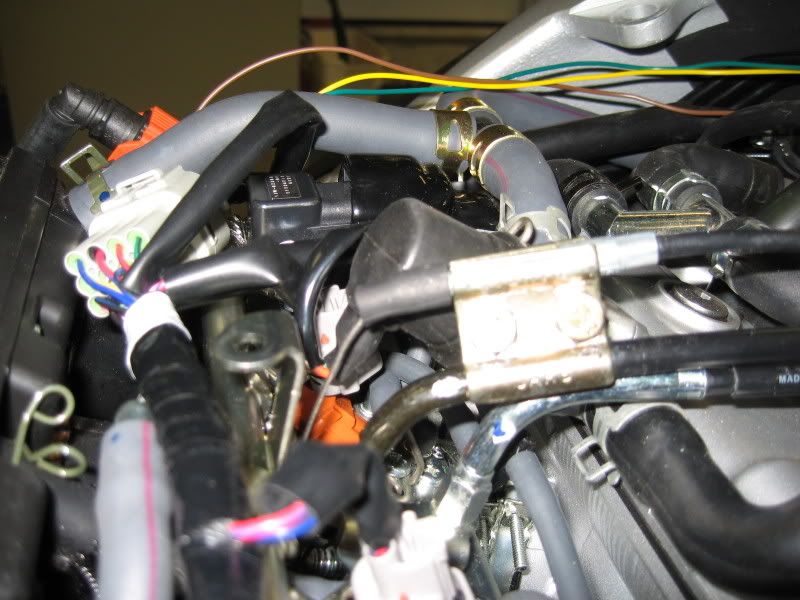
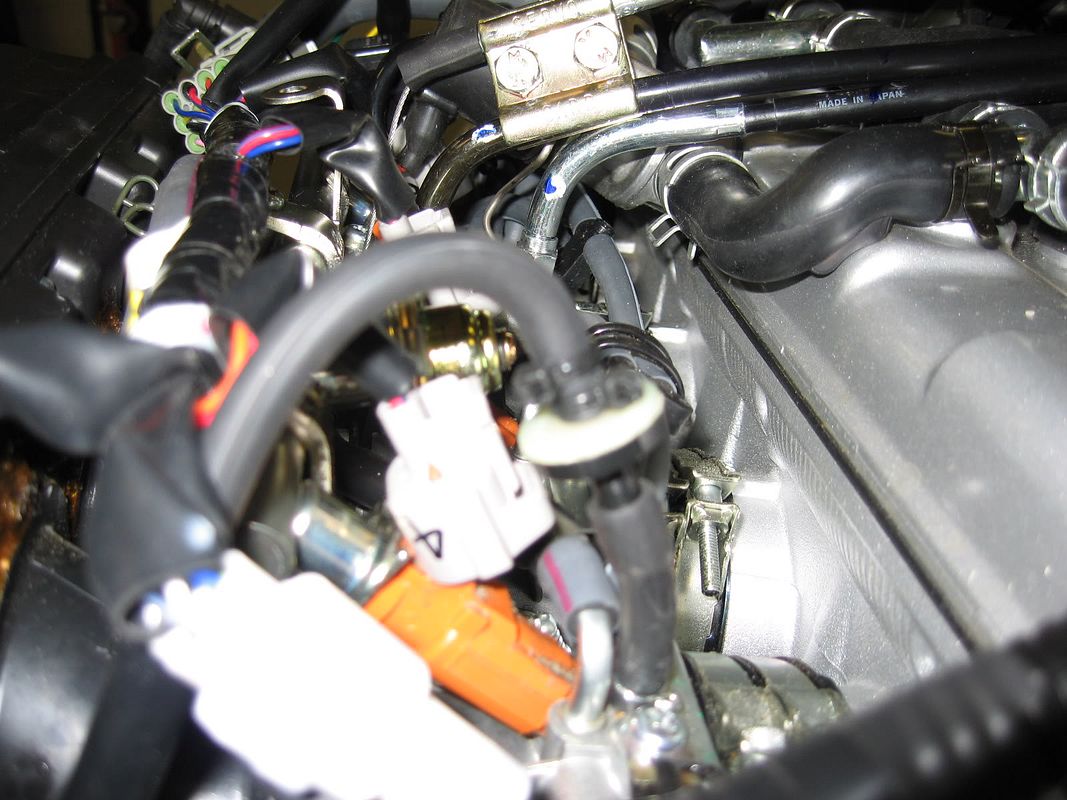
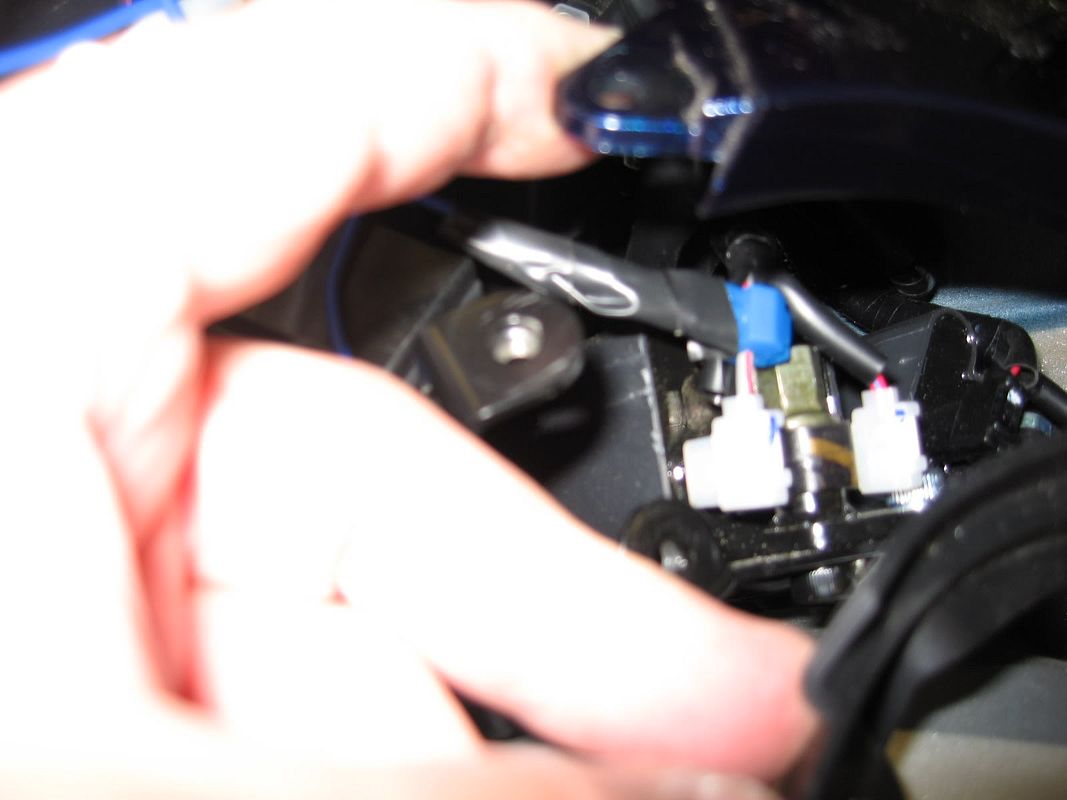
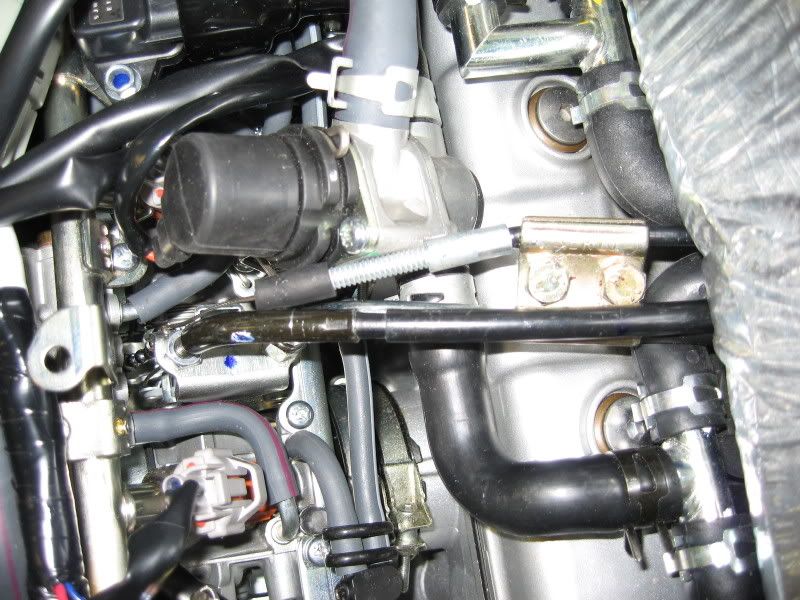
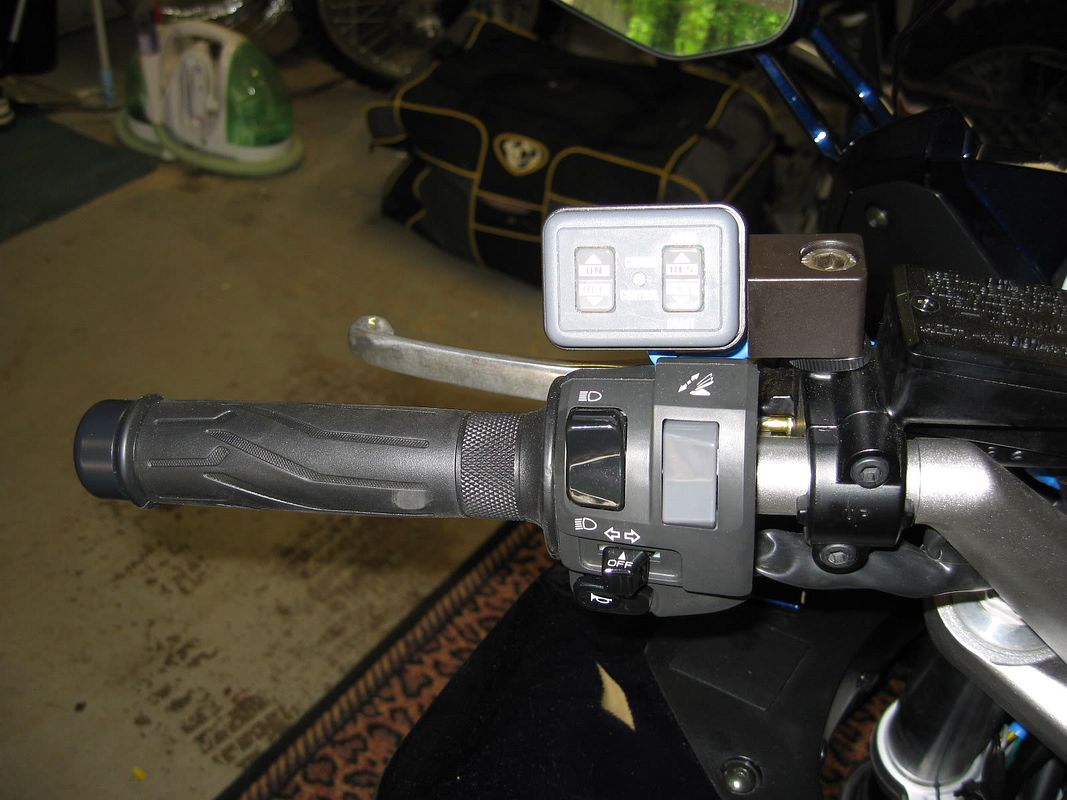
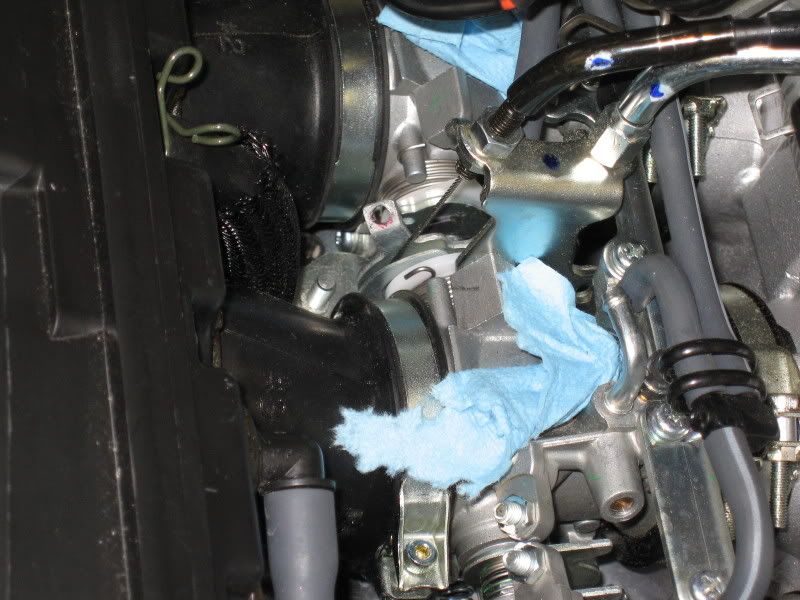
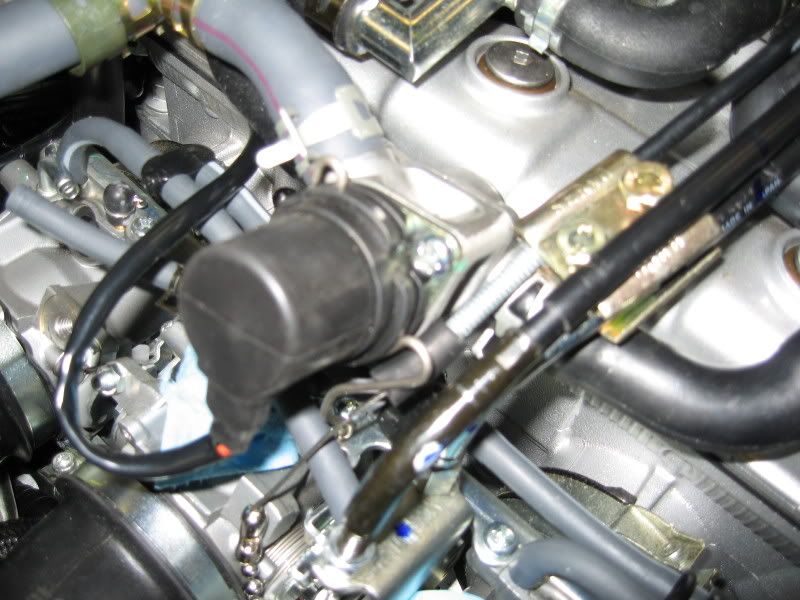
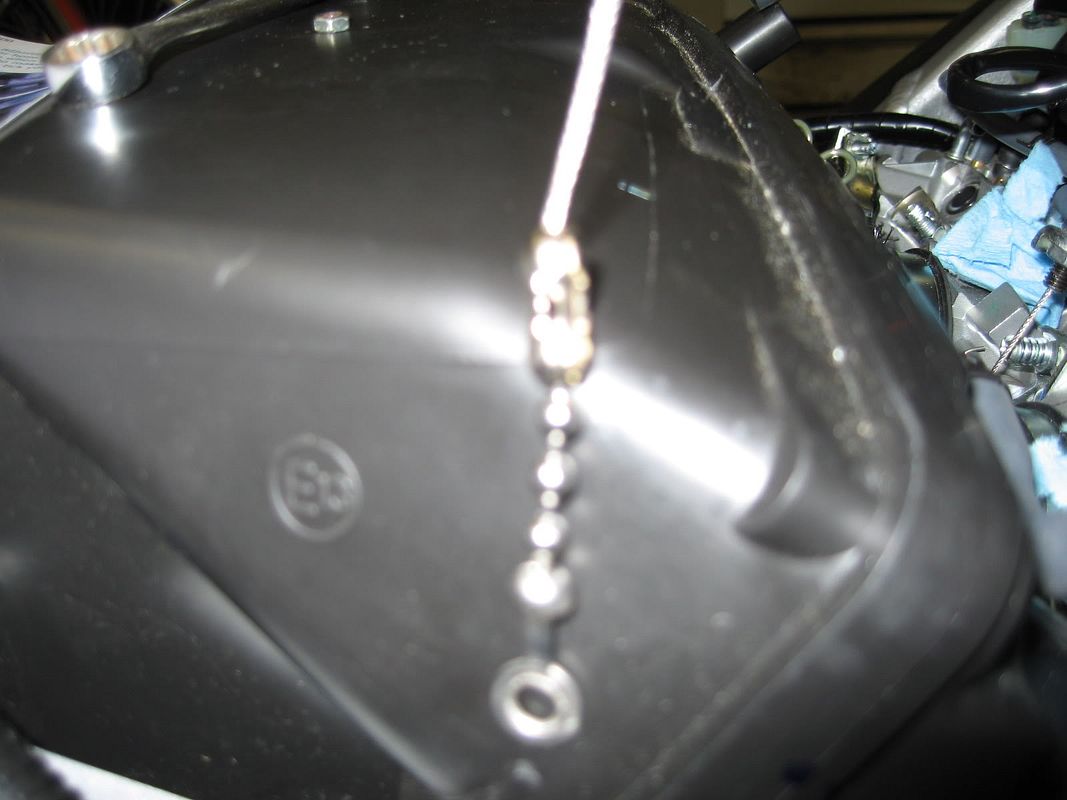
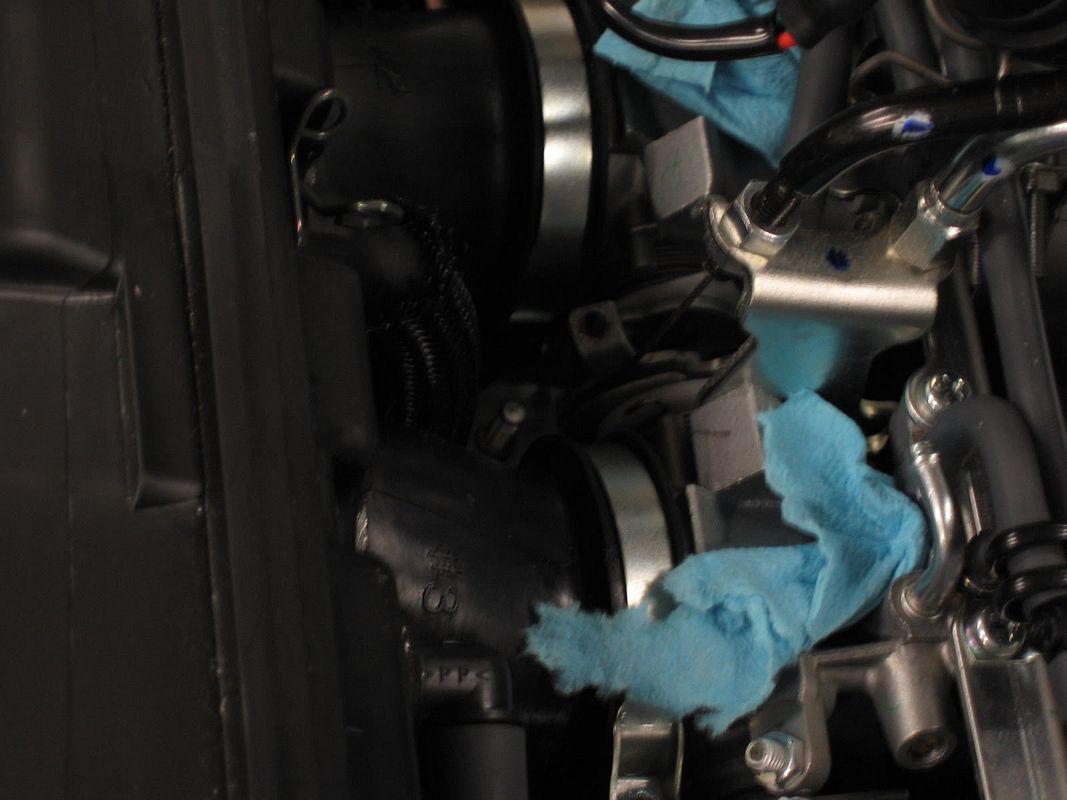
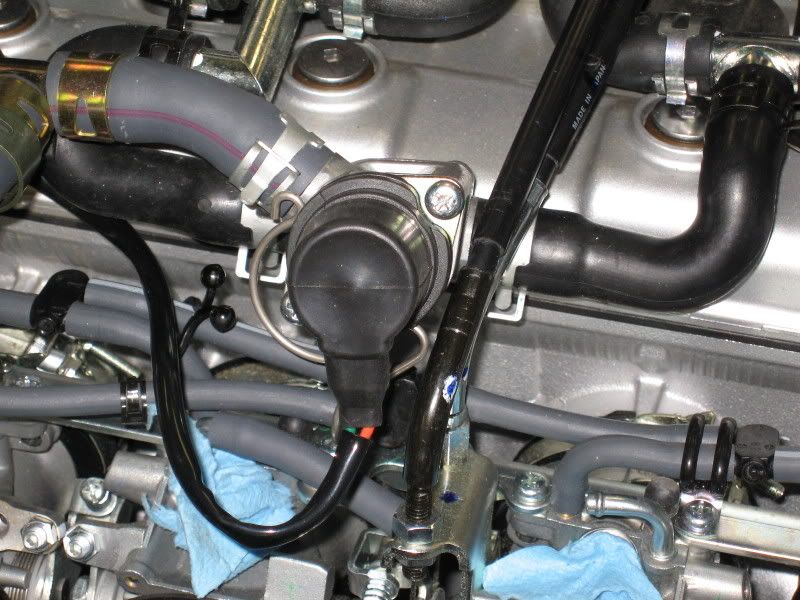
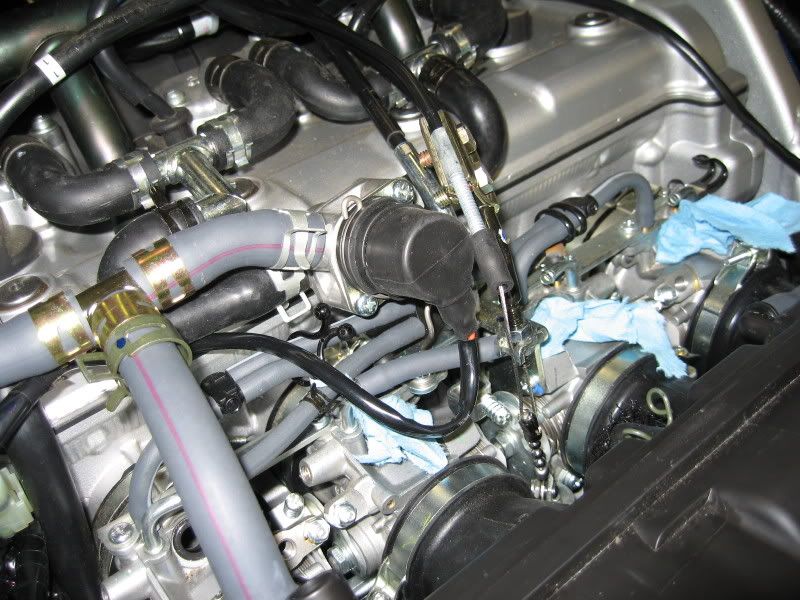
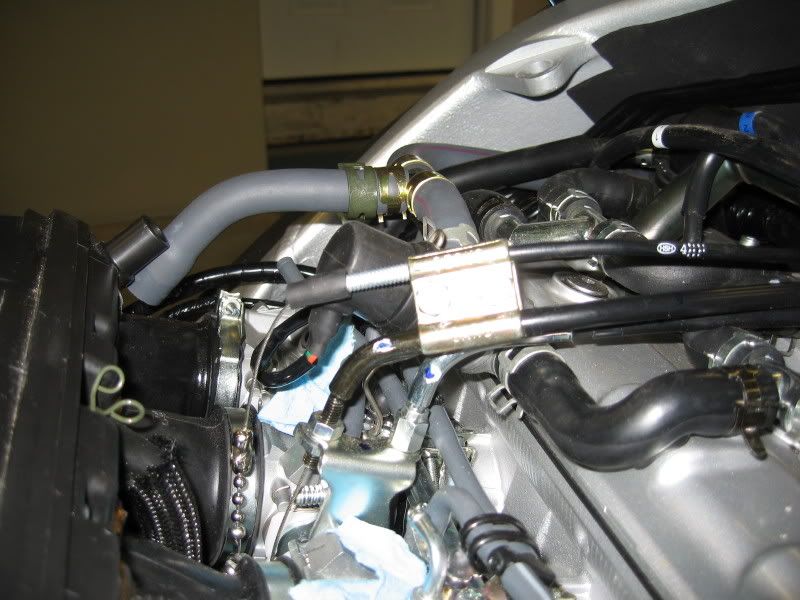
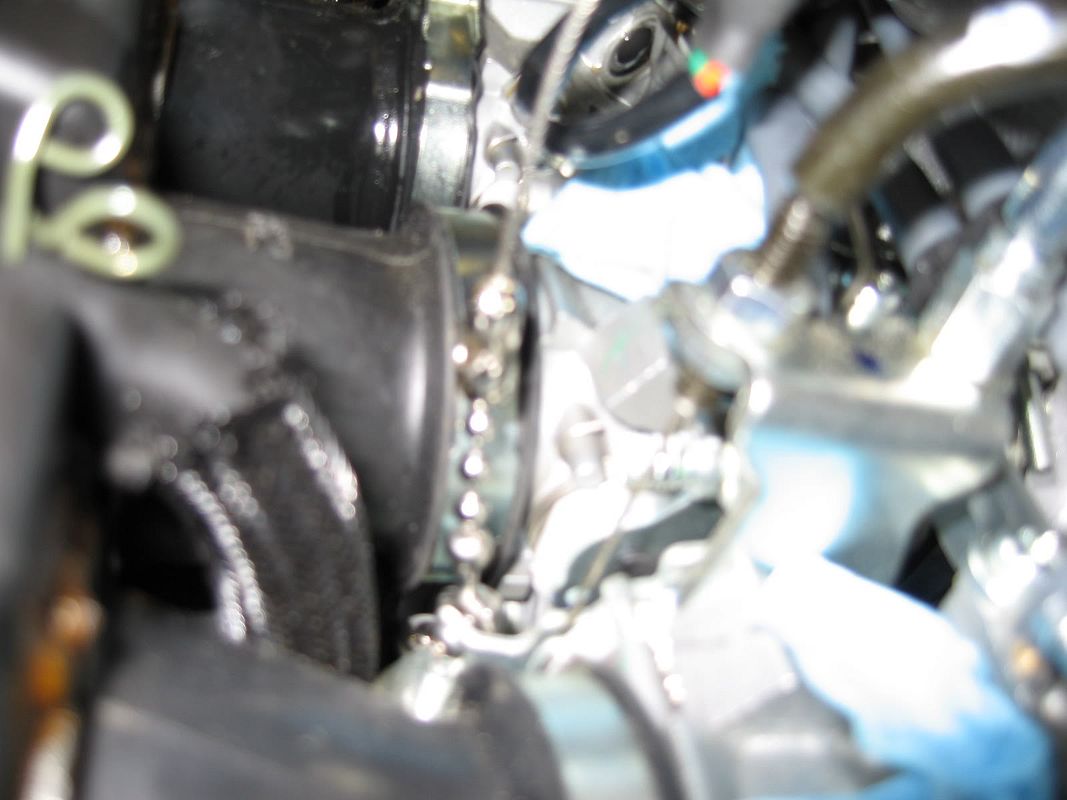
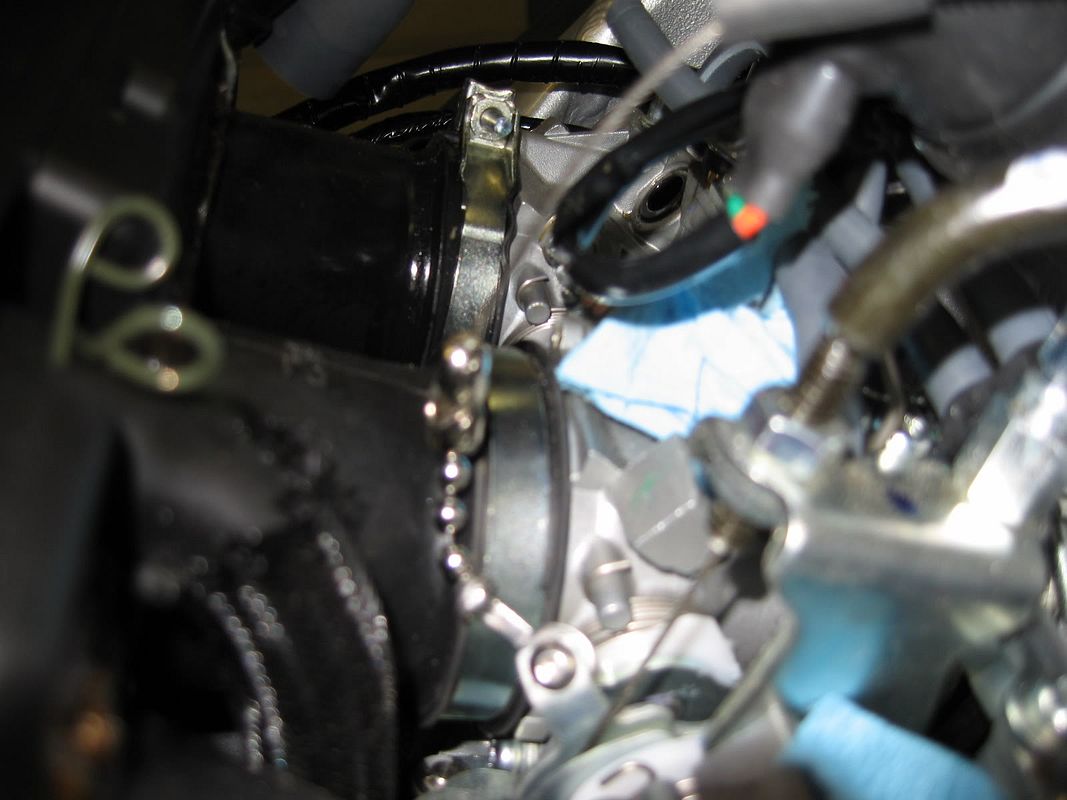
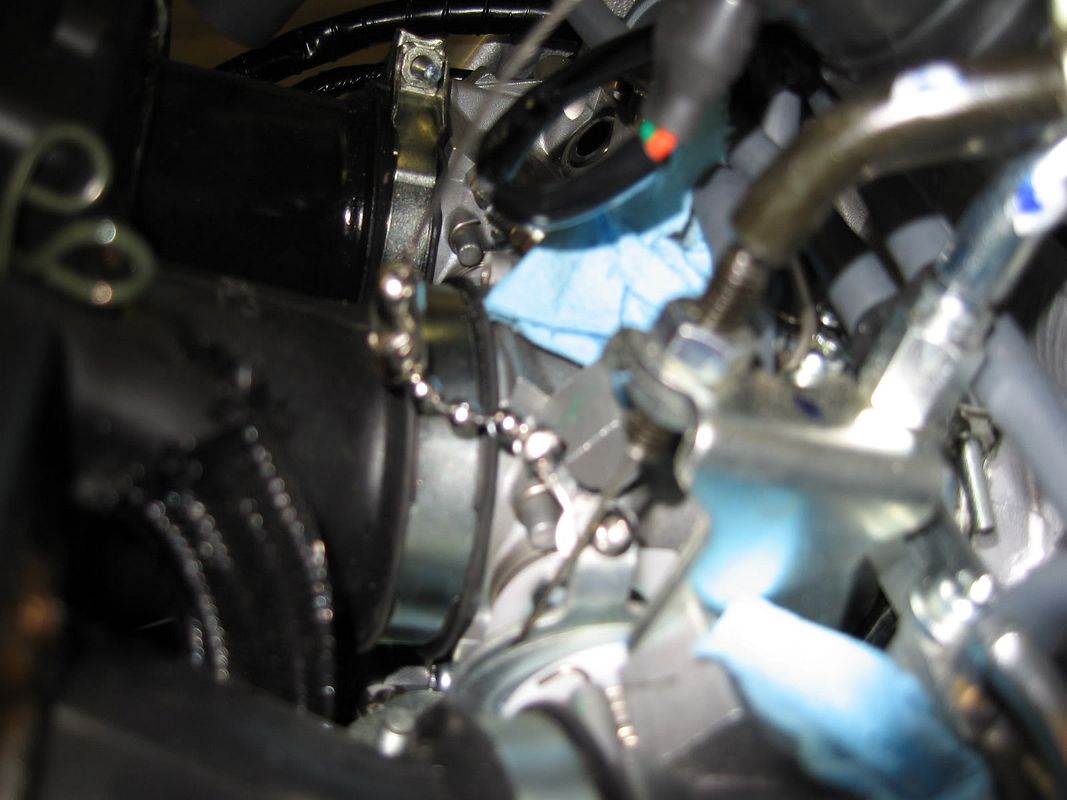
I'm in the process of installing the Audiovox cruise control and I have a little issue. I'm following the directions posted on FJRinfo.com. Bike is '06, servo will be mounted under seat. Drilled throttle tang. Installed bead chain. When I snap open the throttle to test, the chain will sometime loop under the throttle tang, preventing the throttle from fully returning. I've messed with it for about an hour, tried different set-ups and I'm still not totally comfortable. I've had stuck throttle before on dirtbikes and don't want to try that on the street. So for those of you that have installed this unit, here's a few questions; Under normal operation, does the servo cable retract when opening the throttle, even if not on cruise control? Is your bead chain adapter (the end that bolts to the throttle tang) free to rotate or is it fixed? How many beads did you use? I'm only using (5), as more seems to make the problem worse. I had to bend the throttle tang a bit to prevent the nut from catching the main throttle cable - I'm assuming you did that also.

I'm at a standstill until I get some help.........thanks in advance!

Anybody with Audiovox experience is welcomed to call me @ 423-517-0393 if you feel like lending a hand..!

Thanks,

 
Any way you can post a picture of the tang area? If not what are you using to hold the CC cable in position and roughly where is it positioned?

I did not bend anything during my installation, just cleared the end of the fastener that was touching the throttle cable.

 
Viewoftang.jpg


Drilled throttle tang. Red stuff is Loctite.

Verytight.jpg


This is the air valve that's in the way on the '06. I wedged the mounting plate between the cables and the valve, but it is very tight and under a lot of tension. Probably not a good idea to mount this way.

Servocable.jpg


End of servo cable with bead chain for reference.

DrilledThrottleTang.jpg


Another view of the crilled and bent throttle tang. Drilling this wasn't as bad as I feared. I had wifey hold the throttle steady, drilled a very small pilot hole and than the 5/32" hole.

Airvalve.jpg


Air valve looking toward front of bike.

First attempt at posting pictures on a forum...........hope this worked.

[SIZE=8pt]Edit by SkooterG: When posting photos, make sure you use the "image" button, and not the hyperlink or URL button.[/SIZE]

 
Last edited by a moderator:
Thanks to Radman's quick response, we're back on track. Here's a few notes for those of you who will be installing the CC. No need to drill a big (5/32") hole in the tang as you won't be using the bolt from the kit. I used an 8mm bolt, 1/4" long with a nylon locking nut. Do not tighten this nut all the way as the chain adapter needs to swivel freely. Other than that, pictures should tell the story. Let me know if anybody has specific questions. Now that I'm a picture posting god, I will document the rest of the install and post pictures.

ViewfromLeft.jpg


View from left side, facing forward.

ViewfromRight.jpg


View from right side, facing forward.

Idle.jpg


Throttle assembly at idle.

HalfThrottle.jpg


Throttle assembly at half-throttle.

WideOpenThrottle.jpg


Throttle assembly at wide-open.

I snapped the throttle about 200 times and all is smooth, no hanging, no catching. I fell good about this, so moving on to the rest of the install. Thanks Radman..!

 
Glad you got the problem solved. When I installed mine, I had similar concerns about the CC cable getting tangled with something else. My solution was to use a very long and weak tensioning spring. I attached one end to the fuel injection rail, the other to the CC cable. The spring holds the CC cable up out of the way of everything when relaxed, and it is such a weak spring that it does not affect the operation of the CC.

 
Last edited by a moderator:
okay-

Dumb question:

Which fasterners did you use to connect the bead chain to the cable and tang?

Let me see:

Part #24 (bead chain couping) to the Servo cable

Then the bead chain Part#20 (5 links total)

Then the small version of part #25 (bead chain eyelet) to the tang?

It also appears that you did not use star washers part#2 on the throttle cable clamps. I would be worries that those might come loose without.

 
Glad to help,and glad it worked out. Another note, you don't need a big screw for the throttle connection-a #4 or #6 button head machine screw, fastened with a nylock nut attached nylock side first, but screwed on far enough to engage the threads of the nut itself, is plenty. This eases the drilling task, as a much smaller hole than Steve used is all thats necessary, and you're less likely to wreck the tab. Also important note is that the hole be drilled out towards the edge of the tab as close to the edge as is practible-combined with the buttonhead screw, this insures minimum contact with the throttle cable, and if it does contact the screw, it brushes up against the smooth buttonhead, ensuring that the cable will not snag and possible hold the throttle open-which would happen at full throttle if at all-not cool. This method should negate the possibility that the tab has to be bent to clear the cable: something I've seen on a couple installs. Locate the chain connector under the tab (nut side), further ensuring no cable hangups. ;)

It also appears that you did not use star washers part#2 on the throttle cable clamps. I would be worries that those might come loose without.
Did not use-clamp still tight after 12,000 miles.

 
Last edited by a moderator:
Dumb Question #2

How come you cannot use the provide screw part #34?

I understand the nylock nut (quick run the Home Depot) but why get a new screw? Am I missing something?

 
Dumb Question #2
How come you cannot use the provide screw part #34?

I understand the nylock nut (quick run the Home Depot) but why get a new screw? Am I missing something?
Did you read my post at all? It would appear not, so repeating myself is pointless.

 
Did you read my post at all? It would appear not, so repeating myself is pointless.
"Another note, you don't need a big screw for the throttle connection-a #4 or #6 button head machine screw"

I interpreted this as puchase a new screw. I Sawwee! :sorry:

 
Did you read my post at all? It would appear not, so repeating myself is pointless.
"Another note, you don't need a big screw for the throttle connection-a #4 or #6 button head machine screw"

I interpreted this as puchase a new screw. I Sawwee! :sorry:
It was a correct interpretation. Go to hardware store and buy a couple as well as a couple nuts-better too many than too few. This new screw is key to the plan.

asc3934.jpg


Last edited by a moderator:
Thanks Radman, you're the best.

Now. One FINAL LAST LITTLE question.

Out of all the post I have seen and questioned, I have not seen where the black ground cable goes on the Servo unit. Is this ground not needed? Its the real short wire.

 
Thanks Radman, you're the best.
Now. One FINAL LAST LITTLE question.

Out of all the post I have seen and questioned, I have not seen where the black ground cable goes on the Servo unit. Is this ground not needed? Its the real short wire.
I fit is indeed the black ground with the ring terminal, and you are doing an underseat servo install, use one of the 2 bolts on the center frame between the front and rear seat.

 
It's Cinqo de Mayo.......we should be partying. Radman is right and I need to edit my post, I bought an 8mm and 6mm bold and used the 6mm, not the 8mm as previously mentioned. I re-installed the fuel rail and the servo cable will have to be moved toward the front of the bike in the cable clamp. It gets real tight with the fuel rail. Pictures to follow tomorrow.

Flienlow, your sequence of connections is correct.......that's exactly what I did and it works great (for the bead chain). The cable clamp can still rotate, but "teeth" inside the clamp prevent the cables from sliding in or out.

On to better and bigger things tonight............................!

 
Update for those of you that will be tackling this farkle on an '06.

RedandPurplewireconnection.jpg


The brake light harness must be different on the '06. I couldn't get anything out of the brown plug on the right side of the bike. So I cut open the harness going to the tail light assembly and tapped in there.

PurpleandRedwireconnection.jpg


Red wire from the servo goes with the blue wire from the bike harness and purple wire from the servo goes with the yellow wire from the bike harness.

FinalPositionofThrottleLinkage.jpg


Final position of the throttle linkage.

VacuumDiodeon4Cylinder.jpg


Vacuum line from servo (mounted under seat) going into the #4 cylinder, with diode, or check valve.

CoilConnection.jpg


Connection at coil.

Off to the NAPA to get some shrink wrap for the control harness. I'll post additional pictures shortly.

 
Well boys and girls, it's now test ride time. The final assembly went relatively smooth. All electrical connections were straight forward with no surprises. I di have to relocate the throttle cable clamp. Originally, the clamp was mounted vertically, next to the air valve. However, it was too high for the insulation and the tank. So I moved it forward and mounted it horizontally. Pictures are a little deceiving, but the clamp it mounted flat. Off for a ride..........!

Refitaftertankinstall.jpg


Throttle cable clamp.

Anotheroffinalrefit.jpg


Another view of clamp.

Anotheroffinalrefit.jpg


Extra wire bundled over the tank insulation.

Controlpad.jpg


Control pad, using Skyway's mount.

 
HEY!! what is the gray wire on the control pad for? farkel says to connect it to blue wire on left turn signal. TMW! can I connect somewhere else?


Latest posts

Top