I just did my CCT on my 2003 with 36,000miles. This thread was great, however I have some tips that may make someone else's life much easier.
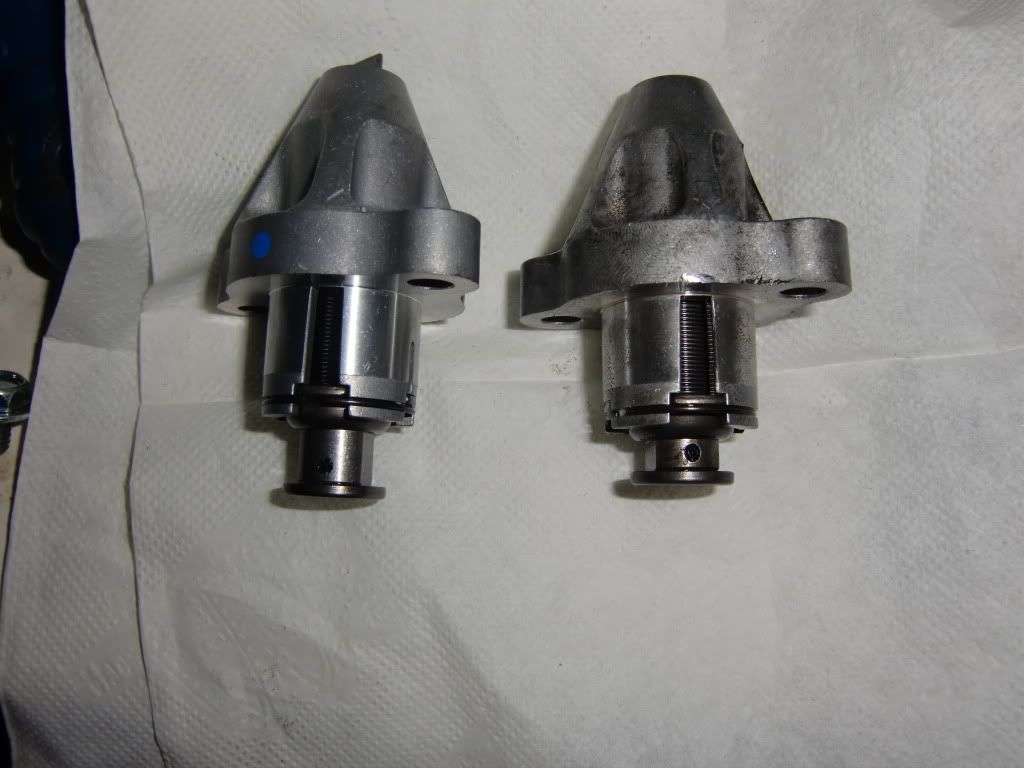
I noticed a lot of noise from the cct after warm up and over a period of 500miles it became very pronounced. I purchesed the newer blue dot part. I will throw in some added notes that will augment the original post instructions.
First,remove the lower fairing and don't forget the three screws on the bottom.
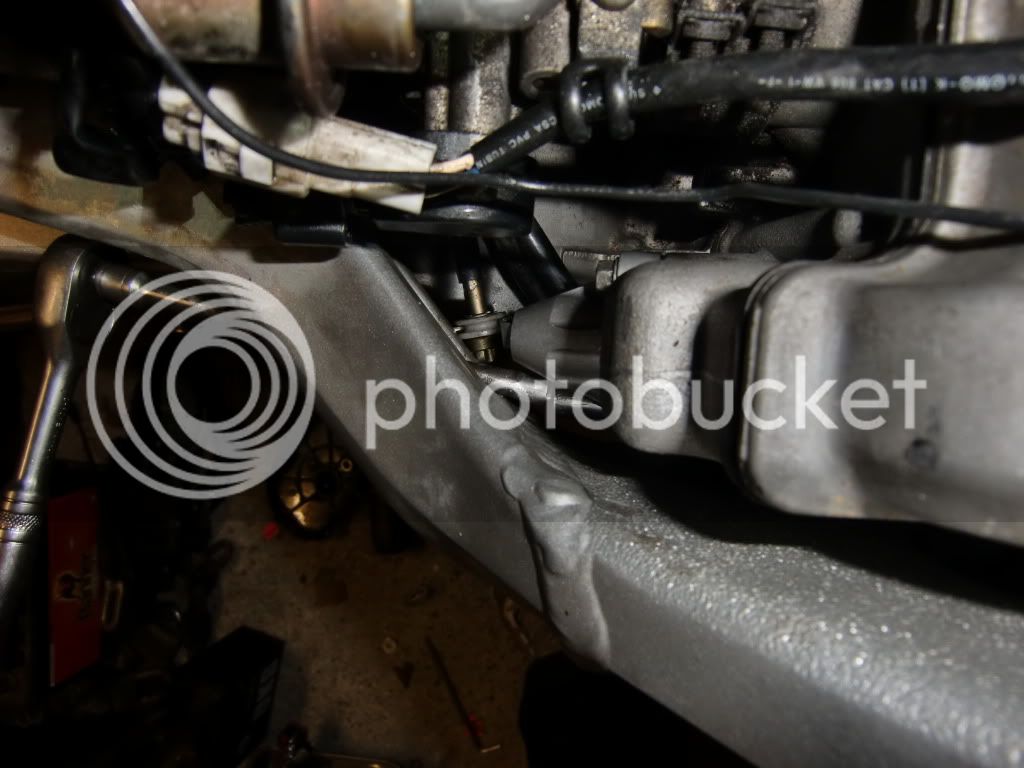
Remove the right side silver panel and both black plastic pieces that are just below the tank. remove the two tank bolts and suspend the tank up by whatever method is safe, you will need at least 12 inches of room. move the black rubber piece and you should have a good view of the CCT. Remove the grey rubber plug that is in the frame. loosen the top bolt that also holds the idle set screw, move the bracket down if you can.
Tool check time.
two 8mm wrenches,
one long, long thin flat tip crew driver
one 5-6in ratchet extention, 1/4
one 10mm shallow 1/4 socket, and some tape or gum
one very long set of neadle nose plyers, harbor frieght sells a pack of 6 for 6 bucks.
Dremel or friend with one or a grinder.
one zip tie
one 10mm long socket as mentioned by the other guy, thanks for the picture, it was worth a thousnd words.
two different allens,
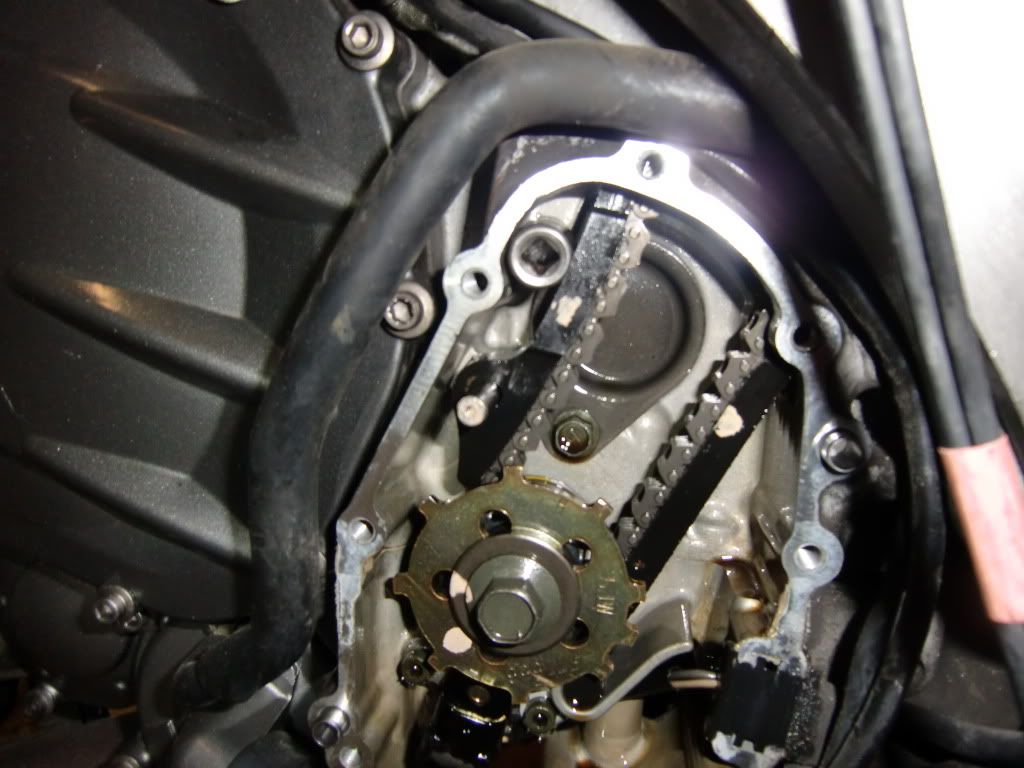
remove the allen bolts holding the engine cover on, gently loosen each by just a bit in a star/car tire pattern, loosen the larger one in the center. remove the cover gently as the gasket is delicate. Now do a check and ensure that the lower guide dowel pin is still in its place, if it is in the cover like me, stop and gently tap the guide up untill you can fully insert the dowel in its proper place.
Inspect your chain at this point, mine was almost new looking. gently insert the deep 10mm socket in the place seen in the picture earlyer, and use a zip tie to secure the chain, wrap it around the guide and snug it up. Your now done in this area.
with one hand, hold the 10mm short socket on the screw that is in the middle of the cct, while holding the socket, gently insert the ratchet extention through the hole in the frame and secure it to the socket. now lossen this screw. Once the screw is off, hold the socket with one hand and remove the extention, then the socket and screw, tape or gum is nice, there is a hollow part of the frame that stuff can dissapear in so watch out. instert the screw driver, and turn CW until you feel a slight lock. this just retracted the CCT, which will make removal much easyer, the previous step made sure that the chain did not loosen causeing a possible tooth skip.
Now here is the awesome part, called awesome part 1. there are two 8mm bolts that hold the CCT to the engine as mention before, the top bolt is self explanitory, the bottom is the focus of hell. take a 8mm wrench and cut it in half with the open end just slightly shorter than the box end. take the other 8mm and loosen the bottom bolt, hopefully you can get at least a slight turn, this was enough to initialy loosen it. nowloosen the top bolt just a bit. use your new factory yamaha wrench and start the process of loosening the bottom bolt take turn to loosen the top. once the bolt is almost out, place you right hand pinky on the top of the bottom bolt from the top access, basketball player hands will have trouble. While doing this use you left hand index finger and place it on the bottom of the bottom bolt, use both hands to gently loosen the bolt until it comes out, this was actually easier towards the end than the wrench. do the same once you tighten it.
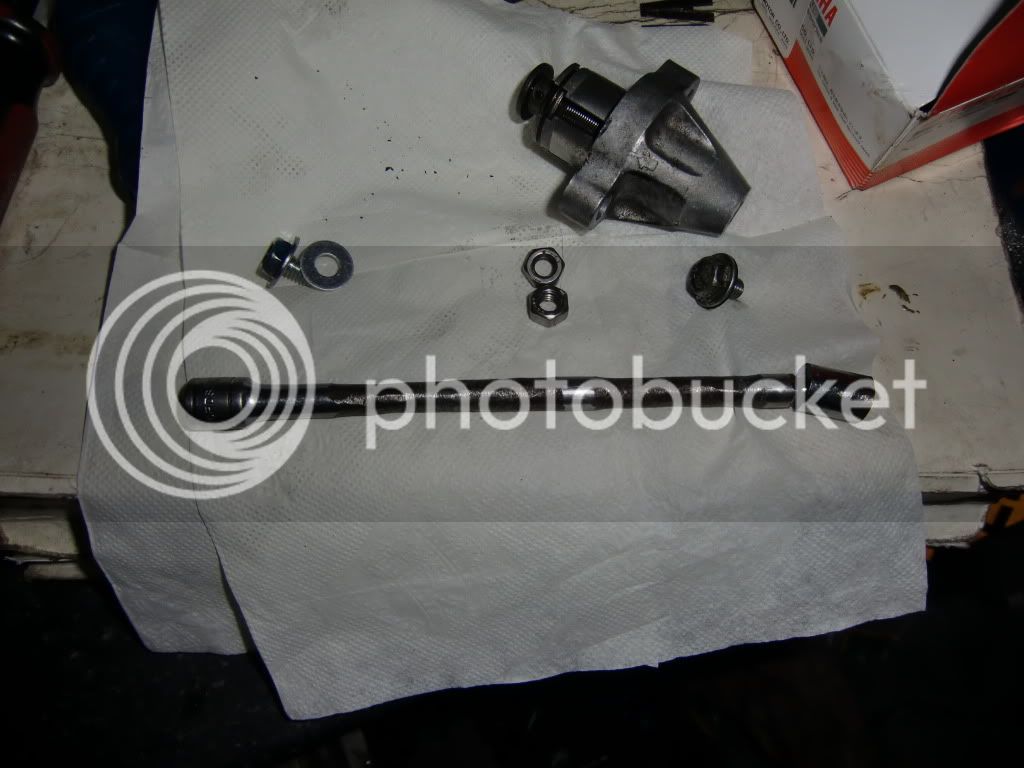
Once the bolts are out, gently bring the CCT down and out through the bottom of the frame, it should come out fine. Chek the CCT feature of the unit to understand how it works.
take the new gasket and use a little dab of something (gasket sealer) to keep the gasket on the new CCT, you don't need to remove the T-pin, but if you do, you will need to wind it up CW, and hold the plunger in with your hand and insert the t-pins, i would not even think about trying to install it fully extended. Be carefull to ensure that the gasket stays put on install. Line up the New CCT blue dot up, use your other hand to start the top bolt, once it is somewhat snug, use the two handed technique stated earlier to start the bottom bolt, to turn the bolt with the mini wrench like hell. once both bolts are snug, tighten the top, dont get crazy with this, use the mini wrench to tighten the lower bolt, once your ready to put a little torque on it use the open end of the other 8mm, and push the end of the wrench with the open end and push towards the engine block, just a little, but you will not have enough leverage on the mini wrench alone. Remove the t-pin with the neadle nose plyers. you should hear a pronounced click sound, if you are worried that it has not extended, simply turn the adjustment screw CW two rotations and let the screw driver rotate CCW in your hand as stated in the earler post. Once you few ok, screw the 10mm bolt in this spot in a similar manor as the removal.
Remove the socket that you jammed next to the guide, and cut the zip tie, it may tighten up some as your old CCT may have not had enough force to fully do its job. Button up the cover and I re-used the gasket, tighten the screw that you loosened that holds the idle set screw. start putting everything back togeather, take your time and consult your parts bin and manual, extra parts are badddddd.
Cross your fingers and start it up, no really taking off the bottom cover is so easy that I would recommend it, plus you get a chance to check out the condition of you chain and see just how much it may have streached. Hope this helps and sorry if I'm re stating stuff said before. I originally had lots of questions and this was the way that I went about this, took about 2 hours, and my bike now sounds great, the difference was very noticeable, and the old CCT had little to no life left.


")