BuilderBob
Well-known member
Just returned from a 1,500 mile trip to Asheville and back (did the "dragon" again) and the CC performed flawlessly. I'm a happy camper! 


The only important "change" is dip switch #7. Everything else is pretty much as shown in the original install procedures.I would just be extremely grateful if one of the experienced guys would take the original install thread and the changes found here and take some pictures and make one straightforward install thread showing the correct install.
I'm a little confused as to what to follow. Do the original install as per the other thread and then try and incorporate the changes found here? or is there a comprehensive install thread that is now correct with the "learning curves"?
ahhhhhh, what speed did you set it to do the dragon ??? :dribble:Just returned from a 1,500 mile trip to Asheville and back (did the "dragon" again) and the CC performed flawlessly. I'm a happy camper!
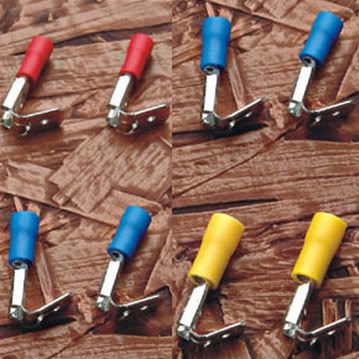
Thanks for the info on the posi-tap. What do you mean by "twin prong connector" though?I used a posi-tap on all of the wires that needed to tap into factory wires except for the tach signal I just got a twin prong connector. I think the size 18-22 gauge.
I'm still considering doing that for the red and purple, but my soldering skills are pretty terrible and I don't really want to try it anywhere near the ECU or anything else remotely expensive/sensitive/delicate.I soldered mine, those insulation displacement connectors look sketchy at best to me.JMHO.
Trust us, that is the fix. My Gen II hasn't dropped out of cruise once since I made that change."...and setting the #7 DIP switch to OFF are the most important changes. "
Oh my goodness! Hours & hours of AVCC research and many months of struggle and THAT is the solution?!! Funny, I stumbled on this thread yesterday looking for a vacuum gauge tester! Apparently not needed.
"Heat, time, distance, and hills are what you need for a complete test."
I thought zombies had invaded my head and I was unwillingly to believe those were the "real" symptoms. Everything would work perfect...for about 45 minutes!
After the dip switch fix & 50 mile test today, all is good, though not ready to declare victory just yet. The one negative is it doesn't seem to "set" as smoothly and I'm noticing as much as +3/-5 variations from previously +3/-3. That is a small sacrifice if the thing never "drops." I would be elated :yahoo: Kudos to Mr. Fulcher.
Could you explain this further?Victory claimed :yahoo:
I also found with more careful application of throttle during set & resumes, the discrepancy is usually +- 2 (instead of 3-5).
Yeah please.Could you explain this further?Victory claimed :yahoo:
I also found with more careful application of throttle during set & resumes, the discrepancy is usually +- 2 (instead of 3-5).
Sure. Instead of dumping the throttle (essentially letting go) immediately after pushing set or resume, I maintained a steady hand & speed for a second or two or three. Now instead of my speed dropping 3 to 5 mph from initial set position and then returning, it now fluctuates usually in the minus (-) 0-2 mph before settling in at the initial set position. At the time of my erratic throttle I also noticed the occasional accelerate (+) too, though that was usually much less dramatic and much less annoying.Yeah please.Could you explain this further?Victory claimed :yahoo:
I also found with more careful application of throttle during set & resumes, the discrepancy is usually +- 2 (instead of 3-5).
Some audiovox installations seem more sensitive than others. What I do to minimize speed variation when activating the cruise control:Sure. Instead of dumping the throttle (essentially letting go) immediately after pushing set or resume, I maintained a steady hand & speed for a second or two or three. Now instead of my speed dropping 3 to 5 mph from initial set position and then returning, it now fluctuates usually in the minus (-) 0-2 mph before settling in at the initial set position. At the time of my erratic throttle I also noticed the occasional accelerate (+) too, though that was usually much less dramatic and much less annoying.
Mine is close. But apparently not as sensitive as yours; after all mine IS the Prunieville versionI dunno, but mine just kicks in when I hit set, just like a car.Whatever works.
Enter your email address to join: