Link to all my Gen II mods
Although there are probably better units out there now, I selected this combo meter years ago (initially for my Tiger) based on price and functionality. I’ll mention the pro/con’s at the end. The meter is shown below with some spade terminals added to the wire leads. It comes with Velcro strips for mounting (not shown) and the aluminum piece is one of my custom made FJR brackets.

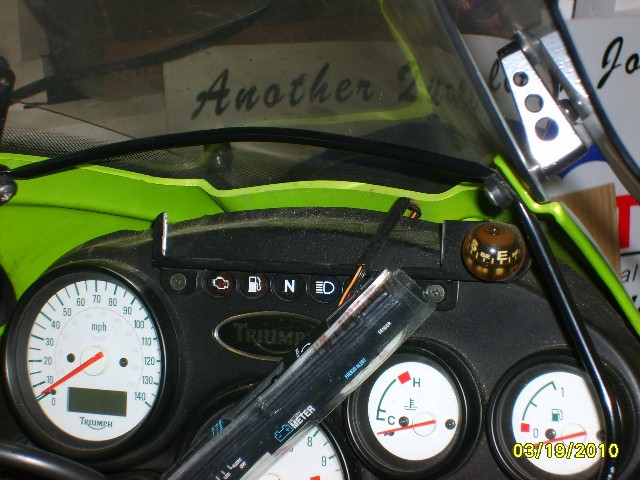
When I bought the FJR, I decided to buy another one of these meters because I was familiar and happy with the one on the Tiger. I’ve had it mounted in three different places so far as I reconfigured the bike. Although the meter comes with Velcro to mount it, I opted to create a custom mount that engages the ribbing molded in the side of its housing. I figured I needed to make a bracket to mount it on the bike somewhere anyway and decided to add provisions to directly hold the meter. Plus, the Velcro just didn’t hold it secure enough for my liking. The perfect tension on the “fork” allows it to slide in from the top, but holds it firmly in place. Before mounting my custom handlebar system, a bracket (shown in the picture above) allowed it to mount between the two small screws holding the covers over the OEM handlebar mount bolts. I thought it looked pretty good there, but it had to be relocated when I removed the OEM handlebars.
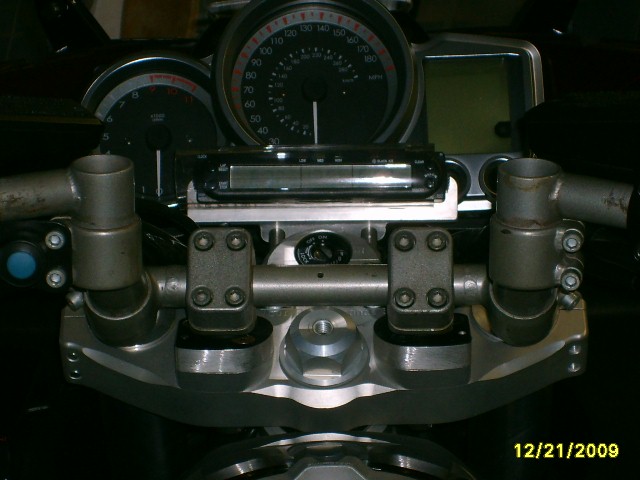
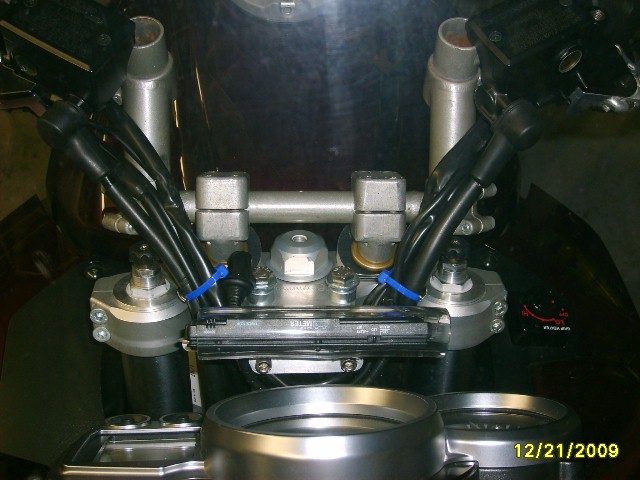
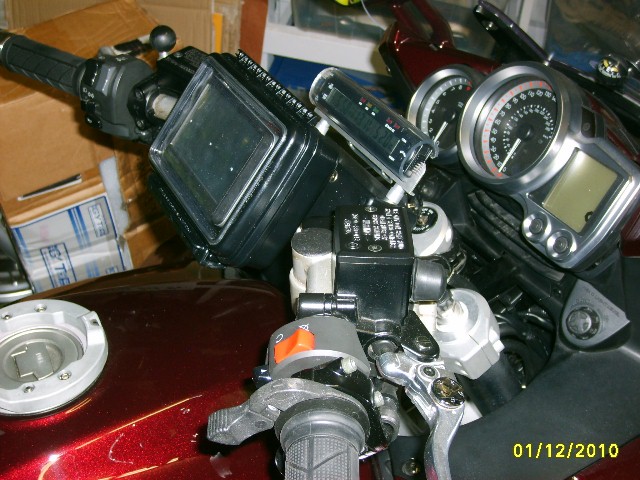
Once I had the Helibar triple clamp installed, the second location was mounted directly to the clamp just in front of the ignition switch. This location required a second aluminum bracket to be made (I’m getting good at it!). It utilized the two screw holes holding the Helibar “C” shaped piece surrounding the switch and was fitted with longer screws and some spacers.
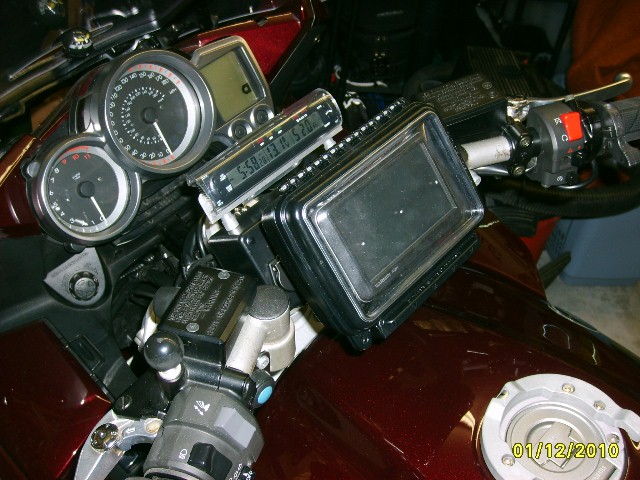
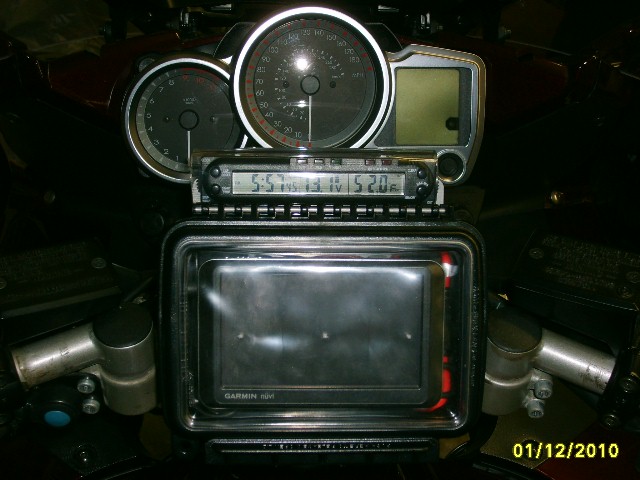
The last and hopefully permanent position is mounted on top of the GPS base pod. I found access to the ignition switch just a bit too tight between the GPS pod and the forward-mounted voltmeter so the meter was moved back to the pod. This time I was able to reuse the second bracket by simply adding two new holes to it. I still need to reach around everything to get to the ignition switch, but I find this works fine.
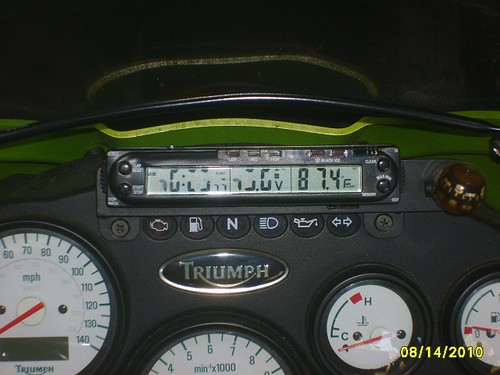
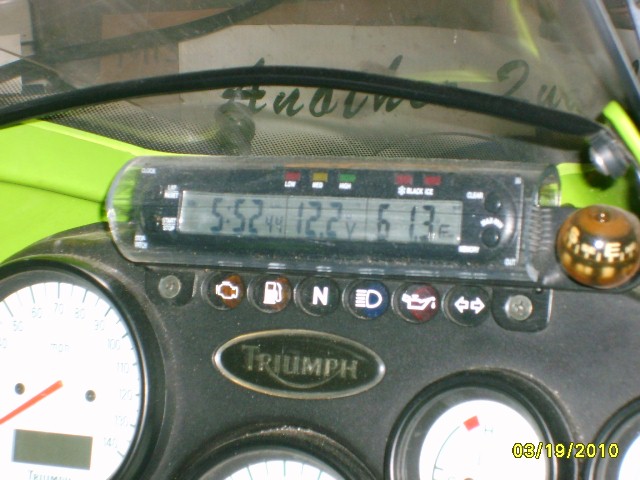
Here are some shots of the voltmeter mounted on the Tiger. I pulled the meter out of the bracket in one to show a bit more detail.
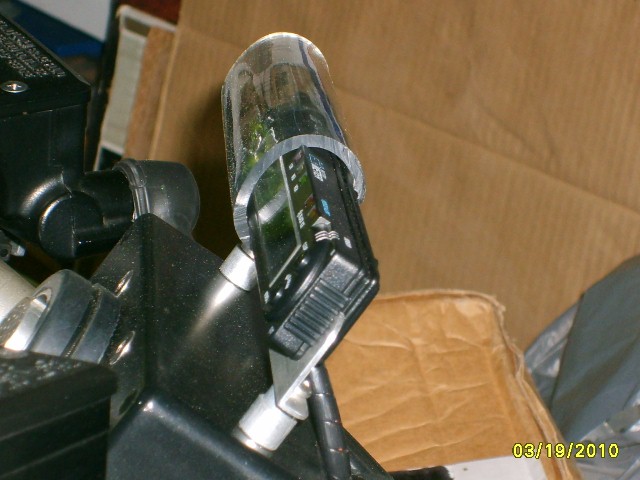
I have some small gripes about this particular meter. The first time I got caught in heavy FL rain with it, I thought it was toast. Water seeped into the LCD display and it started displaying erratically. But much to my dismay, it worked fine after it dried out. To stop water from directly dousing the meter again, I simply cut off a section of clear tubing (.75” ID) and slit it lengthwise. It still comes off easy to access the rear mode set buttons. I’ve had no water problems since, and I’ve been caught in some nasty storms. Second, in direct sunlight with the bike parked, the LCD sometimes darkens, but it has to be a hot day and it clears up as soon as I start riding and some airflow gets to it. Third, is the backlighting. It is just a little too dim to see clearly at night. I very seldom ride at night so this hasn’t been a big concern of mine. Lastly, these meters don’t like to have their leads reversed by mistake.
The plus sides of this meter are that it is inexpensive ($25), has stood the test of time, and pulls very little current so I just have it powered up 100% of the time (even with the ignition off). It’s great to be able to wander out in the garage and just glance over and see the battery charge, time, or temperature anytime.
Although there are probably better units out there now, I selected this combo meter years ago (initially for my Tiger) based on price and functionality. I’ll mention the pro/con’s at the end. The meter is shown below with some spade terminals added to the wire leads. It comes with Velcro strips for mounting (not shown) and the aluminum piece is one of my custom made FJR brackets.
When I bought the FJR, I decided to buy another one of these meters because I was familiar and happy with the one on the Tiger. I’ve had it mounted in three different places so far as I reconfigured the bike. Although the meter comes with Velcro to mount it, I opted to create a custom mount that engages the ribbing molded in the side of its housing. I figured I needed to make a bracket to mount it on the bike somewhere anyway and decided to add provisions to directly hold the meter. Plus, the Velcro just didn’t hold it secure enough for my liking. The perfect tension on the “fork” allows it to slide in from the top, but holds it firmly in place. Before mounting my custom handlebar system, a bracket (shown in the picture above) allowed it to mount between the two small screws holding the covers over the OEM handlebar mount bolts. I thought it looked pretty good there, but it had to be relocated when I removed the OEM handlebars.
Once I had the Helibar triple clamp installed, the second location was mounted directly to the clamp just in front of the ignition switch. This location required a second aluminum bracket to be made (I’m getting good at it!). It utilized the two screw holes holding the Helibar “C” shaped piece surrounding the switch and was fitted with longer screws and some spacers.
The last and hopefully permanent position is mounted on top of the GPS base pod. I found access to the ignition switch just a bit too tight between the GPS pod and the forward-mounted voltmeter so the meter was moved back to the pod. This time I was able to reuse the second bracket by simply adding two new holes to it. I still need to reach around everything to get to the ignition switch, but I find this works fine.
Here are some shots of the voltmeter mounted on the Tiger. I pulled the meter out of the bracket in one to show a bit more detail.
I have some small gripes about this particular meter. The first time I got caught in heavy FL rain with it, I thought it was toast. Water seeped into the LCD display and it started displaying erratically. But much to my dismay, it worked fine after it dried out. To stop water from directly dousing the meter again, I simply cut off a section of clear tubing (.75” ID) and slit it lengthwise. It still comes off easy to access the rear mode set buttons. I’ve had no water problems since, and I’ve been caught in some nasty storms. Second, in direct sunlight with the bike parked, the LCD sometimes darkens, but it has to be a hot day and it clears up as soon as I start riding and some airflow gets to it. Third, is the backlighting. It is just a little too dim to see clearly at night. I very seldom ride at night so this hasn’t been a big concern of mine. Lastly, these meters don’t like to have their leads reversed by mistake.
The plus sides of this meter are that it is inexpensive ($25), has stood the test of time, and pulls very little current so I just have it powered up 100% of the time (even with the ignition off). It’s great to be able to wander out in the garage and just glance over and see the battery charge, time, or temperature anytime.