Yet Another Audiovox Cruise Install

Yamaha FJR Motorcycle Forum

Help Support Yamaha FJR Motorcycle Forum:

This site may earn a commission from merchant affiliate links, including eBay, Amazon, and others.
For future reference connecting the ground (-) circuit to the frame is not recommended but it'll work in most cases.
The frame is not a component of any electrical circuits. You'll notice in the FJR's wiring schematics that a return wire (usually black or some variation) is routed throughout the wiring harness. This is the common (-) side of most circuits.

The engine crankcase is an electrical conductor since the battery's negative post is connected to the engine. The frame will conduct electricity because it's bolted to the engine at several places. But having current flow from the engine to the frame is not recommended.
What are some cases where it could cause problems, and how bad would the problems be?

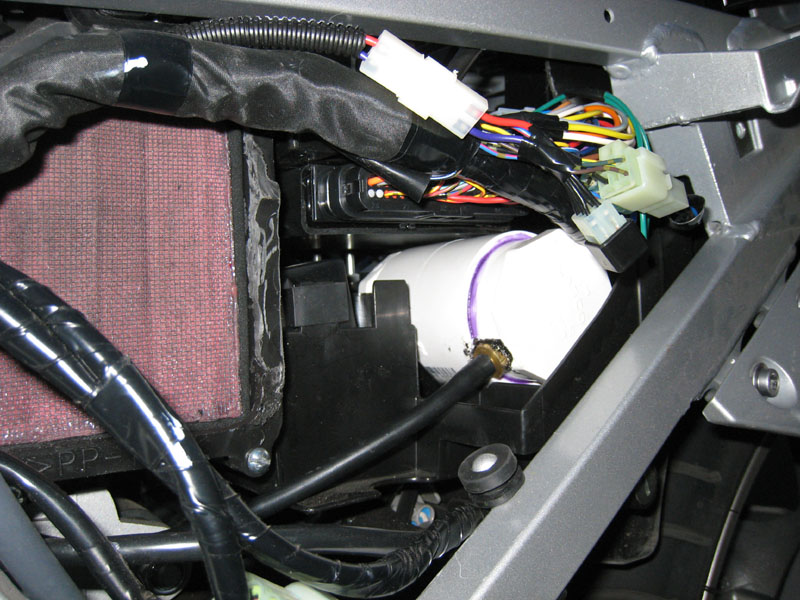
The FJR-specific powerlet kit that I have also uses a bolt on the frame for the ground connection.

 
This is one of the reasons I signed up here.

Unfortunately I can't find a suplier in Europe.

I plan to install a CCS-100 on my FJ1200 (1994)

Can anyone tell me a price and firm that can ship to europe?

 
I finally added a vacuum reserve canister because the accelerate button for the cruise control was quite ineffective. The cruise control seems to engage a bit quicker now and the accelerate button actually works! I made my canister out of a 2" PVC coupler, two 2" PVC plugs and a 3/16" threaded brass nipple thing. I found a nice place for it that only required a very slight dremeling in one of the ribs on the top side of the rear fender where the canister sits (right next to the lock barrel that actuates the seat release mechanism) to allow it to fit under the tool tray:

vacuum_reserve_canister.jpg


I used some basic PVC primer and glue to glue the PVC parts together. I only inserted the plugs about half-way into the coupler to make it as long as could fit in the space under the tray. That nasty looking black junk is some silicone gasket maker I had left-over from installing my Remus hexacones, and it seems to do a good job at sealing the threads of the brass nipple. The canister was still holding vacuum when I checked today after a full 2 days of no riding.

And here's the hose from the canister where it meets up with the rest of the cruise control's vacuum hoses:

vacuum_reserve_line.jpg


This info has been added to the original post. You can also see my new solution for blocking off the air injection ports :)

 
Last edited by a moderator:
anyone have one of thees units for sale?
A guy on ebay is trying to get nearly $450 for one!

Carparts.com has it for less than $100. Search keywords "cruise control" and then look for "Audiovox - Electronic Dash-Mount Cruise Control."

Also use the discount code "SAVE" for free shipping in the United States.
Were you able to actually buy one from them? :blink:
First test of the audiovox I installed over the winter, using two large fuel filters for vacuum instead of the large PVC type. The unit worked perfectly, no problems whatsoever. In fact, it seemed surreal, having never experienced any tpe of cruise control on a bike other than the throttle-lock types.

 
anyone have one of thees units for sale?
A guy on ebay is trying to get nearly $450 for one!

Carparts.com has it for less than $100. Search keywords "cruise control" and then look for "Audiovox - Electronic Dash-Mount Cruise Control."

Also use the discount code "SAVE" for free shipping in the United States.
Were you able to actually buy one from them? :blink:
Yes, I bought one from Carparts.com a little over a month ago and got it within three business days.

 
I am FINALLY trying to install my cruise control and am putting it under the tank. What coolant is required by Yamaha to not void the warranty? I can find no designation of what coolant to use. Thanks!!!

 
All I could find is this from the maintenance section:

Recommended antifreezeHigh-quality ethylene glycol antifreeze

containing corrosion inhibitors

for aluminum engines

I just got some regular car antifreeze (pre-diluted, because I am lazy and it was on sale) that was ethylene glycol based and said it had corrosion inhibitors in it. I don't think Yamaha can legally void your warranty as long as the stuff you use meets these basic requirements.

I am also in the middle of the AVCC install on my bike, and I put the servo in front of the coolant pipe. I am pretty much stuck now, though, so I figure here is as good a place as any to plead for help...

I think I messed up when I ground down the head of the screw in the throttle tang to prevent it from catching on the cable (I could not find a button-head screw with a shallow-enough head). I did this before I put the other nuts and pull-cable on the screw. :banghead: So now it is in the tang, and I don't think I could turn it to loosen it (locktite + ground head + very limited access angles), and I still need to get the cable for the servo connected to it.

I guess my only choice now is to remove the throttle bodies from the bike so I can assemble the chain connector onto the screw on a work bench (or maybe even dremel off the screw and start over).

So my question: what is necessary to remove the throttle bodies? The manual says I have to remove the entire air box to do it. Is this really necessary, or can the fuel rail come out by pulling the air box tubes off of it?

Is there a step-by-step guide for removing the TBs anywhere? I searched but couldn't find one. And one more (maybe dumb) question: am I correct in my assumption that what people refer to as the "fuel rail" is the same as the throttle bodies?

TIA

-Dan

 
Last edited by a moderator:
Maffud, sorry to hear about your problem.

I have been working on this damn thing all day. I FINALLY have gotten the servo installed, the cable installed to the tang, and reinstalled the coolant pipe. It about killed me....

To those of you whom have done this without removing the fuel rail, I have decided one of the following three must be true: A) You have access to transporter technology (and you magically "beamed in" the bolt and nuts and "beamed out the material for the hole), or B) you are full of crap and did not really do it, or C) you are DA MAN!!!! Cause I cannot even imagine ANYONE being able to do that without tearing half the damn bike apart!!!! AAAARRRrrrrrrgggghhhhhh!!!

Time for a case of beer....... (and I'm not even done yet)

 
So my question: what is necessary to remove the throttle bodies? The manual says I have to remove the entire air box to do it. Is this really necessary, or can the fuel rail come out by pulling the air box tubes off of it?Is there a step-by-step guide for removing the TBs anywhere? I searched but couldn't find one. And one more (maybe dumb) question: am I correct in my assumption that what people refer to as the "fuel rail" is the same as the throttle bodies?

TIA

-Dan
Limber up your Dremel. It would be a lot less work to grind the head off that screw than to pull the throttle bodies off the bike, because you will have to pull the airbox and the fuel rail to remove the throttle bodies.

Your assumption that fuel rail = throttle bodies is incorrect. The fuel rail sits above the throttle bodies and provides a mount for the fuel injectors. The throttle bodies are the "carburetor looking" thingies mounted to the intake manifold.

The fuel rail is a snap to remove.....unplug some wiring connectors and remove two large philips-head screws.

Removal/replacement of the throttle bodies is a half-day job for someone who's done it before. And the airbox would need to be removed.

Like I said, DREMEL! :p

 
Thanks for the explanation. It sounds like the "fuel rail" is actually the same as the "injector rail", and that has already been removed in my case.

I think I still may go ahead and remove the TBs, though, because even if I get this screw off of the tang, I would still need to find a way to mount the cable to it with a new screw, and I just don't see how it could be done without dropping parts into the engine compartment. Also, I hate the idea of using the Dremel in that area, with all the hoses and things around it that could be damaged by a slip of the hand, and all the metal shavings flying everywhere. I know I already did this once, but I think I should quit while I'm ahead (or not further behind).

I still want to see a step-by-step guide for removing the TBs, but I guess I'll be using the FSM for that.

Thanks again.

-Dan

 
It sounds like the "fuel rail" is actually the same as the "injector rail", and that has already been removed in my case.
I think I still may go ahead and remove the TBs, though, because even if I get this screw off of the tang, I would still need to find a way to mount the cable to it with a new screw, and I just don't see how it could be done without dropping parts into the engine compartment. Also, I hate the idea of using the Dremel in that area.
Have someone hold the throttle (partially) open for you, or rig something up to hold the throttle open. This will move the tang into a position that is much easier to access. I had no problems drilling the tang, mounting hardware to it and grinding the head of the screw a bit with the fuel rail removed and the throttle held partially open.

 
Thanks for the explanation. It sounds like the "fuel rail" is actually the same as the "injector rail", and that has already been removed in my case.
I think I still may go ahead and remove the TBs, though, because even if I get this screw off of the tang, I would still need to find a way to mount the cable to it with a new screw, and I just don't see how it could be done without dropping parts into the engine compartment. Also, I hate the idea of using the Dremel in that area, with all the hoses and things around it that could be damaged by a slip of the hand, and all the metal shavings flying everywhere. I know I already did this once, but I think I should quit while I'm ahead (or not further behind).

I still want to see a step-by-step guide for removing the TBs, but I guess I'll be using the FSM for that.

Thanks again.

-Dan
Fuel rail = injector rail. You're 100% correct on that.

IF you're gonna do it "the hard way" be aware that the throttle bodies come OFF a lot easier than they go back ON.

During the final stages of my engine replacement....i.e., putting the throttle bodies back on.....I found it just about 1/2 an inch away from impossible to get the TBs back on the intake spigots. They came right off...but wouldn't go back on -- even with a mallet and block of wood.

I eventually removed the rubber spigots from the cylinder head, got them installed one at a time on the TBs, then back on the cylinder head. There's a ridge on each TB that slips into a groove molded on the spigots and mine just would not engage...at least not all 4 TBs at once. So off they came, twisted and forced on each throttle body one at a time, and then the complete assembly popped right on the cylinder head.

#1 suggestion if you go the route of removing the throttle bodies -- go buy a T-handle hex driver the right size of the TB-to-spigot-to-cylinder head clamps. I just about wore my fingertips bloody using a standard "L" hex key. It's a 3mm wrench, IIRC.

22606.jpg


Have someone hold the throttle (partially) open for you, or rig something up to hold the throttle open. This will move the tang into a position that is much easier to access. I had no problems drilling the tang, mounting hardware to it and grinding the head of the screw a bit with the fuel rail removed and the throttle held partially open.
I actually still have a throttlemeister installed, so holding the throttle open is not a problem. But regardless of the throttle position, it is working in some very tight spaces, and I have big fat fingers, and I am no surgeon. Yes, it was easy enough to get the screw in, and even grinding down the head was not too bad, but the whole time I felt like I was playing with fire (somewhat literally, as the thought occurred to me that there were sparks flying and fuel probably present somewhere nearby).

I suppose I should mention that part of my problem may be that I think I drilled the hole in the tang too close the edge, so I left it smaller than it needs to be for a #4 screw. I have been trying to use a #3 screw in the smaller hole, and the nuts for such a screw are MUCH smaller than the #4 nuts, making it even more difficult to hold on to them and turn them. I could drill the hole wider, but I am afraid it will actually reach the end of the tang. Maybe this would be OK, but so far I have been trying to avoid that. I don't think there would be any issue with the #3 screw being strong enough to support the cable.

In case it is not obvious, I am pretty frustrated with this process right now (and I know the problems are of my own doing). I do appreciate the help.

Thanks

Dan

 
Be aware that to get the throttle bodies out, the airbox has to come out, which means the left side bodywork has to come off (to remove the air cleaner) and which also means the tool tray needs to come out (it doesn't have to, but it makes life immensely easier) which means the ECU has to be disconnected. You also have a couple of coolant hoses, the throttle cables, and the idle screw which have to come off of the throttle body, which is easier if you remove the throttle grip and pull the cables out of there to give some slack.

The job cascades quickly, in other words.

If there is even the remotest chance of getting there without pulling the throttle bodies, leave them on the bike. :)

 
Be aware that to get the throttle bodies out, the airbox has to come out, which means the left side bodywork has to come off (to remove the air cleaner) and which also means the tool tray needs to come out (it doesn't have to, but it makes life immensely easier) which means the ECU has to be disconnected. You also have a couple of coolant hoses, the throttle cables, and the idle screw which have to come off of the throttle body, which is easier if you remove the throttle grip and pull the cables out of there to give some slack.
The job cascades quickly, in other words.

If there is even the remotest chance of getting there without pulling the throttle bodies, leave them on the bike. :)
I think I see your point. However, I know me, and I know that if I try to do this in that space on the engine, parts are going to end up deep in the engine (again - I am getting tired of using my telescopic magnet tool to retrieve screws, nuts, clamps, etc.).

I already have the side fairings off and the coolant drained, because I was doing a coolant change anyway, and I had to remove the coolant pipe to get the servo behind it. The left side cover is also off because I needed to get to the wires at the ECU anyway.

I reinstalled the tray, but it's only 5 screws to get it back out and it's no problem to disconnect the ECU (now that I know how to do it).

OK, I sound like I'm arguing with offered advice, and I don't mean to. I appreciate the input. I guess I am still just not convinced that I am going to be able to do this without removing the TBs. I believe that it can be done. I am just not sure that it can be done BY ME.

 
OK, I sound like I'm arguing with offered advice, and I don't mean to. I appreciate the input. I guess I am still just not convinced that I am going to be able to do this without removing the TBs. I believe that it can be done. I am just not sure that it can be done BY ME.
Not at all, I don't see it like that. We had a guy some months ago post about a shifting problem from neutral to first. I (and many others) suggested it was a clutch problem. That guy became argumentative!!! "Can't be the clutch, all the other shifts work fine!" Never could convince him that sticky clutch plates are a well-known issue with some at-that-time-recent FJRs, and he just knew that since he could go from 1st to 2nd and on up that it couldn't be the clutch (even though you can do those shifts without using the clutch at all!) and going into first is the ONLY time you shift with one of the tranny shafts motionless. He even got rather personally offensive, to me and some others who were trying to help.

(That wasn't you, was it??!) :)

So discussion, questioning, wondering . . . . that's not arguing. You're good.

 
Top