You are using an out of date browser. It may not display this or other websites correctly.
You should upgrade or use an alternative browser.
You should upgrade or use an alternative browser.
I give, how do you remove the fairing side panels on the 2013?
- Thread starter Bungie
- Start date


Help Support Yamaha FJR Motorcycle Forum:
This site may earn a commission from merchant affiliate
links, including eBay, Amazon, and others.
I don't have any pics of them on the bike yet, but there are some pics of the same sliders on Abercrombie's '13 FJR at the following link:pics of those fine looking sliders!!!
https://www.fjrforum.com/forum//index.php/topic/159435-2013-fjr-for-sale/
montanaman
Member
Well.. I have to say it was a long day removing the fairings to put the OEM sliders on.. A very long day. Two fairly competent ( sober at the time lol) guys had a heck of a time and thanks to all here for providing a play by play of it never would have happened. I'm no "wrench God" but I've put on and taken off plenty of items on lot's of bikes... nothing compared to this. I love the 2013 FJR and I bought it for it's "simplicity" in terms of mechanical up-keep but who ever designed this travesty should not be working on motorcycle design anymore. The whole "tab" system is fragile and unpredictable at best. I am sure I broke off at least two trying to maneuver and ultimately force the issue. The push pins are great if you are only using them once. Waaaayy to many different sizes and shapes of fasteners.. To do it right/quickly one would need to virtually catalog every piece removed. It took a good 6 hours and plenty of words not suitable for children. At the end I had 3 "course" silver screws. ( later discovered that those were for the inside black top part of the fairings ... Not the allen head versions that I stripped in there) There is still one ( silver coarse screw) that I have no idea where it goes. The "deletion" of the catalytic ( CA bike don't ya know err..) made reassembling the lower "chin" part of the fairing a nightmare. The "cat" is in the trash BTW.. (I don't live in CA anymore thank God) At least I lost some weight off the bike. All and all it is way to much of a process to get to the radiator reservoir, battery and anything that lives under the fairings. I did get the sliders on and they look great. I had the foot fairings but after looking at how complicated that would be without directions I decided not to do that. They will be for sale and if my feet get a bit colder and wetter so be it..
Whew I am glad that's over and I can see where even with a dealer/mechanic it would be a significant amount of time to do the work..
Thanks again all .. If you go down this road make lots of notes and take lots of pictures because putting it all back together is a giant jig-saw puzzle.
And make sure you have your favorite adult beverage when you are done...
El Toro Joe
FYYFF
Very entertaining...
mcatrophy
Privileged to ride a 2018 FJR1300AS
quote name="montanaman" post="1202729" timestamp="1420594738"
") .
.
As for the foot shields, they are supplied with an instruction sheet that is adequate. I managed to fit mine with only a few pauses for thought, their shape does make orientation something less than obvious.
A few pics starting around here.
I thought I had..... If you go down this road make lots of notes and take lots of pictures ...
.As for the foot shields, they are supplied with an instruction sheet that is adequate. I managed to fit mine with only a few pauses for thought, their shape does make orientation something less than obvious.
A few pics starting around here.
Last edited by a moderator:
mcatrophy
Privileged to ride a 2018 FJR1300AS
I've enhanced some of the pictures in my post #15, hopefully it will make visibility of some of the details a little better (though it does nothing for the colour of my bike).
[edit]
Couple of examples of enhancement: (click on image for larger view)
Original Enhanced


[/edit]
[edit]
Couple of examples of enhancement: (click on image for larger view)
Original Enhanced


[/edit]
Last edited by a moderator:
Warpdrv
Well-known member
Thanks mcatrophy....... nice work on the visuals and grunt work you put into it.....
Just hate the idea of having to go through all that for anyone considering factory sliders..... I'd have bought aftermarket to avoid something like that.
Glad I went with the Cages.....
But installing the Headers, no other way around that now is der.....
Just hate the idea of having to go through all that for anyone considering factory sliders..... I'd have bought aftermarket to avoid something like that.
Glad I went with the Cages.....
But installing the Headers, no other way around that now is der.....
Niehart
Pie Smuggler
I think Marcus gave me this over sized plastic egg tray. It's great for keeping bolts, fasteners, etc separated and sorted by where they go.

wheatonFJR
...
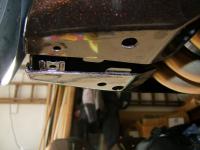
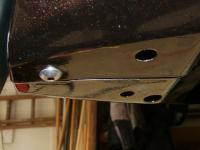
Thanks!!!!!Took my panels off to install stuff, took some pictures as I went. I've annotated them with MNFJR05's excellent description....
This post needs pics for the mechanically challenged
(Click on any image for larger view)
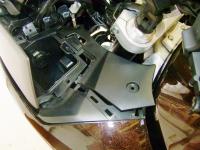
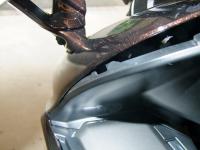
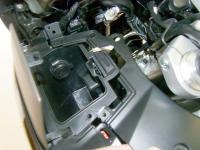
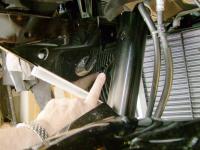
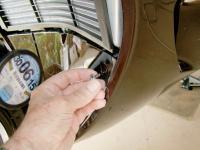
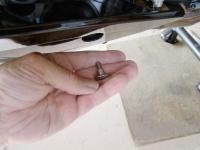
Remove the threaded fasteners from the center plastic on each side of the gauge cluster, and the two at the curve near the base as they meet the side panels.
Remove the push pin fasteners that hold the center dash plastic to the side panels on each side down along the fork tubes. While you are there remove all of the other push pin type fasteners you can see down there on the edges of the side panels.

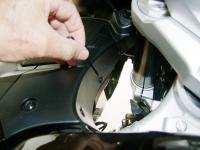
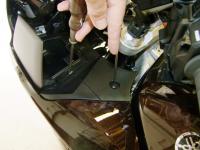
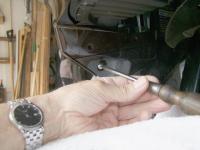
You'll need a long thin #2 Philips screwdriver to remove the two screws holding the headlight adjusters, one on each side. Rotate the adjuster to expose the screw hole to the outside of the bike for easier removal. Remove the two adjusters.
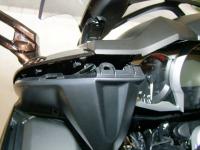
Carefully pop the center panel loose along the top near the gauge cluster. Then slowly move outwards using a thin common screwdriver to push the center panel in along the edge where it meets the fairing edge to pop the tabs loose. You'll need to open the glovebox lid to get it past the left side. Pull it up towards the cockpit for removal. With a little prodding it will come out.
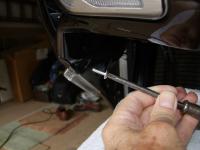
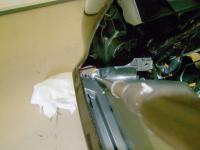
You can start removing the fasteners on the black side panels now. They are near the gas tank facing straight up and the Philips head screw under the glovebox lid. The battery side has screws near the same locations on the right side.
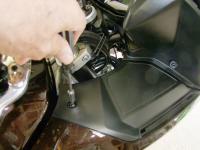
Once removed, remove the black side panels. They come out easily compared to every other panel.
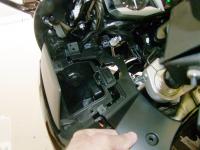

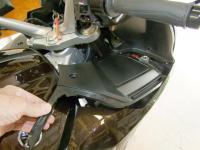
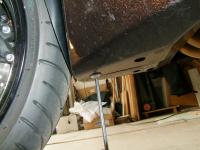
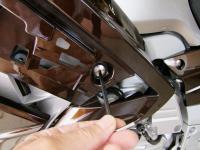
Now comes the fun part. You need to remove all the screws and fasteners in the black panels that reside along the top of the front wheel in the fairing tunnel. There is a Philip head screw on each side and at least 5 push pin style fasteners one each side. Once removed, pull the black panels out. They are flexible and come out easily. mcatrophy comment: I only found 4 push pins each side. Note the two lower rear ones are longer than the others, remember this when re-installing.

Get some refreshments, take a moment and relax. I'd suggest nothing too strong. Might interfere with your concentration.
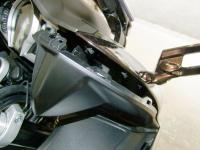
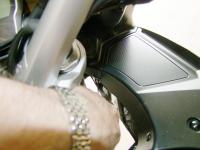
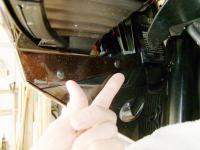
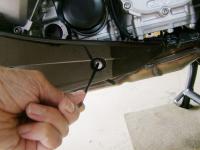
Now, remove the two fasteners on the right side of the fairing triangle and the one in the bottom that's accessible lying on your back near the chin. The two in the front of the triangle have plastic washers, the one underneath does not.
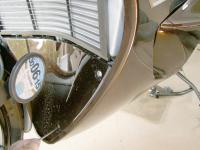
Remove the fastener from each vent that faces forward just low and outward of each headlight. Leave the vent.
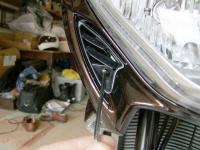
Remove the adjustable fairing venting on each side of the fairing. I will assume you know how to get those off.
Take a break. More refreshments. Ditto.
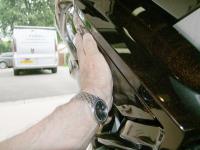
Remove the fasteners at the bottom trailing edge of each side of the fairing. Lying down helps to see them, one and each side.
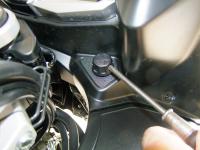
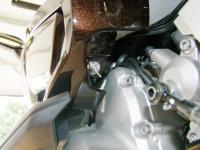
Now, in front of the glovebox is a silver Philips head screw facing rearward, remove it.

The last fastener to remove of the one hiding behind the adjustable side panel. Remove it. You are now ready to remove the left side fairing.
The tabs we need to release are along the edge in front of the glovebox and behind the forward vent where you removed the bolt earlier.
Regret I failed to take pictures, I didn't have enough hands. :yeaahh:
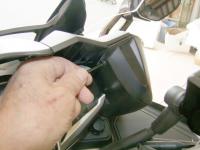
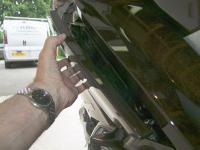
Grasp the fairing panel through the side vent with one hand and slowly tip the bottom of the fairing outward. The screw tab behind the vent will pop out, you may need to encourage it a little. You will see the tab that needs to be released right next to the silver Philips head screw you removed earlier in front of the glovebox. Tip and rotate the fairing panel out and back and it should release.
Regret I failed to take pictures, I didn't have enough hands. Once you begin to pull the bottom rear of the panel out, the seam at the top front starts to spread. There's one tab at about the middle of it and two small bumps. It comes apart quite easily.
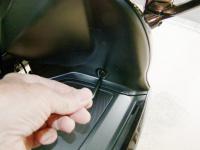
Disconnect the electrical connects from the glovebox and turn signal and set the panel aside.
The right side is basically the same, only reversed. Same tabs and same locations.
To reinstall, work backwards through the removal procedure.
Take care with getting all tabs tucked in correctly. Easy to get wrong e.g. where the two fairings join underneath.
Hope that helps. My advice, take your time and go slow. Have refreshments handy. A partner in crime helps.
I hope that it helps too. Couldn't have done it without MNFJR05's post. [edit] Some pictures enhanced to improve visibility of some details. [/edit]
escapefjrtist
Searching for Dry Roads
Once you do it a few times, it'll be like second nature. I'm kinda looking forward to digging into a GEN III and seeing how the puzzle comes apart...
--G
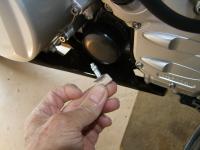
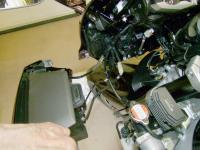
BTW - The part(s) you removed from the chin area is the charcoal canister. Do make sure you plugged the appropriate lines after removal.
--G
BTW - The part(s) you removed from the chin area is the charcoal canister. Do make sure you plugged the appropriate lines after removal.
HotRodZilla
GOD BLESS AMERICA
Mcatrophy, just so you know, you are a great asset to this forum. Thank You for all the stuff you do go make working on these bad boys easier. Your pictures and writeups are first rate!
wheatonFJR
...
Amen!Mcatrophy, just so you know, you are a great asset to this forum. Thank You for all the stuff you do go make working on these bad boys easier. Your pictures and writeups are first rate!
Niehart
Pie Smuggler
+1Amen!Mcatrophy, just so you know, you are a great asset to this forum. Thank You for all the stuff you do go make working on these bad boys easier. Your pictures and writeups are first rate!
mcatrophy
Privileged to ride a 2018 FJR1300AS
Now you're making me feel all embarrassed+1Amen!Mcatrophy, just so you know, you are a great asset to this forum. Thank You for all the stuff you do go make working on these bad boys easier. Your pictures and writeups are first rate!

In any case, most of my contributions are based on others' stuff. In this topic it's MNFJR05's original work that enabled me to do my bit for mankind (or possible womankind).
Last edited by a moderator:
Ok, what if instead of saying "Great job!", for the sake of your comfort we just toned it down to a "not bad"?Now you're making me feel all embarrassed.

wheatonFJR
...
How about "not bad for an Englishman"...
Nah, I'd stick with my original thanks. You've been a big help to many. THANKS!...I mean thanks, I guess.
Nah, I'd stick with my original thanks. You've been a big help to many. THANKS!...I mean thanks, I guess.
Mcatrophy, Great documentary! Knowing how the Brits enjoy a good ALE, if you happen to visit the San Francisco area let me know and I will treat you to some of America's finest ALES.
Art
Art
petey
Well-known member
I agree if I'm doubtful about any work/disassembly I'm looking for mcatroph's great pics and rite-ups...THANKS man...

Last edited by a moderator:
Bill Lumberg
Merica
If you were lucky. Mine was assembled by a part-time minimum wager that left several rather important things undone. My dealer saves their mechanics for the billable stuff.
The mechanic who put the bike together was off that day, but, "he would know."
Similar threads
- Replies
- 8
- Views
- 666
- Replies
- 0
- Views
- 189
- Replies
- 12
- Views
- 1K
- Replies
- 3
- Views
- 610