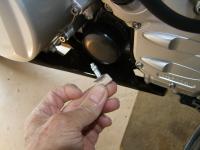
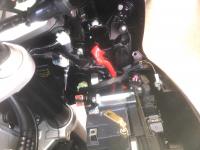
Yes, I agree with full compliments mcatrophy...your pics and words helped me immensley this aft while I installed the factory risers! BTW, any of you have difficulty getting those short bolts in, attaching the plastic covers to the slider steel substructure?
You are using an out of date browser. It may not display this or other websites correctly.
You should upgrade or use an alternative browser.
You should upgrade or use an alternative browser.
I give, how do you remove the fairing side panels on the 2013?
- Thread starter Bungie
- Start date

Help Support Yamaha FJR Motorcycle Forum:
This site may earn a commission from merchant affiliate
links, including eBay, Amazon, and others.
mcatrophy
Privileged to ride a 2018 FJR1300AS
Not my words, so thank MNFJR05 for those. I would have really struggled to do my fairings without his post.Yes, I agree with full compliments mcatrophy...your pics and words helped me immensely this aft while I installed the factory risers! BTW, any of you have difficulty getting those short bolts in, attaching the plastic covers to the slider steel substructure?
I assume you mean "installed the factory sliders"? I cheated on those, my dealer did them for me prior to my picking up the bike.
I don't know which bolts you are referring to, I had no difficulty with any, all seemed to line up ok. Sometimes if the bolt is going into one of those horrible spring-clip nuts, the nut needs to be properly positioned first. Where they are threaded into a tapped hole in the frame. it's only necessary to align everything and ensure the bolt is square to the thread.
It often helps to put a hex key through where the bolt's going to go make sure all the layers are in the right place.
If you mean the quick-fastener holding the cowling vent...
(Click on image for larger view)

... I had to grovel on the floor to see where it went, then it wasn't hard. Except for the garage floor on the back of my head
I always put a dob of copper-loaded grease on the threads of the bolts, helps stop any difficulty the next time they are taken out.
Oops, my mistake 4 sure. I meant factory "frame sliders". In this case, I found the bolts along with the shouldered washers, were impossible to get threaded in order to attached the plastic shroud on the slider/support bracket. I simply could not find purchase. It appeared their simply was not enough room for both bolt and washer. Sooo, I skipped the washer and the bolts went in fine. All in all, the whole project, from headlight knob removal, cutting out a few chunks of fairing to buttoning everything up took me 4 hours. I must be slowing down in my old age. BTW, I read somewhere somebody having trouble removing one of their headlight adjuster knobs and I think I know why. While one of mine was attached by a Phillips screw, the other was a Torx of all things...minor supply glictch on the assembly line I guess !
Last edited by a moderator:
mcatrophy
Privileged to ride a 2018 FJR1300AS
More likely the dealer, all that stuff has to be taken off to assemble the bike out of the crate. He probably lost it and found a substitute.... BTW, I read somewhere somebody having trouble removing one of their headlight adjuster knobs and I think I know why. While one of mine was attached by a Phillips screw, the other was a Torx of all things...minor supply glictch on the assembly line I guess !
Uncle Hud
Just another blob of protoplasm using up your oxyg
My headlight adjuster knobs fell off on the initial ride home. I suppose the assembler forgot to install the set screws. (Salesman got that straightened out in ten minutes when I returned the bike a few days later.)
As to the original question: I remove the fairing side panels by taking my bike to the dealer. In the past 15 years, I have somehow become terribly clumsy with tools. I tried to remove the right side (starboard) to wire up the aftermarket horns. An hour later, after having actually removed zero panels, I had the fairing somewhat back together, two leftover screws, and one lost bolt. Not trying it again.
As to the original question: I remove the fairing side panels by taking my bike to the dealer. In the past 15 years, I have somehow become terribly clumsy with tools. I tried to remove the right side (starboard) to wire up the aftermarket horns. An hour later, after having actually removed zero panels, I had the fairing somewhat back together, two leftover screws, and one lost bolt. Not trying it again.
Last edited by a moderator:
After reading this, I've made the executive decision to have my competent dealer replace my damaged left side plastics since insurance included the cost of labor. That way if something goes wrong or pieces are broken, they will be responsible instead of me!
I'm not sure about that.Seems to me, most of the bike, especially that area of the bike, comes assemled Watching all those shows about the bike industry and seeing the various brands and models coming off the assembly line, me thinks motorcycles come more assemled than most peple know, with alldue respect of course!More likely the dealer, all that stuff has to be taken off to assemble the bike out of the crate. He probably lost it and found a substitute.... BTW, I read somewhere somebody having trouble removing one of their headlight adjuster knobs and I think I know why. While one of mine was attached by a Phillips screw, the other was a Torx of all things...minor supply glictch on the assembly line I guess !
mcatrophy
Privileged to ride a 2018 FJR1300AS
Pictures I took of my bike prior to it being fully assembled include this one (apologies for the quality, they were snapped with my phone)I'm not sure about that.Seems to me, most of the bike, especially that area of the bike, comes assemled Watching all those shows about the bike industry and seeing the various brands and models coming off the assembly line, me thinks motorcycles come more assemled than most peple know, with alldue respect of course!More likely the dealer, all that stuff has to be taken off to assemble the bike out of the crate. He probably lost it and found a substitute.... BTW, I read somewhere somebody having trouble removing one of their headlight adjuster knobs and I think I know why. While one of mine was attached by a Phillips screw, the other was a Torx of all things...minor supply glictch on the assembly line I guess !
(Click on image for larger view)

It shows the righthand dash area uncovered, you can see the headlamp adjuster spindle without its knob just left of centre. The bike comes without its mirrors fitted, these panels have to come off in order to fit them.
More pictures start here.
Last edited by a moderator:
Lowcountry Joe
Well-known member
Thanks for the steps and photos. Great teamwork!
mcatrophy
Privileged to ride a 2018 FJR1300AS
Because there seem to be many accesses to my pictures associated with fairing removal, I've created a pdf file based on my entry above.
It includes the text and pictures in a form that can be printed, and may be more convenient for taking into your work area.
The file is over 30MB long, so will take a little while for you to download due to my slow server internet connection, probably over twenty minutes, so apologies for that.
[edit] The file size is about 3MB [/edit]
Direct link: https://atrophy.lock.net/do/FJR2014PanelRemoval.pdf.
I hope this is useful. Any errors or other comments, please let me know.
It includes the text and pictures in a form that can be printed, and may be more convenient for taking into your work area.
[edit] The file size is about 3MB [/edit]
Direct link: https://atrophy.lock.net/do/FJR2014PanelRemoval.pdf.
I hope this is useful. Any errors or other comments, please let me know.
Last edited by a moderator:
escapefjrtist
Searching for Dry Roads
Downloaded and saved! Thanks mcatrophy from current [and future!] GEN III owners.
I'll be digging into my first GEN III this weekend for a LED light install, perfect timing!
--G
I'll be digging into my first GEN III this weekend for a LED light install, perfect timing!
--G
wheatonFJR
...
Between MNFJR and mcatrophy...a great service was bestowed to the community.
THANKS!
THANKS!
I completed the fairing removal without breaking anything thanks to the guidance provided by MNF JR and mcatrophy. While I went into it with some trepidation, I found the whole experience not as bad as some have let on. In order to accomadate the OEM Frame sliders, the fairing plastic had to be modified (also read: cut). Once I found the proper speed on the Dremel like tool, even that was reletively easy. All in all, I was worried about nothing. Had no parts left over and didn't lose anything. Thanks once again to those Forum members that have given us the pics and instructions on how to`s re: fairing removal.
hppants
Well-known member
This information will be very helpful to me as I am just now learning about the Gen III.
Am I to understand that the fairings have to be removed to install frame sliders?
Me thinks I'm going to buy every thing and do this only once (frame sliders, LED lights, fuse block and accessory wires, etc)
Am I to understand that the fairings have to be removed to install frame sliders?
Me thinks I'm going to buy every thing and do this only once (frame sliders, LED lights, fuse block and accessory wires, etc)
mcatrophy
Privileged to ride a 2018 FJR1300AS
OEM sliders need the fairings off. Don't know about any others.This information will be very helpful to me as I am just now learning about the Gen III.Am I to understand that the fairings have to be removed to install frame sliders?Me thinks I'm going to buy every thing and do this only once (frame sliders, LED lights, fuse block and accessory wires, etc)
wheatonFJR
...
bump...
...and a thanks again to mnfjr and mcatrophy!
...and a thanks again to mnfjr and mcatrophy!
jscasteel
Well-known member
Mods, sticky, please?
Uncle Hud
Just another blob of protoplasm using up your oxyg
Yes, BIG THANK YOU to those that contributed. mcatrophy's PDF will be quite valuable over the next few months as I route wiring to new GPS and cell phone mounts.
wheatonFJR
...
In case they don't stick it...you can always find it in the FAQ thread for Gen IIIs. It is linked to in that thread. That's how I find it.Mods, sticky, please?
Similar threads
- Replies
- 8
- Views
- 665
- Replies
- 0
- Views
- 189
- Replies
- 12
- Views
- 1K
- Replies
- 3
- Views
- 610


